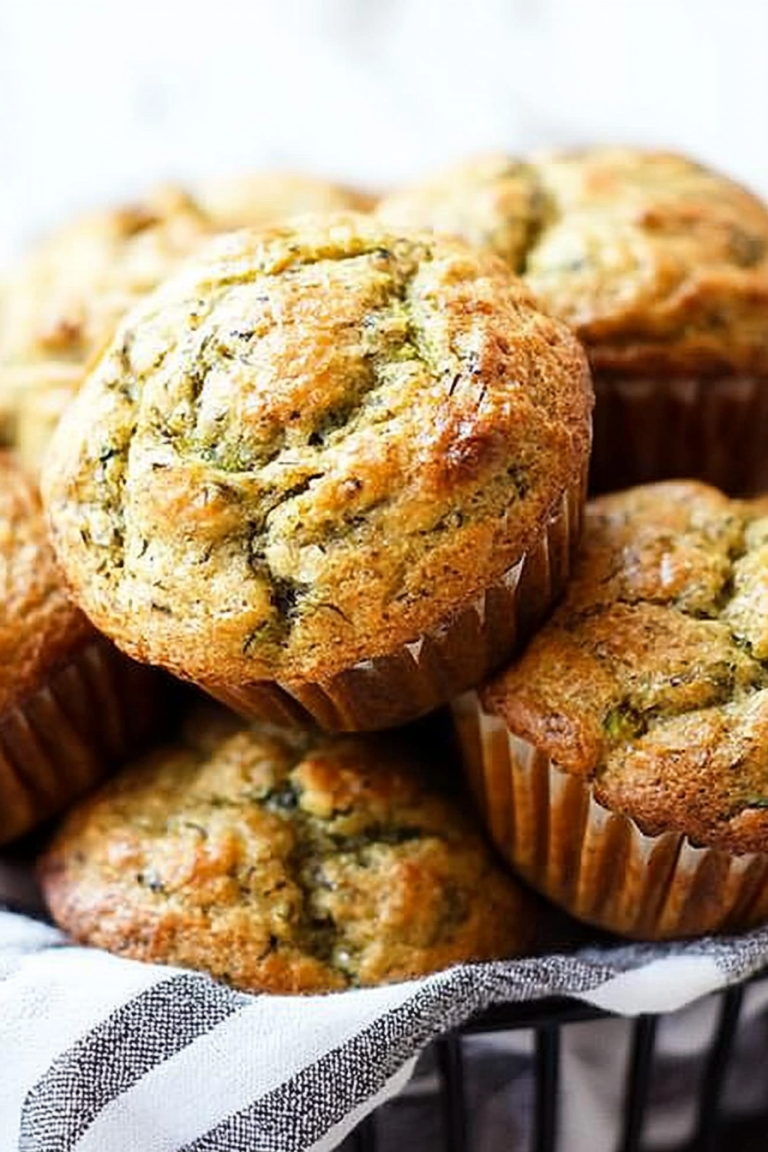
There are some recipes that just feel like a warm hug, aren’t there? This crustless zucchini pie is absolutely one of those for me. I remember the first time I made it, purely out of a need to use up a ridiculous amount of zucchini from my garden that summer. I was honestly a little skeptical – zucchini in a pie? But oh, my goodness, it turned out to be one of those happy accidents that became a staple in our home. It’s incredibly moist, subtly sweet, and has this wonderfully tender crumb that just melts in your mouth. Honestly, it’s like a cross between a moist cake and a tender, fluffy bread, and it’s become my go-to when I want something comforting but don’t have hours to bake. If you’ve ever loved a good Zucchini Bread but wished for something a bit more, well, pie-like in its presentation and texture, then you’re in for a real treat with this crustless zucchini pie. It’s the kind of dessert that makes people ask, “What IS that?!” in the best way possible.
What is a crustless Zucchini Pie?
So, what exactly is this magical creation? Think of it as a wonderfully moist, tender, cake-like dessert that happens to have zucchini as its star ingredient, but without a traditional crust. The “pie” in the name really refers to its delightful texture and the way it’s typically baked and served in a pie plate. It’s not a savory quiche, nor is it a heavy, dense cake. It’s somewhere perfectly in the middle, offering a light sweetness with a tender, almost pudding-like interior that’s surprisingly rich. The zucchini, when finely grated and baked, practically disappears into the batter, adding incredible moisture and a subtle earthiness that balances the sweetness beautifully. It’s essentially a fuss-free, incredibly forgiving way to enjoy the bounty of zucchini season, or just to have a delicious, slightly healthier treat on hand. It’s the kind of thing you can whip up on a whim, making it a true lifesaver for those busy weeknights when a sweet craving hits hard.
Why you’ll love this recipe?
Oh, where do I even start with why this crustless zucchini pie is a winner? First off, the flavor is just divine. It’s not overly sweet, which I really appreciate. The zucchini lends this amazing, subtle depth that makes it feel more sophisticated than your average quick bread. When it bakes, the aroma that fills the kitchen is just heavenly – a warm, comforting scent that promises pure deliciousness. Then there’s the texture. It’s impossibly tender and moist, almost like a cloud. It’s not crumbly or dry at all, thanks to all that goodness from the zucchini! I’ve tried it with different kinds of zucchini, and it always turns out beautifully. And the simplicity? It’s ridiculously easy. I’m talking minimal fuss, maximum reward. You probably have most of the ingredients in your pantry right now! Plus, it’s surprisingly budget-friendly, making it a great option when you need to feed a crowd or just want a special treat without breaking the bank. It’s also wonderfully versatile. Serve it warm with a dollop of whipped cream or ice cream for dessert, or enjoy a slice with your morning coffee for a delightful breakfast treat. It truly stands out because it delivers so much flavor and incredible texture with such minimal effort. I genuinely believe this is one of those recipes that will become a treasured favorite in your kitchen too.
How do you make a crustless Zucchini Pie?
Quick Overview
Making this crustless zucchini pie is surprisingly straightforward. You’ll essentially be preparing a moist batter, folding in grated zucchini, and baking it until it’s golden and set. The magic happens in how the zucchini integrates, creating an unbelievably tender and moist result without any fuss. It’s all about combining wet and dry ingredients, then gently mixing in the star vegetable, followed by a simple bake. This method ensures a perfect texture every single time, making it an absolute breeze even for beginner bakers. It’s a one-bowl wonder if you’re careful, making cleanup a cinch too!
Ingredients
For the Main Batter:
You’ll need about 2 cups of all-purpose flour – make sure it’s fresh! I usually use unbleached because I find it gives a slightly better texture, but all-purpose is perfectly fine. Then, 1.5 cups of granulated sugar. You can play with this a little depending on how sweet you like things; sometimes I shave off a quarter cup if my zucchini is particularly sweet. For leavening, we’ll use 1 teaspoon of baking soda and 1/2 teaspoon of baking powder. Don’t skip the salt; 1/2 teaspoon of fine sea salt really enhances all the other flavors. And the spice! 1 teaspoon of cinnamon is essential for that warm, comforting flavor. A pinch of nutmeg is also lovely if you have it on hand, but it’s optional. I also love adding 1/4 teaspoon of ground ginger for an extra little kick!
For the Filling:
This is where the star ingredient comes in! You’ll need about 2 cups of finely grated zucchini. It’s important to grate it finely – I use the small holes on my box grater. And here’s a crucial tip I learned the hard way: squeeze out as much excess moisture as you possibly can! You can do this by wrapping the grated zucchini in a clean kitchen towel or cheesecloth and giving it a good wring. This step is key to avoiding a soggy pie. I also add 2 large eggs, lightly beaten. These bind everything together and add richness. For more moisture and that wonderful tender crumb, 1/2 cup of melted unsalted butter is perfect. You can also use a neutral-flavored oil like vegetable or canola oil. And finally, 1 teaspoon of vanilla extract for that classic sweet flavor.
For the Glaze:
This is optional, but it really takes the pie to the next level! For a simple powdered sugar glaze, you’ll need 1 cup of powdered sugar, sifted to avoid lumps. Then, 2-3 tablespoons of milk (you can use regular, almond, or even a bit of lemon juice for a zingy twist). If you want it thinner, add more liquid; for thicker, add more powdered sugar. A tiny splash of vanilla extract in the glaze is also delightful.
Step-by-Step Instructions
Step 1: Preheat & Prep Pan
Alright, let’s get started! First things first, preheat your oven to 350 degrees Fahrenheit (175 degrees Celsius). While the oven is heating up, grab your pie plate. I like to use a standard 9-inch pie plate. You don’t need to grease it heavily, just a light coating with butter or cooking spray is perfectly fine. This prevents any sticking and makes for easy removal later. I usually don’t even need to flour it, but if you’re worried, a light dusting of flour after greasing will do the trick. Pop it on a baking sheet – this just makes it easier to move in and out of the oven and catches any potential drips, which is always a good idea in my book.
Step 2: Mix Dry Ingredients
In a large mixing bowl, whisk together the flour, sugar, baking soda, baking powder, salt, cinnamon, and any other spices you’re using. I like to use a whisk for this because it helps to break up any clumps and ensure everything is evenly distributed. You want to make sure that leavening agents are perfectly mixed in so you get an even rise. Give it a good whisk until everything is well combined and looks uniform. This is your foundation for a light and airy pie!
Step 3: Mix Wet Ingredients
In a separate medium bowl, whisk together your lightly beaten eggs, melted butter (or oil), and vanilla extract. Whisk them until they’re well combined and the mixture is smooth and slightly emulsified. This is where the richness and moisture start to come from. If you’re using melted butter, make sure it’s not piping hot – just warm is perfect, so it doesn’t scramble the eggs. Give it a good stir until everything is fully incorporated.
Step 4: Combine
Now, pour the wet ingredients into the bowl with the dry ingredients. Using a spatula or a wooden spoon, mix everything together until *just* combined. Don’t overmix! Overmixing can develop the gluten in the flour too much, leading to a tougher texture, and we want this pie to be super tender. A few streaks of flour are okay; they’ll disappear as you add the zucchini. The batter will be thick at this stage.
Step 5: Prepare Filling
This is the most important step for getting that perfect texture! If you haven’t already, finely grate your zucchini. Then, take your grated zucchini and place it in a clean kitchen towel or cheesecloth. Wring it out really, really well over the sink. You’ll be amazed at how much liquid comes out! Getting rid of that excess moisture is crucial for a delicious, non-soggy pie. Once squeezed, add the dry grated zucchini to your batter. Gently fold it in with your spatula until it’s just evenly distributed. Again, don’t overmix!
Step 6: Layer & Swirl
Pour the batter into your prepared pie plate. Use your spatula to spread it out evenly. At this point, you can do a little swirl on top for decoration if you like, but it’s totally optional. I sometimes like to make a few zig-zag patterns with my spatula, but honestly, a smooth top bakes up beautifully too. The zucchini is already mixed in, so there’s no distinct layering like you might expect in some pies. It’s all about getting that delicious, zucchini-infused batter into the pan.
Step 7: Bake
Place the pie on the baking sheet in your preheated oven. Bake for about 35-45 minutes. The exact time will depend on your oven, so keep an eye on it. You’ll know it’s done when the top is golden brown and a toothpick inserted into the center comes out clean, or with just a few moist crumbs attached. It should also feel set and slightly springy when you gently press the top. If it’s browning too quickly around the edges but still looks a bit soft in the center, you can loosely tent it with aluminum foil for the last 10-15 minutes of baking.
Step 8: Cool & Glaze
Once baked, carefully remove the pie from the oven and let it cool in the pie plate on a wire rack. It needs to cool for at least 20-30 minutes before you even think about glazing it. If you try to glaze a hot pie, the glaze will just melt right off! While the pie is cooling, you can make the glaze. In a small bowl, whisk together the sifted powdered sugar and 2 tablespoons of milk (or lemon juice). Keep whisking until it’s smooth and has a drizzle-able consistency. If it’s too thick, add a tiny bit more liquid; if it’s too thin, add a bit more powdered sugar. Once the pie has cooled sufficiently, drizzle or spread the glaze over the top. Let the glaze set for another 10-15 minutes before slicing.
Step 9: Slice & Serve
Once the glaze has set, your beautiful crustless zucchini pie is ready to be enjoyed! Use a sharp knife to slice it into wedges. I find it slices best when it’s still slightly warm, but it’s also delicious at room temperature or even chilled. Serve it as is, or with a dollop of Whipped cream, a scoop of vanilla ice cream, or even a dusting of powdered sugar if you skipped the glaze. It’s perfect for breakfast, brunch, dessert, or even a delightful afternoon snack. Enjoy every moist, tender bite!
What to Serve It With
This crustless zucchini pie is so wonderfully versatile, it fits in at almost any meal! For breakfast, I love to serve it warm with a simple cup of coffee. It’s got that comforting, slightly sweet flavor that’s perfect for starting the day without being too heavy. You can even serve a small slice alongside scrambled eggs or a yogurt parfait for a more substantial morning meal. For a more elegant brunch spread, I’ll present it on a pretty platter, maybe with some fresh berries scattered around. A glass of sparkling cider or mimosas would be perfect alongside it then. As a dessert, it truly shines! A generous scoop of vanilla bean ice cream melting into a warm slice is pure bliss. You could also serve it with a light raspberry coulis or a dollop of freshly whipped cream. And for those cozy snack times? Honestly, just a slice on its own is perfection. It’s the kind of treat that satisfies a sweet tooth without leaving you feeling weighed down. My family also loves it with a glass of cold milk, just like they would with a classic cookie!
Top Tips for Perfecting Your Crustless Zucchini Pie
Zucchini Prep: The absolute most critical step here is squeezing out the moisture from your grated zucchini. I’ve tried many methods, and the good old kitchen towel wring-out is still the best. Don’t be shy; really get in there and squeeze hard. You’ll be shocked at how much water you can extract. This guarantees a tender crumb and prevents any sogginess. Also, use fresh zucchini if possible; it has less water content and a better flavor. I find that medium-sized zucchini are best – not too watery, not too tough.
Mixing Advice: Remember, with quick breads and cakes, overmixing is the enemy of tenderness! Mix the wet and dry ingredients until they’re *just* combined. A few tiny lumps are better than a tough cake. Once you add the zucchini, fold it in gently. You’re not looking for a perfectly uniform batter at this stage; the zucchini will distribute as it bakes.
Swirl Customization: While the recipe is delicious with a smooth top, a little swirl can be fun! You can create simple patterns with a knife or spatula. For a bit more flavor and color, you could even mix a tablespoon or two of cocoa powder into a portion of the batter and swirl that in for a marble effect. Just be sure not to overmix when swirling, as the goal is distinct ribbons of color and flavor.
Ingredient Swaps: If you need to make this gluten-free, I’ve had success using a good quality gluten-free all-purpose flour blend that contains xanthan gum. You might need to add an extra tablespoon or two of liquid as GF flours can be thirstier. For a dairy-free version, use a neutral oil like canola or melted coconut oil instead of butter, and a non-dairy milk for the glaze. I’ve also experimented with using applesauce for some of the oil, which adds extra moisture but can make the pie a bit denser.
Baking Tips: Every oven is a little different, so get to know yours! My oven tends to run a bit hot, so I sometimes reduce the temperature by 10-15 degrees Fahrenheit and increase the baking time slightly. Always use the toothpick test – it’s your most reliable indicator. If the top is getting too dark before the inside is cooked, tenting with foil is your best friend. Placing the pie on a baking sheet not only catches drips but also helps ensure even heat distribution from the bottom.
Glaze Variations: While the simple powdered sugar glaze is classic, feel free to get creative! For a lemon glaze, use fresh lemon juice instead of milk for a bright, tangy flavor. A maple glaze made with powdered sugar and maple syrup is also delicious. If you prefer not to glaze, a light dusting of powdered sugar just before serving is lovely. You can even melt some chocolate chips and drizzle that over the cooled pie for a decadent touch.
Storing and Reheating Tips
Keeping this crustless zucchini pie delicious is pretty straightforward. If you have any leftovers (which is rare in my house!), you can leave it at room temperature for up to two days, provided your kitchen isn’t too warm. Just be sure to cover it loosely with plastic wrap or foil to keep it fresh. If you plan on keeping it longer than that, your refrigerator is the best place for it. Store it in an airtight container or well-wrapped in plastic wrap and foil. It should stay good in the fridge for about 4-5 days. When you want to reheat a slice, I find the best method is to pop it in a moderate oven (around 300°F or 150°C) for about 10-15 minutes, or until warmed through. This helps to restore some of that lovely moist texture. You can also reheat it gently in the microwave, but be careful not to overheat it, or it can become a bit chewy.
If you’re thinking about freezing portions, this pie freezes beautifully! Once it’s completely cooled, wrap individual slices tightly in plastic wrap, then in a layer of aluminum foil, or place them in freezer-safe bags. It should keep well in the freezer for up to 2-3 months. To thaw, simply transfer a slice to the refrigerator overnight and then reheat as usual. If you’ve glazed the pie, you might want to do the glazing *after* reheating a frozen or refrigerated slice for the best appearance and texture. Some people prefer to glaze it right before serving, even if it’s at room temperature, for the freshest glaze consistency.
Frequently Asked Questions
Final Thoughts
I truly hope you give this crustless zucchini pie a try. It’s one of those recipes that’s so satisfying to make because it’s forgiving, uses simple ingredients, and delivers such incredibly delicious results. The moist, tender crumb and the subtle sweetness make it a winner for any occasion. It’s the kind of dessert that feels a little bit special without requiring any fancy techniques or hard-to-find ingredients. If you love zucchini bread, you’ll adore this. And if you’re looking for a way to use up that surplus zucchini from your garden, well, this is your answer! I always encourage readers to experiment and make recipes their own, so feel free to add your favorite spices or try a different glaze. I can’t wait to hear how your crustless zucchini pie turns out! Please leave a comment below to share your experience or any tweaks you made – I love hearing from you!
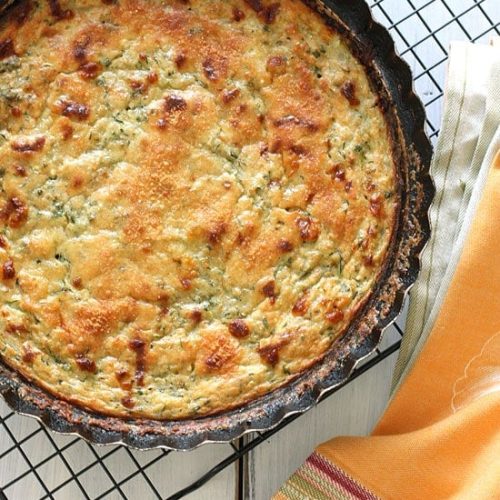
Crustless Summer Zucchini Pie
Ingredients
Main Ingredients
- 10 oz zucchini shredded, all liquid squeezed out
- 0.5 cup shallots chopped
- 0.25 cup fresh chives chopped
- 0.5 cup part-skim mozzarella
- 2 tbsp grated parmesan cheese
- 0.5 cup white whole wheat flour King Aurthur or all purpose, or GF flour mix
- 1 tsp baking powder
- 0.67 cup fat-free milk
- 1 tsp olive oil
- 2 large eggs beaten
- 0.5 tsp kosher salt
- 1 to taste black pepper
- 1 as needed cooking spray I used my misto
Instructions
Preparation Steps
- Preheat oven to 400°F (200°C). Lightly spray a pie dish with cooking spray or your oil mister.
- Combine shredded zucchini (liquid squeezed out), chopped shallots, chopped chives, and mozzarella cheese in a bowl.
- Sift flour and baking powder in a medium bowl.
- Add fat-free milk, olive oil, beaten eggs, kosher salt, and black pepper to the dry ingredients and blend well.
- Combine the wet mixture with the zucchini mixture and pour it all into the prepared pie dish.
- Top with parmesan cheese and bake for 30-35 minutes or until a knife inserted near the center comes out clean.
- Let it stand for at least 5 minutes before slicing and serving.