Okay, let’s talk about fall. You know, that magical time when the air gets crisp, the leaves start doing their whole fiery dance, and all you want is something warm, comforting, and utterly delicious. For me, that feeling is perfectly captured in a slice of perfectly baked banana pumpkin bread. Seriously, if I could bottle the scent of this baking, I’d be a millionaire! It’s not just a quick bread; it’s a hug in loaf form. I’ve tried a million variations over the years, but this one? This is the one I always come back to. It’s got that perfect balance of sweet banana and earthy pumpkin, with just enough spice to make you feel like you’re wrapped in a cozy blanket. It’s what I make for potlucks, for unexpected guests, and honestly, just for myself on a chilly Tuesday afternoon. It’s like my go-to chocolate chip cookie recipe, but with a spectacular fall makeover.
What is banana pumpkin bread?
So, what exactly is this glorious concoction we’re diving into? Think of it as the absolute best of both worlds. You take the moist, tender crumb that makes Banana Bread so beloved, and you infuse it with the rich, warm flavors of pumpkin and fall spices. It’s essentially a celebration of two of the most comforting ingredients Mother Nature has given us. The name itself is pretty straightforward, but the magic is in how these two star players really complement each other. It’s not just a banana bread with a bit of pumpkin thrown in, or vice versa. They meld together beautifully, creating a depth of flavor that’s truly something special. It’s that familiar, welcoming sweetness of ripe bananas meeting the subtle, earthy notes of pumpkin, all tied together with a delicate whisper of cinnamon and nutmeg. It’s homey, it’s delicious, and it’s surprisingly easy to whip up, which is always a win in my book.
Why you’ll love this recipe?
There are so many reasons why this banana Pumpkin bread recipe has become my absolute go-to, and I just know you’re going to fall in love with it too! First off, the flavor. Oh, the flavor! It’s like a symphony in your mouth. You get that intense, natural sweetness from perfectly ripe bananas, which also ensures an incredibly moist texture. Then comes the pumpkin, adding a lovely, subtle earthiness and a beautiful orange hue that just screams fall. And the spices! I’m talking cinnamon, nutmeg, a pinch of cloves – they all come together to create that warm, cozy aroma that fills your entire house and makes everyone ask, “What’s baking?!”
Beyond the incredible taste, the simplicity is a huge draw. This isn’t some fussy, complicated dessert. It’s a true quick bread, meaning you can get it from pantry to oven in under 15 minutes. It’s a lifesaver on busy weeknights when you need a treat but don’t have hours to spare. And let’s not forget about cost-efficiency! Most of the ingredients are pantry staples, and even the fresh ones, like bananas and pumpkin, are usually quite affordable, especially when they’re in season. This recipe feels decadent without breaking the bank, which is always a bonus. Plus, it’s incredibly versatile. You can enjoy it plain, toasted with butter, or even with a drizzle of cream cheese frosting. It’s perfect for breakfast, a snack, or even a simple dessert. What I love most about this recipe, though, is that it evokes such happy memories. It reminds me of autumn afternoons at my grandma’s house, the smell of her kitchen, and the pure joy of sharing something homemade. It’s more than just a recipe; it’s a feeling, and I can’t wait for you to experience it.
How do you make banana bread?
Quick Overview
Making this banana Pumpkin bread is surprisingly straightforward! You’ll basically mix your dry ingredients, then your wet ingredients, combine them gently, fold in a delicious pumpkin swirl, and bake until golden and fragrant. The beauty of this recipe lies in its simplicity and the incredible flavor payoff. It requires minimal fuss and uses common pantry staples, making it an accessible treat for any home baker. Trust me, even if you’re new to baking, you can totally nail this. It’s all about gentle mixing and letting the quality ingredients shine.
Ingredients
For the Main Batter:
1 and 1/2 cups all-purpose flour (I always sift mine for an extra light texture)
1 teaspoon baking soda (makes sure it’s fresh!)
1/2 teaspoon ground cinnamon
1/4 teaspoon ground nutmeg
1/4 teaspoon ground cloves (optional, but adds such a nice depth)
1/2 teaspoon salt
1/2 cup (1 stick) unsalted butter, softened (or you can use melted if you’re in a rush, just let it cool slightly)
3/4 cup granulated sugar
2 large eggs, at room temperature (this helps them incorporate better)
3 ripe bananas, mashed (the riper, the sweeter and more flavorful!)
1/4 cup milk (I’ve tested this with almond milk and it actually made it even creamier! Use whatever you have.)
For the Filling:
1/2 cup pumpkin puree (make sure it’s plain pumpkin puree, NOT pumpkin pie filling!)
1/4 cup packed brown sugar (light or dark, both work beautifully)
1 teaspoon pumpkin pie spice (or a mix of cinnamon, ginger, and nutmeg)
For the Glaze:
1/2 cup powdered sugar (sifted, if you want it super smooth)
1-2 tablespoons milk or cream (start with 1 and add more until you reach your desired drizzling consistency)
1/4 teaspoon vanilla extract (optional, but it adds a lovely note)
Step-by-Step Instructions
Step 1: Preheat & Prep Pan
First things first, let’s get that oven ready. Preheat it to 350 degrees Fahrenheit (175 degrees Celsius). Now, grab a standard loaf pan. I like to grease it really well with butter or cooking spray, and then dust it with a little flour. Some people like to line it with parchment paper, leaving an overhang on the sides to make lifting the bread out easier – that’s a pro move I’ve adopted recently and it’s a lifesaver!
Step 2: Mix Dry Ingredients
In a medium bowl, whisk together your flour, baking soda, cinnamon, nutmeg, cloves (if using), and salt. Whisking them all together ensures that the leavening agent and spices are evenly distributed throughout the batter. This is super important so you don’t end up with a pocket of baking soda or spice. You want everything to be uniform.
Step 3: Mix Wet Ingredients
In a larger bowl, cream together the softened butter and granulated sugar until light and fluffy. This usually takes a few minutes with an electric mixer, or a bit longer by hand. Then, beat in the eggs, one at a time, making sure each is fully incorporated before adding the next. Next, stir in the mashed bananas and the milk. The mixture will look a bit thick and might seem slightly curdled from the bananas – that’s totally normal and actually a good sign!
Step 4: Combine
Now, it’s time to bring those wet and dry ingredients together. Pour the dry ingredients into the wet ingredients. Use a spatula or a wooden spoon to gently fold them together until just combined. Be careful not to overmix here! A few streaks of flour are perfectly fine. Overmixing develops the gluten in the flour, which can lead to a tough, dense bread, and we definitely don’t want that. We’re aiming for tender and moist.
Step 5: Prepare Filling
In a small bowl, mix together the pumpkin puree, brown sugar, and pumpkin pie spice. Stir it until it’s well combined and you have a lovely, thick pumpkin mixture. This is where a lot of that incredible fall flavor comes from, so don’t skip this step!
Step 6: Layer & Swirl
Pour about half of your banana batter into the prepared loaf pan. Dollop half of the pumpkin filling mixture over the batter. Then, carefully pour the remaining banana batter on top, followed by the rest of the pumpkin filling. Now comes the fun part! Take a knife or a skewer and gently swirl the pumpkin mixture into the banana batter. You don’t want to over-swirl; just a few gentle turns to create beautiful marbled patterns. This is what makes it look as good as it tastes!
Step 7: Bake
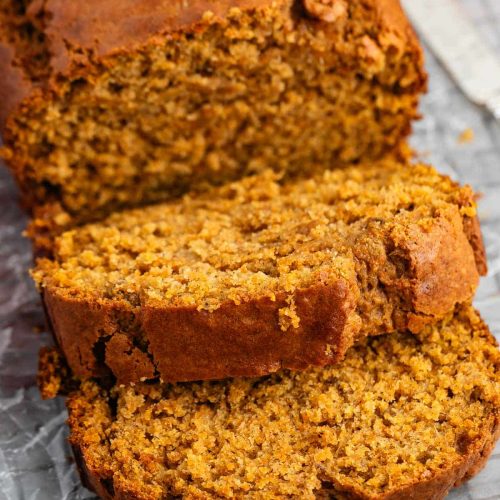
Pop that beautiful loaf into your preheated oven. Bake for about 50 to 65 minutes. The exact time can vary depending on your oven, so start checking around the 50-minute mark. You’ll know it’s done when a toothpick inserted into the center comes out clean, or with just a few moist crumbs attached (no wet batter!). If the top starts to brown too quickly, you can loosely tent it with aluminum foil.
Step 8: Cool & Glaze
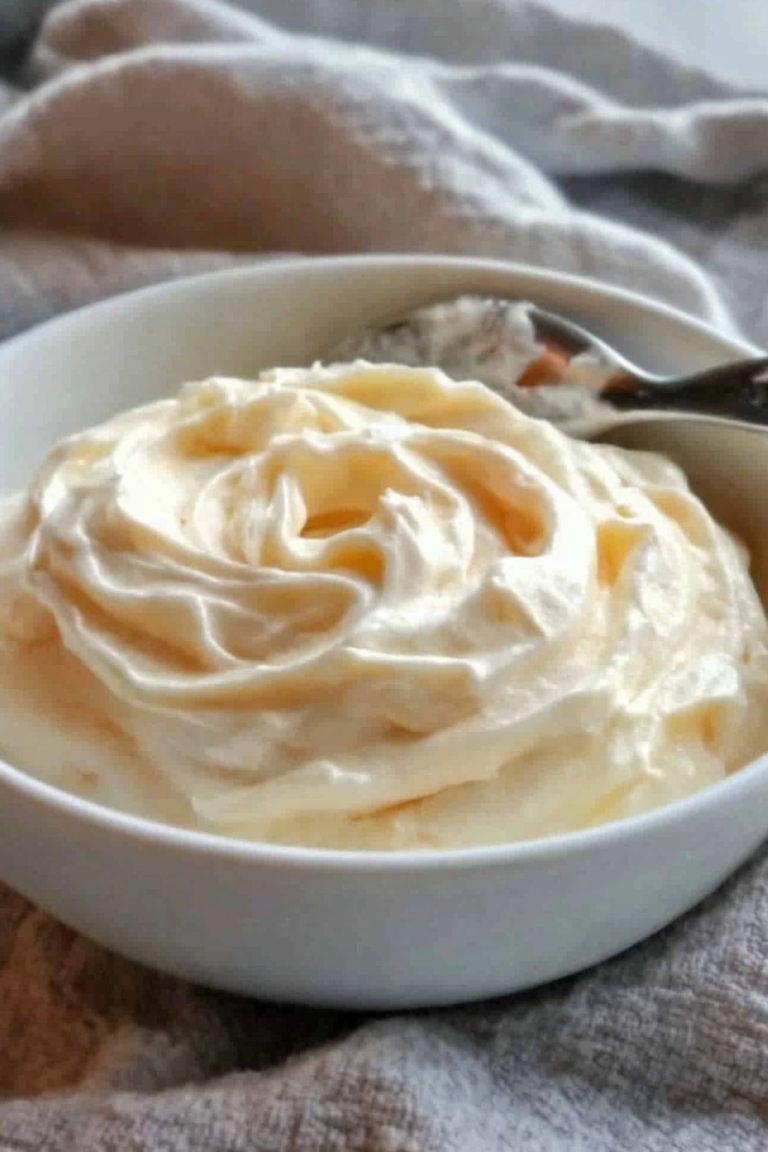
Once baked, let the banana pumpkin bread cool in the pan on a wire rack for about 15-20 minutes. This helps it set up properly. Then, carefully invert the loaf onto the wire rack to cool completely. While it’s cooling, whisk together the powdered sugar, 1 tablespoon of milk, and vanilla extract (if using) for the glaze. Add more milk, a tiny bit at a time, until you get a smooth, drizzly consistency. Once the bread is completely cool, drizzle the glaze over the top. This is totally optional, but oh-so-delicious!
Step 9: Slice & Serve
Once the glaze has set a bit, it’s time to slice into this masterpiece! Use a sharp knife for clean slices. This bread is absolutely delicious served at room temperature, or even slightly warmed. You can enjoy it as is, or with a smear of butter or cream cheese. Get ready for the compliments!
What to Serve It With
This banana pumpkin bread is so versatile, it fits into almost any meal or occasion! For a cozy breakfast, I love toasting a thick slice and slathering it with a good quality butter. The warmth brings out all those delicious spices. It pairs perfectly with a hot cup of coffee or a soothing mug of herbal tea. It feels like a weekend treat even on a Tuesday!
For a more festive brunch, especially during the fall holidays, I’ll often serve it alongside a fruit salad bursting with seasonal flavors like apples and pears, and maybe some scrambled eggs or a light frittata. A little dollop of Greek yogurt or a side of whipped cream can elevate it for a slightly more elegant presentation. It’s not overly sweet, so it doesn’t overpower other brunch dishes.
As a dessert, it’s wonderful served slightly warm with a scoop of vanilla bean ice cream or a drizzle of caramel sauce. You could even serve it with a dollop of whipped cream infused with a little maple syrup or a touch of cinnamon for an extra special touch. It’s certainly a crowd-pleaser after a hearty meal, and so much easier than a full-blown cake!
And for those perfect cozy snack moments? This bread is the star. Curl up on the couch with a slice and a warm cider, or pack a piece for an afternoon pick-me-up at work. My kids ask for this all the time, especially after school. It’s the perfect balance of comforting and satisfying, without being too heavy. We often have it after an evening walk when it’s getting chilly, and it just hits the spot every single time.
Top Tips for Perfecting Your Banana Pumpkin Bread
I’ve made this banana pumpkin bread more times than I can count, and through all those bakes, I’ve picked up a few tricks that I think really make a difference. First off, for the zucchini prep, it’s crucial to get as much moisture out as possible. Grating your zucchini on the large holes of a box grater works best. Then, I like to take handfuls of the grated zucchini and squeeze them firmly in my hands, or wrap them in a clean kitchen towel or cheesecloth and wring them out. This step might seem tedious, but it’s the secret to avoiding a soggy bread and ensuring a nice, firm crumb. Fresh zucchini also yields better results, so try to use it within a few days of purchasing.
When it comes to mixing, remember the golden rule: gentle is key! You want to combine the wet and dry ingredients until they’re just moistened. Overmixing is the nemesis of tender quick breads. If you see a few small lumps of flour, don’t worry; they’ll disappear during baking. A good visual cue is to stop mixing as soon as you no longer see large pockets of dry flour. The batter should be thick but pourable.
For that beautiful swirl, don’t go crazy! You want distinct pockets of pumpkin flavor and color, not a uniform muddy mix. A few gentle drags of a knife or skewer through the batter will create lovely marbled patterns. Think of it as abstract art – less is more! Experiment with different patterns each time; it’s part of the fun.
Ingredient swaps can be tricky, but I’ve tested a few things. If you’re out of regular milk, I’ve found that unsweetened almond milk or oat milk work wonderfully and don’t significantly alter the flavor. For the sugar, while brown sugar adds a lovely caramel note to the pumpkin swirl, you could try using all granulated sugar if that’s all you have, though the texture and flavor might be slightly different. I always use very ripe bananas, speckled brown is ideal, as they provide natural sweetness and moisture. If your bananas aren’t super ripe, you might need to add a touch more sugar or a bit of extra liquid.
Baking tips are essential! Always use the middle rack of your oven for even heat circulation. If you find your loaf is browning too quickly on top before the center is cooked, don’t hesitate to loosely tent it with aluminum foil for the remainder of the baking time. To test for doneness, a wooden skewer or a thin knife inserted into the thickest part of the loaf should come out clean or with a few moist crumbs, but no wet batter. It’s better to underbake slightly than to overbake, which can result in a dry loaf.
And finally, for the glaze, consistency is everything. If it’s too thick, it’ll be hard to drizzle and might crack when it sets. If it’s too thin, it’ll just run off the bread. Start with the smaller amount of liquid and add more gradually until you achieve a smooth, pourable consistency. You can also play with flavor additions – a little orange zest in the glaze is fantastic, or a tiny bit of almond extract instead of vanilla. Just have fun with it!
Storing and Reheating Tips
Keeping your delicious banana pumpkin bread fresh is key to enjoying it over several days (if it lasts that long!). At room temperature, I find it stays wonderfully moist and delicious for about 2 to 3 days. The best way to store it is in an airtight container or wrapped tightly in plastic wrap. This prevents it from drying out. Just make sure it’s completely cool before you wrap it up, otherwise, you’ll trap moisture and can encourage sogginess.
If you know you won’t get through it within a few days, or if you live in a particularly warm climate, storing it in the refrigerator is a great option. It will keep well in the fridge for up to a week. Again, an airtight container is your best friend here. You might notice it firms up a bit in the fridge, but don’t worry, it’ll regain its lovely texture when you reheat it.
For longer storage, freezing is an absolute lifesaver! You can freeze the entire loaf or individual slices. To freeze a whole loaf, wrap it extremely well in plastic wrap, then in a layer of aluminum foil, and finally place it in a freezer-safe bag or container. It will keep beautifully in the freezer for up to 2 to 3 months. If you’re freezing slices, wrap each slice individually in plastic wrap and then store them in a freezer bag. To thaw, simply leave it at room temperature for a few hours, or reheat gently. Frozen bread thaws beautifully and retains most of its flavor and texture.
Now, about the glaze: I highly recommend adding the glaze only once the bread is completely cool and you’re ready to serve it. If you glaze it and then store it at room temperature or in the fridge, the glaze can become sticky or slightly gummy. If you plan to store it for more than a day, it’s best to store the bread plain and then make a fresh batch of glaze to drizzle on just before serving. This ensures that beautiful, clean finish we’re aiming for.
Frequently Asked Questions
Final Thoughts
I really hope you give this banana pumpkin bread a try. It’s one of those recipes that just makes you feel good. It’s comforting, it’s delicious, and it brings that wonderful autumn feeling right into your kitchen. The balance of the sweet bananas with the warm, spiced pumpkin is truly something special, and the texture is just spot-on – moist, tender, and perfectly spiced. It’s the kind of thing that makes a regular day feel a little bit brighter and a special occasion feel extra cozy.
If you love this recipe, you might also enjoy my Spiced Apple Crumble or my Pumpkin Chocolate Chip Cookies – they capture that same fall spirit! But seriously, this banana pumpkin bread is a winner. It’s reliable, it’s crowd-pleasing, and it’s incredibly satisfying to make and share. Don’t be intimidated by the swirl; it’s easier than it looks and adds such a beautiful touch. I can’t wait to hear what you think! Let me know in the comments below if you give it a go, and if you have any fun variations or tips of your own. Happy baking!
banana pumpkin bread
Ingredients
Main Ingredients
- 2 cups all-purpose flour 248g
- 2 teaspoons pumpkin pie spice
- 0.25 teaspoon cinnamon
- 1 teaspoon baking soda
- 0.25 teaspoon baking powder
- 0.25 teaspoon salt
- 1 cup packed brown sugar 200g
- 0.5 cup vegetable oil 119g
- 0.75 cup pumpkin puree 180g
- 2 medium overripe bananas
- 2 large eggs
- 1 teaspoon vanilla extract
Instructions
Preparation Steps
- Preheat oven to 350°F (175°C). Spray a 9x5-inch loaf pan with nonstick cooking spray (or grease and flour it).
- Whisk together flour, pumpkin spice, cinnamon, baking soda, baking powder, and salt in a small bowl. Set aside.
- Stir brown sugar, vegetable oil, pumpkin puree, and mashed bananas in a large bowl (using a wooden spoon or spatula, or you can use a mixer).
- Stir in eggs and vanilla, then mix in dry ingredients until just combined.
- Pour batter into prepared pan. Bake 40-50 minutes or until a toothpick inserted into the center of the bread comes out clean.
- Let cool in the pan for 10 minutes before removing and slicing to serve.