You know those days? The ones where you’re just craving something sweet, something a little bit special, but you don’t have hours to spend in the kitchen? Or maybe it’s a busy weeknight, and you need a treat that’s guaranteed to make everyone smile. Well, I’ve got you. And not just any treat, but *the* treat. These butterscotch shortbread bars are my absolute go-to. They’re buttery, they’re caramelly, and they have this incredible crumbly texture that just melts in your mouth. Honestly, they’re like a hug in bar form. If you’ve ever loved a classic shortbread, imagine that, but then someone went and drizzled it with liquid gold. That’s what we’re talking about here, and trust me, these butterscotch shortbread bars are going to become your new best friend in the baking department.
What are Butterscotch Shortbread Bars?
So, what exactly are butterscotch shortbread bars? Think of it as taking everything you adore about traditional shortbread – that rich, buttery flavor and perfectly tender crumb – and then amping it up with the warm, comforting sweetness of butterscotch. It’s essentially a thick, shortbread-like base, often infused with Brown Sugar or butterscotch chips, sometimes topped with a layer of gooey butterscotch sauce or a drizzle. The “bar” part means it’s baked in a square or rectangular pan, making it super easy to slice and share (or hoard, no judgment here!). It’s not a fussy cake, it’s not a delicate cookie; it’s that perfect in-between that delivers big on flavor without any of the fuss. It’s the kind of dessert that feels a little bit nostalgic, a little bit decadent, and completely doable for any home baker, even if you’re just starting out.
Why you’ll love this recipe?
Oh, where do I even begin with why you’ll fall head over heels for these butterscotch shortbread bars? First off, the FLAVOR is just out of this world. That deep, caramel-like sweetness from the butterscotch, perfectly balanced by the rich, creamy butteriness of the shortbread. It’s not cloyingly sweet, but it’s definitely sweet enough to satisfy any craving. And the TEXTURE! It’s that ideal crumbly, tender shortbread that just crumbles apart beautifully with every bite. Seriously, the smell that fills your kitchen while these are baking is pure magic – it’s warm, inviting, and the kind of scent that makes people magically appear, asking what you’re up to.
Then there’s the SIMPLICITY. This is what truly makes it a lifesaver. You don’t need any fancy equipment or complicated techniques. Most of the ingredients are likely already in your pantry. I can whip these up from start to finish on a relatively busy afternoon, and they always turn out perfectly. It’s so much easier than rolling out individual cookies or dealing with a finicky cake batter.
And let’s talk COST-EFFICIENCY. Compared to buying fancy bakery bars, this homemade version is incredibly budget-friendly. You get so much deliciousness for the cost of a few staple ingredients. It’s a sweet treat that doesn’t break the bank, which is always a win in my book.
Finally, the VERSATILITY. While they’re phenomenal on their own, these bars are fantastic for so many occasions. They’re a crowd-pleaser at parties, a perfect addition to a cookie tray, or just a delightful afternoon pick-me-up with a cup of coffee. They pair wonderfully with a scoop of vanilla ice cream, or you can even dress them up with a sprinkle of sea salt on top for an extra pop. What I love most about this specific butterscotch shortbread bar recipe is that it’s tried and true. I’ve made it countless times, for family gatherings, bake sales, and just because, and it never, ever fails to impress. It’s one of those recipes that I just *know* will be delicious, every single time.
How do I make Butterscotch Shortbread Bars?
Quick Overview
Making these butterscotch shortbread bars is surprisingly straightforward. You’ll basically prepare a rich, buttery shortbread dough, press most of it into your baking pan, then layer on a simple butterscotch filling. The rest of the dough gets crumbled on top, creating a delightful texture contrast. It bakes up into golden perfection, and once cooled, you slice it into glorious bars. It’s a fuss-free method that guarantees a delicious outcome with minimal effort. What makes this method special is how the flavors meld together as it bakes, creating that irresistible butterscotch-shortbread synergy.
Ingredients
For the Main Batter:
2 ½ cups all-purpose flour, plus more for dusting
1 cup (2 sticks) unsalted butter, softened but not melted
½ cup packed light brown sugar
1 teaspoon vanilla extract
½ teaspoon salt
For the Filling:
1 cup packed light brown sugar
½ cup (1 stick) unsalted butter
2 tablespoons milk (whole or 2% works best for richness)
1 teaspoon vanilla extract
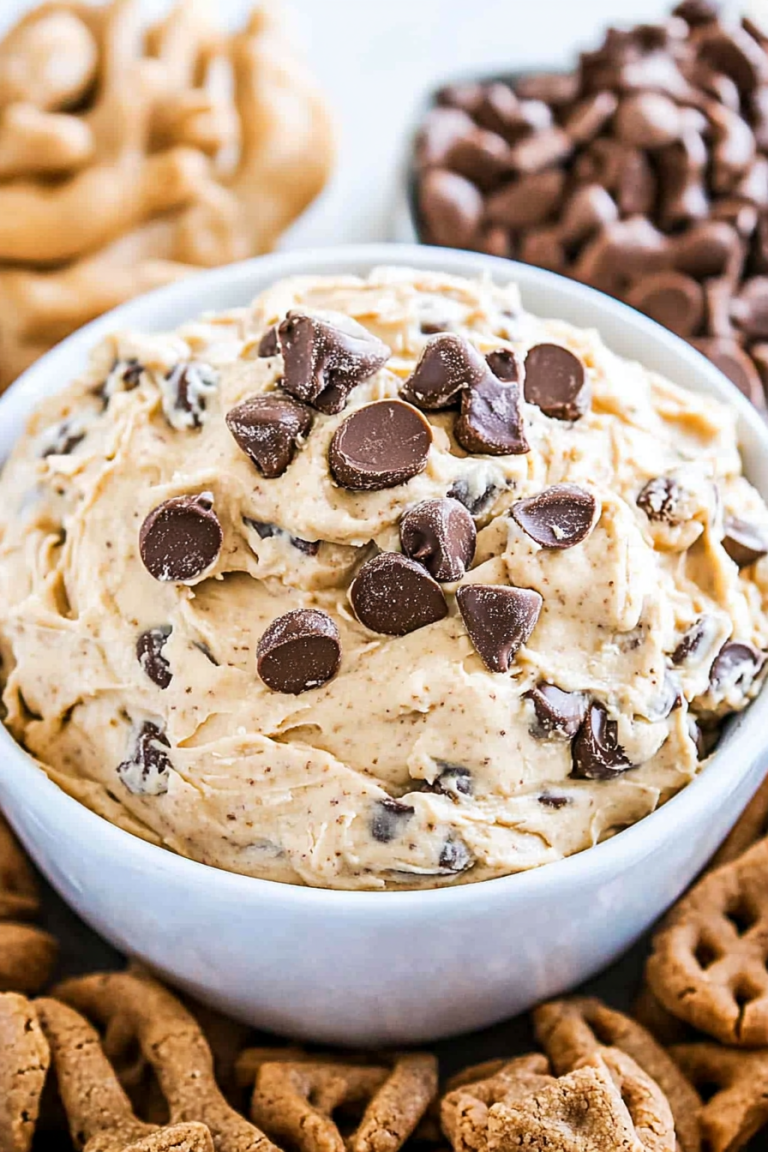
½ cup butterscotch chips (optional, but I highly recommend them for extra butterscotch punch!)
For the Glaze (Optional, but I love it!):
½ cup powdered sugar
1-2 tablespoons milk or cream
½ teaspoon vanilla extract
Step-by-Step Instructions
Step 1: Preheat & Prep Pan
First things first, let’s get your oven ready. Preheat it to 350 degrees Fahrenheit (175 degrees Celsius). Now, grab an 8×8 inch baking pan. I always like to line mine with parchment paper, leaving some overhang on the sides. This makes lifting the bars out so much easier later on. Then, lightly grease the parchment and the exposed sides of the pan. This ensures nothing sticks and you get those perfectly clean edges.
Step 2: Mix Dry Ingredients
In a medium bowl, whisk together your flour, salt, and any other dry spices if you’re adding them (like a pinch of cinnamon, which I sometimes do!). Whisking them together ensures everything is evenly distributed. This might seem like a small step, but it really helps make sure you don’t get pockets of salt or flour in your final bars. We want consistent deliciousness!
Step 3: Mix Wet Ingredients
In a large bowl, cream together your softened butter and the packed light brown sugar. You want this to be nice and fluffy. I usually use an electric mixer for this, beating it until it’s light in color and airy. Then, beat in the vanilla extract. Make sure your butter is truly softened – not liquid, but squishy enough to cream properly. This is key for a tender shortbread texture.
Step 4: Combine
Now, gradually add the dry ingredients to the wet ingredients. Mix on low speed or by hand until just combined. Don’t overmix! Overmixing can develop the gluten in the flour, leading to tough bars. We want tender, melt-in-your-mouth shortbread, so stop mixing as soon as you don’t see any dry flour streaks. The dough will be crumbly, which is exactly what we want.
Step 5: Prepare Filling
In a small saucepan over medium heat, melt the butter for the filling. Once melted, stir in the packed brown sugar and milk. Bring this mixture to a gentle boil, stirring constantly, and let it boil for about 1-2 minutes. This allows it to thicken slightly. Remove from heat and stir in the vanilla extract. If you’re using butterscotch chips, stir them in now until they’re mostly melted and create a beautiful, gooey mixture. Let this filling cool for just a few minutes while you prepare the base.
Step 6: Layer & Swirl
Take about two-thirds of your shortbread dough and press it evenly into the bottom of your prepared pan. You can use your hands or the bottom of a measuring cup to get a nice, even layer. Then, pour the slightly cooled butterscotch filling over the dough and spread it out. Now, take the remaining one-third of the shortbread dough and crumble it over the top of the butterscotch filling. You want to create an uneven, rustic topping. Don’t worry about covering it perfectly; the gaps let the butterscotch peek through!
Step 7: Bake
Pop that pan into your preheated oven. Bake for about 30-35 minutes, or until the crumbly topping is golden brown and the edges are set. Keep an eye on it; ovens can be a bit different. You want that lovely golden hue, indicating the butter has done its magic. The filling should be bubbly around the edges.
Step 8: Cool & Glaze
This is arguably the hardest part – waiting! Let the bars cool completely in the pan on a wire rack. I know, it’s tempting to dig in while they’re warm, but they need time to set up. If you try to cut them too soon, they’ll fall apart. Once completely cool, you can make the optional glaze. Whisk together the powdered sugar, milk or cream, and vanilla until smooth and drizzly. Drizzle this over the cooled bars. Let the glaze set for about 15-20 minutes before slicing.
Step 9: Slice & Serve
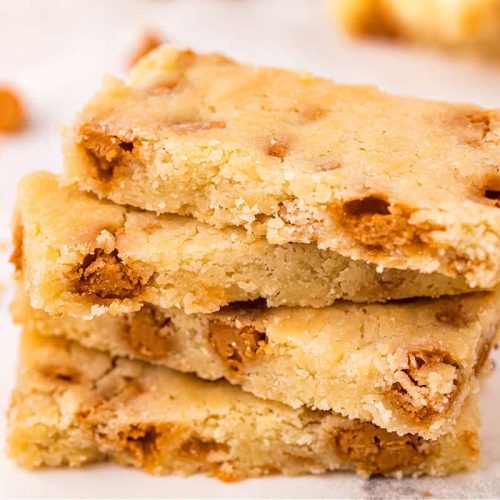
Once the glaze is set (or if you skipped it!), use the parchment paper overhang to lift the entire block out of the pan. Place it on a cutting board and use a sharp knife to cut into bars. I usually get about 16 bars from an 8×8 pan. These are best served at room temperature. The combination of the crumbly shortbread and the gooey butterscotch is just divine. Enjoy every single bite!
What to Serve It With
These butterscotch shortbread bars are honestly a star all on their own, but they can be wonderfully paired with a variety of beverages and occasions. For a simple breakfast treat, imagine a warm cup of coffee or a creamy latte alongside a piece. The buttery goodness is a fantastic complement to your morning brew. They’re also great for a quick, satisfying breakfast on the go if you’ve got a busy morning ahead.
At brunch, these bars bring a touch of elegance without being fussy. Serve them on a pretty platter with some fresh berries. They’re delightful with a mimosa or a sparkling cider. They add that perfect sweet note to a spread of savory brunch dishes.
As a dessert, they really shine. Serve them slightly warm (you can pop a piece in the microwave for about 10 seconds if you like!) with a scoop of vanilla bean ice cream. The contrast between the warm, gooey bar and the cold ice cream is pure bliss. A drizzle of extra caramel sauce on top wouldn’t hurt either!
And for those cozy snack times? These bars are your best friend. They’re perfect for an afternoon slump pick-me-up with a glass of cold milk. My kids always ask for these after school, and they disappear in minutes. They’re just comforting and satisfying, like a little taste of home. I’ve even taken them camping and served them around the campfire – they’re that versatile and always a hit. My family also loves them after dinner, especially when we’re just lounging around. They’re that comforting, familiar taste that always hits the spot.
Top Tips for Perfecting Your Butterscotch Shortbread Bars
I’ve made these butterscotch shortbread bars more times than I can count, and through all those batches, I’ve picked up a few tricks that really make them shine. For the BASE, make sure your butter is properly softened. I can’t stress this enough. It needs to be soft enough that you can easily indent it with your finger, but not so soft that it’s melted or greasy. This is crucial for achieving that tender, crumbly shortbread texture we all love. When you cream it with the brown sugar, beat it until it’s really light and fluffy – this incorporates air, which also contributes to a lovely texture.
When you’re MIXING the dough, remember: do not overmix! As soon as the dry ingredients are incorporated into the wet, stop. Seriously. Overmixing develops the gluten in the flour, and that’s the enemy of tender shortbread. The dough will look a bit crumbly, and that’s perfectly okay. It’ll come together when you press it into the pan. For the FILLING, I sometimes like to add a pinch of flaky sea salt right into the butterscotch mixture just before pouring it over the base. It adds this incredible depth of flavor and balances the sweetness beautifully.
For the CRUMBLE TOPPING, don’t try to make it look perfect. The charm is in the rustic, uneven texture. Some gaps are good – they let the butterscotch filling bubble up and caramelize a little, which is delicious! If you find your dough is a little too sticky to crumble, you can pop it in the fridge for 10-15 minutes. It’ll firm up, making it easier to break into pieces.
INGREDIENT SWAPS: While this recipe is fantastic as is, I’ve experimented a bit! If you don’t have brown sugar, you can use granulated sugar, but the flavor won’t be as deep. The brown sugar is what gives that signature butterscotch richness. For the milk in the filling, I’ve tried a splash of heavy cream for an even richer finish, and it’s divine! For gluten-free friends, I’ve had success using a good quality gluten-free all-purpose flour blend (one that contains xanthan gum). You might need to adjust the liquid slightly, so keep an eye on the dough consistency.
BAKING TIPS: Always bake in the center of the oven. This ensures even heat distribution. Keep an eye on the color of the topping; you want it golden brown, not burnt. If the edges are browning too quickly but the center isn’t done, you can loosely tent the pan with foil. And remember, the bars will continue to set as they cool, so don’t overbake them thinking they need to be rock solid right out of the oven.
Storing and Reheating Tips
Proper storage is key to keeping these butterscotch shortbread bars tasting as delicious as they do when they’re fresh out of the oven. If you plan on enjoying them within a couple of days, ROOM TEMPERATURE storage is perfectly fine. Just make sure they are completely cooled first. Store them in an airtight container, and they should stay fresh for about 3-4 days. You can layer them between sheets of parchment paper to prevent the topping from sticking to the bottom of the next layer.
For longer storage, the REFRIGERATOR is your best bet. Again, ensure they are fully cooled before refrigerating. An airtight container is essential here too. In the fridge, they’ll stay good for up to a week. I actually find that the flavors meld together even more beautifully after a day or two in the fridge, and they have a delightful chilled texture.
If you want to keep these gems around for even longer, FREEZER instructions are your friend. This recipe freezes exceptionally well! Once completely cooled, I like to cut them into individual bars. Then, I wrap each bar tightly in plastic wrap, followed by a layer of aluminum foil, or place them in a freezer-safe bag or container. They can last in the freezer for up to 2-3 months. To thaw, simply transfer them from the freezer to the refrigerator overnight, or let them come to room temperature on the counter for a couple of hours.
GLAZE TIMING ADVICE: If you’re planning to refrigerate or freeze your bars, I highly recommend applying the glaze *after* thawing or just before serving. The glaze can become a bit sticky or soft in the fridge or freezer. If you’re storing them at room temperature for just a day or two, glazing them before storing is perfectly fine. Just ensure the bars are completely cool before adding the glaze, and let the glaze set before covering.
Frequently Asked Questions
Final Thoughts
So there you have it – my tried-and-true recipe for the most delightful butterscotch shortbread bars! I really hope you give these a try. They’re more than just a dessert; they’re a little slice of comfort, a guaranteed crowd-pleaser, and honestly, just plain delicious. What I love most is that they bring so much joy with so little fuss. They’re perfect for those moments when you want to bake something special but don’t have a lot of time, or when you just need a little something sweet to brighten your day.
If you’re a fan of shortbread, or anything with a good dose of caramel-like butterscotch flavor, these are going to be right up your alley. They’re a testament to how simple, quality ingredients can create something truly memorable. If you’re looking for other easy bar recipes that are always a hit, you might also enjoy my Lemon Bar recipe or my Blondies with Pecans. They share that same spirit of deliciousness made simple!
I can’t wait to hear how yours turn out! Please, if you make these, leave a comment below and let me know what you think, or share your own tips and variations. I love hearing about your baking adventures! Happy baking, everyone!
Butterscotch Shortbread Bars
Ingredients
Main Ingredients
- 1 cup unsalted butter melted and slightly browned
- 1 cup powdered sugar
- 2 cups all purpose flour
- 0.5 teaspoon kosher salt
- 1 large egg
- 1 cup butterscotch morsels
Instructions
Preparation Steps
- In a small saucepan on medium-low heat, melt butter. Bring to a boil and allow to brown for 1-2 minutes. Remove from heat, allow to cool for a few minutes.
- In a large mixing bowl, add melted butter with powdered sugar, mix completely. Add flour and salt. Mix together (will be crumbly). Add in egg and butterscotch, mix until completely combined.
- Line a 15x10x1 baking sheet with parchment paper. Place dough on baking sheet and press (with palms of hand) to about 1/4 inch thick. Shape into a rectangle (doesn't have to touch side of pan).
- Bake in a 350 degree oven for 20-25 minutes, until lightly browned. Remove from oven and cool about 5 minutes. Using a sharp knife, make slices into cookies about 3-inch x 1-inch. Don't separate, allow to cool completely.
- When cooled, separate cookie bars (using knife if necessary). Store in air tight container for one week. ENJOY!