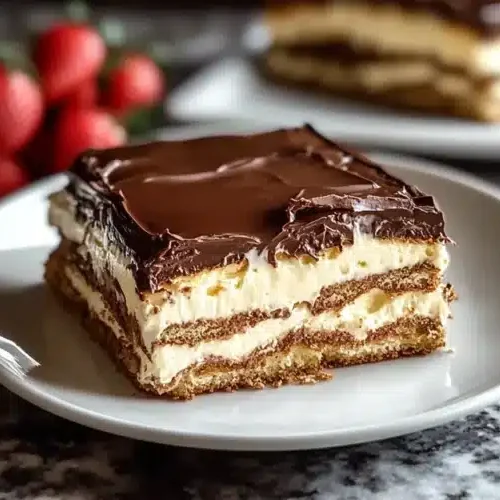
Oh, my friends, gather ’round! I’ve got a recipe that’s been a secret weapon in my kitchen for years, a true lifesaver when those sweet cravings hit but the thought of turning on the oven feels like climbing Mount Everest. This No Bake Chocolate Eclair Cake. Just saying it makes me happy! It’s like a hug in dessert form, a nostalgic trip back to simpler times, and honestly, it’s so ridiculously easy that it feels like magic. Forget fussing with pastry dough or complicated custards. This is the dessert you bring to potlucks when you want to impress everyone without breaking a sweat, or the one you whip up for a last-minute family movie night. If you love the classic flavors of an eclair – that creamy filling, the rich chocolate, the buttery graham crackers – but wish you could have it in cake form without all the work, then you are in for such a treat. It reminds me a little bit of a no-bake cheesecake in its ease, but with that unmistakable eclair vibe that’s just pure comfort.
What is no bake chocolate eclair cake?
So, what exactly is this wonder I’m raving about? Think of it as a deconstructed, simplified eclair, transformed into a layered cake that requires absolutely zero baking. It’s essentially a dreamy combination of crushed graham crackers (or cookies, more on that later!), a luscious, no-cook vanilla pudding-like filling, and a decadent chocolate glaze that hardens just enough to be delightful. The “cake” part comes from the layers of graham crackers that soften beautifully in the creamy filling, creating a texture that’s tender and satisfying. The name “eclair cake” comes from the fact that it captures all the beloved flavors and elements of a traditional eclair, just presented in an entirely different, much more approachable format. It’s the ultimate shortcut to a crowd-pleasing dessert, perfect for those days when you need something sweet and impressive, but your energy levels are hovering around zero. It’s also just plain delicious, and that’s really all that matters, right?
Why you’ll love this recipe?
Why is this no bake chocolate eclair cake a must-try recipe?flavor is just spot on. It hits all the right notes: the subtle sweetness of the graham crackers, the creamy, dreamy vanilla filling that isn’t too heavy, and that glorious, glossy chocolate topping. It’s rich without being overwhelming, and it satisfies that chocolate craving like nothing else. Then there’s the simplicity. Seriously, the most complex part is probably waiting for it to chill! You don’t need any fancy equipment, and the steps are so straightforward that even if you’re new to the kitchen, you’ll nail this on the first try. It’s also incredibly cost-effective. The ingredients are pantry staples for most people, making it a budget-friendly way to serve a crowd or treat your family. Andversatility! While I adore it as is, you can totally play around with it. I’ve experimented with different cookies for the base, added a hint of almond extract to the filling, or even swirled in some raspberry jam. It’s also fantastic for a variety of occasions. Need a quick dessert for a weeknight? Done. Bringing something to a baby shower? Perfect. Craving a slice of pure happiness at 10 pm? This is your answer. What I love most about this is that it *feels* indulgent, like you spent hours in the kitchen, but in reality, it’s a total breeze. It’s a dish that consistently gets rave reviews, and the best part is, it’s so easy you can actually enjoy the party instead of being stuck in the kitchen.
How to Make No Bake Chocolate Eclair Cake
Quick Overview
This No Bake Chocolate Eclair Cake is all about layering simple components. We start by creating a base with graham crackers, then smother it in a luscious, no-cook vanilla cream, and finish with a rich chocolate ganache-like topping. It’s a no-bake marvel that comes together in less than 30 minutes of active time, and the rest is just chilling! The magic happens as it sits in the fridge, allowing the crackers to soften into a cake-like texture and the flavors to meld beautifully. It’s a truly foolproof recipe that’s perfect for busy bakers or anyone who wants maximum deliciousness with minimal effort.
Ingredients
For the Main “Cake” Layers:
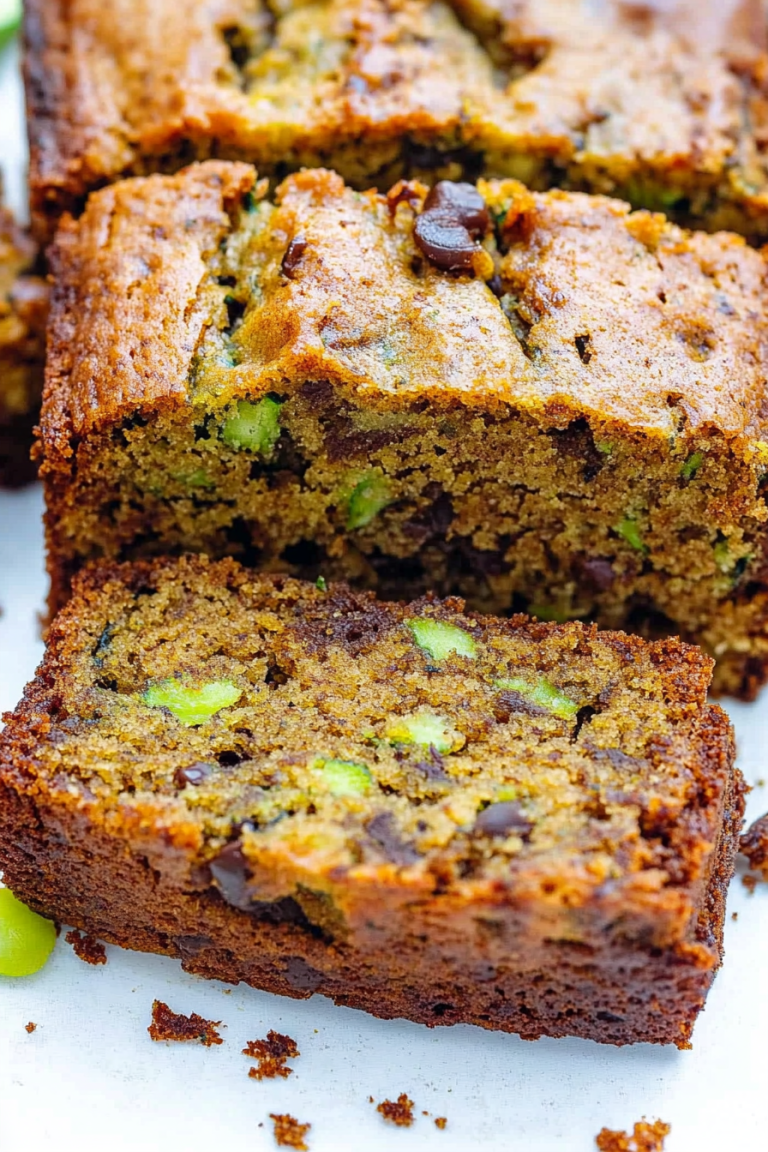
Okay, the classic choice here is graham crackers, and they work beautifully! You’ll need about 2 sleeves, crushed into fine crumbs (but not so fine they turn to dust!). I usually pulse mine in a food processor until they’re mostly fine with a few tiny bits for texture. If you don’t have a food processor, no worries – just pop them into a zip-top bag and go to town with a rolling pin! Alternatively, you can use vanilla wafers or even shortbread cookies for a slightly different, but equally delicious, base.
For the Luscious Filling:
This is where the magic really happens! You’ll need sweetened condensed milk – this is non-negotiable for that creamy, rich texture and sweetness without needing to cook it down. Then, we’ll use instant vanilla pudding mix. Make sure it’s *instant* pudding, not the cook-and-serve kind, as it sets up without heat. For liquid, I prefer whole milk because it makes it extra rich, but I’ve tested this with 2% and even almond milk when I’ve run out, and it actually made it even creamier and gave it a subtle nuttiness! You’ll want about 2 cups of milk. A splash of vanilla extract also amplifies that beautiful vanilla flavor. Sometimes I add a tiny pinch of salt to balance the sweetness, but that’s totally optional.
For the Decadent Chocolate Glaze:
This glaze is so simple and so good. We’re talking butter, cocoa powder (unsweetened is best so you can control the sweetness), powdered sugar for that smooth texture, a little milk or even heavy cream for richness, and a touch more vanilla extract. Some people like to add a bit of corn syrup for extra shine, but I usually skip it and it still turns out gorgeous. You can adjust the milk to get your desired consistency – thicker for a more opaque glaze, thinner for something that drizzles.
Step-by-Step Instructions
Step 1: Preheat & Prep Pan
You don’t need to preheat an oven for this recipe, which is one of the best parts! Grab an 8×8 inch or 9×9 inch baking dish. You can lightly grease it if you’re worried about sticking, but I usually just line mine with plastic wrap or parchment paper, leaving some overhang. This makes it super easy to lift the whole cake out once it’s set, which is great if you want to serve it on a platter. If you do this, make sure the lining goes up the sides of the dish.
Step 2: Mix Dry Ingredients
If you’re using graham crackers, pulse them in a food processor or crush them in a bag until you have fine crumbs. You want a texture that will soften nicely. If you’re using other cookies, do the same. We aren’t making a crust that needs to be pressed, so just having them ready to go is perfect. Make sure you have enough to create a good base layer, about 1 to 1.5 cups of crumbs.
Step 3: Mix Wet Ingredients
In a large bowl, whisk together the sweetened condensed milk, the instant vanilla pudding mix, and your milk of choice (whole milk, 2%, or even almond milk). Add the vanilla extract and that tiny pinch of salt if you’re using it. Whisk vigorously for about 2-3 minutes. You’ll see it start to thicken up almost immediately. Don’t be alarmed if it looks a little softer than you expect – it will firm up more as it chills.
Step 4: Combine
Spread about half of your graham cracker crumbs evenly across the bottom of your prepared baking dish. Then, pour about half of the pudding mixture over the crumbs. Gently spread it to cover the crumbs evenly. Repeat with the remaining crumbs and the remaining pudding mixture, creating a second layer of crumbs and then topping it with the rest of the pudding mixture. You’ll want the top layer to be the pudding mixture for the glaze to sit on.
Step 5: Prepare Filling
Actually, I already covered the filling preparation in Step 3! It’s that simple – just whisking everything together until it thickens. The key is to use *instant* pudding. If you’ve accidentally grabbed cook-and-serve, it won’t set properly without being heated, so make sure you have the right kind!
Step 6: Layer & Swirl
In this recipe, we’re layering graham crackers and pudding. So, Step 4 covered the layering part. You’ll have a bottom layer of crumbs, then pudding, then more crumbs, then the final layer of pudding on top. No swirling is needed here, just even layers. This is what gives it that cake-like structure and texture as the crackers soften. Trust me on this one; the simplicity is key!
Step 7: Bake
And… we don’t bake! That’s the beauty of this No Bake Chocolate Eclair Cake! Once you have your layers assembled in the pan, cover it tightly with plastic wrap or foil. Then, pop it into the refrigerator to chill and set. You’ll want to give it at least 4-6 hours, but overnight is even better. This allows the graham crackers to absorb moisture from the pudding and soften into a tender, cake-like consistency. If you try to cut it too soon, it will be messy!
Step 8: Cool & Glaze
After the cake has chilled and set (seriously, be patient here!), it’s time for the crowning glory: the chocolate glaze. In a medium saucepan, melt the butter over medium heat. Whisk in the cocoa powder and cook for about a minute until fragrant. Remove from heat and whisk in the powdered sugar, milk (or cream), and vanilla extract. Keep whisking until the glaze is smooth, glossy, and has a pourable consistency. If it’s too thick, add a tiny bit more milk; if it’s too thin, add a bit more powdered sugar. Once smooth, pour the glaze over the chilled cake, spreading it evenly to cover the top. Let the glaze set at room temperature for about 30 minutes, or pop it back in the fridge for about 15 minutes if you’re impatient like me, until it’s slightly firm to the touch.
Step 9: Slice & Serve
Once the glaze has set, it’s time to serve! If you lined your dish with parchment or plastic wrap, you can carefully lift the entire cake out and place it on a serving platter. If not, just slice it directly in the pan. Use a sharp knife for clean cuts. I find that running the knife under hot water and wiping it clean between slices helps immensely. Serve chilled. This cake is best enjoyed within a few days of making it.
What to Serve It With
This No Bake Chocolate Eclair Cake is so versatile, it fits in perfectly with any meal or occasion. For a simple breakfast treat (because, why not?), I love cutting small squares and serving them with a steaming mug of good quality coffee. It feels like a decadent treat to start the day, but it’s so easy you can have it ready in minutes if you’ve already made it. For a delightful brunch spread, I’ll cut it into slightly larger portions and serve it alongside fresh berries like raspberries or sliced strawberries. The tartness of the berries cuts through the richness beautifully. A glass of mimosas or a light sparkling rosé pairs wonderfully. When serving it as a formal dessert, I like to get a little fancy with plating. A drizzle of extra chocolate sauce, a dollop of whipped cream, or a few chocolate shavings on the side can elevate it instantly. It’s also fantastic with a small scoop of vanilla bean ice cream. And for those cozy snack moments, it’s perfect on its own! My family just loves it curled up on the couch with a glass of cold milk. It’s that perfect comforting treat that feels special but is always accessible. My grandma used to make a similar layered cookie dessert, so for me, it’s also a taste of childhood, and I love sharing that feeling with my own kids.
Top Tips for Perfecting Your No Bake Chocolate Eclair Cake
Over the years, I’ve learned a few little tricks that help make this No Bake Chocolate Eclair Cake absolutely perfect every single time. For the graham cracker base, I always recommend pulsing them in a food processor. It gives you a nice, uniform crumb that softens beautifully. If you only have larger bits, you might end up with pockets that are too crunchy. Aim for fine crumbs, but don’t turn it into powder! For the filling, using *instant* vanilla pudding is absolutely crucial. I’ve seen people accidentally use the cook-and-serve kind, and it just won’t set up properly, leading to a runny mess. Make sure you whisk that pudding mix thoroughly with the condensed milk and milk until it’s well combined and starting to thicken. Don’t overmix it, but definitely make sure there are no dry pockets of pudding mix. When it comes to the glaze, consistency is key. I usually start with a slightly thicker mixture and then thin it out with a tablespoon of milk at a time until it pours smoothly but isn’t watery. This way, you can control it better. If you’re worried about it being too sweet, you can use dark cocoa powder for a richer, less sweet chocolate flavor in the glaze. Some folks like to add a tiny bit of espresso powder to the glaze to deepen the chocolate flavor – a fantastic idea! For ingredient swaps, I’ve had success using digestive biscuits or even Biscoff cookies for the base if you want a more spiced flavor profile. And for the filling, I’ve even used sugar-free instant pudding, and it works well, though you might want to adjust the sweetener in the glaze if you do that. My biggest tip, though? Patience with the chilling time. Resist the urge to cut into it too early. Letting it set overnight is truly the secret to that perfect cake-like texture where the graham crackers have completely softened and melded with the cream. I learned this the hard way when I was impatient and ended up with a slightly crumbly, messy slice, but it was still delicious! So, trust the chilling process; it’s doing all the work for you.
Storing and Reheating Tips
This No Bake Chocolate Eclair Cake is best enjoyed fresh, but it holds up beautifully for a few days, which makes it perfect for making ahead. For room temperature storage, I wouldn’t leave it out for more than 2-3 hours, especially if your kitchen is warm, as the dairy in the filling can spoil. If you’ve just made it and the glaze is still a bit soft, letting it sit at room temperature for about 30 minutes to an hour after glazing helps it set nicely before you refrigerate it. Refrigerator storage is your best bet for keeping it fresh and firm. Once it’s fully set and the glaze is firm, cover the dish tightly with plastic wrap or an airtight lid. It will stay delicious in the fridge for about 3 to 4 days. The texture of the graham cracker layers will continue to soften over time, becoming even more cake-like, which I personally love! If you’re planning to make it even further in advance, freezer instructions are also an option, though I prefer it fresh. Wrap the cake very, very well in plastic wrap, then in a layer of aluminum foil. It should last in the freezer for up to 1-2 months. Thaw it in the refrigerator overnight before serving. The texture might be slightly different after freezing and thawing, a little softer, but it’s still a treat. For glaze timing, I always add the glaze *after* the cake has fully chilled and set in the refrigerator. If you add the glaze too early, it can become messy or meld too much with the pudding layer. Once the cake is chilled and ready, make your glaze, pour it over, let it set at room temperature or briefly in the fridge, and then slice and serve!
Frequently Asked Questions
Final Thoughts
Honestly, this No Bake Chocolate Eclair Cake is one of those recipes that just makes life a little bit sweeter and a whole lot easier. It’s proof that you don’t need a complicated process to achieve truly delicious results. Every time I make it, I’m reminded of why it’s such a favorite – the perfect balance of textures, the comforting flavors, and the sheer joy of seeing everyone’s faces light up when they take their first bite. It’s the kind of dessert that brings people together, sparking conversations and happy memories. If you’re looking for a dessert that’s impressive yet incredibly simple, or if you’re just craving that classic eclair flavor without the baking fuss, I really hope you give this one a try. It’s a recipe that I’ve loved sharing with friends and family, and I know you’ll love it too. I can’t wait to hear how yours turns out, so please leave a comment below and tell me all about it, or share your favorite variations! Happy baking (or rather, happy no-baking)!
No Bake Chocolate Eclair Cake
Ingredients
Main Ingredients
- 14.4 ounce Graham crackers one box
- 2 package Instant vanilla pudding mix 3.4 oz each
- 3 cup Whole milk cold
- 8 ounce Whipped topping like Cool Whip, thawed
- 16 ounce Chocolate frosting one can
Instructions
Preparation Steps
- Arrange a single layer of graham crackers in the bottom of a 9x13 inch baking dish. Break crackers as needed to fill in gaps.
- In a large bowl, whisk together the instant vanilla pudding mix and cold milk for about 2 minutes, until thickened. Gently fold in the thawed whipped topping.
- Spread half of the pudding mixture evenly over the layer of graham crackers in the dish.
- Place another layer of graham crackers over the pudding mixture.
- Spread the remaining pudding mixture over the second layer of graham crackers.
- Add a final layer of graham crackers on top of the remaining pudding.
- Carefully spread the chocolate frosting over the top layer of graham crackers. For easier spreading, you can microwave the frosting for 15-30 seconds until slightly softened.
- Cover the dish tightly with plastic wrap and refrigerate for at least 4-6 hours, or preferably overnight, to allow the graham crackers to soften and the flavors to meld.
- Slice and serve chilled.