
There are some foods that just bring you back, you know? For me, it’s the smell of perfectly fried onion rings, specifically the kind that have that slight sweetness from really good Tennessee onions. I can still remember my mom making these on a Saturday afternoon, the whole kitchen buzzing with anticipation. It wasn’t just the taste, it was the whole experience – the sizzle in the pan, the golden-brown perfection, and that first bite that was both crispy and tender. It’s funny, I’ve tried other onion rings, even some fancy restaurant versions, but nothing ever quite measured up to these. They’re not just good; they’re a memory, a feeling. And honestly, if you haven’t cooked with good Tennessee onions before, you’re missing out on a secret weapon for so many dishes. They have a way of caramelizing beautifully and offering a depth of flavor that other varieties just can’t match. So, when I tell you these Tennessee onion rings are the best, I really mean it. This recipe is my go-to, the one I whip out when we have company, or honestly, when I just need a little taste of home.
What are Tennessee onion rings?
So, what exactly makes these “Tennessee” onion rings? Well, it all comes down to the star ingredient: those incredible onions grown in Tennessee soil. These aren’t your everyday yellow onions; they’re often a bit sweeter, with a more robust flavor profile that holds up beautifully when fried. Think of them as the rock stars of the onion world. These onion rings are essentially thick-cut slices of these special onions, coated in a seasoned batter and then fried to a perfect golden crisp. It’s not some complicated, multi-step process with a dozen obscure ingredients. It’s simple, honest-to-goodness comfort food. The “Tennessee” part is really about honoring that ingredient and the unique sweetness and flavor it brings to the party. They’re a bit like a classic diner onion ring but elevated, with a depth of flavor that makes you pause and savor each bite. It’s the kind of dish that feels both familiar and excitingly new all at once.
Why you’ll love this recipe?
Honestly, there are so many reasons I keep coming back to this Tennessee onion ring recipe, and I’m sure you’ll find your own favorites too. First and foremost, the flavor is just out of this world. Those Tennessee onions, when they’re cooked just right, get this incredible sweet and savory balance. They aren’t overpoweringly sharp; instead, they offer this beautiful, mellow sweetness that’s just divine. And the texture? Oh my goodness. We’re talking about a crunch that’s satisfyingly loud but gives way to a tender, almost melt-in-your-mouth onion inside. It’s the perfect contrast! What I also love is how surprisingly simple this recipe is. You don’t need fancy equipment or a culinary degree. If you can chop an onion and mix a batter, you’re golden. This is a lifesaver on busy weeknights when you want something special but don’t have hours to spend in the kitchen. And don’t even get me started on the cost-efficiency! Onions are usually pretty budget-friendly, and the rest of the ingredients are pantry staples. You get a gourmet-level appetizer or side dish without breaking the bank. Plus, they are incredibly versatile. I’ll get to more of that later, but seriously, they’re not just for burgers anymore! What truly sets this apart for me, compared to other recipes I’ve tried, is the *way* the batter clings and fries up. It stays crispy for ages, which is a rare and wonderful thing in the world of fried foods.
How do I make a Tennessee onion ring?
Quick Overview
This recipe is all about simplicity and flavor. We’ll start by slicing our gorgeous Tennessee onions, then dip them in a perfectly seasoned batter, and finally, fry them until they’re golden and irresistible. The key is in the batter – it’s designed to be light, crispy, and hold onto the onion without getting soggy. It’s a straightforward process that delivers spectacular results every single time. You’ll be amazed at how quickly you can transform simple ingredients into something truly special.
Ingredients
For the Onions: What is the meaning of the word “for the onions”?
2 large Tennessee onions (about 1.5 lbs total) – *Look for onions that feel firm and heavy for their size. The sweetness of Tennessee onions is non-negotiable here!*
Vegetable oil or peanut oil, for frying (about 4-6 cups) – *Choose a neutral oil with a high smoke point.*
For the Batter:
1.5 cups all-purpose flour – *You can experiment with a bit of rice flour mixed in for extra crispness, about 1/4 cup, but regular flour works beautifully.*
1/2 cup cornstarch – *This is crucial for that ultra-crispy texture!*
2 teaspoons baking powder – *For lift and lightness.*
1 teaspoon salt – *Don’t skimp on the salt; it enhances all the flavors.*
1/2 teaspoon black pepper – *Freshly ground is always best!*
1/4 teaspoon paprika – *Adds a lovely subtle color and a hint of smoky flavor.*
1/4 teaspoon garlic powder – *Just a touch to round things out.*
1.5 cups cold club soda or beer – *Cold is key! The carbonation helps create a lighter, crispier batter. Beer adds a nice depth of flavor, but club soda is equally delicious and perfect for non-alcoholic.*
For Serving (Optional but Recommended!):
Your favorite dipping sauce (ranch, comeback sauce, spicy aioli) – *I’ll share my favorite soon!*
Step-by-Step Instructions
Step 1: Prepare the Onions
First things first, let’s get our onions ready. You want to peel them, and then slice them into rings about 1/2 inch thick. Don’t worry if some slices are a bit thicker or thinner; it all adds to the rustic charm! Once they’re sliced, gently separate the rings. If any are stuck together, just give them a little coax. Sometimes, if they’re really stuck, you can lightly press them to loosen them up. Place these separated rings in a large bowl. Now, this is a little trick I learned from my mom: let them sit in a bowl of ice water for about 15-20 minutes. This helps to firm them up and draws out a bit of excess moisture, which means they’ll fry up even crispier. After they’ve had their ice bath, drain them really well and pat them thoroughly dry with paper towels. This step is super important – excess water and hot oil are not friends!
Step 2: Mix Dry Ingredients
In a large mixing bowl, whisk together the all-purpose flour, cornstarch, baking powder, salt, black pepper, paprika, and garlic powder. Give it a good stir with a whisk or a fork to make sure everything is evenly distributed. You want those spices and leavening agents to be uniformly spread so every bite is flavorful. Make sure there are no clumps of baking powder. This dry mixture is the foundation of our crispy coating.
Step 3: Mix Wet Ingredients
Now, for the magic part! When you’re ready to fry (and I mean *ready*, oil should be heating), pour the very cold club soda or beer into the dry ingredients. Whisk it *just* until it’s combined. It’s okay, and even desirable, for the batter to be a little lumpy. Overmixing develops the gluten in the flour, which can lead to a tougher coating. We want light and airy! The batter should have the consistency of pancake batter, maybe just a touch thinner. If it seems too thick, add a tablespoon or two more of club soda/beer. If it seems too thin, add a tablespoon or two more of flour and cornstarch mixture.
Step 4: Coat the Onion Rings
Working in batches so you don’t overcrowd the pan (and cool down the oil too much), take a few dried onion rings at a time and toss them gently in the batter. Make sure each ring is well coated. Let any excess batter drip back into the bowl for a second before you carefully place them into the hot oil.
Step 5: Heat the Oil
In a heavy-bottomed pot or Dutch oven, pour in your frying oil. You want at least 2-3 inches of oil. Heat the oil over medium-high heat until it reaches about 350°F (175°C). If you don’t have a thermometer, you can test the oil by dropping a tiny bit of batter in it. It should sizzle immediately and float to the surface. If it browns too quickly, your oil is too hot. If it just sits there, it’s not hot enough. Maintaining the right temperature is key to perfectly fried, non-greasy rings!
Step 6: Fry the Onion Rings
Carefully place a few battered onion rings into the hot oil, making sure not to overcrowd the pot. Fry for about 3-5 minutes, flipping them occasionally with a slotted spoon or spider strainer, until they are a beautiful golden brown and crispy. They cook surprisingly quickly! Don’t rush them, but don’t let them burn either.
Step 7: Drain and Season
Once they’re perfectly golden, lift the onion rings out of the oil using your slotted spoon or spider strainer, letting any excess oil drip off. Transfer them to a wire rack set over a baking sheet or to a plate lined with paper towels. Immediately sprinkle them with a little extra salt while they’re still hot. This is when the salt really sticks and enhances the flavor. This step is absolutely non-negotiable for the best taste!
Step 8: Repeat and Serve
Continue frying the remaining onion rings in batches, making sure to let the oil come back up to temperature between batches. Serve them immediately while they are hot and crispy. Trust me, they won’t last long!
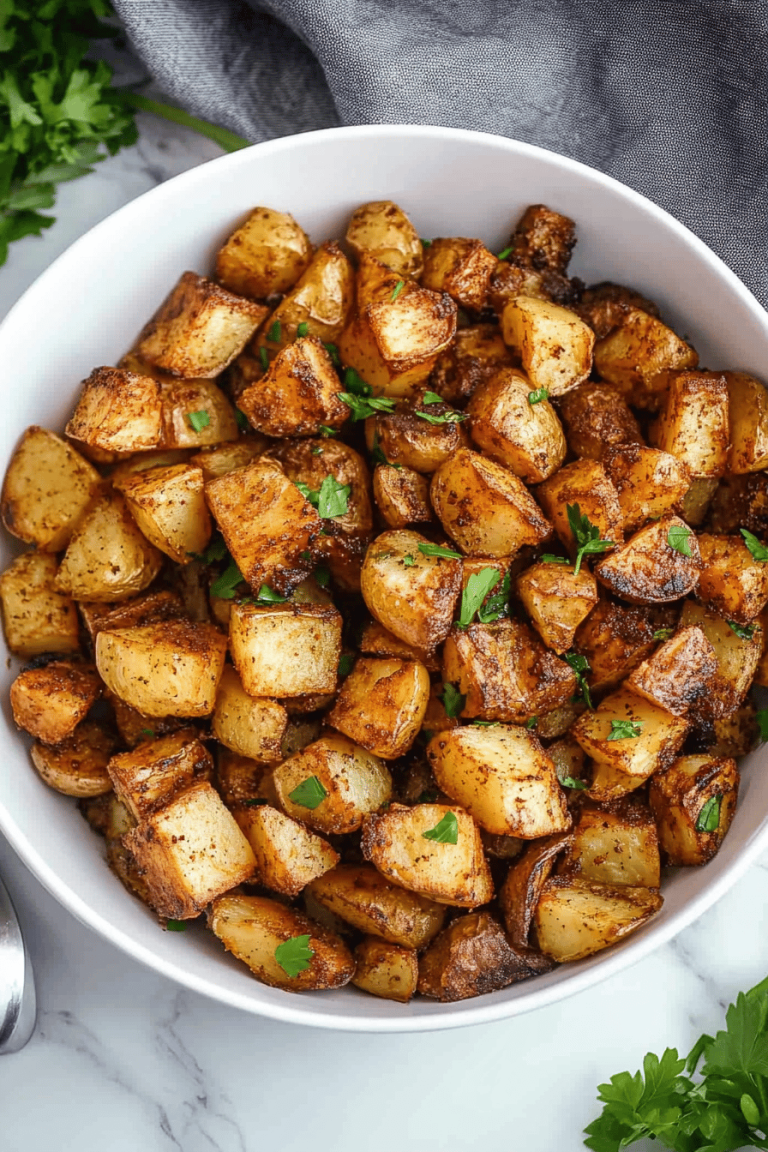
What to Serve It With
These Tennessee onion rings are so versatile, they’ve earned a permanent spot in my appetizer rotation. For a classic breakfast or brunch spread, they’re amazing alongside some fluffy scrambled eggs and crispy bacon. They add a savory, satisfying crunch that’s just unexpected and delightful. Think of them as a gourmet breakfast side! For a casual brunch, I love serving them alongside sliders or a mini quiche. They just elevate the whole meal. As a dessert? Hear me out! While it sounds odd, a small, perfectly fried onion ring with a slightly sweet dipping sauce can be a fascinating palate cleanser or even a unique dessert component, especially if paired with something creamy. But where they truly shine is as a side for dinner or as a star appetizer. They are phenomenal with burgers, of course, piled high on top or served on the side. They’re also fantastic with grilled chicken or steak. My absolute favorite pairing, though, is with a hearty pulled pork sandwich. The sweetness of the onion rings complements the smoky pork so well. And for dipping? My go-to is a homemade comeback sauce – it’s a creamy, tangy, slightly spicy concoction that’s just addictive. But honestly, a good ranch, a spicy aioli, or even just some ketchup works wonders. Don’t be afraid to experiment!
Top Tips for Perfecting Your Tennessee Onion Rings
I’ve made these rings more times than I can count, and over the years, I’ve picked up a few tricks that I think really make a difference. First, and I can’t stress this enough, use those actual Tennessee onions if you can find them! Their natural sweetness and lower water content make them ideal. If you can’t find them, a good quality sweet onion will work, but it won’t be quite the same magic. When it comes to slicing, aim for consistency. I like about a half-inch thick, as it gives you that good onion-to-batter ratio. Too thin and they might burn; too thick and the inside might not cook through. For the batter, the key is keeping it *cold*. Cold club soda or beer, a cold bowl – it all helps create a crispier crust because it shocks the batter as it hits the hot oil. Remember that bit about not overmixing? Seriously, just combine until you don’t see dry flour anymore. Lumps are your friend here. Also, don’t be tempted to put too many rings in the fryer at once. It lowers the oil temperature drastically, leading to greasy, soggy rings. Fry in batches, give them space, and let the oil recover its heat between batches. I learned this the hard way early on! If you’re looking for a flavor variation, try adding a pinch of cayenne pepper to the dry mix for a little kick, or some dried herbs like chives or parsley. For the glaze suggestion, I’m thinking more about a dipping sauce here! My personal favorite is a remoulade-style sauce with a bit of Creole mustard, mayo, and a dash of hot sauce. It’s a game-changer. And finally, the draining process! A wire rack is superior to paper towels alone because it allows air to circulate all around the ring, keeping the bottom from getting steamy and soft.
Storing and Reheating Tips
Okay, so the absolute best way to enjoy these Tennessee onion rings is fresh out of the fryer. They’re at their peak crispiness and flavor then. However, life happens, and sometimes you have leftovers (if you’re lucky!). For storing them at room temperature, I wouldn’t recommend keeping them longer than an hour or two, as they will start to lose their crispness. If you absolutely must store them longer, an airtight container might seem like a good idea, but it often traps moisture and makes them soggy. Honestly, if you know you’ll have extras, it’s sometimes better to have a small fry session later rather than try to salvage them. If you do refrigerate them, store them in a single layer on a plate or parchment paper, loosely covered with plastic wrap or foil. They should be good in the fridge for about 1-2 days, but again, the texture will change. For reheating, the oven is your best friend. Preheat your oven to around 375°F (190°C). Arrange the leftover onion rings in a single layer on a baking sheet lined with parchment paper. Bake for about 8-10 minutes, or until they are heated through and re-crisped. You might need to flip them halfway through. Microwaving them is generally a no-go if you want any semblance of crispiness – they tend to get chewy and soft. If you absolutely have to use the microwave for a quick reheat, do it for very short intervals, checking frequently, but I truly advise against it for the best results. As for the glaze timing, since these are fried, there’s no glaze involved in the cooking process itself. The dipping sauce is added when you serve them, so whether they’re fresh or reheated, the sauce is always a last-minute addition.
Frequently Asked Questions
Final Thoughts
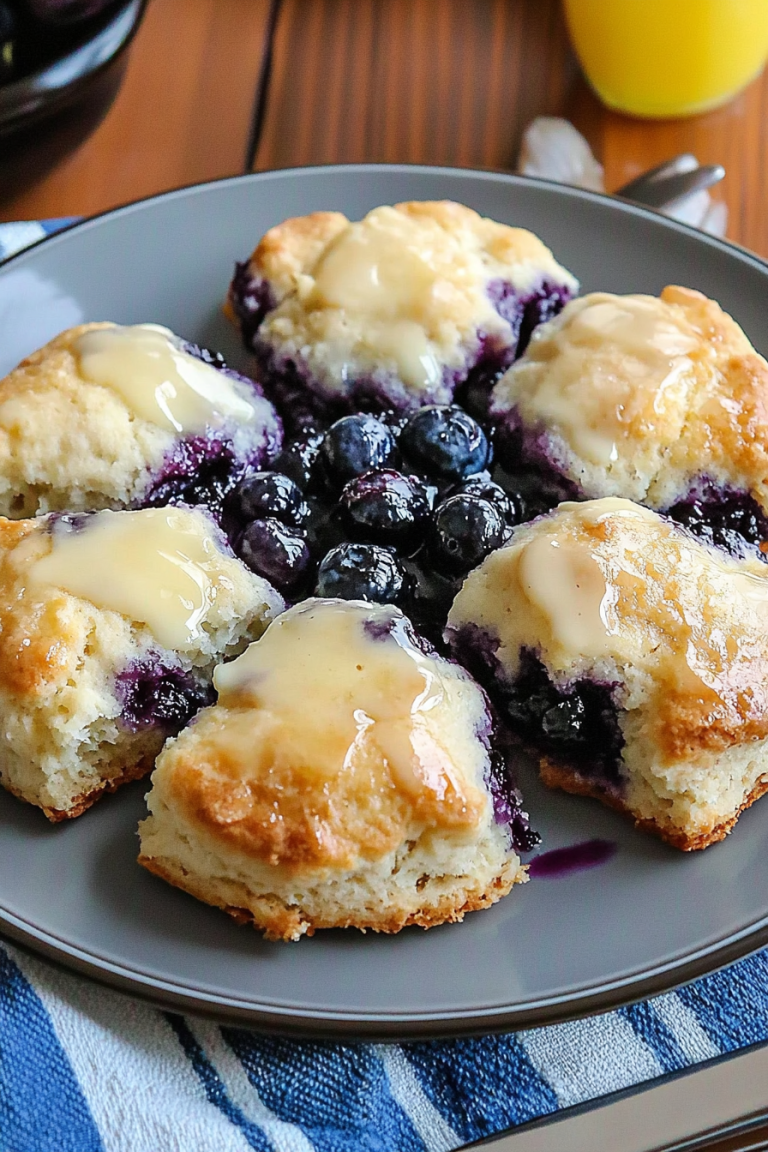
There you have it – my absolute favorite way to make Tennessee onion rings! I really hope you give this recipe a try. It’s more than just a side dish; it’s a little slice of comfort and pure deliciousness. The way the Tennessee onions caramelize and the batter fries up to a perfect crunch is just something special, and I’m so excited for you to experience it. They’re proof that sometimes, the simplest ingredients, prepared with a little love and a few key techniques, can create something truly unforgettable. If you love this recipe, you might also enjoy my Crispy Fried Pickles or my Classic Buttermilk Biscuits – they’re in a similar vein of down-home goodness! Please, if you make these, come back and leave a comment to let me know how they turned out! I’d love to hear your variations or any funny stories that happen in your kitchen. Happy frying, and happy eating!
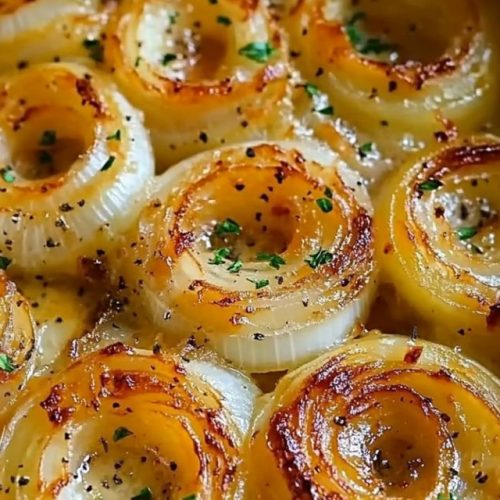
Tennessee onions
Ingredients
Main Ingredients
- 2 pounds yellow onions peeled and sliced into 1/2-inch rings
- 4 slices bacon cooked crispy and crumbled
- 0.25 cup light brown sugar packed
- 2 tablespoons Worcestershire sauce
- 2 tablespoons unsalted butter melted
- 0.5 teaspoon salt
- 0.25 teaspoon black pepper freshly ground
Instructions
Preparation Steps
- Preheat your oven to 350°F (175°C). Lightly grease a 9x13 inch baking dish.
- Arrange the sliced onions evenly in the prepared baking dish.
- In a small bowl, whisk together the crumbled bacon, brown sugar, Worcestershire sauce, melted butter, salt, and black pepper until well combined.
- Pour the mixture evenly over the sliced onions in the baking dish, making sure to coat them well.
- Cover the baking dish tightly with aluminum foil and bake for 30 minutes.
- Remove the foil and continue baking for another 15 minutes, or until the onions are tender and lightly caramelized. Stir halfway through the uncovered baking time for even cooking.
- Serve hot as a delicious side dish.

I totally get it—there’s something so comforting about the smell of perfectly fried onion rings. That sweet Tennessee onion flavor really hits different.