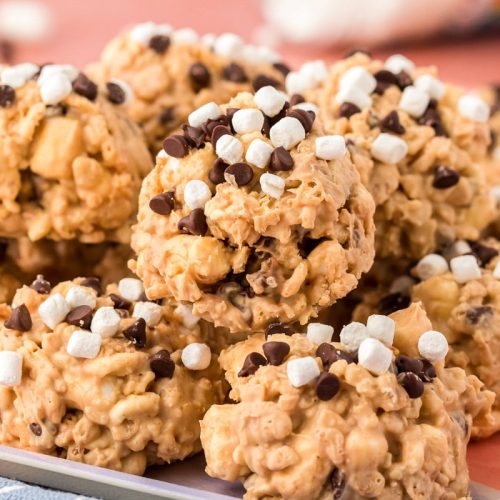
Oh, where do I even begin with these avalanche cookies? For me, they’re pure joy in cookie form. They remind me of those chilly autumn afternoons when I was a kid, the kind where the air smells like damp leaves and you just crave something warm and sweet. My grandma used to make these, and the smell would fill her tiny kitchen, drawing everyone in like a magnet. These aren’t your average chocolate chip cookies, though they have some of that comforting familiarity. Think of them as a delightful surprise, a party in your mouth with every bite. They’re like a snowdrift of deliciousness, hence the name, and honestly, they’re ridiculously easy to whip up. If you’re a fan of chewy, slightly crisp cookies packed with gooey goodness, you are going to fall head over heels for these avalanche cookies.
What are Avalanche Cookies?
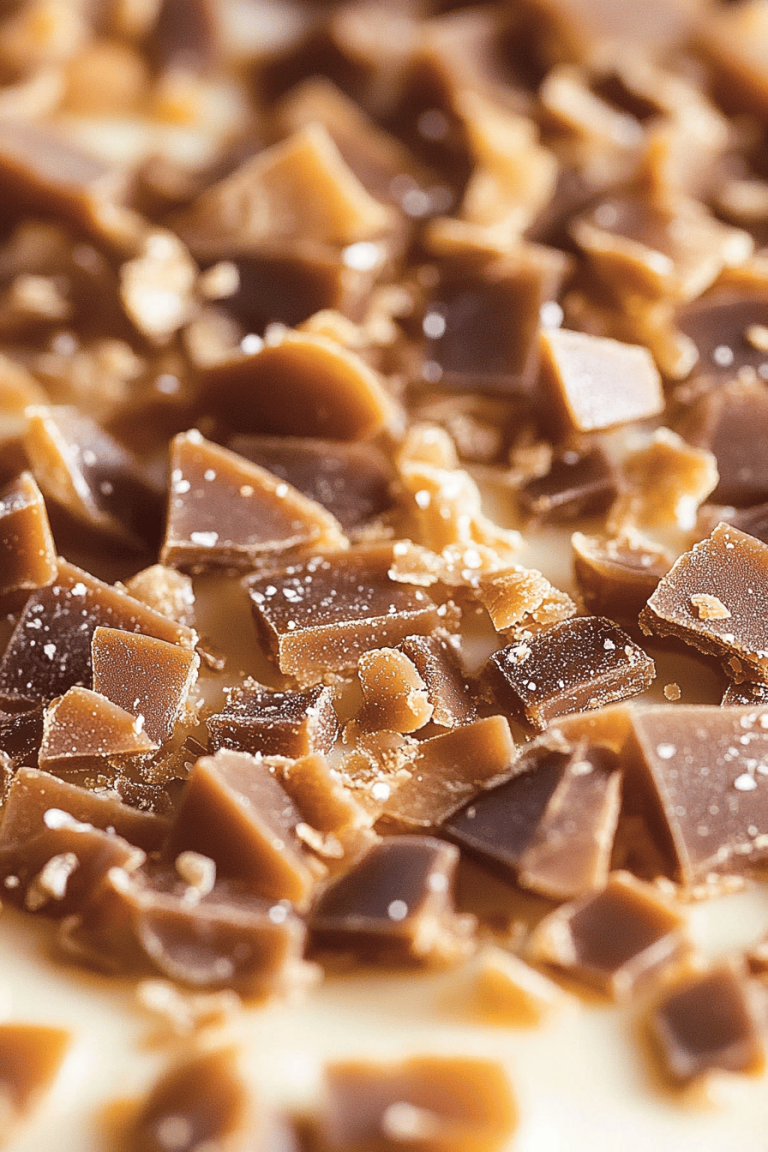
So, what exactly are these magical things we call avalanche cookies? Picture this: a wonderfully chewy cookie base, packed with all sorts of goodies – think chocolate chips, Peanut Butter chips, and sometimes even nuts or coconut. They get their name because when you break one open, the mix-ins spill out like an avalanche! It’s not a fancy, complicated cookie; it’s more of a delightful, rustic treat that’s all about flavor and texture. They’re essentially a celebration of mix-ins. They’re like the more adventurous, slightly wilder cousin of a classic chocolate chip cookie, and honestly, they’re so much fun to make and even more fun to eat. It’s that perfect balance of sweet, salty, and chewy that just makes you happy.
Why you’ll love this recipe?
There are so many reasons why this avalanche cookie recipe has become my absolute go-to, and I just know you’re going to adore it too. First off, the flavor is just out of this world! You get that rich, buttery cookie base, which is perfectly complemented by the salty sweetness of Peanut Butter chips and the classic comfort of chocolate chips. If you’re like me and love a good textural contrast, you’ll be thrilled. The edges get this lovely, slight crisp, while the center stays wonderfully soft and chewy. It’s the best of both worlds! And the best part? They are surprisingly simple to make. I’ve made these countless times when I’ve had unexpected guests or when the sweet craving hits HARD, and they always come together quickly. No fancy techniques required, just good old-fashioned creaming butter and sugar. Plus, they’re incredibly budget-friendly. You likely have most of the ingredients in your pantry already, and the ones you might need to grab are usually quite affordable. And let’s talk versatility – you can totally customize these avalanche cookies! Add some chopped walnuts, pecans, or even some shredded coconut for an extra layer of flavor and crunch. I’ve even experimented with white chocolate chips and butterscotch chips, and they were divine. They’re just so forgiving and adaptable, which is a huge win in my book. Honestly, what I love most about this recipe is that it delivers maximum deliciousness with minimal fuss. It’s a true lifesaver!
How do you make Avalanche cookies?
Quick Overview
Making these avalanche cookies is a breeze, honestly! You’ll basically cream your butter and sugars, add your eggs and vanilla, then mix in your dry ingredients. The real magic happens when you stir in all those wonderful mix-ins like chocolate chips and Peanut Butter chips. Then, you’ll drop spoonfuls onto your baking sheets and let them bake until they’re golden around the edges and still a little soft in the middle. The key is to not overbake them, so they stay wonderfully chewy. It’s a straightforward process that guarantees a fantastic cookie every single time, no matter your baking experience level.
Ingredients
For the Main Batter:
1 cup (2 sticks) unsalted butter, softened: Make sure it’s good quality butter; it really makes a difference in flavor and texture. Softened means you can easily press your finger into it, but it’s not melted or greasy. It’s crucial for proper creaming!
3/4 cup granulated sugar: This helps with the structure and gives them that classic cookie sweetness.
3/4 cup packed light Brown Sugar: Brown sugar is your best friend here for that chewy texture and lovely caramel notes. Don’t skip packing it into the cup!
2 large eggs: These bind everything together and add richness. Make sure they’re at room temperature for the best emulsion.
1 teaspoon vanilla extract: Pure vanilla extract is a must for that warm, comforting flavor.
2 1/4 cups all-purpose flour: Spooned and leveled, not scooped! Scooping can lead to too much flour, resulting in dry cookies. I always double-check mine.
1 teaspoon baking soda: This is what gives them a little lift and helps with spread.
1/2 teaspoon salt: Balances out the sweetness and enhances all the other flavors.
For the Filling (The “Avalanche” Mix-ins):
1 cup semi-sweet chocolate chips: The classic choice! Ghirardelli or Guittard are my favorites, but use what you love.
1 cup peanut butter chips: These are essential for that signature avalanche cookie flavor. Reese’s are great, but I also love the ones from Guittard.
Optional additions: 1/2 cup chopped nuts (like walnuts or pecans), or 1/2 cup shredded sweetened coconut. These are totally up to you and your taste preferences!
For the Glaze (Optional, but Recommended!):
1 cup powdered sugar: For that smooth, sweet finish.
2-3 tablespoons milk (any kind, even almond milk!): Start with 2 tablespoons and add more until you reach your desired drizzling consistency.
1/2 teaspoon vanilla extract: Just a touch to enhance the flavor.
Step-by-Step Instructions
Step 1: Preheat & Prep Pan
Get your oven preheated to 375°F (190°C). Line your baking sheets with parchment paper. This is my non-negotiable step! It prevents sticking, makes cleanup a breeze, and helps the cookies bake evenly without getting too dark on the bottom. You can also use silicone baking mats if you have them.
Step 2: Mix Dry Ingredients
In a medium bowl, whisk together the all-purpose flour, baking soda, and salt. Whisking them together ensures that the leavening agents and salt are evenly distributed throughout the flour, which leads to consistent cookies. Don’t skip this step; it’s a simple way to ensure success.
Step 3: Mix Wet Ingredients
In a large bowl (or the bowl of your stand mixer fitted with the paddle attachment), cream together the softened unsalted butter, granulated sugar, and packed light brown sugar until light and fluffy. This usually takes about 2-3 minutes. Then, beat in the two large eggs, one at a time, making sure each is incorporated before adding the next. Finally, stir in the vanilla extract. The mixture should look smooth and well-combined.
Step 4: Combine
Gradually add the dry ingredients to the wet ingredients. Mix on low speed (or stir with a wooden spoon) until *just* combined. Be careful not to overmix here! Overmixing develops the gluten in the flour, which can lead to tough cookies. Stop mixing as soon as you no longer see streaks of dry flour.
Step 5: Prepare Filling
Now for the fun part! Gently stir in your chocolate chips, peanut butter chips, and any other optional additions you’re using (like nuts or coconut). Use a sturdy spoon or a spatula to fold them in until they’re evenly distributed throughout the dough. You want to make sure every bite gets a good amount of those delicious mix-ins!
Step 6: Layer & Swirl
This step isn’t really about layering and swirling in the traditional sense like a marbled cake. Instead, it’s about ensuring those delicious avalanche mix-ins are distributed throughout the dough. What I like to do is give the dough a final gentle fold with my spatula to make sure the chips and nuts are really incorporated. Then, I use a cookie scoop (about 1.5 to 2 tablespoons) to drop rounded balls of dough onto the prepared baking sheets, leaving about 2 inches between each cookie. This ensures they have room to spread as they bake.
Step 7: Bake
Bake for 9 to 12 minutes, or until the edges are lightly golden brown and the centers still look a little soft and underdone. They will continue to set up as they cool on the baking sheet. Trust your eyes here – you want them to look perfectly chewy, not crispy. Ovens can vary, so keep an eye on them, especially the first time you make them!
Step 8: Cool & Glaze
Let the cookies cool on the baking sheets for about 5-10 minutes. This is crucial because they are very soft when they come out of the oven and will fall apart if you try to move them too soon. Once they’ve firmed up a bit, carefully transfer them to a wire rack to cool completely. While they’re cooling, whisk together the powdered sugar, milk, and vanilla extract in a small bowl until smooth for the glaze. If it’s too thick, add a tiny bit more milk; if it’s too thin, add a little more powdered sugar. Once the cookies are completely cool, drizzle the glaze over them using a spoon or a piping bag. Let the glaze set for about 15-20 minutes before serving or storing.
Step 9: Slice & Serve
Once the glaze has set, your delicious avalanche cookies are ready to be enjoyed! You can eat them whole, or if you’re feeling adventurous, you can cut one in half to reveal that incredible avalanche of goodness inside. They’re best enjoyed at room temperature, but honestly, they’re pretty amazing warm too (just be careful of the melty chips and glaze!).
What to Serve It With
These avalanche cookies are pretty much perfect on their own, but they also pair beautifully with a variety of beverages and can be part of a larger spread. For a cozy breakfast treat alongside your morning coffee, they’re just divine. The richness of the cookie and the warmth of the coffee is a match made in heaven. For a more festive brunch, I love to arrange them on a pretty platter. They add a touch of indulgence without being overly fussy. They also make a fantastic dessert after dinner. Imagine serving a warm cookie with a scoop of vanilla bean ice cream – pure bliss! And for those cozy snack moments, when you just need a little something sweet to tide you over, these cookies are the ultimate comfort. My kids always ask for these when they get home from school, and I’ll often have one with a cold glass of milk. One of my favorite traditions is to serve them with hot apple cider in the fall; the spices complement the cookie flavors so well.
Top Tips for Perfecting Your Avalanche Cookies
I’ve made these avalanche cookies more times than I can count, and through the years, I’ve picked up a few tricks that I think really elevate them. First, about the butter: always, always use softened butter. If your butter is too cold, it won’t cream properly with the sugar, and you won’t get that lovely light and fluffy texture that is so important for chewy cookies. If it’s too warm or melted, your cookies will spread too much and become flat and greasy. I usually leave mine out on the counter for about an hour before I start baking. When it comes to mixing, remember that rule: “just combined.” Seriously, resist the urge to overmix once the flour is in. A few streaks of flour are okay; they’ll disappear when you add the mix-ins. Overmixing is the silent killer of tender cookies! For the mix-ins, don’t be shy! You want a good distribution of chocolate and peanut butter chips (and any other goodies!) throughout the dough. If you’re chopping nuts, make sure they’re roughly chopped so you get nice little bursts of flavor and crunch, not huge chunks that could throw off the dough balance. When it comes to baking, my biggest tip is to watch them closely. Ovens are so different! I know mine tends to run a little hot, so I usually shave off a minute or two from the suggested baking time. You want the edges to look set and lightly golden, but the center should still look a little soft and underbaked. They’ll continue to cook on the hot baking sheet after you take them out of the oven, which is exactly what we want for that perfect chewy texture. If you’re making the glaze, starting with 2 tablespoons of milk and adding more very gradually is key. It’s so easy to make it too thin, and then you’re chasing it with more powdered sugar. A thicker glaze will give you those nice defined drizzles, while a thinner one will spread more. Experiment to see what you prefer! Lastly, for ingredient swaps, if you can’t find peanut butter chips, you can use an equal amount of finely chopped peanut butter cups, or even just substitute with more chocolate chips for a more classic chocolate cookie. If you’re avoiding nuts, just leave them out – the cookies will still be fantastic!
Storing and Reheating Tips
One of the best things about these avalanche cookies is how well they store. At room temperature, they’ll stay wonderfully fresh for about 3-4 days if you keep them in an airtight container. I usually just use a good quality cookie tin or a plastic container with a tight-fitting lid. If you add the glaze, I find they are best eaten within the first 2 days, as the glaze can sometimes get a bit sticky after that. If you plan to store them for longer, your refrigerator is your friend. They’ll keep well in an airtight container in the fridge for up to a week. Honestly, though, they rarely last that long in my house! If they do freeze well, too. I like to wrap them individually in plastic wrap, then place them in a freezer-safe bag or container. They can stay frozen for up to 3 months. To thaw them, just leave them at room temperature for a few hours. If you’ve glazed them, I’d recommend glazing them *after* they’ve thawed, or just be aware that the glaze might soften a bit during thawing. Reheating isn’t usually necessary because they’re best at room temp or slightly warmed by the residual heat of the baking sheet, but if you absolutely must, you can pop one in a warm oven (around 300°F/150°C) for just a few minutes until slightly warmed through. Be careful not to overdo it, or you’ll lose that perfect chewy texture!
Frequently Asked Questions
Final Thoughts
So there you have it, my friends – my cherished recipe for avalanche cookies! I really hope you give these a try. They’re more than just a cookie to me; they’re a little piece of comfort, a reminder of happy times, and a guaranteed crowd-pleaser. The combination of chewy cookie, melty chips, and that hint of salty peanut butter is just perfection. They’re proof that sometimes, the simplest recipes are the most rewarding. If you’re looking for another family favorite that’s just as easy and delicious, you might want to check out my [link to another recipe, e.g., “Classic Chocolate Chip Cookie Recipe”]. I can’t wait to hear what you think once you bake these avalanche cookies! Please leave a comment below and let me know how yours turned out, or if you tried any fun variations. And if you’re sharing pictures on social media, be sure to tag me – I’d love to see your creations! Happy baking, everyone!
Avalanche cookies
Ingredients
Main Ingredients
- 0.5 cup butter
- 0.5 cup peanut butter creamy
- 1 cup granulated sugar
- 0.5 cup brown sugar packed
- 2 large eggs
- 1 teaspoon vanilla extract
- 2 cups all-purpose flour
- 1 teaspoon baking soda
- 0.5 teaspoon salt
- 3 cups crispy rice cereal
- 1.5 cups chocolate chips semi-sweet or milk chocolate
Instructions
Preparation Steps
- Preheat oven to 350°F (175°C). Line baking sheets with parchment paper.
- In a large bowl, cream together the butter, peanut butter, granulated sugar, and brown sugar until light and fluffy.0.5 cup butter
- Beat in the eggs one at a time, then stir in the vanilla extract.0.5 cup butter
- In a separate medium bowl, whisk together the flour, baking soda, and salt.0.5 cup butter
- Gradually add the dry ingredients to the wet ingredients, mixing until just combined.
- Stir in the crispy rice cereal and chocolate chips.0.5 cup butter
- Drop rounded tablespoons of dough onto the prepared baking sheets.
- Bake for 5-7 minutes, or until the edges are lightly golden brown and the centers are still soft. Do not overbake.
- Let the cookies cool on the baking sheets for a few minutes before transferring them to a wire rack to cool completely.