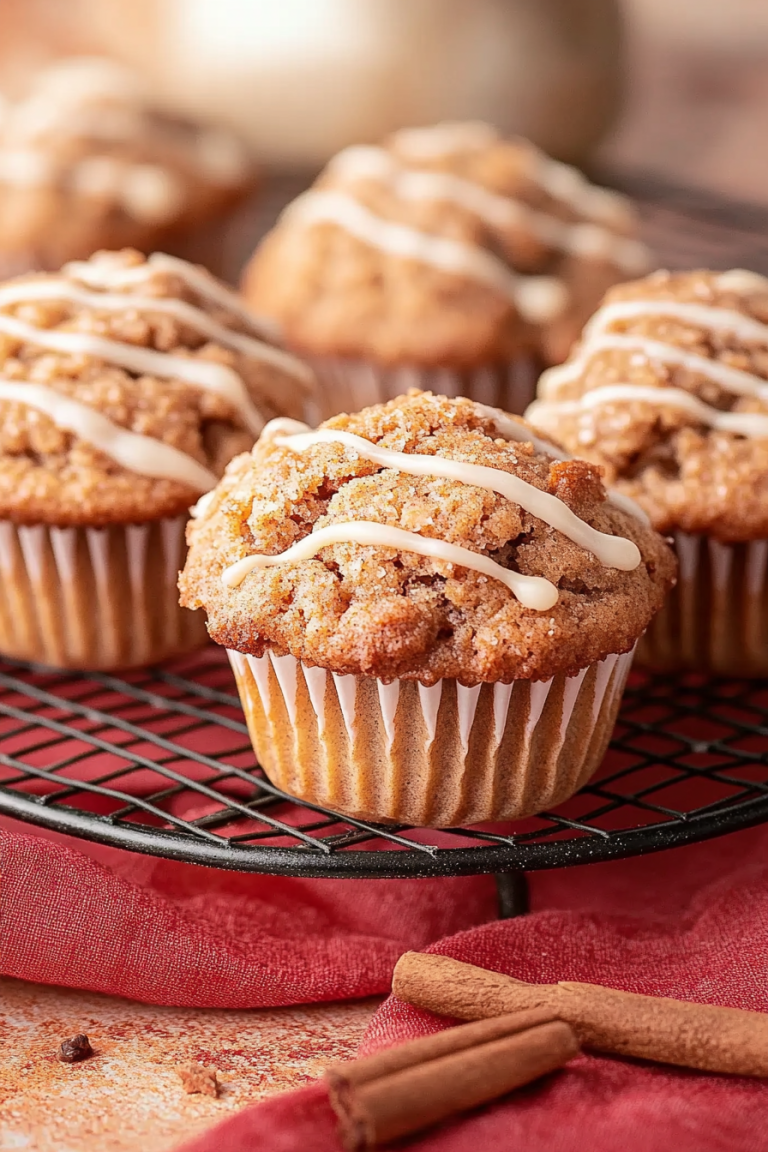
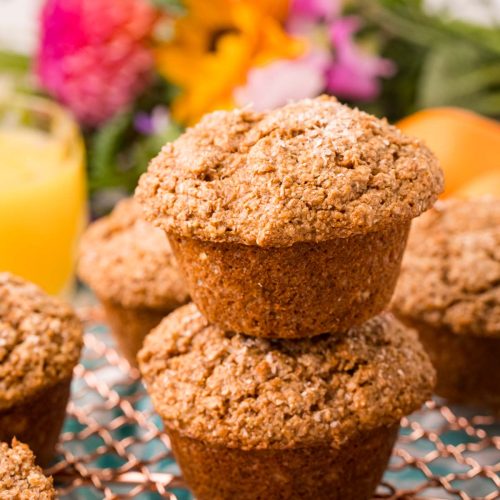
You know those days? The ones where you wake up with a craving for something comforting, something wholesome, but the thought of a complicated bake sends you straight back to bed? Yeah, I have those days too. And on those days, my absolute go-to is my recipe for bran muffins. Not just any bran muffins, mind you. These are the kind that are incredibly moist, packed with just the right amount of sweetness, and have this lovely, hearty texture that feels so satisfying. They remind me so much of the ones my grandma used to make, but with a few little tweaks I’ve picked up over the years that make them truly special. Forget those dry, crumbly disappointments you might have encountered; these bran muffins are the real deal and they’ve become a staple in my kitchen, especially when I need a quick breakfast or a guilt-free treat. They’re honestly as good, if not better, than any fancy coffee cake, but they take a fraction of the effort!
What are Bran Muffins?
So, what exactly are bran muffins? At their heart, they’re a type of quick bread, meaning they use a chemical leavener (like baking soda or baking powder) instead of yeast, which makes them super fast to whip up. The star ingredient, of course, is bran – that’s the outer layer of the wheat kernel, full of fiber and nutrients. But don’t let the “healthy” aspect fool you; these aren’t bland, cardboard-like discs! Think of them as a warm, tender hug in muffin form, bursting with flavor and just the right amount of chewiness. They’re wonderfully versatile, acting as a blank canvas for all sorts of delicious add-ins. Honestly, they’re the perfect marriage of wholesome goodness and irresistible taste, making them a favorite for breakfast, snacks, or even a light dessert. It’s that satisfying combination of hearty and sweet that makes them so enduringly popular.
Why you’ll love this recipe?
Okay, let me tell you why this particular bran muffin recipe holds such a special place in my heart – and why I’m so sure you’re going to adore it too. First off, the flavor is just incredible. We’re talking about a perfect balance of warm, nutty bran notes with a subtle sweetness that isn’t overpowering. And the texture? Oh, the texture! They are unbelievably moist and tender, never dry or crumbly, which is honestly my biggest pet peeve with bran muffins. This recipe is also a lifesaver on busy mornings. I can literally mix up the batter in under 15 minutes and have them baking while I’m getting ready. Plus, they’re wonderfully budget-friendly. The ingredients are all pantry staples, making them a cost-effective way to have delicious homemade treats on hand. And the versatility! You can add dried fruit, nuts, chocolate chips – you name it. What I love most about these bran muffins is that they always deliver. They’re consistently delicious, even when I’m a little rushed or experimenting with ingredient swaps. They’re the kind of recipe that makes you feel like a baking pro, even if you’re just starting out. They’re honestly miles better than those pre-packaged muffins you grab in a pinch; the homemade taste is just incomparable.
How do you make Bran Muffins?
Quick Overview
The beauty of these bran muffins lies in their simplicity. You’ll whisk together your dry ingredients, then your wet ingredients in separate bowls, and then gently combine them. A quick fold-in of any tasty additions, a scoop into your muffin tin, and into the oven they go! The whole process from start to finish is incredibly straightforward, making them perfect for even beginner bakers. You’ll end up with a batch of warm, fragrant muffins that are ready to be devoured in no time at all. It’s that fuss-free approach that makes them so incredibly appealing.
Ingredients
For the Main Batter:
You’ll need 2 cups of whole wheat bran cereal – this is key for that classic bran flavor and texture. Make sure it’s the flakes or small pieces, not the powdery stuff. I always opt for a good quality brand for the best flavor. Then, 1 ½ cups of all-purpose flour; you can substitute some whole wheat flour if you want to boost the fiber even more, but it might make them a tad denser. For sweetness, we’re using ¾ cup of granulated sugar. Feel free to reduce this slightly if you prefer, but I find this amount perfectly balances the bran. Next, 2 teaspoons of baking soda to give them a nice lift, and ½ teaspoon of salt to enhance all those flavors. And don’t forget 1 cup of buttermilk; this is my secret to extra moist muffins! If you don’t have buttermilk, you can easily make a substitute by adding 1 tablespoon of lemon juice or white vinegar to 1 cup of regular milk and letting it sit for 5-10 minutes.
For the Filling:
This is where you can really have fun! I usually go for ½ cup of raisins or chopped dried cranberries for a burst of chewy sweetness. You can also add ½ cup of chopped walnuts or pecans for a lovely crunch. If you’re feeling decadent, a ½ cup of mini chocolate chips is always a hit with my family, especially the kids! Make sure your dried fruit isn’t too old and dry; if it is, a quick soak in warm water can rehydrate it beautifully.
For the Glaze:
This is optional, but oh-so-good! You’ll need 1 cup of powdered sugar, sifted to avoid lumps. Then, about 2-3 tablespoons of milk (or your favorite plant-based milk for a dairy-free option). You can also add a splash of vanilla extract or even a bit of orange zest for a brighter flavor. The key is to get the consistency just right – thick enough to drizzle, but not so thick that it’s hard to work with. It should be smooth and pourable.
Step-by-Step Instructions
Step 1: Preheat & Prep Pan
First things first, preheat your oven to 375°F (190°C). I always like to have my oven fully heated before I even start mixing. This ensures even baking right from the moment the muffins go in. Next, grab a standard 12-cup muffin tin. I like to use silicone muffin liners because they’re so easy to clean and the muffins just pop right out. If you don’t have those, you can grease your tin well with butter or cooking spray, or use good quality paper liners. Make sure every cup is ready to go.
Step 2: Mix Dry Ingredients
In a large mixing bowl, combine your 2 cups of whole wheat bran cereal, 1 ½ cups of all-purpose flour, ¾ cup of granulated sugar, 2 teaspoons of baking soda, and ½ teaspoon of salt. Give it a good whisk. You want everything to be evenly distributed. This ensures that your leavening agents and flavorings are spread throughout the batter, leading to evenly risen and perfectly seasoned muffins. Don’t just stir; whisking actually helps to aerate the dry ingredients a bit, which can contribute to a lighter texture.
Step 3: Mix Wet Ingredients
In a separate medium bowl, whisk together 1 cup of buttermilk (or your homemade substitute), 2 large eggs, and ½ cup of melted unsalted butter (or a neutral oil like canola or vegetable oil). I usually melt my butter and let it cool for just a minute or two so it doesn’t cook the eggs. Make sure the eggs are fully incorporated and the mixture is smooth. The buttermilk is crucial here; it reacts with the baking soda to create tenderness and moisture in the finished muffins.
Step 4: Combine
Now for the magic! Pour the wet ingredients into the bowl with the dry ingredients. Using a spatula or a wooden spoon, gently fold them together until *just* combined. Seriously, don’t overmix! You’ll still see a few streaks of flour, and that’s perfectly okay. Overmixing develops the gluten in the flour, which can lead to tough, rubbery muffins. We want tender, cake-like muffins, so stop as soon as you don’t see huge pockets of dry flour.
Step 5: Prepare Filling
If you’re adding any mix-ins like raisins, dried cranberries, nuts, or chocolate chips, gently fold them into the batter now. I usually add about ½ cup of my chosen add-ins. Fold them in just enough to distribute them evenly. This is also the time to add any spices like cinnamon or nutmeg if you like – a teaspoon of cinnamon is lovely here. Again, be careful not to overmix. The goal is to incorporate them without overworking the batter.
Step 6: Layer & Swirl
This step is optional but adds a beautiful touch and extra flavor if you’re using something like a fruit compote or a cinnamon-sugar mixture as a swirl. For this recipe, I typically just fill the muffin cups directly. Divide the batter evenly among the prepared muffin cups, filling each about two-thirds to three-quarters full. If you are swirling, you would typically spoon half the batter in, add your swirl mixture, and then top with the remaining batter, swirling gently with a knife or toothpick.
Step 7: Bake
Pop your muffin tin into the preheated oven. Bake for 18-22 minutes, or until a wooden skewer or toothpick inserted into the center of a muffin comes out clean. The tops should be golden brown and spring back lightly when touched. Ovens can vary, so start checking around the 18-minute mark. If they’re browning too quickly, you can loosely tent them with foil.
Step 8: Cool & Glaze
Once baked, remove the muffin tin from the oven and let the muffins cool in the tin for about 5-10 minutes. This helps them set up properly. Then, carefully transfer them to a wire rack to cool completely. While they’re cooling, if you’re making the glaze, whisk together your sifted powdered sugar with 2-3 tablespoons of milk and a splash of vanilla until smooth. Once the muffins are completely cool (this is important, otherwise the glaze will melt off!), drizzle the glaze over the tops. You can be as artistic or as simple as you like with this!
Step 9: Slice & Serve
Once the glaze has set slightly, your bran muffins are ready to be enjoyed! These are fantastic served slightly warm or at room temperature. They slice beautifully, revealing that moist, tender interior. They look so inviting on a plate, especially with that lovely drizzle of glaze. They’re perfect for grabbing on the go, or for enjoying with a cup of coffee or tea.
What to Serve It With
These bran muffins are so versatile, they truly fit into any part of your day! For a simple, satisfying breakfast, I love pairing them with a hot cup of black coffee or a creamy latte. They’re perfect on their own, but a dollop of Greek Yogurt or a smear of your favorite fruit jam takes them to the next level. For a more leisurely brunch, I’ll often serve these alongside a fruit salad or a platter of scrambled eggs and bacon. They add a lovely, wholesome element to the spread. When I’m craving something sweet after dinner but don’t want anything too heavy, these muffins are my answer. They’re lovely with a small scoop of vanilla ice cream or a drizzle of honey. And for those cozy afternoon snack times? They’re pure comfort. I love them with a glass of cold milk, just like when I was a kid. My family also has a tradition of taking them on hikes or picnics because they travel so well and provide that much-needed energy boost. You really can’t go wrong!
Top Tips for Perfecting Your Bran Muffins
Over the years, I’ve learned a few tricks that make these bran muffins consistently amazing. For the bran cereal, I always opt for plain, whole wheat bran flakes. Avoid any sweetened or flavored varieties, as they can throw off the sweetness balance. When it comes to the buttermilk, if you can’t find it, that homemade substitute I mentioned (milk with lemon juice or vinegar) works like a charm. I’ve tested it countless times, and the texture is virtually identical. When you’re combining the wet and dry ingredients, this is where most people go wrong by overmixing. Remember, just fold until you don’t see large pockets of dry flour. A few streaks are fine; they’ll disappear during baking. I’ve learned the hard way that overmixing leads to tough muffins, and nobody wants that! For the add-ins, don’t be shy! If you love dried fruit, consider soaking them in hot water for 10 minutes before draining to plump them up for extra juiciness. If you’re using nuts, toasting them lightly beforehand can really enhance their flavor. When it comes to baking, every oven is a little different. My oven tends to run a bit hot, so I often bake mine closer to 18 minutes. If yours runs cooler, you might need the full 22 minutes. A toothpick test is your best friend here. Don’t be afraid to adjust the glaze consistency. If it’s too thick, add milk a teaspoon at a time. If it’s too thin, add more powdered sugar. I’ve found that a slightly thicker glaze holds up better for storage and looks gorgeous.
Storing and Reheating Tips
These bran muffins are pretty forgiving when it comes to storage, which is another reason I love them. If you plan on eating them within a day or two, you can simply keep them in an airtight container at room temperature. I usually just pop them into a zip-top bag or a plastic food storage container, and they stay wonderfully fresh. If you know you’ll have them around for longer, or if your kitchen is particularly warm, I recommend storing them in the refrigerator. They’ll typically keep well for up to a week in the fridge, and they still taste great! For longer-term storage, freezing is your best bet. Once the muffins are completely cool, wrap them individually in plastic wrap, then place them in a freezer-safe bag or container. They can stay frozen for up to 2-3 months. To reheat, you can pop a frozen muffin into the microwave for about 30-60 seconds, or place them in a toaster oven at 300°F (150°C) for about 5-10 minutes until warmed through. For the glaze, I always recommend adding it *after* the muffins have cooled completely and *before* serving or storing. If you refrigerate muffins with glaze on them, the glaze can sometimes get a bit sticky or weep. If you’re freezing them with glaze, the glaze might get slightly soft upon thawing, but it’s still delicious!
Frequently Asked Questions
Final Thoughts
So there you have it – my go-to recipe for bran muffins! I truly believe these are the best because they strike that perfect balance of hearty, healthy goodness and absolutely irresistible flavor and moisture. They’re the kind of recipe that makes you feel good about what you’re eating, and they’re so satisfying to make and share. Whether you need a quick breakfast to get your day started, a comforting snack, or a simple dessert, these muffins have got you covered. They’re proof that wholesome can be incredibly delicious, and that’s something I always strive for in my kitchen. If you love these, you might also enjoy my recipe for hearty Oatmeal Cookies or my simple whole wheat bread. I can’t wait to hear what you think of these bran muffins! Please leave a comment below to share your experience, any fun variations you tried, or how your family enjoyed them. And if you love them, be sure to rate them too!
Classic Bran Muffins
Ingredients
Dry Ingredients
- 1.5 cups All-purpose flour
- 1.5 cups Wheat bran
- 0.5 cups Brown sugar
- 2 teaspoons Baking soda
- 0.5 teaspoons Salt
- 1 teaspoon Cinnamon
Wet Ingredients
- 1.5 cups Buttermilk
- 0.5 cups Vegetable oil
- 1 Egg
Instructions
Preparation Steps
- Preheat oven to 375°F (190°C). Grease and flour a 12-cup muffin tin, or line with paper liners.
- In a large bowl, whisk together the flour, wheat bran, brown sugar, baking soda, salt, and cinnamon.
- In a separate medium bowl, whisk together the buttermilk, vegetable oil, and egg.
- Pour the wet ingredients into the dry ingredients and stir until just combined. Do not overmix.
- Divide the batter evenly among the prepared muffin cups.
- Bake for 18-20 minutes, or until a wooden skewer inserted into the center of a muffin comes out clean.
- Let the muffins cool in the tin for a few minutes before transferring them to a wire rack to cool completely.