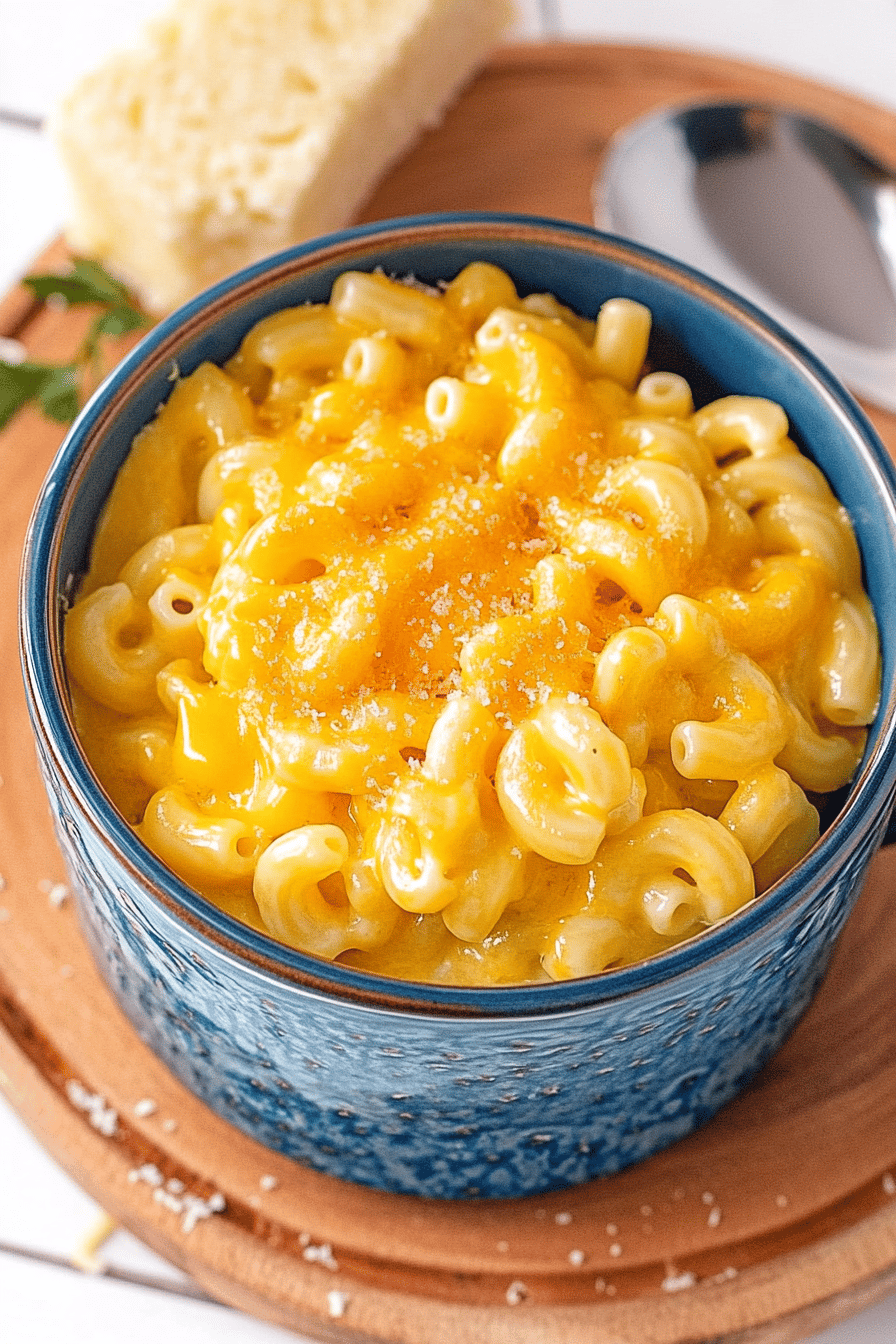
Oh, you guys. I’ve got something seriously special to share with you today. This isn’t just another recipe; it’s a little piece of magic I whip up when life gets crazy, or when that late-night craving hits and I absolutely do NOT want to fire up the oven for a whole cake. We’re talking about the ultimate mac and cheese mug. Yes, you read that right! It’s like the comfort of classic mac and cheese, but condensed into a perfect, single-serving, ready-in-minutes dream. Think of it as your personal pot of cheesy gold, ready whenever you are. I’ve tried a million different “quick mac” recipes over the years, but this one, this mac and cheese mug, has a special place in my heart (and my frequent rotation). It’s the easiest thing ever, yet it tastes so incredibly decadent. It’s the perfect antidote to a long day, a busy weeknight, or even just a serious case of the “I need something delicious *right now*” blues. Forget those boxed versions, this homemade wonder is leagues above and takes barely any more effort!

What is the Mac and Cheese Mug?
So, what exactly IS this magical mac and cheese mug? At its heart, it’s exactly what it sounds like: a rich, creamy, cheesy pasta dish made right in a mug, usually cooked in the microwave. It’s not really about boiling pasta separately and then trying to make a sauce for a single serving – that’s way too much effort! Instead, we’re combining everything right there in the mug, letting the pasta cook in the liquid and cheese sauce. It’s essentially a super-condensed, speedier version of baked mac and cheese, minus the baking time and the massive cleanup. The beauty of it is its simplicity. You toss in your pasta, your milk, your cheese, and a few flavor boosters, give it a stir, pop it in the microwave, and *voilà*! You’ve got yourself a steaming hot, ridiculously satisfying bowl of mac and cheese. It’s the ultimate comfort food hacker’s dream, perfect for anyone who loves that gooey, cheesy goodness but doesn’t have the time or the inclination for a full-blown cooking session.
Why you’ll love this recipe?
Honestly, where do I even begin? There are so many reasons why this mac and cheese mug has become my go-to, and I just know you’re going to fall in love with it too. First and foremost, the FLAVOR is just out of this world. Despite being so quick and easy, it doesn’t taste like a shortcut at all. It’s wonderfully creamy, perfectly cheesy, and has that satisfying, comforting depth that only good mac and cheese can provide. I’ve found that using a good quality cheese blend makes a huge difference here, really elevating the taste. Then there’s the SIMPLICITY. This is literally a lifesaver on nights when I get home late or when the kids are practically starving the second they walk in the door. I can have this ready in under 10 minutes, from start to finish. No complicated steps, no fancy equipment, just a mug and a microwave! It’s also incredibly COST-EFFECTIVE. You’re using basic pantry staples and a little bit of cheese, which makes it a budget-friendly indulgence. Plus, it’s so VERSATILE! While I adore the classic version, you can totally play around with it. Add some cooked bacon bits, a sprinkle of paprika, or even some finely chopped chives for an extra kick. It’s perfect for a quick lunch at your desk, a midnight snack that feels like a treat, or even a simple dinner when you just can’t face cooking anything more involved. Compared to other quick mac and cheese options out there, this one truly hits the sweet spot of speed, flavor, and pure comfort. What I love most about this is how it satisfies that craving without the guilt or the effort. It feels like a proper, homemade dish, even though it took almost no time at all.
How do I make a Mac and Cheese Mug?
Quick Overview
The process for making this mac and cheese mug is wonderfully straightforward. You’ll simply combine uncooked pasta, liquid (usually milk or a mix of milk and water), and your shredded cheese directly in a microwave-safe mug. A few seasonings go in too. Then, it’s microwaved in short intervals, with stirring in between, allowing the pasta to cook and the sauce to thicken into a glorious, cheesy concoction. It’s so simple, it almost feels like cheating, but the results are undeniably delicious. You get perfectly cooked pasta and a creamy sauce all in one go, with minimal fuss and even less cleanup!
Ingredients
For the Mac and Cheese Base: For the Mac and Cheese Base: For the Mac and Cheese Base: For the Mac and Cheese Base: For the Mac
* 1/2 cup small pasta shapes (like elbow macaroni, ditalini, or shells – really small ones work best for quick cooking!)
* 1 cup milk (whole milk makes it extra creamy, but 2% works great too!)
* 1/2 cup shredded cheese blend (a mix of cheddar and Monterey Jack is my favorite, but Gruyere or even a bit of cream cheese adds amazing richness)
* 1/4 teaspoon salt (or to taste)
* Pinch of black pepper
* Optional: A tiny pinch of garlic powder or onion powder for an extra flavor boost.
For the Optional Toppings (Because we deserve it!):
* A few extra sprinkles of shredded cheese
* A dash of paprika
* Crushed crackers or breadcrumbs for a little crunch
* Cooked bacon bits
* Fresh chives or parsley, finely chopped

Step-by-Step Instructions
Step 1: Choose Your Mug and Prep
First things first, grab a microwave-safe mug. Make sure it’s large enough to hold everything and allow for some expansion as the pasta cooks – a good 12-16 ounce mug is usually perfect. You don’t need to grease it or anything, as the liquid will prevent sticking.
Step 2: Add the Pasta and Liquid
Pour your 1/2 cup of small pasta shapes into the mug. Then, add the 1 cup of milk over the pasta. Give it a gentle stir to make sure all the pasta is submerged as much as possible. This is where the magic starts!
Step 3: Season It Up
Now, let’s add those flavor builders. Stir in the 1/4 teaspoon of salt, a pinch of black pepper, and if you’re using them, your garlic powder and onion powder. Give it another quick stir to distribute the seasonings.
Step 4: Microwave Time! (First Round)
Pop the mug into the microwave. Cook on high power for about 3 minutes. Keep an eye on it – you don’t want it to boil over. If it looks like it’s getting too frothy, just pause the microwave for a few seconds. Carefully remove the mug (it will be hot!) and give it a good stir. You’ll notice the liquid is starting to get a bit starchy.
Step 5: Add the Cheese!
Now for the best part! Stir in your 1/2 cup of shredded cheese blend. Really get it in there and stir until it’s mostly melted and starting to form a sauce. It might still look a little thin, but don’t worry!
Step 6: Microwave Time! (Second Round and Beyond)
Put the mug back in the microwave for another 2-3 minutes. Again, watch it closely. Remove and stir well. The pasta should be getting tender, and the sauce should be thickening nicely. You might need another 1-minute interval, stirring after each, until the pasta is cooked to your liking (al dente is usually best) and the sauce is creamy and smooth. This usually takes about 7-10 minutes total cooking time, depending on your microwave’s power and the type of pasta used.
Step 7: Let It Rest (Crucial Step!)
Once the pasta is cooked and the sauce is creamy, let the mug sit on the counter for about 1-2 minutes. This resting period is key! It allows the sauce to thicken up perfectly and the flavors to meld. It will seem a little thin right out of the microwave, but trust me, it’s going to transform.
Step 8: Add Optional Toppings
Now is your chance to make it extra special! Sprinkle on some extra cheese, a dash of paprika, some crunchy breadcrumbs, or whatever your heart desires. For an extra touch, add some fresh chives or parsley.
Step 9: Enjoy Immediately!
Carefully pick up your mug (it will be hot!), grab a spoon, and dive in! This mac and cheese mug is best enjoyed straight from the mug while it’s warm and gooey. Perfection!
What to Serve It With
While a mac and cheese mug is a complete meal in itself, especially when you’re looking for something quick and satisfying, it can also be a delightful component of a larger meal or enjoyed in different ways! For BREAKFAST, I sometimes have a smaller portion with a side of scrambled eggs and a slice of toast. It sounds a bit unconventional, but the savory cheesiness is surprisingly good with breakfast flavors, and the quick cooking time fits perfectly into a rushed morning. For BRUNCH, imagine this served in a slightly smaller mug, maybe with a sprinkle of chives and a tiny fork, alongside a mimosa or a fancy coffee. It adds a gourmet touch to a casual brunch spread without any fuss. And, yes, AS DESSERT! Hear me out. If you make a slightly sweeter version (maybe with a touch more milk and less salt, and a pinch of sugar), topped with some berries or a dollop of whipped cream, it can be a fun, playful dessert. My kids *love* it this way. For a COZY SNACK, it’s obviously the star. Pair it with some crunchy veggies like carrot sticks or celery to add a little freshness, or just enjoy it on its own with a glass of milk or a favorite soda. My absolute favorite pairing for a lazy afternoon is this mac and cheese mug with a good book and a warm cup of tea. It’s just pure, unadulterated comfort!
Top Tips for Perfecting Your Mac and Cheese Mug
Over the years, I’ve tinkered with this mac and cheese mug recipe more times than I can count, and I’ve learned a few tricks that I think are worth sharing to make yours absolutely perfect. First, regarding the pasta: ZUCCHINI PREP isn’t applicable here since we’re not using zucchini in this version, but for the pasta itself, using really small shapes is key. If you use larger pasta, it won’t cook evenly in the microwave in the short time we have. Think tiny elbows, or even orzo if that’s what you have! I’ve learned that overmixing can sometimes make the sauce a bit gummy, so the MIXING ADVICE here is to stir just enough to combine the ingredients and prevent sticking, especially during the microwave intervals. You want to see those nice, distinct strands of pasta coated in creamy cheese. For the CHEESE, don’t be afraid to experiment with your blends! What I love most is a sharp cheddar for flavor and Monterey Jack for meltiness. A little bit of cream cheese or even a tablespoon of sour cream can add an incredible, luxurious creaminess if you have it on hand. For ingredient SWAPS, if you don’t have milk, a mix of half milk and half water works, but it won’t be quite as rich. I’ve even tried almond milk in a pinch, and while it changes the flavor profile slightly, it still works! For BAKING TIPS, since we’re microwaving, it’s more about MICROWAVE TIME adjustments. Every microwave is different, so the first time you make this, pay close attention and make notes for your specific appliance. Starting with 3 minutes, then adding 2-minute intervals and stirring in between is usually a safe bet. You want the pasta tender but not mushy. If the sauce seems a little too thick after resting, you can always stir in a tablespoon of milk or water to loosen it up. If it’s too thin, you might need another short burst in the microwave or just let it sit a bit longer. My biggest lesson learned was not to rush the resting time after cooking – that’s when the magic really happens and the sauce achieves its perfect consistency!
Storing and Reheating Tips
This mac and cheese mug is honestly best when eaten fresh, right out of the mug. However, life happens, and sometimes you might have a little leftover, or you might want to prep ahead. If you have leftovers, the best way to store them is to let the mac and cheese cool completely in the mug. Then, you can cover the top of the mug tightly with plastic wrap or transfer it to an airtight container. It’s best kept in the REFRIGERATOR STORAGE for up to 2-3 days. The sauce will thicken up quite a bit as it cools, so don’t be alarmed by that. For REHEATING, you can either put the mug back in the microwave for about 30-60 seconds, stirring halfway through, or transfer it to a small saucepan on the stove. If reheating in the microwave, you’ll likely need to add a splash of milk or water to loosen up the sauce again. On the stove, gentle heat is key – you don’t want to scorch it. For FREEZER INSTRUCTIONS, I generally don’t recommend freezing mac and cheese made this way. The texture of the pasta and sauce can get a bit… weird after thawing. It’s really meant to be a quick, fresh dish. If you absolutely had to freeze it, I’d suggest portioning it into a freezer-safe container and using it within a month, but be prepared for a slight difference in texture. I haven’t found any success with storing the GLAZE or toppings separately for this recipe, as it’s meant to be a quick, single-serve meal that’s enjoyed immediately. The magic is in its instant gratification!
Frequently Asked Questions
Final Thoughts
So there you have it, my friends! My absolute favorite way to get that incredible mac and cheese fix in a flash. This mac and cheese mug is more than just a recipe; it’s a testament to how delicious and satisfying comfort food can be, even when you’re pressed for time. It’s proof that you don’t need a lot of ingredients or a lot of fuss to make something truly wonderful. I hope you try it, and I hope it brings a little bit of that quick, cheesy joy into your day. If you love this, you might also want to check out my quick cheddar biscuits or my 5-ingredient tomato soup for an equally cozy and easy meal pairing. Please, please, please let me know in the comments below how yours turns out! I’d love to hear if you tried any fun topping variations or if it became your new go-to comfort food too. Happy microwaving, and even happier eating!
Mac and Cheese Mug
Ingredients
Main Ingredients
- 0.5 cup Elbow macaroni
- 0.5 cup Water
- 0.25 cup Milk
- 0.5 cup Shredded cheddar cheese
- 0.125 cup Shredded mozzarella cheese
- 1 tablespoon Butter
- teaspoon Salt to taste
- teaspoon Black pepper to taste
Instructions
Preparation Steps
- Combine macaroni and water in a microwave-safe mug. Microwave on high for 3 minutes, stirring halfway through.
- Drain any excess water from the mug.
- Add milk, cheeses, and butter to the mug. Stir until well combined.
- Microwave for another 1-2 minutes, or until cheese is melted and the mac and cheese is creamy. Stir occasionally.
- Season with salt and pepper to taste. Serve immediately.

