You know, there are some food debates that just… never seem to end. And high up on that list, right there with “is a hot dog a sandwich?”, is the infamous Hawaiian pizza. I swear, you bring it up at a dinner party and suddenly everyone has an opinion. For me, though? It’s pure comfort. It’s the sweet tang of pineapple mingling with salty ham, all on a cheesy, bubbly base. It takes me right back to those Friday nights growing up, when Dad would bring home a big, steaming pizza, and the Hawaiian was always the first to disappear. It’s not just about the Hawaiian pizza toppings; it’s about the memories. This isn’t just a recipe; it’s a little slice of happiness, and honestly, I think everyone deserves to experience that. Especially when it’s this easy to whip up yourself!

What are Hawaiian pizza toppings?
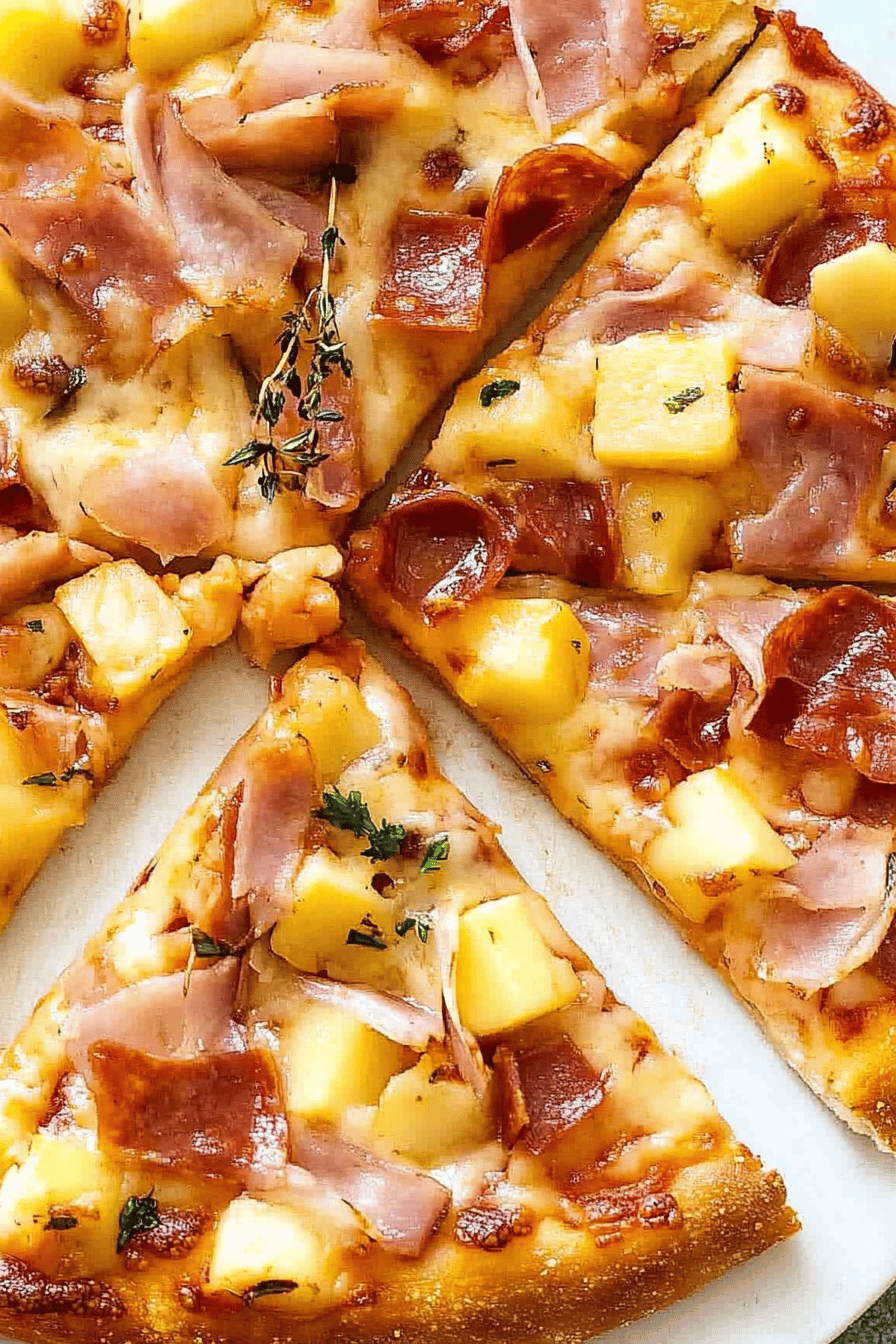
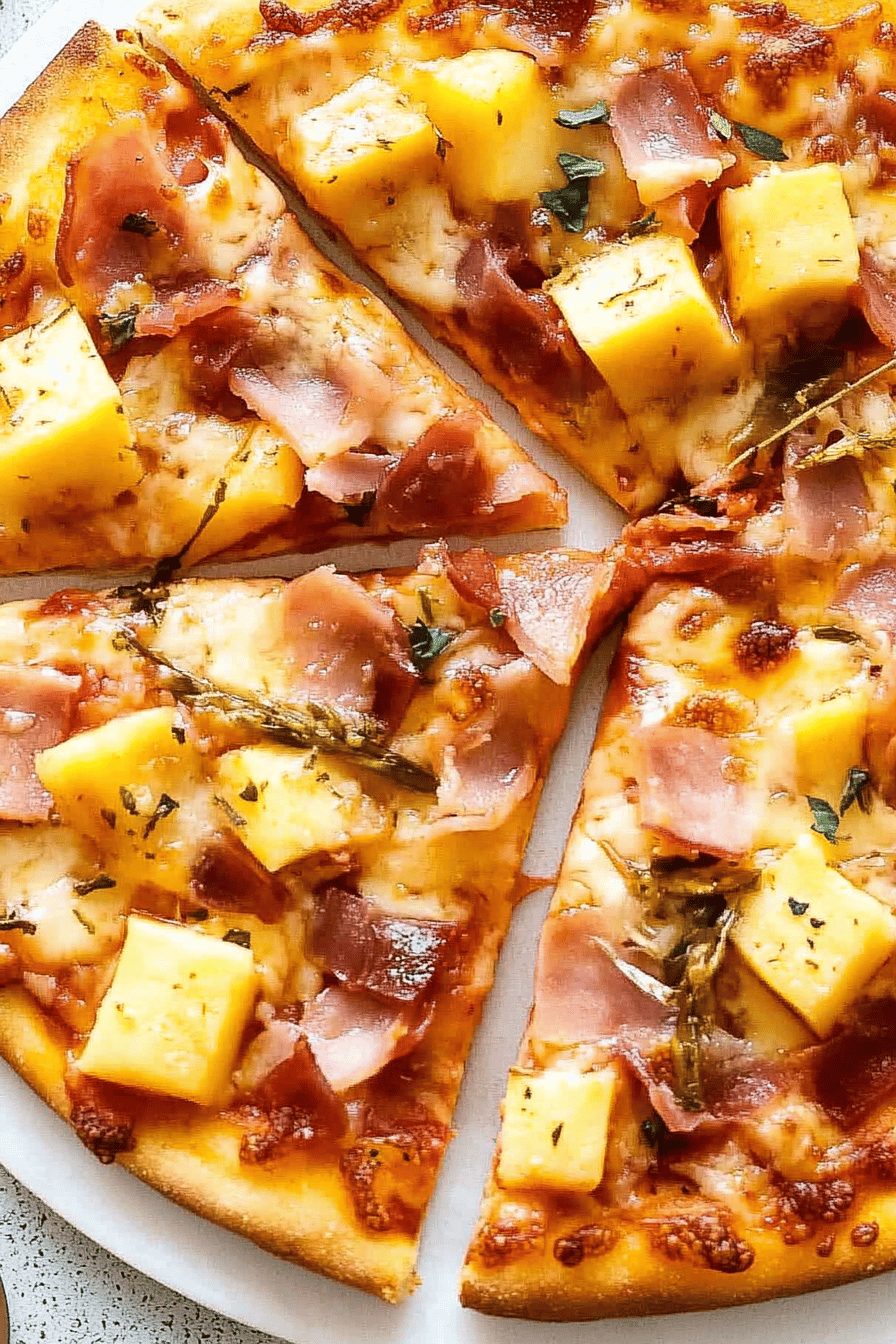
So, what exactly are we talking about when we say “Hawaiian pizza toppings”? At its heart, it’s a classic combination that’s become a global phenomenon, even if it sparks a little controversy here and there. Think of it as the sweet and savory superstar of the pizza world. It’s essentially a pizza topped with tomato sauce, cheese, pineapple chunks, and ham. The beauty of it lies in the contrast: the juicy, slightly tart sweetness of the pineapple cuts through the richness of the cheese and the salty, savory punch of the ham. It’s a flavor profile that’s both surprising and incredibly satisfying. It’s not your everyday pepperoni, that’s for sure, but it offers a delightful change of pace that many of us just can’t get enough of. It’s a testament to how simple ingredients can come together to create something truly memorable.
Why you’ll love this recipe?
Honestly, the biggest reason I adore this take on Hawaiian pizza is the sheer joy it brings. It’s a flavor explosion that just makes you happy! The sweetness from the pineapple, especially when it gets a little caramelized around the edges, paired with the savory ham and gooey mozzarella is just… chef’s kiss! But beyond the incredible taste, this recipe is a lifesaver. It’s surprisingly simple to pull together, which means you don’t need to spend hours in the kitchen to get a fantastic result. On those busy weeknights when you’re craving something delicious but also need to get dinner on the table fast, this is my go-to. Plus, let’s be real, it’s incredibly budget-friendly. Ham and pineapple are readily available and don’t break the bank, making it a great option for feeding a crowd without emptying your wallet. And the versatility! You can easily tweak it. Don’t like ham? Try bacon bits! Want a little heat? Add some jalapeños. It’s a fantastic base that welcomes your own personal touch. What I love most, though, is how universally loved it is. Even the pickiest eaters in my family (and believe me, I have them!) will gobble this up. It’s a crowd-pleaser that never disappoints, and that’s worth its weight in gold for any home cook.
How do you make Hawaiian pizza toppings?
Quick Overview
Making this Hawaiian pizza is remarkably straightforward. We’re talking about building layers of flavor that come together in a symphony of sweet and savory goodness. You’ll start by getting your dough ready, then layer on a simple yet flavorful tomato sauce, plenty of cheese, succulent ham, and those signature pineapple chunks. A quick bake in a hot oven, and voilà – a pizza that’s a guaranteed hit. It’s the kind of recipe that makes you feel like a culinary wizard, even if you’re just throwing a few things together. The magic happens in the oven, transforming simple ingredients into something truly special.
Ingredients
For the Pizza Base: For the Pizza Base: For the Pizza Base: For the Pizza Base: For the Pizza Base: For the Pizza Base: For
1 pound pizza dough (store-bought or your favorite homemade)
1/2 cup pizza sauce (use a good quality one, it makes a difference!)
1.5 cups shredded mozzarella cheese (whole milk is best for meltiness)
1 cup diced cooked ham (I prefer a good quality deli ham, diced small)
For the Pineapple Punch:
1 cup pineapple chunks (canned, drained well, or fresh chunks are great too!)
Optional: A pinch of red pepper flakes for a little warmth
For Finishing:
Optional: Fresh parsley, chopped, for garnish
Step-by-Step Instructions
Step 1: Preheat & Prep Pan
First things first, let’s get that oven screaming hot! Preheat your oven to 475°F (245°C). If you have a pizza stone or steel, pop it in there while the oven preheats. This helps get that super crispy crust we all love. If not, a regular baking sheet will work just fine. Lightly grease your baking sheet if you’re not using parchment paper.
Step 2: Prepare the Dough
If you’re using store-bought dough, let it sit at room temperature for about 30 minutes. This makes it way easier to stretch. On a lightly floured surface, gently stretch or roll out your pizza dough to your desired thickness and shape – usually around a 12-inch circle. Be careful not to overwork it, as this can make it tough. Transfer your dough to a pizza peel dusted with cornmeal or directly onto your prepared baking sheet.
Step 3: Sauce It Up
Spread a thin, even layer of pizza sauce over the dough, leaving about a half-inch border for the crust. You don’t want too much sauce, or your pizza might get soggy. Just enough to coat it nicely.
Step 4: Cheese, Please!
Now for the best part – the cheese! Sprinkle the shredded mozzarella evenly over the sauce. Make sure to get it all the way to the edges of the sauce. This forms the cheesy foundation for our toppings.
Step 5: Ham and Pineapple Time
Distribute the diced ham evenly over the cheese. Then, scatter the pineapple chunks all over. If you like a little kick, now’s the time to sprinkle those red pepper flakes over the top. Try to spread them out so you get a nice balance of sweet and savory in every bite.
Step 6: Get Baking
Carefully slide your pizza onto the preheated pizza stone (if using) or place your baking sheet in the oven. Bake for 10-15 minutes, or until the crust is golden brown and the cheese is bubbly and slightly browned. Keep an eye on it, as oven temperatures can vary!
Step 7: Cool and Garnish
Once it’s out of the oven, let the pizza cool on a wire rack for a few minutes before slicing. This helps the cheese set and prevents the toppings from sliding off. If you’re feeling fancy, sprinkle some fresh chopped parsley over the top for a pop of color and freshness.
Step 8: Slice and Serve
Use a sharp pizza cutter or a large knife to slice your masterpiece. Serve immediately and enjoy the delightful combination of Hawaiian pizza toppings!
What to Serve It With
This Hawaiian pizza is pretty much a meal in itself, but it plays so well with other things! For a classic breakfast vibe, I love serving a slice (or two!) with a perfectly brewed cup of coffee. The richness of the coffee cuts through the sweetness beautifully. If you’re going for a brunch spread, this pizza is a fantastic addition. Imagine it alongside some fresh fruit salad, maybe some scrambled eggs, or even some crispy bacon. It adds a fun, savory-sweet element that stands out. For dessert? Well, this isn’t exactly a dessert pizza, but if you’re in a craving mood, a small slice can totally hit the spot after a lighter meal! And for cozy snacks? Forget about it! This is pure comfort food. I’ll often cut it into smaller squares and serve it as finger food during movie nights. It’s always a hit! My family’s tradition is to have it on a Sunday night, and we usually pair it with a simple green salad with a light vinaigrette to balance out the richness of the pizza. It’s just perfect.
Top Tips for Perfecting Your Hawaiian Pizza
Okay, so you’ve got the basics down, but here are a few little secrets I’ve picked up over the years that make this Hawaiian pizza truly shine. When it comes to the pineapple, drainage is key! Soggy pineapple is a pizza crime. Make sure you drain canned pineapple really, really well, or if you’re using fresh, pat it dry with paper towels. Nobody wants a watery pizza, right? For the ham, I find that dicing it small helps distribute the flavor more evenly. If you use big chunks, you might get a mouthful of just ham, and we want that sweet and salty balance in every single bite. And speaking of balance, don’t go overboard with the sauce or cheese. It’s tempting to pile it on, but a thin layer of sauce and just enough cheese allows the ham and pineapple to be the stars of the show. My biggest learning curve was learning to not overwork the pizza dough. If it snaps back when you try to stretch it, let it rest for another 10 minutes. Trust me on this one, it makes a world of difference in getting that perfect, slightly chewy crust. I’ve also found that adding a tiny pinch of red pepper flakes with the pineapple adds a subtle warmth that really complements the sweetness, without making it spicy. It’s a little trick that elevates the whole flavor profile. And always, always preheat your oven and pizza stone/steel properly. That intense heat is crucial for a crispy, golden-brown crust. I learned that lesson the hard way when I was in a rush and didn’t let my stone get hot enough – sad times!
Storing and Reheating Tips
Now, if by some miracle you have leftovers (which is rare in my house!), storing and reheating this Hawaiian pizza is super simple. For room temperature storage, it’s best to let the pizza cool completely and then cover it loosely with foil or plastic wrap. It’ll keep okay for a couple of hours, but it’s best enjoyed fresh. If you need to store it for longer, the refrigerator is your best friend. I like to pop slices into an airtight container or wrap them tightly in plastic wrap. It’ll stay good in the fridge for about 3-4 days, and the flavors actually meld even more, which can be nice! For freezing, this is a bit trickier as pizza can sometimes lose its crispiness, but it’s doable. Let the slices cool completely, then wrap each slice individually and tightly in plastic wrap, followed by a layer of aluminum foil. You can store it like this in the freezer for up to a month. When it comes to reheating, the microwave is the quickest but can make the crust a bit soft. For best results, I always recommend reheating in a preheated oven at around 350°F (175°C) for about 5-10 minutes, or until heated through. A toaster oven or an Air Fryer also work wonders for reviving that crispiness. If you froze your pizza, thaw it overnight in the refrigerator first before reheating. And a little tip for the glaze, if you’re using one (like a little drizzle of honey after baking): it’s best added *after* reheating to keep its texture.
Frequently Asked Questions
Final Thoughts
So there you have it – my take on the classic Hawaiian pizza, and why I think it deserves way more love than it sometimes gets! It’s more than just a pizza; it’s a delightful dance of flavors that’s surprisingly easy to create in your own kitchen. It’s the perfect answer to a pizza craving that’s a little out of the ordinary, a fun twist that’s family-approved, and a reminder that sometimes, the simplest combinations are the most satisfying. If you’re looking for other fun pizza variations, you might enjoy my recipe for a spicy vegetarian pizza or a classic Margherita. Give this Hawaiian pizza a try, and I promise you’ll find yourself adding it to your regular rotation. I’d absolutely love to hear how yours turns out! Did you add anything extra? Did your family devour it? Let me know in the comments below – I can’t wait to read about your pizza adventures!

Hawaiian Pizza
Ingredients
Pizza Dough and Sauce
- 1 pound pizza dough
- 0.5 cup pizza sauce
Toppings
- 1.5 cup shredded mozzarella cheese
- 1 cup diced cooked ham
- 0.75 cup crushed pineapple, drained
- 0.5 cup sliced black olives
Instructions
Preparation Steps
- Preheat your oven to 450°F (230°C). If using a pizza stone, place it in the oven while it preheats.
- On a lightly floured surface, stretch or roll out the pizza dough to your desired thickness and shape.1 pound pizza dough
- Transfer the dough to a pizza peel dusted with cornmeal or parchment paper.
- Spread the pizza sauce evenly over the dough, leaving a small border for the crust.1 pound pizza dough
- Sprinkle the mozzarella cheese over the sauce.1 pound pizza dough
- Evenly distribute the diced ham, crushed pineapple, and sliced black olives over the cheese.1 pound pizza dough
- Carefully slide the pizza onto the preheated pizza stone or place the baking sheet in the oven.
- Bake for 12-15 minutes, or until the crust is golden brown and the cheese is bubbly and melted.
- Let the pizza cool for a few minutes before slicing and serving.