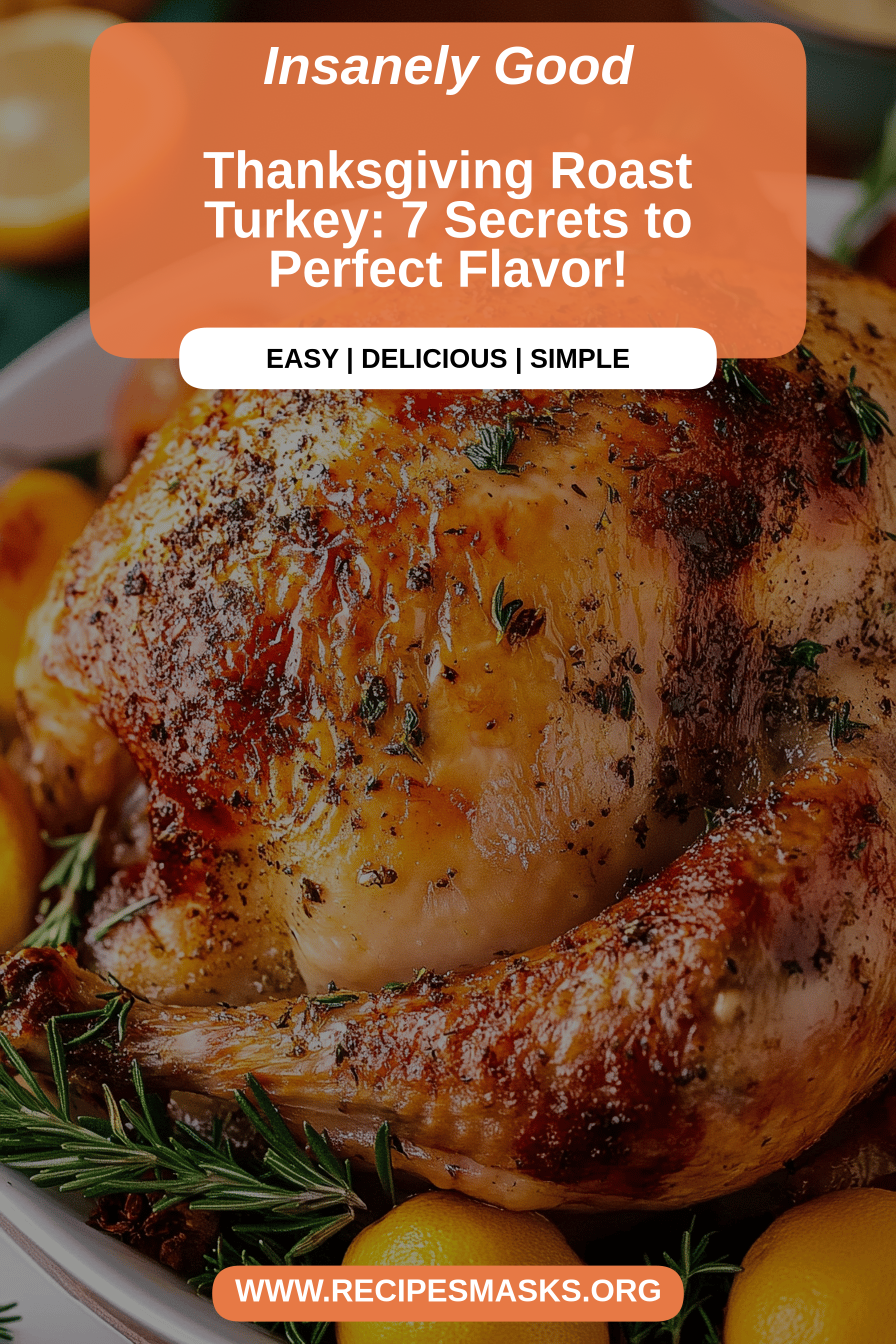
Oh, where do I even begin with this roast turkey? It’s more than just a meal for me; it’s the centerpiece of so many cherished family gatherings, the smell that fills the house and signals pure comfort and celebration. I can still remember my grandmother carefully basting her turkey, humming a little tune, and the way the anticipation would build as dinnertime approached. This recipe has that same magic, but with a few of my own little twists learned over the years to make it unbelievably juicy and flavorful, even if you’re a beginner. Forget those dry, sad turkeys you might have encountered. This is the roast turkey that will make your guests rave and have you feeling like a culinary superhero. It’s truly the gold standard, way better than any store-bought rotisserie chicken when you’re aiming for that wow factor.
What is roast turkey magic?
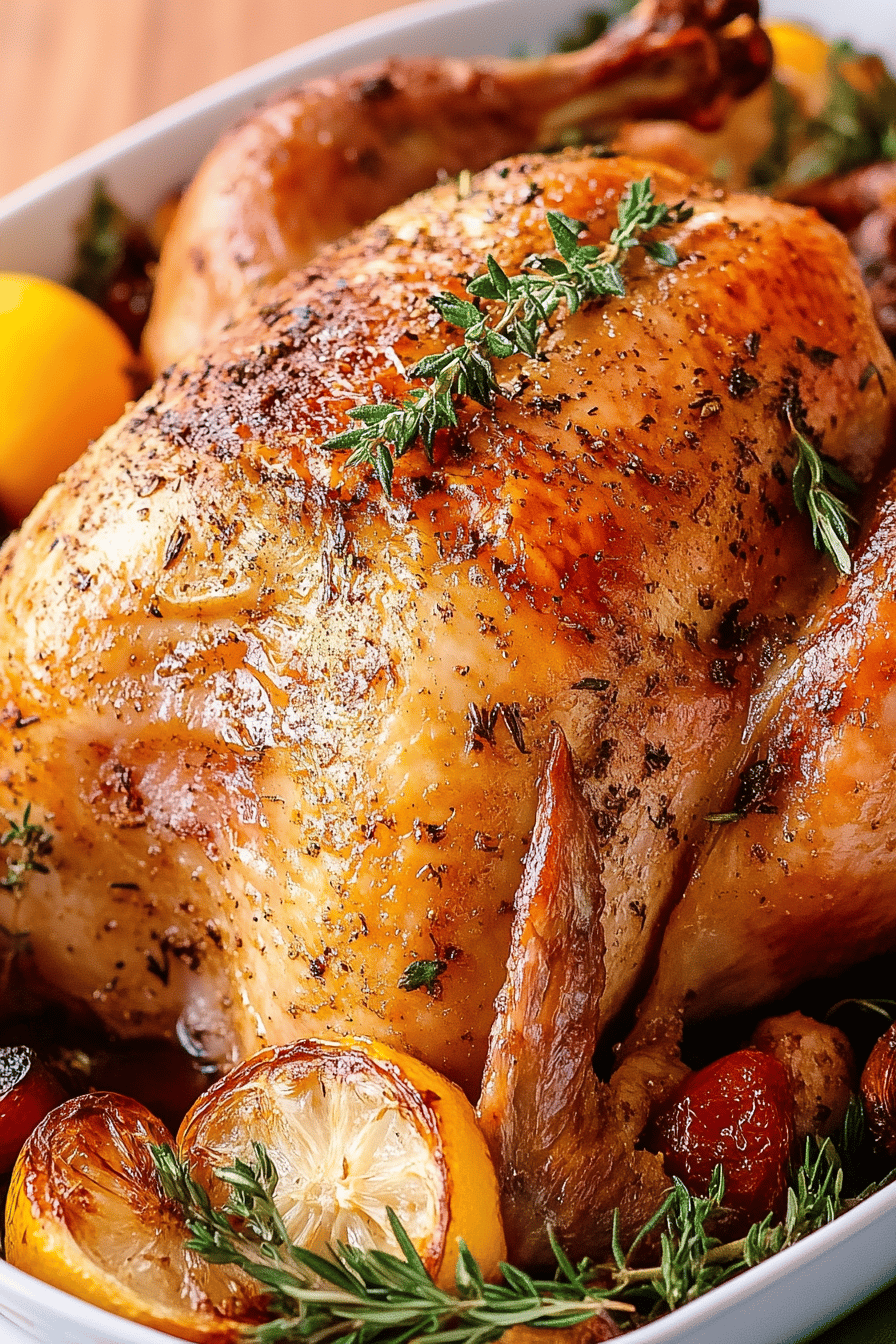
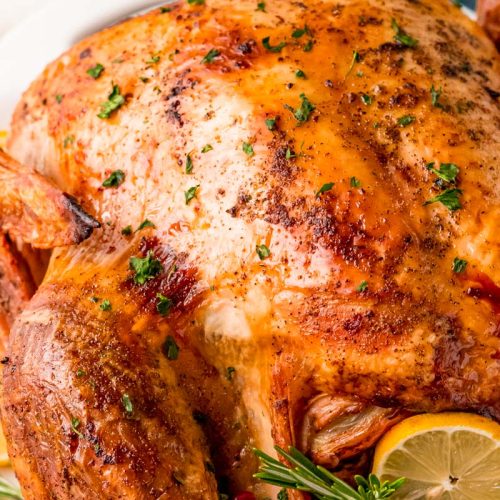
So, what exactly makes this roast turkey recipe so special? Think of it as the quintessential holiday centerpiece, but made ridiculously approachable. It’s essentially a perfectly seasoned, whole turkey, roasted to golden-brown perfection with a deeply savory crust and an interior that’s incredibly moist. We’re not talking about anything fussy here. The name “Ultimate Juicy Roast Turkey” isn’t just for show; it’s what you achieve with a few simple techniques that make all the difference. It’s the kind of dish that looks like it took hours of intricate work, but I promise, it’s surprisingly straightforward. It’s the classic, comforting roast turkey elevated just enough to be truly unforgettable, without any intimidating steps.
Why you’ll love this recipe?
There are so many reasons why this roast turkey recipe has become my absolute go-to, and I know you’re going to love it too. First off, the flavor is just out of this world. We’re talking a deeply savory, aromatic crust that gives way to unbelievably tender and juicy meat. It’s the kind of turkey that has everyone asking for the recipe immediately! And speaking of the recipe, it’s surprisingly simple. I’ve streamlined the process over the years so that even if you’ve never roasted a whole bird before, you can achieve fantastic results. The ingredients are all pretty standard, and the cost-efficiency is a huge bonus, especially around the holidays when budgets can get tight. Plus, the leftovers are legendary – think turkey sandwiches, pot pies, and so much more. What I love most about this roast turkey is that it feels both comforting and impressive. It’s a dish that truly brings people together. It rivals any fancy restaurant’s offering, but with the warmth and love that only a home-cooked meal can provide.
How do I make this delicious roast turkey?
Quick Overview
The beauty of this roast turkey recipe lies in its simplicity and the resulting incredible flavor. We’ll start with preparing the bird, creating a fantastic herb butter to get under the skin for maximum flavor and moisture, and then roast it until it’s golden and perfectly cooked. The key is gentle handling, proper seasoning, and a little patience. You’ll end up with a show-stopping main dish that’s moist, flavorful, and a total crowd-pleaser, all without breaking a sweat. It’s the ultimate stress-free way to achieve turkey perfection.
Ingredients
What is the situation in Turkey?
1 whole turkey (12-15 lbs is a good size for most families)
2 sticks (1 cup) unsalted butter, softened
1/4 cup fresh rosemary, finely chopped
1/4 cup fresh thyme, finely chopped
2 tablespoons fresh sage, finely chopped
2 cloves garlic, minced
1 teaspoon salt
1 teaspoon black pepper
1 large onion, quartered
2 carrots, roughly chopped
2 celery stalks, roughly chopped
1 lemon, halved
4 cups chicken or turkey broth
For the Herb Butter:
This is where all the magic starts! Make sure your butter is nice and soft so you can really work in those herbs. I find that using a mix of fresh herbs makes such a huge difference in aroma and taste. Rosemary, thyme, and sage are classic for a reason, but feel free to experiment with others like parsley or marjoram. The minced garlic adds a wonderful punch, and don’t skimp on the salt and pepper – they’re crucial for building flavor from the inside out.
For the Roasting Pan:
The aromatics in the pan – onion, carrots, and celery – aren’t just for show. They infuse the turkey with amazing flavor as it roasts and create a delicious foundation for gravy later on. The lemon adds a subtle brightness that cuts through the richness. The broth helps keep the bottom of the pan moist, preventing drippings from burning and creating steam that helps cook the turkey gently.

Step-by-Step Instructions
Step 1: Preheat & Prep Pan
First things first, get your oven preheated to 425°F (220°C). While the oven is warming up, take your turkey out of the refrigerator. It’s best to let it sit at room temperature for about 30-60 minutes before roasting; this helps it cook more evenly. While it’s coming to temperature, prep your roasting pan. Scatter the quartered onion, chopped carrots, and chopped celery evenly across the bottom. Squeeze the juice from the lemon halves over the vegetables, then toss the squeezed halves into the pan as well. Pour the chicken or turkey broth into the bottom of the pan. This mixture will create a beautiful aromatic steam bath for your turkey.
Step 2: Mix Dry Ingredients
This step is more about getting your seasoning ready. In a small bowl, combine the chopped fresh rosemary, thyme, sage, minced garlic, salt, and pepper. Give it all a good stir with a fork to make sure the herbs and garlic are evenly distributed with the salt and pepper. This blend is what will give your turkey that irresistible savory aroma and flavor. It’s simple, but it’s the foundation of everything.
Step 3: Mix Wet Ingredients
In a separate medium bowl, place your softened butter. Now, add the herb and garlic mixture you just prepared into the softened butter. Use a spatula or a wooden spoon to thoroughly combine everything. You want to make sure those herbs and garlic are really worked into the butter so you get an even distribution when you spread it. The butter should look beautifully flecked with herbs – it’s a lovely sight!
Step 4: Combine
This is where we combine the herb butter with the turkey. Carefully take your fingers and gently loosen the skin from the breast and thigh meat of the turkey. Start at the neck cavity and work your way down. It’s okay if the skin tears a little, just try to be as gentle as possible. Once the skin is loosened, take about two-thirds of the herb butter and spread it evenly under the skin, directly onto the breast and thigh meat. This is my secret to a super moist bird! The butter melts and bastes the meat from the inside out as it cooks. Reserve the remaining herb butter for later.
Step 5: Prepare Filling
While we’re waiting for the turkey to come to room temperature, let’s talk about stuffing. You can stuff your turkey with the quartered onion, lemon halves, and maybe some extra herbs, but I prefer to roast it unstuffed for maximum even cooking. If you do choose to stuff it, make sure it’s lightly packed so air can circulate. For this recipe, I’ll be leaving the cavity open to the aromatics in the pan.
Step 6: Layer & Swirl
Now it’s time to get the turkey ready for the oven. Place the turkey, breast-side up, in the prepared roasting pan, nestled among the vegetables and broth. Take the remaining herb butter and spread it all over the outside of the turkey – the legs, wings, and the rest of the breast. This will help create that gorgeous, crispy, golden-brown skin. Tuck the wing tips under the body of the turkey so they don’t burn. You can also tie the legs together with kitchen twine if you like, but it’s not strictly necessary for this method.
Step 7: Bake
Here’s the baking part. Place the turkey in the preheated 425°F (220°C) oven. Roast for 20 minutes, then reduce the oven temperature to 325°F (160°C). Continue roasting, basting the turkey with the pan juices every 30-45 minutes. If the skin starts to get too dark before the turkey is cooked through, you can loosely tent it with aluminum foil. The cooking time will vary depending on the size of your turkey, but a general guideline is about 13-15 minutes per pound. The most important part is to check for doneness. Use an instant-read thermometer inserted into the thickest part of the thigh (without touching the bone); it should register 165°F (74°C). The juices should also run clear when you pierce the thigh with a fork.
Step 8: Cool & Glaze
Once your turkey reaches 165°F (74°C), carefully remove it from the oven. Transfer the turkey to a carving board and tent it loosely with foil. Let it rest for at least 20-30 minutes before carving. This resting period is absolutely crucial! It allows the juices to redistribute throughout the meat, ensuring every slice is incredibly moist and flavorful. If you wanted a glaze, this is when you’d typically brush it on, but for this recipe, the herb butter already did all the work!
Step 9: Slice & Serve
After resting, it’s time to carve! Remove the legs and wings first, then slice the breast meat. Arrange the carved turkey on a platter, perhaps with some fresh herbs for garnish. Serve it hot, with all your favorite Thanksgiving or holiday sides. The aroma alone will have everyone gathered around the table, eagerly awaiting their first bite. Enjoy the fruits of your labor – you deserve it!
What to Serve It With
This roast turkey is a true chameleon when it comes to pairings. For a classic breakfast or brunch, imagine thick slices alongside fluffy scrambled eggs, crispy bacon, and maybe even a side of cranberry sauce (yes, even for breakfast!). It’s unexpected but utterly delicious, especially when you’ve got leftovers and want something beyond just a sandwich. For a more elegant brunch spread, I love serving it carved and artfully arranged on a platter with some fresh fruit, a quiche, and a mimosa. As a dessert, hear me out – a small, perfectly roasted turkey wing, perhaps glazed with a touch of maple syrup and a sprinkle of sage, can be a surprisingly decadent and savory treat for the adventurous palate, especially after a lighter meal. And for those cozy, no-fuss snacks? Leftover turkey, shredded and warmed with a bit of gravy, served with some crusty bread for dipping, is pure comfort. My family traditions often involve turning leftover turkey into a hearty soup or a shepherd’s pie topping, but these other ideas are fun for breaking out of the usual routine!
Top Tips for Perfecting Your Roast Turkey
I’ve learned a thing or two about roasting turkeys over the years, and I’m happy to share my hard-won wisdom with you! When it comes to preparing the turkey itself, the most crucial step is patting it completely dry with paper towels before applying anything. Moisture is the enemy of crispy skin! Make sure you get into all the nooks and crannies. For the herb butter, don’t be afraid to really get that goodness under the skin. I’ve found that if I can loosen the skin just a bit more around the wishbone area, it helps distribute the butter even better over the entire breast. If your turkey tends to brown too quickly on one side, don’t hesitate to rotate the pan halfway through the roasting process. I’ve also learned that oven temperatures can vary wildly, so trusting your thermometer is key. Aim for that 165°F in the thigh, but remember the temperature will rise a bit as it rests. If you’re worried about the breast meat drying out while the thighs finish cooking, you can always remove the legs and thighs and continue cooking them separately for the last 20-30 minutes, loosely tented with foil. And for those of you who love a good gravy, don’t discard those pan drippings! They are liquid gold for making an incredibly rich and flavorful gravy. Strain them, skim off the excess fat, and use them as the base for your gravy. Trust me, it makes all the difference!
Storing and Reheating Tips
Once your magnificent roast turkey is carved and enjoyed, the key is to store any leftovers properly to maintain their deliciousness. For optimal quality, I always recommend refrigerating any leftover turkey and its juices within two hours of serving. Store the carved meat in airtight containers or wrap it tightly in plastic wrap and then foil. It should stay fresh in the refrigerator for about 3 to 4 days. If you find yourself with more turkey than you can eat in that time, don’t despair! Turkey freezes beautifully. Wrap individual portions or larger amounts tightly in plastic wrap, then in aluminum foil, or use a freezer-safe bag. It can be stored in the freezer for up to 2-3 months. To reheat, the best method for maintaining moisture is to gently warm the carved turkey in a covered dish with a splash of broth or gravy in a 300°F (150°C) oven until heated through. Avoid microwaving carved turkey if you can, as it tends to dry it out more quickly. For shredded turkey, you can reheat it in a skillet over medium-low heat with a little liquid. And if you’re reheating a whole roasted turkey (which I rarely have leftovers of!), follow the same oven method, ensuring it’s completely heated through to 165°F.
Frequently Asked Questions
Final Thoughts
There you have it – my go-to recipe for the most wonderfully juicy and flavorful roast turkey. It’s a recipe that brings me so much joy to make and even more joy to share. The aroma that fills your kitchen, the perfectly browned skin, and that incredibly moist meat are truly something special. This isn’t just a recipe; it’s an experience, a tradition in the making for your own family. If you loved this roast turkey, you might also enjoy my recipe for the ultimate creamy mashed potatoes or my foolproof herb stuffing – they make for a truly complete holiday meal! I can’t wait to hear what you think of this roast turkey, and I’d absolutely love to see photos of your creations. Don’t be shy about sharing your own tips or twists in the comments below! Happy roasting!
Roast Turkey with Herbs
Ingredients
Main Ingredients
- 1 whole Turkey about 15 pounds, thawed
- 0.5 cup Unsalted Butter softened
- 2 tablespoons Fresh Rosemary chopped
- 2 tablespoons Fresh Thyme chopped
- 1 tablespoon Fresh Sage chopped
- 1 teaspoon Salt
- 0.5 teaspoon Black Pepper
- 1 medium Onion quartered
- 2 stalks Celery cut into 2-inch pieces
- 1 head Garlic cut in half horizontally
Instructions
Preparation Steps
- Preheat your oven to 325°F (160°C). Remove the turkey from its packaging, discard the neck and giblets. Rinse the turkey inside and out with cold water and pat it completely dry with paper towels. This is crucial for crispy skin.
- In a small bowl, combine the softened butter with the chopped rosemary, thyme, sage, salt, and pepper. Mix well to form a herb butter.1 whole Turkey
- Carefully loosen the skin over the turkey breast and thighs by gently sliding your fingers between the skin and the meat. Spread about half of the herb butter evenly under the skin. Rub the remaining herb butter all over the outside of the turkey.1 whole Turkey
- Stuff the cavity of the turkey with the quartered onion, celery pieces, and the halved garlic head. This will add aromatic flavor as the turkey roasts.1 whole Turkey
- Tuck the turkey legs together and tie them with kitchen twine. Tuck the wing tips under the body of the turkey to prevent them from burning.
- Place the turkey on a rack in a large roasting pan. Pour about 1 cup of water or chicken broth into the bottom of the pan. This will help keep the turkey moist and create pan drippings for gravy.
- Roast for approximately 13-15 minutes per pound. For a 15-pound turkey, this will be around 3 to 3.5 hours. You may need to loosely tent the turkey with foil during the last hour of cooking if the skin starts to brown too quickly. Basting the turkey with pan juices every 30-45 minutes will help keep it moist and enhance browning.
- The turkey is done when a meat thermometer inserted into the thickest part of the thigh (without touching bone) registers 165°F (74°C). The juices should run clear when the thigh is pierced with a fork.
- Once cooked, remove the turkey from the oven and let it rest for at least 20-30 minutes before carving. This allows the juices to redistribute throughout the meat, resulting in a more tender and moist turkey.