Oh, how do I even begin to describe these Twix cookies? For me, they’re more than just a treat; they’re a little piece of pure joy, a trip down memory lane to my childhood kitchen, and honestly, a lifesaver on those days when a serious sweet craving hits but I don’t have hours to bake a whole cake. You know those moments, right? When you just need something *good* and comforting. These cookies deliver that every single time. They’ve got that perfect balance of crumbly shortbread, gooey caramel, and a rich chocolate coating that just sings. If you love the classic candy bar, you are going to be absolutely obsessed with these homemade Twix cookies. I’ve tried a lot of cookie recipes over the years, and while I adore a classic Chocolate Chip or a perfectly chewy oatmeal raisin, these Twix cookies hold a special place in my heart. They’re a little more effort than your average drop cookie, sure, but trust me, the payoff is HUGE.

What are Twix Cookies?
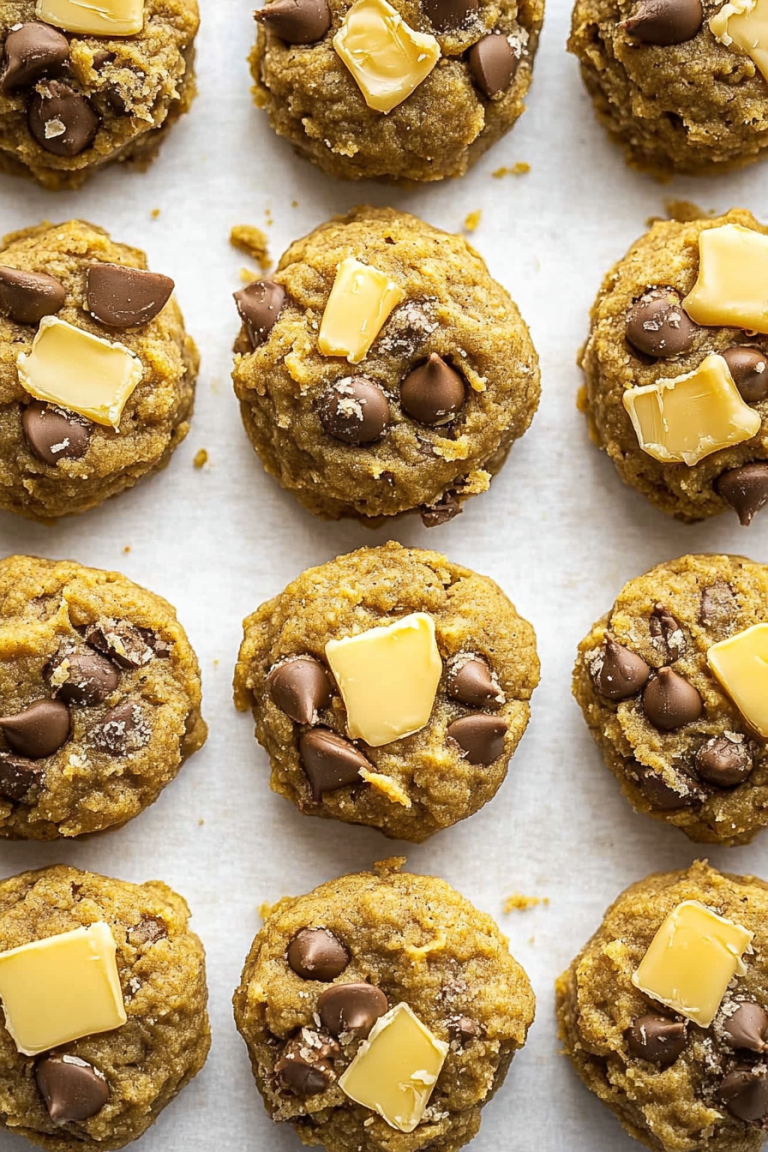
So, what exactly are these magical things we’re talking about? Think of them as the ultimate DIY tribute to the beloved Twix candy bar. Essentially, we’re taking the best elements of that iconic treat and transforming them into a delightful cookie form. You get a buttery, crumbly shortbread base that’s just sturdy enough to hold everything together. Then comes the star of the show: a luscious, homemade caramel that’s wonderfully chewy without being sticky. And to finish it off? A smooth, rich chocolate coating that ties all those glorious flavors and textures together. It’s like getting all the satisfaction of unwrapping a Twix, but in a format that feels way more homemade and special. They aren’t just cookies; they’re an experience! It’s essentially a deconstructed, elevated version of what we all love about the candy bar, made with ingredients you can pronounce and love.
Why you’ll love this recipe?
There are so many reasons why I keep coming back to this Twix cookie recipe, and I just know you’ll fall in love with it too. First off, the FLAVOR! It’s a symphony of textures and tastes. That sweet, slightly salty shortbread base is the perfect canvas for the rich, gooey caramel, and the smooth chocolate just brings it all home. It’s incredibly satisfying. Then there’s the SIMPLICITY, which might surprise you for something that tastes so gourmet. While there are a few steps, none of them are complicated. I’ve made these on busy weeknights, and they’re surprisingly manageable. Plus, the ingredients are super AFFORDABLE and readily available in most grocery stores, meaning you can whip up a batch of these without breaking the bank. And let’s talk VERSATILITY! While they’re incredible on their own, I love serving these at parties, bake sales, or just as a special afternoon pick-me-up. They look so impressive, don’t they? What I love most is that they satisfy that specific candy bar craving in a way that no other cookie can. They’re truly a unique and utterly delicious bake.
How do I make Twix cookies?
Quick Overview
Making these Twix cookies is a three-part magic show! We’ll start with a simple shortbread base, then whip up a dreamy homemade caramel, and finally, dip them in chocolate. The process is straightforward: mix, press, cook, pour, chill, and dip. It sounds like a lot, but each step is designed to be forgiving and rewarding. The key is allowing each layer to set properly, ensuring you get that distinct Twix bar experience in every bite. You’ll be amazed at how quickly these come together once you get into the rhythm!
Ingredients
For the Main Batter:
2 cups all-purpose flour (I always use unbleached, it makes a difference!)
1/2 cup granulated sugar
1/4 teaspoon salt (just a pinch to balance the sweetness)
1 cup (2 sticks) unsalted butter, softened (make sure it’s truly softened, not melted!)
1 teaspoon vanilla extract
For the Filling:
1 cup (2 sticks) unsalted butter
1 cup packed light brown sugar (this is key for that classic caramel flavor)
1/2 cup corn syrup (or golden syrup for a slightly different note)
1 (14-ounce) can sweetened condensed milk
1 teaspoon vanilla extract
Pinch of salt (optional, but I always add it)
For the Glaze:
2 cups semi-sweet chocolate chips (or milk chocolate if you prefer)
1 tablespoon vegetable oil or coconut oil (this makes the chocolate super smooth and shiny)

Step-by-Step Instructions
Step 1: Preheat & Prep Pan
First things first, let’s get our oven ready! Preheat it to 350°F (175°C). Grab an 8×8 inch baking pan. I like to line mine with parchment paper, leaving some overhang on the sides. This makes lifting the whole slab out so much easier later on – it’s a total game-changer. You want to make sure the parchment covers the bottom and sides so nothing sticks.
Step 2: Mix Dry Ingredients
In a medium bowl, whisk together your flour, granulated sugar, and salt. Give it a good stir to make sure everything is evenly distributed. This simple step ensures your shortbread base has a uniform texture.
Step 3: Mix Wet Ingredients
In a large bowl, cream together the softened butter and vanilla extract until light and fluffy. You can use an electric mixer for this, or a good old-fashioned whisk and some elbow grease if you’re feeling energetic!
Step 4: Combine
Gradually add the dry ingredients to the wet ingredients, mixing on low speed (or by hand) until just combined. Be careful not to overmix! We want a dough that’s crumbly but holds together when you press it. If it seems too dry, add a tablespoon of milk or water at a time. Press this dough evenly into the bottom of your prepared baking pan. Make sure it’s nice and flat!
Step 5: Prepare Filling
Now for that glorious caramel! In a medium saucepan, combine the butter, brown sugar, corn syrup, and sweetened condensed milk. Cook over medium heat, stirring constantly, until the mixture comes to a boil. Once boiling, reduce the heat to low and let it simmer gently for about 5-7 minutes, stirring frequently, until it thickens slightly and turns a lovely golden caramel color. Stir in the vanilla extract and a pinch of salt if you’re using it. Don’t skimp on stirring here; burnt caramel is a sad thing indeed!
Step 6: Layer & Swirl
Pour the hot caramel evenly over the shortbread base in the pan. Use a spatula to spread it out to the edges. You can gently swirl the caramel a little if you like, but it’s not necessary. The goal is an even layer of caramel goodness.
Step 7: Bake
Pop the pan into your preheated oven and bake for about 20-25 minutes, or until the edges of the shortbread are lightly golden and the caramel is bubbly. Keep an eye on it so the shortbread doesn’t burn. The shortbread should look cooked through, and the caramel should be a rich amber color.
Step 8: Cool & Glaze
This is the hardest part: patience! Let the pan cool completely on a wire rack. This is crucial for the caramel to set properly. Once cooled, pop the whole slab into the refrigerator for at least an hour, or until the caramel is firm. This makes it much easier to cut. While it’s chilling, melt your chocolate chips with the oil in a microwave-safe bowl in 30-second intervals, stirring in between, until smooth. You can also use a double boiler. Once the caramel slab is firm, lift it out using the parchment paper and place it on a cutting board. Cut it into bars or squares – I usually cut mine into about 12-16 bars. Then, dip each bar halfway into the melted chocolate, letting any excess drip off. Place the dipped bars back onto the parchment paper-lined baking sheet and return to the fridge to let the chocolate set completely.
Step 9: Slice & Serve
Once the chocolate is firm, your amazing Twix cookies are ready to be devoured! I like to let them sit at room temperature for about 15-20 minutes before serving so the caramel isn’t too hard. Just cut them into your desired serving size and enjoy the magic!
What to Serve It With
These Twix cookies are really a showstopper on their own, but they also play beautifully with other things! For breakfast (yes, I’ve totally had one with my coffee!), they’re fantastic with a strong, dark roast coffee or a creamy latte. The richness of the cookie is balanced perfectly by a bold brew. For a more elaborate brunch spread, I love to arrange them on a tiered serving stand alongside fresh berries and maybe some mini quiches. They add that touch of indulgence that elevates the whole occasion. As a dessert, they’re an absolute dream. Serve them after a meal with a scoop of vanilla bean ice cream, or alongside a glass of dessert wine. The contrast of the warm ice cream and the cool, chocolatey cookie is heavenly. And for those cozy snack moments? Honestly, a glass of cold milk is all you need. My kids ask for them constantly with their afternoon milk! One of my favorite family traditions is to have them with hot cocoa on a chilly evening – pure comfort.
Top Tips for Perfecting Your Twix Cookies
Over the years of making these (and believe me, it’s been many!), I’ve picked up a few tricks that I swear by. For the shortbread base, don’t be tempted to overwork the dough. A gentle touch ensures a tender crumb. If it feels too sticky to press, chilling it for 10-15 minutes can help. When it comes to the caramel, constant stirring is your best friend. It prevents burning and ensures a smooth, even consistency. If you’re worried about the caramel sticking, a light greasing of your saucepan with butter or a non-stick spray can be a lifesaver. Don’t rush the cooling process! It’s *so* tempting to dive in, but letting the shortbread and caramel chill properly is non-negotiable for clean cuts and a good texture. For dipping the cookies in chocolate, make sure your chocolate is nice and smooth. If it’s too thick, add that little bit of oil or coconut oil; it really makes a difference in achieving a glossy finish. I’ve found that using good quality chocolate chips makes a noticeable difference in the final flavor. For ingredient swaps, if you don’t have corn syrup, golden syrup or even a touch more brown sugar can work in a pinch for the caramel, though it might alter the exact chewiness slightly. If you want a richer chocolate flavor, you can try using dark chocolate chips for the coating. And honestly, if you mess up a little, don’t sweat it! These cookies are so forgiving, and even a slightly wonky shape tastes incredible. I’ve learned that sometimes the “perfect” cookies are the ones that have a little character!
Storing and Reheating Tips
Storing these delicious Twix cookies is pretty straightforward, and thankfully, they stay quite fresh! At room temperature, they are best stored in an airtight container for about 3-4 days. I usually lay them flat or put parchment paper between layers so they don’t stick together. If you live in a warm climate or your kitchen tends to be humid, popping them in the refrigerator is a great option. They’ll last even longer in the fridge, usually up to a week, and they stay delightfully firm. For longer storage, you can absolutely freeze them! I like to wrap individual cookies or small stacks of them tightly in plastic wrap, then place them in a freezer-safe bag or container. They can stay frozen for up to 2-3 months. When you’re ready to enjoy a frozen one, the best way to reheat them is to let them thaw at room temperature for about 20-30 minutes. This allows the caramel to soften up nicely again. For refrigeration storage, I don’t usually add the glaze until the cookies are ready to be eaten if I plan on keeping them for more than a day or two, but if they’re fully assembled and chilled, they hold up well. The glaze helps seal in the moisture, so it’s generally fine to glaze them before storing in the fridge or freezer.
Frequently Asked Questions
Final Thoughts

Honestly, making these Twix cookies is such a rewarding baking experience. They might seem a little involved at first glance, but each step is so worth it for that incredible result. You get that perfect crunch of shortbread, the melt-in-your-mouth caramel, and the satisfying snap of chocolate. It’s the ultimate homemade treat that always impresses. If you’re a fan of similar recipes, you might also adore my homemade shortbread cookies or my chewy caramel brownies – they share that comforting, indulgent vibe. But for that specific candy bar replication, these Twix cookies are truly unbeatable. I really hope you give them a try! I can’t wait to hear how yours turn out, or if you discover any fun variations. Don’t forget to leave a comment below or tag me on social media with your creations! Happy baking, everyone!

Twix Cookies
Ingredients
Shortbread Base
- 2.5 cup all-purpose flour
- 1 cup unsalted butter softened
- 0.5 cup granulated sugar
- 1 teaspoon vanilla extract
Caramel Filling
- 1 can sweetened condensed milk 14 oz
- 0.5 cup unsalted butter
- 0.25 cup light corn syrup
- 1 teaspoon vanilla extract
Chocolate Coating
- 2 cups semi-sweet chocolate chips
- 1 tablespoon vegetable oil
Instructions
Preparation Steps
- Preheat oven to 350°F (175°C). Line a 9x13 inch baking pan with parchment paper.
- In a large bowl, cream together the softened butter and granulated sugar until light and fluffy.
- Beat in the vanilla extract.
- Gradually add the flour and mix until just combined. The dough will be stiff.
- Press the dough evenly into the prepared baking pan.
- Bake for 15-18 minutes, or until the edges are lightly golden brown.
- While the shortbread bakes, prepare the caramel. In a medium saucepan, combine sweetened condensed milk, butter, and corn syrup.
- Cook over medium heat, stirring constantly, until the mixture thickens and turns a golden caramel color, about 5-8 minutes. Stir in vanilla extract.
- Pour the hot caramel evenly over the warm shortbread base.
- Let the caramel cool completely and set, about 1 hour.
- Once the caramel is set, melt the chocolate chips with vegetable oil in a microwave-safe bowl in 30-second intervals, stirring until smooth.
- Spread the melted chocolate evenly over the caramel layer.
- Refrigerate for at least 30 minutes to allow the chocolate to harden.
- Cut the chocolate-covered caramel into bars or squares.