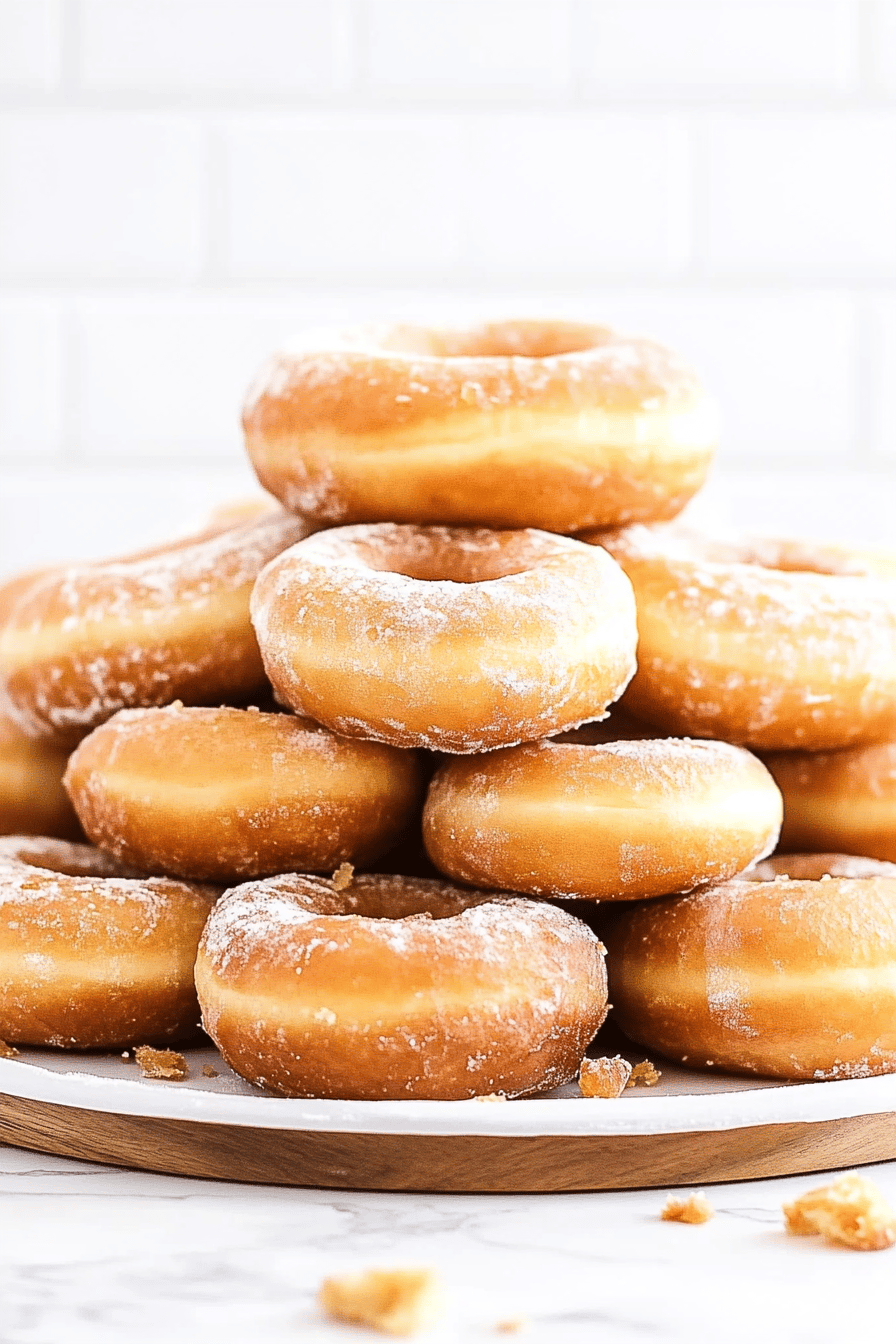
Oh, sourdough donuts. Just saying the words brings back a flood of memories. I remember my grandma, her hands dusted with flour, humming as she pulled a batch of these golden beauties from the oven. They weren’t just donuts; they were little clouds of happiness, slightly tangy from the sourdough starter, perfectly sweet, and utterly addictive. I’ve tried so many donut recipes over the years, from classic cake donuts to airy yeast-raised ones, but nothing quite captures that unique, comforting flavor profile like these sourdough donuts. They’re like a warm hug on a chilly morning, or a delightful surprise waiting for you after a long day. If you’re a fan of cinnamon rolls or even a really good coffee cake, you’re going to fall head over heels for these. They truly are a game-changer when you’re craving something special but don’t want to spend hours in the kitchen.

What is a sourdough donut?
So, what exactly are these magical sourdough donuts? Think of them as the best of both worlds. They have that wonderfully complex flavor from a touch of sourdough starter – that gentle tang that cuts through the sweetness and adds such an interesting depth. But don’t worry, they’re not overwhelmingly sour! It’s a subtle hint that makes them incredibly moreish. Unlike traditional yeast donuts that can sometimes feel a bit heavy, or cake donuts that can lean towards being dry, sourdough donuts strike a perfect balance. They’re tender, slightly chewy, and have this wonderful airy crumb that just melts in your mouth. It’s essentially taking the beloved character of sourdough bread and transforming it into a delightful, sweet treat. They’re the kind of donuts that make you pause, close your eyes, and just savor every single bite.
Why you’ll love this recipe?
Honestly, there are so many reasons why this sourdough donut recipe has become a staple in my kitchen. Firstly, the flavor is just out of this world. That subtle sourdough tang is truly addictive, and when paired with a sweet glaze or a cinnamon-sugar coating, it creates a flavor combination that’s hard to beat. It’s a complex sweetness that feels sophisticated, yet comforting. Secondly, and this is a big one for me, they’re surprisingly simple to make. I know “sourdough” can sometimes sound intimidating, but for these donuts, it’s more about adding a bit of fermented goodness than a complicated process. The batter comes together without much fuss, and the baking is straightforward. What I also adore about this recipe is how cost-effective it is. Using your existing sourdough starter means you’re not buying specialty ingredients, and most of the other components are pantry staples. Plus, they are incredibly versatile! You can fill them with anything your heart desires – from classic vanilla custard to rich chocolate ganache, or even a fruity jam. They’re perfect for any occasion, whether it’s a special weekend brunch, a pick-me-up treat with coffee, or even a fun baking project with the kids. They just make everything feel a little more special, and that’s something I always strive for in my cooking.
How do you make sourdough donuts?
Quick Overview
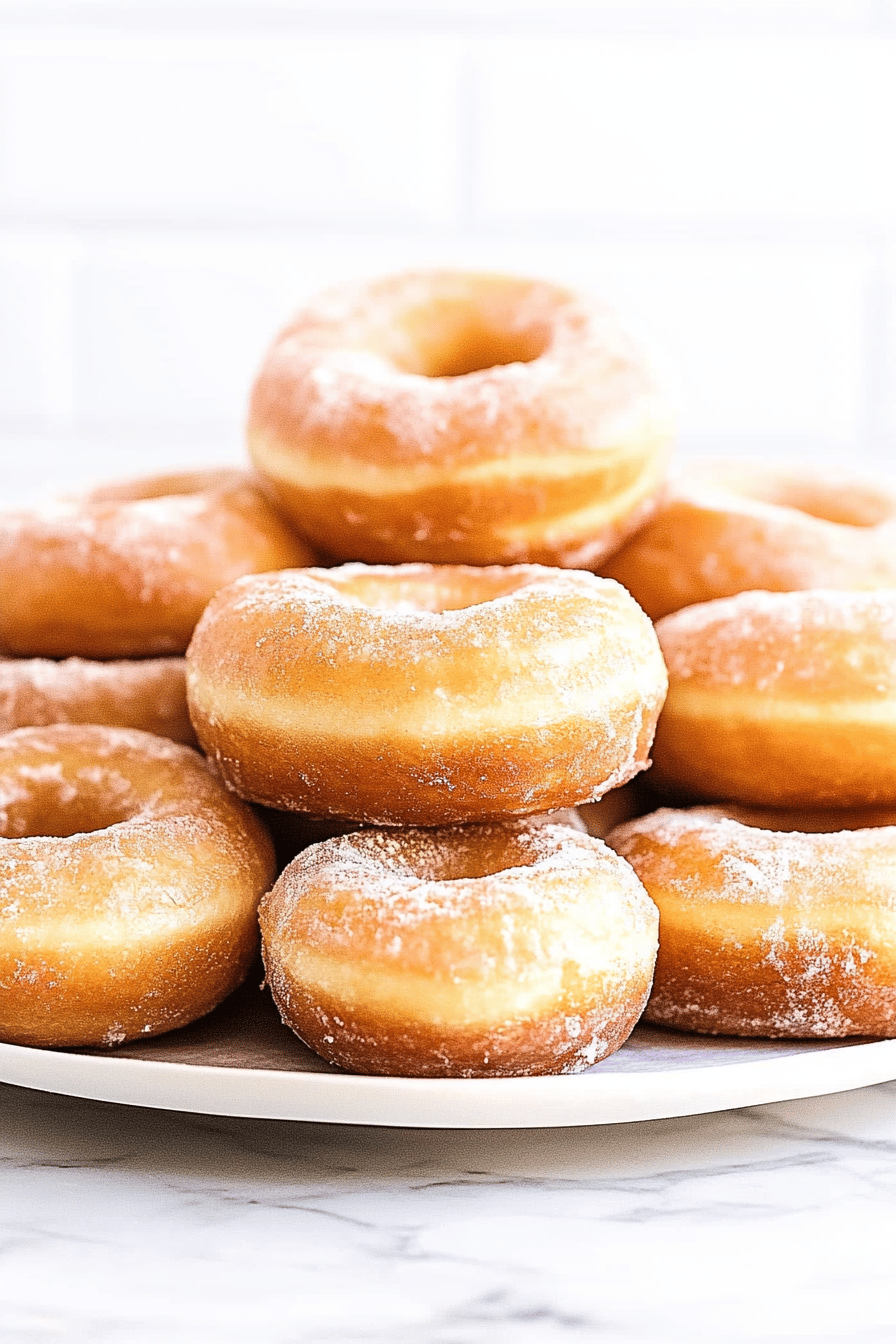
Making these sourdough donuts is a joyous process! You’ll mix up a tender batter infused with your bubbly sourdough starter, gently fold in some warm, comforting spices, and then bake them in a donut pan until they’re golden and puffed. Once they’ve cooled slightly, you’ll dip them in a simple, luscious glaze that hardens just enough to give you that satisfying crackle. It’s a straightforward method that yields incredibly delicious results, and you’ll be amazed at how quickly they come together. The beauty of baking them is that it’s much cleaner and easier than frying, making them perfect for busy days or when you just don’t want the fuss of hot oil.
Ingredients
For the Main Batter:
You’ll need your active, bubbly sourdough starter – about 1 cup. Make sure it’s fed and active, meaning it’s doubled in size and smells pleasantly tangy. This is key for flavor and lift! Then, we’ll add 1 and 3/4 cups of all-purpose flour. I’ve tested this with bread flour in a pinch, and it works, but all-purpose gives you that perfect tender crumb. Next, 1 cup of granulated sugar for sweetness, 1 and 1/2 teaspoons of baking powder for an extra boost, 1/2 teaspoon of baking soda to react with the starter’s acidity, and 1 teaspoon of salt to balance everything out. For richness and moisture, we’ll use 1/2 cup of unsalted butter, melted and slightly cooled. Then, 1 cup of milk – whole milk gives the best texture, but I’ve also used 2% with great results. And finally, 2 large eggs, lightly beaten, and 1 teaspoon of pure vanilla extract for that classic comforting aroma.
For the Filling:
This is where you can get really creative! For a simple yet divine filling, I often make a quick pastry cream. It’s just 2 cups of milk, 1/2 cup of sugar, 3 tablespoons of cornstarch, 3 egg yolks, and a tablespoon of butter with a splash of vanilla. Whisk it all together until thickened. Another favorite is a raspberry jam – just a good quality one, maybe warmed slightly so it’s easier to pipe. Or, for something decadent, a chocolate ganache made with equal parts good quality chocolate and heavy cream, stirred until smooth. You’ll want about 1 to 1.5 cups of your chosen filling.
For the Glaze:
The classic glaze is so simple: 2 cups of powdered sugar, 3 to 4 tablespoons of milk (start with 3 and add more if needed for consistency), and 1 teaspoon of vanilla extract. For a chocolate glaze, swap out half the powdered sugar for unsweetened cocoa powder. For a lemon glaze, use lemon juice instead of milk and add a little lemon zest. You want it thick enough to coat the donuts but thin enough to drip appealingly. If it’s too thick, add a tiny bit more liquid; if it’s too thin, add a little more powdered sugar.
Step-by-Step Instructions
Step 1: Preheat & Prep Pan
First things first, preheat your oven to 350 degrees Fahrenheit (175 degrees Celsius). I like to grease my donut pans really well with butter or cooking spray. Sometimes, I even give them a light dusting of flour or cocoa powder if I’m making chocolate-glazed donuts, just to be extra sure they won’t stick. You want them ready to go!
Step 2: Mix Dry Ingredients
In a large mixing bowl, whisk together the flour, granulated sugar, baking powder, baking soda, and salt. Giving it a good whisk ensures everything is evenly distributed, which means no pockets of leavening agents or salt in your final donuts. You’re looking for a uniform mixture.
Step 3: Mix Wet Ingredients
In a separate medium bowl, combine your active sourdough starter, melted butter, milk, lightly beaten eggs, and vanilla extract. Whisk it all together until it’s well combined and looks smooth. The butter should be slightly cooled so it doesn’t scramble the eggs.
Step 4: Combine
Now, pour the wet ingredients into the dry ingredients. Mix them together with a spatula or a wooden spoon until *just* combined. It’s really important not to overmix here! A few little lumps are perfectly okay. Overmixing can develop the gluten too much and lead to tough donuts, and nobody wants that.
Step 5: Prepare Filling
While your batter is resting for a moment, get your filling ready. If you’re making a pastry cream, follow your favorite recipe or the simple one I mentioned earlier. If you’re using jam or ganache, make sure it’s at a consistency that’s easy to pipe. You can warm it gently if it’s too thick.
Step 6: Layer & Swirl
Spoon or pipe the batter into your prepared donut pans, filling each cavity about two-thirds of the way full. You don’t want them overflowing. If you’re feeling fancy, you can swirl a little bit of your filling into the batter at this stage, but I usually prefer to fill them after baking for a cleaner look and easier control.
Step 7: Bake
Bake for 12 to 15 minutes, or until a wooden skewer inserted into the center of a donut comes out clean. The tops should be lightly golden and spring back when gently touched. Don’t overbake them, or they’ll become dry!
Step 8: Cool & Glaze
Let the donuts cool in the pan for about 5 minutes before carefully transferring them to a wire rack to cool further. While they’re cooling, whip up your glaze. Once the donuts are only slightly warm or at room temperature, it’s time to dip them! Hold each donut by the sides and dip the tops into the glaze. Let the excess drip off for a moment, then place them back on the wire rack with parchment paper underneath to catch drips. Let the glaze set a bit.
Step 9: Slice & Serve
If you’re filling them, wait until the glaze is mostly set. Use a small piping bag with a thin tip to inject your filling into the side of each donut. I like to slice them in half horizontally sometimes too, for a double-decker donut experience! Serve them fresh – they are truly best on the day they are made. But if you have any leftovers (ha!), they’re still delicious the next day.
What to Serve It With
These sourdough donuts are absolute stars on their own, but they also pair beautifully with so many things. For a classic breakfast, you can’t go wrong with a steaming cup of freshly brewed coffee – its slight bitterness cuts through the sweetness of the donuts perfectly. A cold glass of milk is always a hit with the kids, of course! For a more indulgent brunch spread, I love to serve them alongside some fresh fruit salad, perhaps with some yogurt and granola. They add a touch of elegance to the table without any extra effort. As a dessert, they’re divine! Imagine serving a warm, glazed donut with a scoop of vanilla bean ice cream or a dollop of whipped cream – pure bliss. They’re also wonderful with a rich hot chocolate on a cozy afternoon. My family tradition is to have them on Saturday mornings with a big pot of coffee and some scrambled eggs. It’s our little treat to kick off the weekend, and honestly, the smell alone makes everyone leap out of bed!
Top Tips for Perfecting Your Sourdough Donuts
After making these sourdough donuts more times than I can count, I’ve picked up a few tricks that I think are really helpful. First, about the sourdough starter: it absolutely needs to be active and bubbly. If your starter has been in the fridge, make sure to feed it at least once or twice and let it get really lively before using it. This ensures good flavor and lift. For the flour, using a good quality all-purpose flour is best. I’ve found that if I use too much flour, the donuts can be a bit dry, so always measure your flour accurately – spoon it into the cup and level it off, don’t scoop directly from the bag. When mixing the batter, remember that gentle touch is key! You want to mix until just combined; a few small lumps are a good sign you haven’t overdeveloped the gluten. This is crucial for that tender, melt-in-your-mouth texture. For the donut filling, make sure it’s not too thin, or it will leak out. If it’s too thick, it can be hard to pipe. A good test is to see if it holds its shape when you squeeze it from the piping bag. When it comes to baking, ovens can be tricky! I always keep an eye on them starting around the 10-minute mark. The edges will start to look set and lightly golden, and the center should spring back slightly. If your oven tends to bake unevenly, you might need to rotate the pans halfway through. For the glaze, consistency is everything. I always start with the lower amount of liquid and add more a teaspoon at a time until it’s the perfect drizzling consistency. You want it thick enough to coat but thin enough to drip nicely. If you accidentally make it too thin, just whisk in a little more powdered sugar. And if you’re ever short on time, don’t feel pressured to fill them! A good glaze or a simple dusting of cinnamon sugar is absolutely delicious on its own.
Storing and Reheating Tips
These sourdough donuts are truly at their best on the day they’re made, but they’re still quite enjoyable for a couple of days if stored properly. If you have any leftovers (which is rare in my house!), I usually store them in an airtight container at room temperature for up to 2 days. I try not to stack them too high if they’re glazed, to avoid smushing the glaze. If you live in a very warm or humid climate, or if you plan to keep them for more than 2 days, refrigerating them is a good option. Place them in an airtight container in the fridge for up to 4 days. Just know that refrigeration can sometimes make the texture a little firmer, so I always recommend bringing them back to room temperature before serving. For longer storage, you can freeze them! Wrap each donut individually in plastic wrap, then place them in a freezer-safe bag or container. They’ll keep well for up to 2 months. To thaw, simply leave them on the counter for a few hours until they reach room temperature. If you’ve glazed them, the glaze usually holds up well to freezing and thawing. If you’ve filled them, I often recommend filling them *after* thawing and reheating, just to keep the filling freshest. If you want to reheat them slightly, you can pop them in a low oven (around 250°F or 120°C) for about 5-8 minutes until they’re warm and soft again. It really brings them back to life!
Frequently Asked Questions
Final Thoughts
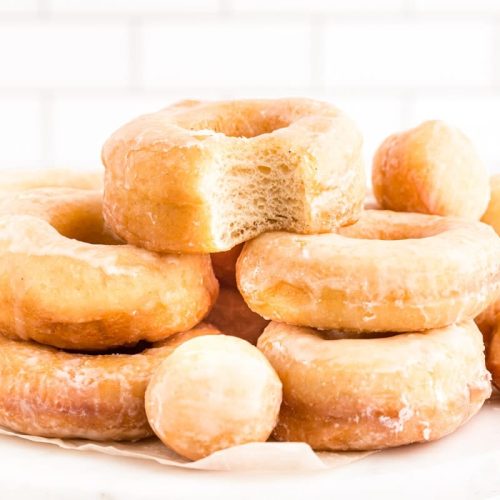
I truly hope you give these sourdough donuts a try. They’re more than just a recipe to me; they’re a piece of my baking history and a source of so much joy for my family. That perfect balance of tang and sweetness, the tender crumb, the simple beauty of a perfectly glazed donut – it’s all just incredibly satisfying. They’re proof that you don’t need to be a professional baker to create something truly special at home. If you love exploring different textures and flavors, you might also enjoy my recipe for {Link to another relevant recipe, e.g., “Chewy chocolate chip cookies“} or my {Link to another relevant recipe, e.g., “Easy No-Knead Sourdough Bread”}. I can’t wait to hear about your baking adventures with these sourdough donuts! Please leave a comment below and let me know how yours turned out, or share any delicious variations you’ve come up with. Happy baking!
Sourdough Donuts
Ingredients
Donut Dough
- 0.5 cup Active Sourdough Starter
- 0.25 cup Granulated Sugar
- 2.5 cup All-Purpose Flour + more for dusting
- 0.5 teaspoon Salt
- 0.5 cup Milk warmed
- 1 large Egg
- 0.25 cup Unsalted Butter melted
Frying
- 4 cup Vegetable Oil or other neutral oil for frying
Glaze
- 2 cup Powdered Sugar
- 0.25 cup Milk
- 0.5 teaspoon Vanilla Extract
Instructions
Make the Dough
- In a large bowl, combine the active sourdough starter and granulated sugar. Whisk until the sugar is dissolved.
- In a separate bowl, whisk together 1 cup of the all-purpose flour, salt, and warmed milk. Let it sit for 5 minutes.
- Add the sourdough mixture, the flour and milk mixture, the egg, and melted butter to the bowl of a stand mixer fitted with a dough hook. Mix on low speed until just combined.
- Gradually add the remaining 1.5 cups of flour, mixing on low speed until a shaggy dough forms. Increase speed to medium-low and knead for 6-8 minutes, until the dough is smooth and elastic.
- Transfer the dough to a lightly greased bowl, cover with plastic wrap, and let it rest at room temperature for 4-6 hours, or until doubled in size.
Shape and Fry the Donuts
- Punch down the dough. Turn it out onto a lightly floured surface and gently roll it to about 0.5 inch thickness. Cut out donuts using a donut cutter or two round cutters of different sizes.
- Place the cut donuts on parchment-lined baking sheets. Cover loosely with plastic wrap and let them proof at room temperature for 1-2 hours, until puffy.
- Heat the vegetable oil in a large, heavy-bottomed pot or Dutch oven to 350°F (175°C).
- Carefully fry the donuts, a few at a time, for 2-3 minutes per side, until golden brown. Use a slotted spoon to remove them from the oil.
- Transfer the fried donuts to a wire rack set over paper towels to drain.
Make the Glaze and Glaze Donuts
- In a medium bowl, whisk together the powdered sugar, milk, and vanilla extract until smooth.
- Dip each warm donut into the glaze, letting excess drip off. Place back on the wire rack to set.