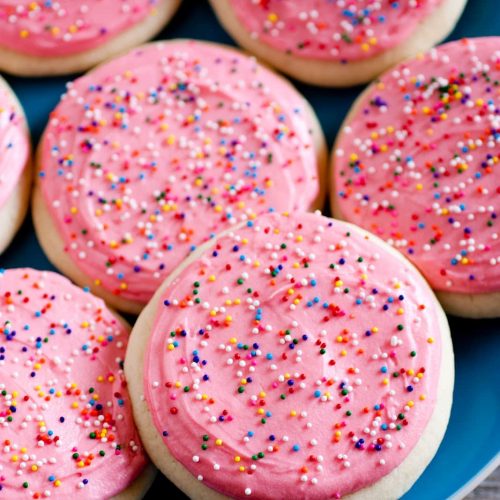
There’s something about sugar cookies that takes me right back to my childhood kitchen—my mom standing by the counter, the scent of vanilla and butter swirling in the air, and the soft hum of the oven. These aren’t just any sugar cookies; they’re the melt-in-your-mouth kind that have a crisp edge and a tender center, the kind my kids beg me to bake again and again on lazy Sunday afternoons. Honestly, they’re my go-to when I need a quick sweet fix that’s far better than grabbing a store-bought treat. If you’ve ever loved classic chocolate chip cookies, you’ll find sugar cookies just as comforting but with their own nostalgic charm. Plus, they’re surprisingly easy to make, with a simple ingredient list and straightforward process that even a novice baker can get right on the first try. Trust me, the moment you bite into one, you’ll understand why this recipe has been a little treasure in my kitchen for years.
What is sugar cookie?
Think of sugar cookies as the cozy, comforting cousin of all cookies—easygoing, delightfully simple, and endlessly adaptable. It’s essentially a sweet, buttery cookie made with sugar, flour, butter, and eggs, often flavored with a splash of vanilla. The name comes from the generous coating or sprinkling of granulated sugar on top before baking, which gives the cookie a subtle crunch that contrasts perfectly with its soft interior. These cookies have been a holiday staple for decades, but honestly, anytime I want something sweet to nibble on without the fuss, sugar cookies are my go-to. They’re gifts from a time when baking was about simple ingredients, family memories, and the joy of sharing something homemade. You can dress them up with sprinkles, icing, or a hint of lemon zest, or keep them just plain and delightful—either way, they never disappoint.
Why you’ll love this recipe?
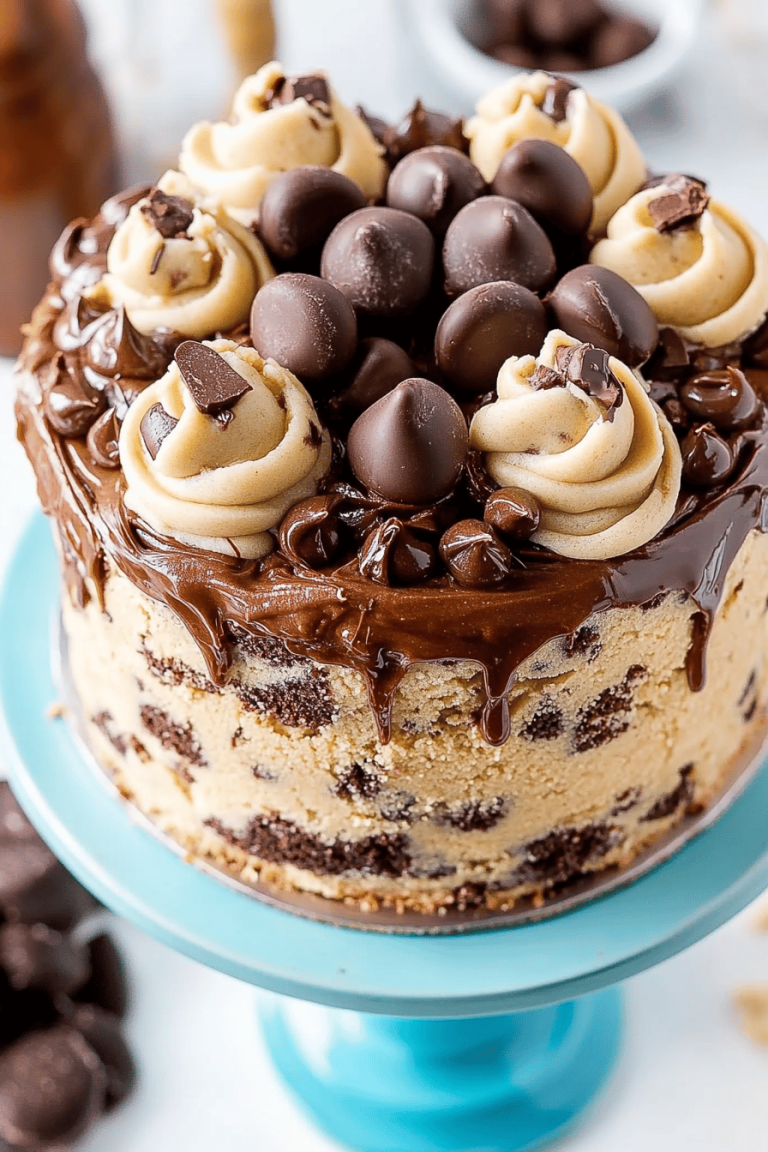
What I adore most about this sugar cookies recipe is how effortlessly it blends incredible flavor with genuine simplicity. First off, the taste—it’s rich with buttery goodness, sweet but not cloying, and there’s that tender crumb that almost melts on your tongue. The vanilla really sings here, and if you give the dough a quick chill (I always do), the flavor deepens dramatically. Second, it’s a no-fuss recipe that doesn’t require any special equipment or fancy ingredients. You likely have everything you need in your pantry already—which means it’s budget-friendly, a big win in my book. What’s more, these cookies are incredibly versatile. I’ve made them in classic round shapes, pressed with a fork for a rustic look, or rolled out and cut into festive shapes for holidays. Sometimes I swirl in a touch of almond extract or coconut for a twist. And because the base is so reliable, they’re a perfect canvas for experimenting with toppings or even sandwiching with homemade jams or creams. Honestly, I’ve made these countless times, and every single batch disappears within minutes in my house. Whether you’re baking for a crowd or just want a small treat, this recipe never lets me down.
How do I make sugar cookies?
Quick Overview
This recipe is delightfully straightforward but packed with little tricks I’ve learned over the years. You start by mixing your dry ingredients separately from your wet ones to get that perfect texture, then gently fold everything together—no need to over-mix and risk tough cookies. I love chilling the dough before baking; it gives a sturdier texture and richer flavor. Sprinkle a bit of sugar on top before baking for that signature sweet crunch. Baking time is short, so keep a close eye—the moment the edges turn golden, you’re in cookie heaven territory. It’s one of those recipes that feels fancy but is genuinely friendly for all skill levels.
Ingredients
For the Main Batter:
- 2 ¾ cups all-purpose flour — Use a good-quality bleached or unbleached kind for a tender crumb
- 1 tsp baking soda — Helps with just a little lift and softness
- ½ tsp baking powder — Adds a light texture
- ½ tsp salt — Balance is key here
- 1 cup unsalted butter, softened — Room temperature is best; I swear by real butter for that rich flavor
- 1 ½ cups granulated sugar — For that classic sweet bite
- 1 large egg — For structure and moisture
- 2 tsp pure vanilla extract — This is where the magic happens
- Optional: ½ tsp almond extract — For an aromatic twist if you’re feelin’ fancy
For the Filling: (If you want to add a jammy twist or sandwich them)
- ½ cup raspberry or strawberry jam — Smooth or chunky, your call
- Optional: A thin layer of cream cheese frosting — Adds luscious creaminess
For the Glaze:
- 1 cup powdered sugar — For sweetness without grit
- 1–2 tbsp milk or lemon juice — Start with less, add until smooth but pourable
- ½ tsp vanilla extract or a few drops of food coloring — For a subtle flavor or festive flair
Step-by-Step Instructions
Step 1: Preheat & Prep Pan
Set your oven to 350°F (175°C) and line baking sheets with parchment paper or a reusable silicone mat. I never skip this because it keeps my cookies from sticking and gives the bottoms a perfect golden finish. Pro tip: If you want crispier edges, pop them on the lower rack; for softer edges, use the middle rack.
Step 2: Mix Dry Ingredients
Whisk together the flour, baking soda, baking powder, and salt in a medium bowl until evenly combined. This step might seem small, but it ensures your leavening agents are well distributed, so your cookies rise evenly. It’s a step I always stick to, no shortcuts here.
Step 3: Mix Wet Ingredients
In a large bowl, beat the softened butter and granulated sugar together until the mixture is light and fluffy—this usually takes about 3 to 4 minutes on medium speed with a handheld mixer, or a good whisk and some elbow grease. You’ll notice the color lightening up, a good sign this step’s done! Add the egg, vanilla extract, and almond extract if using, then mix until just combined.
Step 4: Combine
Gently fold the dry ingredients into the wet mixture using a spatula or wooden spoon. It’s important here not to overmix, or you’ll end up with tough cookies instead of tender, melt-in-your-mouth ones. The dough should come together soft but not sticky. If it feels too gooey, a short chill can help—it’s a trick I learned after a few sticky batches!
Step 5: Prepare Filling
If you’re feeling fancy or want sandwich cookies, spread your jam or cream cheese frosting thinly on one cookie and gently press another on top. For a swirling effect in the dough itself, you could swirl in a couple of tablespoons of jam after spreading half your dough in the pan — it makes for a pretty marbled look and a burst of flavor inside.
Step 6: Layer & Swirl
For simple drop cookies, scoop tablespoon-sized balls onto your prepared baking sheets, leaving about 2 inches between them. For swirled or layered cookies, dollop half the dough, then add spoonfuls of jam or filling in patches, and top with remaining dough before giving it a few gentle swirls with a knife or toothpick. It’s satisfying to see those colors blend into pretty patterns!
Step 7: Bake
Bake your cookies for 9–12 minutes. Keep a close eye in the last few minutes—the edges should start turning a light golden brown while the centers remain soft. Every oven’s different, so I always test one batch first. The smell alone will draw you nearer—it’s that warm vanilla and butter sweetness that’s absolutely irresistible.
Step 8: Cool & Glaze
Allow cookies to cool on the pan for about 5 minutes before transferring them to a wire rack to cool completely. When cool, mix your powdered sugar with milk or lemon juice to your desired consistency and drizzle over the tops—or dip the cookie edges in the glaze for a nice touch. The glaze sets quickly, creating a delightful contrast to the soft cookie beneath.
Step 9: Slice & Serve
If you baked your cookie dough in a pan, wait until fully cooled before slicing into squares with a sharp knife to get clean edges. Serve at room temperature so the texture and flavor shine. These cookies pair beautifully with a tall glass of milk or a cup of tea—it’s what my kids always request when they come home from school.
What to Serve It With
For Breakfast: These sugar cookies are dreamy alongside a creamy latte or black coffee. I’m not ashamed to say I sometimes pair them with scrambled eggs and fruit when time feels tight—it’s that kind of comfort food that eases you into the day.
For Brunch: Dress them up with some fresh berries on the side, or serve with a dollop of whipped cream and a hint of citrus zest. I’ve even paired them with sparkling mimosas at weekend gatherings, and folks always ask for the recipe after.
As Dessert: After dinner, nothing beats serving these with a scoop of vanilla ice cream or alongside fresh strawberries macerated in a drizzle of honey. A dusting of cinnamon or a light brush of salted caramel glaze is an indulgent twist that’s sure to impress.
For Cozy Snacks: On colder days, I pair these cookies with hot chocolate or chai tea for the ultimate comfort duo. My family and I love wrapping up in blankets, cookie in hand, chatting after a long day—these treats really make those moments extra special.
Top Tips for Perfecting Your Sugar Cookies
Butter Matters: Always use softened, but not melted, butter. It gives a lovely, fluffy texture to the dough and depth in flavor. I once rushed this step and had a dense batch that nobody touched!
Don’t Skip the Chill: Chilling your dough—even for 30 minutes—helps the flavors develop and keeps the cookies from spreading too much. This little step changed my baking game.
Don’t Overmix: Overmixing flour can make cookies tough. As soon as you see no streaks of flour, stop. Gently folding in ingredients ensures a tender result.
Swirl With Care: If you’re adding jam or coloring swirls, go slow and swirl just barely—too much mixing will lose the beautiful marbling effect.
Ingredient Swaps: I’ve tried swapping almond extract for coconut or orange zest, both adding unique flavor notes. Dark brown sugar instead of white adds richness but will slightly change texture. Feel free to experiment, but keep flour and butter ratios steady.
Check Your Oven: Oven temperatures vary, so if this is your first time baking these cookies, keep a close eye toward the end. Golden edges and a slightly soft center are your cues they’re ready.
Glaze Variations: Want a thicker glaze? Add extra powdered sugar; thinner? A splash more milk or lemon juice. For a fun twist, add a few drops of food coloring or a touch of coconut rum for grown-up cookies.
Storing and Reheating Tips
Room Temperature: Store your sugar cookies in an airtight container on the counter for up to 4 days. I like to add a slice of bread in the container—it keeps the cookies moist without getting soggy.
Refrigerator Storage: If you want to keep them longer, store the cookies in an airtight container in the fridge for up to a week. Bring them back to room temperature before serving so they’re nice and tender.
Freezer Instructions: These cookies freeze beautifully. Wrap them individually in plastic wrap, then store in a freezer bag for up to 3 months. Thaw at room temperature or heat gently in the microwave for 10 seconds for that fresh-baked feel.
Glaze Timing Advice: If you’re glazing cookies ahead for storage, wait until they’re fully cooled before glazing. For freezer storage, I recommend freezing cookies unglazed and adding glaze after thawing to avoid any textural mishaps.
Frequently Asked Questions
Final Thoughts
This sugar cookie recipe holds a special place in my heart and my kitchen—it’s easy to make, utterly delicious, and brings such warmth to the table. Every batch feels like a small celebration, whether it’s for a holiday, a quiet afternoon treat, or an impromptu gathering with friends. I’m always amazed at how such simple ingredients can deliver this kind of joy. If you love this classic recipe, you might want to explore my collection of other beloved cookies and baked goodies—each one has its own story and special twist. Don’t be shy to tweak this recipe and let me know how yours turns out—I’m always excited to hear your baking adventures. Happy baking and here’s to many sweet, buttery moments ahead!
sugar cookies
Ingredients
Main Ingredients
- 2.5 cups cake flour
- 2 tsp cornstarch
- 1.5 tsp baking powder
- 0.25 tsp salt
- 0.5 cup salted butter at room temperature
- 0.25 cup vegetable shortening unflavored, at room temperature
- 1 cup granulated sugar
- 1 large egg
- 1 large egg white
- 2 tsp vanilla extract
- 0.5 tsp almond extract
Vanilla Frosting
- 0.33 cup salted butter at room temperature
- 2.5 cups powdered sugar
- 0.5 tsp vanilla extract
- 3 Tbsp half-and-half
- food coloring optional
Instructions
Preparation Steps
- Sift cake flour, cornstarch, baking powder, and salt into a large bowl and whisk together. Set aside.
- In the bowl of an electric mixer, beat butter, shortening, and granulated sugar on medium speed until very pale and fluffy, about 4 minutes. Scrape down the sides as needed.
- Add the egg and mix until combined, then add the egg white, vanilla extract, and almond extract and mix well.
- With the mixer running, slowly add dry ingredients and mix just until combined. Transfer the dough to an airtight container and refrigerate for 2 hours.
- Preheat oven to 375°F during the last 10 minutes of refrigeration.
- Scoop dough in 0.25 cup portions and roll into balls. Place dough balls on a floured surface, sprinkle lightly with flour, then flatten evenly to about 0.5 inch thickness to form a round cookie shape.
- Transfer flattened dough to a Silpat or buttered baking sheet. Bake for 9 to 11 minutes until edges are set. Cool on baking sheet for 5 minutes before transferring to a wire rack to cool completely.
- Frost the cooled cookies with vanilla frosting. Add sprinkles immediately after frosting if desired, as frosting sets quickly.
- To make Vanilla Frosting: Combine butter, powdered sugar, vanilla extract, and half-and-half in a bowl. Beat with an electric mixer until smooth and fluffy. Add food coloring if desired.