There are certain recipes that just feel like home. For me, that’s anything involving a luscious, decadent frosting that can transform a simple cake into something truly spectacular. And when I say spectacular, I mean the kind of dessert that makes everyone gasp, then immediately ask for a second slice. This Russian buttercream is that recipe. Forget those super-sweet, often grainy American frostings for a moment. This one? It’s in a league of its own. I first encountered it years ago at a local bakery, and honestly, I was intimidated. Buttercream made with cooked milk and sugar? It sounded complicated and frankly, a little bit weird. But oh, was I wrong! It’s surprisingly approachable, and once you get the hang of it, it’s incredibly stable and unbelievably delicious. If you’ve ever felt that same hesitation about trying a new frosting, let me be your guide. This Russian buttercream is truly a game-changer, and I can’t wait for you to experience it.
What is Russian buttercream?
So, what exactly is this magical Russian buttercream? Think of it as a sophisticated cousin to your classic buttercream. The “Russian” in the name refers to its method of preparation, which involves cooking a sugar syrup with milk or cream until it reaches a specific stage. This cooked mixture is then cooled and gradually incorporated into softened butter. It’s essentially a meringue-based buttercream, but without the egg whites! This cooked sugar-and-milk base is what gives it that incredibly smooth, silky texture and a less intensely sweet flavor profile compared to some other buttercreams. It’s rich, it’s creamy, and it holds its shape like a dream, making it perfect for decorating. It’s not heavy or greasy; instead, it has a light, airy quality that just melts in your mouth. It’s a delightful dance of sweet and creamy, and honestly, once you try it, you’ll understand why it’s a beloved classic for so many.
Why you’ll love this recipe?
Honestly, where do I even begin with why this Russian buttercream is my absolute go-to? First, the flavor is just unparalleled. It has this subtle, caramelized sweetness from the cooked milk and sugar, balanced perfectly by the rich butter. It’s not cloyingly sweet; it’s just perfectly, wonderfully sweet. Then there’s the texture – oh, that texture! It’s incredibly smooth, silky, and airy. It pipes beautifully, holds sharp edges, and feels so luxurious on your tongue. It’s miles away from a greasy, overly stiff buttercream. What I love most, though, is its versatility. This recipe is a lifesaver. Need to frost a cake for a last-minute party? This is your answer. Want to pipe intricate designs? It holds up beautifully. It’s also surprisingly cost-effective, using pretty standard pantry staples. I’ve found myself reaching for this Russian buttercream more times than I can count, whether it’s for a simple batch of cupcakes or a show-stopping layer cake. It’s consistently reliable, and it always impresses. I remember one time I needed to frost a cake for my daughter’s birthday and was running super late. This recipe saved the day because it’s so forgiving and whips up relatively quickly. It’s my secret weapon, and now I’m sharing it with you!
How do you make Russian Buttercream?
Quick Overview
Making this Russian buttercream is a two-part process: first, you’ll create a cooked milk and sugar syrup, and then you’ll whip that into softened butter. The key is patience and precise temperatures. Don’t rush the cooling of the syrup, and make sure your butter is at the right stage of softness. The result is a stable, gloriously smooth, and less sweet frosting that will redefine your baking game. It’s truly a testament to how simple ingredients can create something so extraordinary when treated with a little care.
Ingredients
For the Milk & Sugar Syrup:
You’ll need 1 cup of whole milk (you can try with 2% but whole milk gives the best richness and stability!), 1 3/4 cups of granulated sugar (this seems like a lot, but remember, it’s cooked down and balances out the butter), and 1/2 teaspoon of vanilla extract (or your favorite flavoring!). Using good quality vanilla makes a difference, trust me!
For the Buttercream Base:
This is where the magic happens! You’ll need 1 pound (4 sticks) of unsalted butter, softened to room temperature. This is crucial – too cold and it won’t emulsify; too soft and it can become greasy. Make sure it’s truly softened but not melted! I always take my butter out about 1-2 hours before I plan to start mixing, depending on how warm my kitchen is.
For Flavor & Stability (Optional but Recommended):
1/4 cup of powdered sugar (this adds a little extra stability and smoothness without making it too sweet), and 1-2 teaspoons of vanilla extract (or other flavorings like almond, lemon, or even a touch of coffee extract).
Step-by-Step Instructions
Step 1: Preheat & Prep Pan
This step is less about preheating and more about getting your syrup-making station ready. Grab a medium-sized, heavy-bottomed saucepan. This is important because it helps distribute heat evenly and prevents scorching. Make sure it’s clean and dry!
Step 2: Mix Dry Ingredients
In your saucepan, combine the granulated sugar and the whole milk. Give it a good whisk to ensure there are no clumps of sugar. This initial mix is just to get everything incorporated before we apply heat.
Step 3: Mix Wet Ingredients
Place the saucepan over medium heat. Stir constantly with a heatproof spatula or whisk until the sugar is completely dissolved and the milk is just beginning to simmer around the edges. You don’t want a rolling boil; just a gentle simmer. This is where the sugar starts to cook down and thicken slightly. Keep stirring to prevent a skin from forming or the milk from scorching on the bottom.
Step 4: Combine
Continue to cook the mixture, stirring occasionally, for about 10-15 minutes. You’re looking for the syrup to thicken to a consistency that coats the back of a spoon. You can also use a candy thermometer; you’re aiming for around 235-240°F (113-116°C). Once it reaches this stage, remove the pan from the heat immediately. Stir in the 1/2 teaspoon of vanilla extract. Let this syrup mixture cool down completely. This is non-negotiable! You can speed this up by transferring it to a heatproof bowl and refrigerating it, but make sure it’s completely cool before proceeding. I often make this syrup the day before and pop it in the fridge.
Step 5: Prepare Filling
While the syrup is cooling, make sure your butter is perfectly softened. You want it to yield to gentle pressure but not be greasy or oily. If it’s too cold, your buttercream might break. If it’s too warm, it’ll be soupy. In the bowl of a stand mixer fitted with the whisk attachment (or using a hand mixer), beat the softened butter on medium-high speed for about 5-7 minutes. You want it to become very pale, light, and fluffy. This is crucial for that airy texture.
Step 6: Layer & Swirl
Once the milk and sugar syrup is completely cool, slowly drizzle it into the beating butter, about a tablespoon at a time, while the mixer is running on low speed. Be patient here! It might look curdled or separated at first – don’t panic! This is totally normal. Keep adding the syrup slowly and letting it incorporate. As you add the syrup, the mixture will start to come together and become smoother and fluffier. Once all the syrup is added, increase the mixer speed to medium-high and beat for another 5-7 minutes. The buttercream should become thick, smooth, and gloriously creamy. Now, stir in the powdered sugar (if using) and the remaining vanilla extract on low speed until just combined, then beat on high for another minute.
Step 7: Bake
This step isn’t for baking the buttercream itself, but rather for ensuring it’s perfectly incorporated. If at any point your buttercream seems too soft, refrigerate the bowl for 10-15 minutes and then beat again. If it seems too stiff or curdled, gently warm the bowl over a double boiler for a few seconds, then beat again. The goal is a smooth, stable consistency that holds its shape.
Step 8: Cool & Glaze
Once your Russian buttercream reaches the desired consistency, it’s ready to use! If you’re not using it immediately, cover it tightly with plastic wrap, pressing the wrap directly onto the surface to prevent a skin from forming. It can be stored at room temperature for a few hours or in the refrigerator for up to a week. If refrigerated, let it soften at room temperature and re-whip briefly before using.
Step 9: Slice & Serve
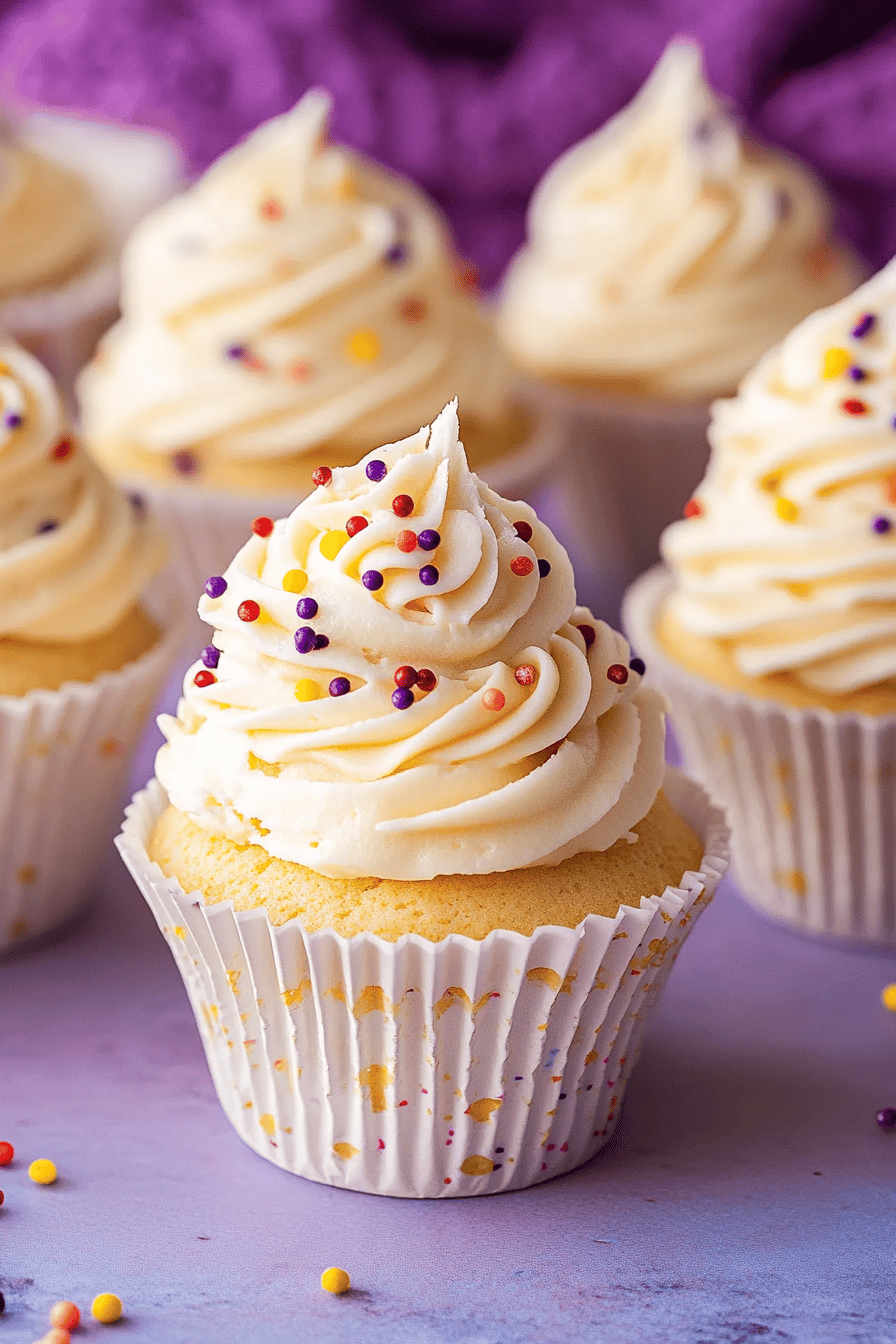
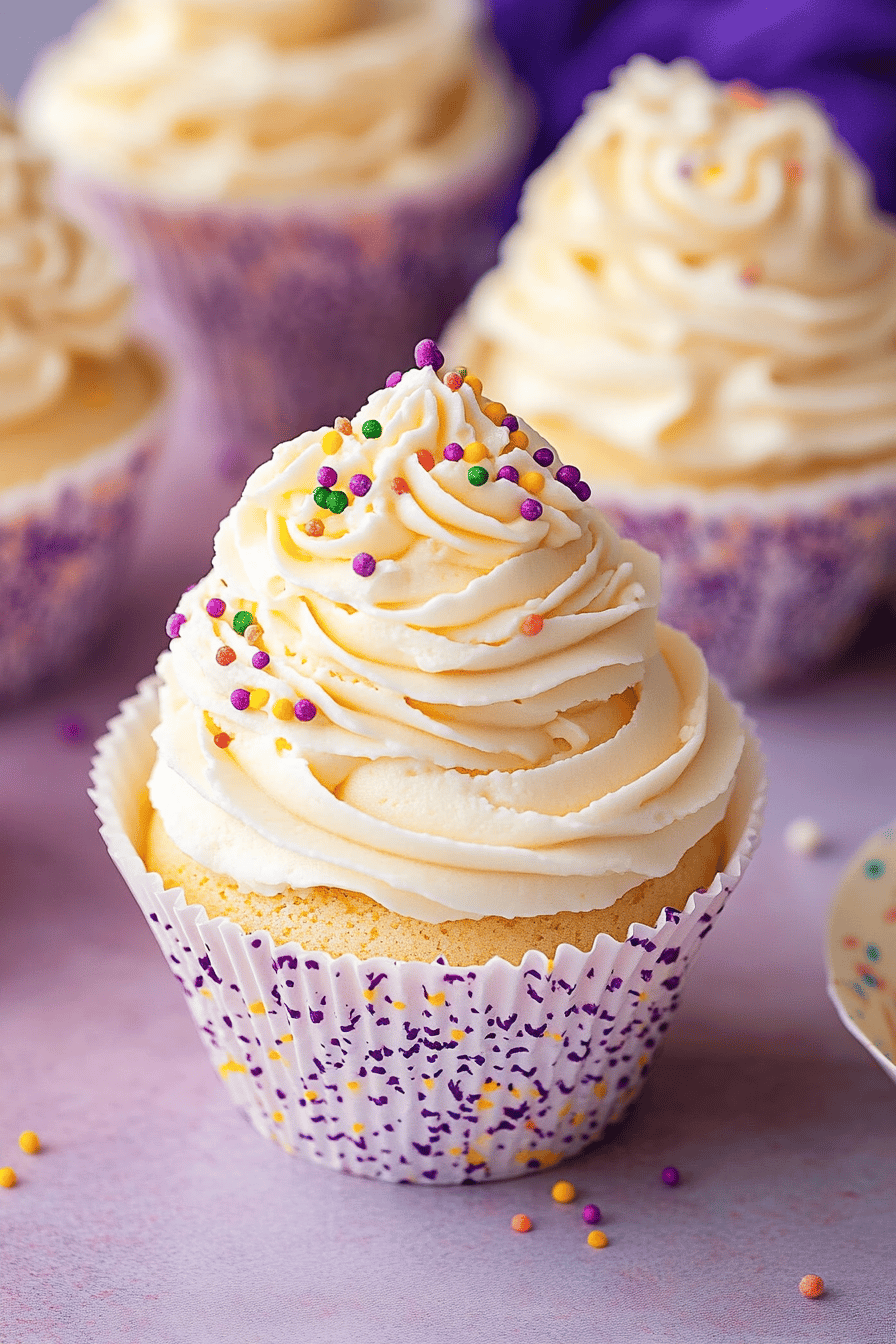
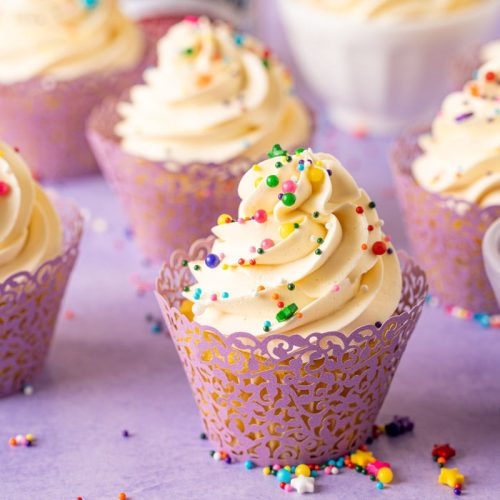
Use your beautiful Russian buttercream to frost cakes, cupcakes, cookies, or anything your heart desires! Pipe it, spread it, swirl it – it’s incredibly forgiving and versatile. The visual appeal is just as stunning as the taste.
What to Serve It With
This Russian buttercream is so versatile, it truly elevates anything it graces. For breakfast, imagine a swirl on a warm, freshly baked cinnamon roll or spread on a slice of buttery brioche toast. The subtle sweetness complements the comforting morning flavors without being overwhelming. For brunch, it’s absolutely divine dolloped on top of fluffy pancakes or waffles, perhaps with a scattering of fresh berries. Its elegance makes it feel special, even for a casual weekend gathering. As a dessert, well, it’s the star! It’s perfect on classic vanilla or chocolate cakes, but I also love it with a lemon or raspberry cake for a delightful flavor contrast. Don’t underestimate its power on simple Sugar Cookies; it transforms them into little works of art. And for those cozy snack moments, a small dollop on a brownie or even stirred into a mug of hot chocolate adds an unexpected touch of luxury. My kids absolutely adore it on simple vanilla cupcakes; they disappear in minutes whenever I make them. It’s the perfect treat when you want something sweet but don’t want to be weighed down by overly rich frosting.
Top Tips for Perfecting Your Russian Buttercream
I’ve made this Russian buttercream more times than I can count, and along the way, I’ve picked up a few tricks that make all the difference. Firstly, the milk and sugar syrup is key. Don’t rush the cooling process. If it’s too warm when you add it to the butter, it will melt the butter and create a greasy mess. I’ve learned to just be patient, or even better, make the syrup the day before. Speaking of butter, room temperature is your best friend here. It needs to be soft enough to beat into a pale, fluffy state, but not so soft that it’s greasy. I always test by pressing a finger into it; it should leave an indentation without feeling oily. If your buttercream looks curdled after adding the syrup, don’t fret! This is super common. Just keep beating. If it persists, pop the bowl in the fridge for 10-15 minutes and then beat again. It should come back together. Conversely, if it gets too soft, a short stint in the fridge works wonders. I also find that sifting your powdered sugar (if you use it) can help prevent any tiny lumps. For flavor variations, I’ve experimented a lot. A little bit of almond extract is divine, especially with vanilla cake. You can also add a touch of espresso powder to the syrup for a mocha twist, or even some finely grated citrus zest for a brighter note. The consistency is usually spot on after a good beating, but if you want it thicker for intricate piping, chilling it slightly and then re-whipping can help. Remember, it’s all about that emulsification, and a little bit of patience goes a very long way with this particular recipe. I learned early on that trying to rush it only led to frustration, so I now embrace the time it takes!
Storing and Reheating Tips
One of the best things about this Russian buttercream is how well it stores, which is a lifesaver for busy bakers like myself. If you’ve made it and won’t be using it immediately, it can sit at room temperature for a few hours if your kitchen isn’t too warm. For longer storage, cover it tightly with plastic wrap, making sure the wrap is directly touching the surface of the buttercream to prevent a skin from forming. In the refrigerator, it will keep beautifully for up to a week. When you’re ready to use it, just let it sit at room temperature for about 30-60 minutes, or until it’s softened enough to re-whip. I always give it a good few minutes of beating on medium speed with my stand mixer to bring it back to its light and fluffy glory. If it still seems a bit stiff, a quick warm-up over a double boiler for just a few seconds and then re-whipping usually does the trick. Freezing is also an option! Wrap it very securely in plastic wrap, then a layer of aluminum foil, and it should last in the freezer for up to 2-3 months. Thaw it in the refrigerator overnight, then bring it to room temperature and re-whip as you would with refrigerated buttercream. The key to keeping it fresh, no matter the storage method, is that tight covering to prevent air exposure. I usually add the glaze or any final flavorings *after* I’ve re-whipped it, just to ensure the freshest taste and texture.
Frequently Asked Questions
Final Thoughts
So there you have it, my friends! This Russian buttercream is more than just a frosting; it’s a little bit of kitchen magic. It’s that perfect balance of rich, creamy, and not-too-sweet that I’ve been searching for. I truly believe that once you try this recipe, you’ll fall head over heels in love with it, just like I have. It’s the kind of recipe that makes you feel like a pastry chef in your own home, and it’s surprisingly forgiving, even for beginners. If you’ve enjoyed making this, I highly recommend trying my [Link to another recipe, e.g., Classic Vanilla Cake] or my [Link to another recipe, e.g., Chocolate Ganache Frosting] for more delightful dessert creations. I’m so eager to hear about your experiences with this Russian buttercream! Did you try any fun flavor variations? How did it turn out? Please, share your thoughts, tips, and pictures in the comments below. Happy baking, and I can’t wait to see what you create!
Russian Buttercream
Ingredients
Main Ingredients
- 1 can sweetened condensed milk 14 ounce
- 1 cup unsalted butter softened
- 1 teaspoon vanilla extract
- 0.25 cup heavy cream
Instructions
Preparation Steps
- In a saucepan, combine the sweetened condensed milk and butter. Cook over low heat, stirring constantly, until the butter is melted and the mixture is smooth. Do not boil.
- Remove from heat and stir in the vanilla extract and heavy cream. Let the mixture cool completely to room temperature, then refrigerate until chilled but not solid.
- In a large bowl, beat the chilled mixture with an electric mixer on high speed until light and fluffy, about 5-7 minutes.
- Use immediately for frosting cakes or cupcakes.