You know those days? The ones where your to-do list is a mile long, the kids are underfoot, and the thought of making a complicated dinner just feels… impossible? Yeah, I’ve been there more times than I can count. That’s precisely when this zucchini quiche recipe becomes my absolute hero. It’s the kind of dish that smells like home, tastes like a comforting hug, and somehow, magically, makes everyone around the table happy. It’s not just a quiche; it’s a little slice of pure comfort, perfect for a lazy weekend brunch or a surprisingly elegant weeknight meal when you’re short on time. Honestly, it’s got that same soul-warming quality as a classic lasagna, but it’s so much lighter and quicker to pull together. This quiche recipe is truly my culinary secret weapon, and I’m so excited to share it with you!

What is a Zucchini Quiche?
So, what exactly *is* zucchini quiche? At its heart, it’s a savory tart, but don’t let the fancy word “tart” intimidate you! Think of it as a delicious, custardy filling nestled inside a flaky crust, packed with fresh, tender zucchini. It’s essentially a vehicle for pure deliciousness. We’re talking about a rich, creamy egg mixture, often laced with cheese and maybe a hint of garlic or herbs, all baked until golden and set. The zucchini adds this beautiful texture and a subtle sweetness that just melts in your mouth. It’s a far cry from a heavy casserole; this quiche feels light yet incredibly satisfying. It’s the kind of dish that looks impressive without requiring you to spend hours in the kitchen, making it perfect for when you want to impress without the stress.
Why you’ll love this recipe?
Honestly, there are so many reasons why this zucchini quiche recipe has earned a permanent spot in my recipe rotation, and I’m pretty sure it’ll become a favorite for you too. First off, the flavor is just out of this world. The zucchini, when baked just right, becomes incredibly tender and sweet, mingling beautifully with the creamy egg custard and any cheese you decide to add. It’s savory, comforting, and has a lightness that makes it perfect any time of day. And speaking of simplicity – this is where it truly shines. Even if you’re not typically a baker, you’ll find this quiche recipe surprisingly easy to whip up. The ingredients are mostly pantry staples, making it super budget-friendly, which is always a win in my book. What I love most, though, is its versatility. You can serve this warm or at room temperature, making it perfect for picnics, potlucks, or just a quick lunch. It’s also fantastic for using up those random bits of cheese or leftover cooked vegetables you might have hanging around. If you enjoyed my recipe for a simple frittata, you’re going to adore this quiche because it shares that same comforting, easy-going vibe but with a wonderfully flaky crust that just elevates everything. It’s genuinely a lifesaver on busy nights, and my kids actually ask for this quiche all the time – high praise in my household!
How do you make Zucchini Quiche?
Quick Overview
Making this delightful zucchini quiche is surprisingly straightforward! We’ll combine a simple, flaky crust (store-bought is totally fine if you’re in a pinch!), then fill it with a luscious mixture of eggs, cream, cheese, and of course, plenty of fresh zucchini. The magic happens in the oven, where everything bakes together into a tender, golden masterpiece. It’s one of those recipes that looks much fancier than it is, and the results are always incredibly rewarding. Don’t be intimidated by the baking process; I’ll walk you through every step!
Ingredients
For the Crust:
1 store-bought or homemade 9-inch Pie crust (or 1.5 cups all-purpose flour, 1/2 tsp salt, 1/2 cup
For the Filling:
2 cups grated zucchini (about 2 medium zucchinis, ends trimmed)
1 cup shredded Gruyère cheese (or cheddar, or a mix!)
1/2 cup chopped yellow onion (or shallots for a milder flavor)
2 tablespoons chopped fresh chives (or parsley, or a blend)
3 large eggs
1.5 cups heavy cream (or half-and-half for a lighter version, or even unsweetened almond milk – I tested this and it actually made it even creamier!)
1/2 teaspoon salt
1/4 teaspoon black pepper
Pinch of nutmeg (optional, but it really adds a lovely warmth)
For the Glaze (Optional, but highly recommended!):
1 tablespoon melted unsalted butter
1 teaspoon Dijon mustard
1/2 teaspoon honey (or maple syrup)
Step-by-Step Instructions
Step 1: Preheat & Prep Pan
First things first, let’s get that oven preheated to 375°F (190°C). If you’re using a store-bought crust, carefully unroll it and gently press it into a 9-inch pie plate. If you’re making your own, prepare it according to your favorite recipe and press it into the pie plate. Don’t forget to prick the bottom of the crust all over with a fork – this helps prevent it from puffing up too much while it bakes. For an extra-flaky crust, you can blind bake it for about 10-15 minutes until it’s lightly golden. This step isn’t strictly necessary, but it’s a little trick that makes a big difference!
Step 2: Mix Dry Ingredients
In a medium bowl, combine your grated zucchini and chopped onion. Now, here’s a crucial step for a perfectly textured quiche: squeeze out as much moisture as possible from the zucchini. You can do this by wrapping it in a clean kitchen towel or cheesecloth and giving it a good squeeze over the sink. Nobody wants a watery quiche! Once squeezed, add the shredded cheese and chopped fresh chives (or your chosen herbs) to the zucchini and onion mixture. Give it all a good stir to combine. This mixture will form the delicious heart of our quiche.
Step 3: Mix Wet Ingredients
In a separate, larger bowl, whisk together the eggs until they’re nice and frothy. Then, slowly pour in the heavy cream (or your chosen liquid), salt, pepper, and that little pinch of nutmeg if you’re using it. Whisk everything together until it’s well combined and smooth. You want a nice, homogenous mixture that will create that signature creamy custard texture when baked.
Step 4: Combine
Now, it’s time to bring our wet and dry ingredients together. Pour the egg and cream mixture over the zucchini, cheese, and onion mixture in the bowl. Gently fold everything together with a spatula or wooden spoon until just combined. Be careful not to overmix here; we’re just aiming to evenly distribute everything. Overmixing can sometimes lead to a tougher crust or a less tender filling, and we definitely don’t want that!
Step 5: Prepare Filling
This step is really about ensuring your zucchini is ready to go. As I mentioned in Step 2, squeezing out the excess moisture is key. If you skip this, your quiche can end up watery and the crust might get soggy. You can use your hands, a clean kitchen towel, or even cheesecloth. The drier the zucchini, the better the texture of your finished quiche will be. The cheese and onion add lovely savory notes that complement the mildness of the zucchini.
Step 6: Layer & Swirl
Pour the combined filling mixture evenly into your prepared pie crust. Don’t worry if it looks quite full; it will settle down as it bakes. You can give the top a gentle shake to ensure everything is spread out evenly. If you want to get fancy, you can even use a skewer to create some subtle swirls on top before baking, but honestly, it’s delicious no matter what. The focus is on getting that lovely, rich custard filled with all those yummy bits.
Step 7: Bake
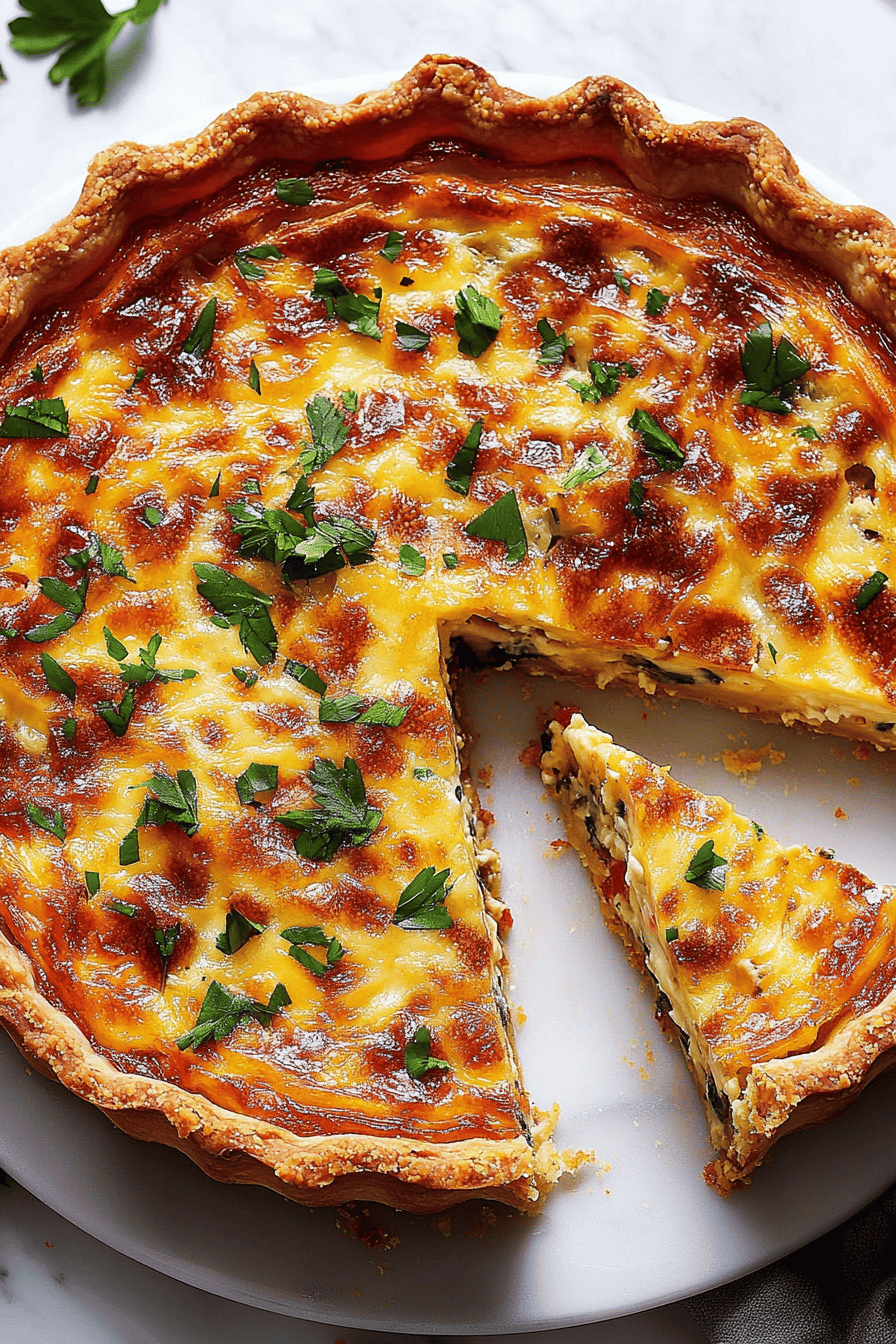
Carefully place your quiche in the preheated oven. Bake for 35-45 minutes, or until the center is set and the top is golden brown. You can test for doneness by gently shaking the pie plate; the center should only jiggle slightly, or you can insert a knife near the center – it should come out clean. If the crust starts to brown too quickly, you can always loosely tent the edges with aluminum foil.
Step 8: Cool & Glaze
Once baked to perfection, carefully remove the quiche from the oven and let it cool on a wire rack for at least 10-15 minutes. This resting period is super important as it allows the filling to fully set. While it’s cooling, whisk together the melted butter, Dijon mustard, and honey for the glaze. Once the quiche has rested a bit, brush this lovely glaze over the top. It adds a subtle sheen and a hint of extra flavor that’s absolutely divine. This glaze is optional but I think it really takes the quiche to the next level.
Step 9: Slice & Serve
After the glaze has been applied, let the quiche cool for another 5-10 minutes. Then, slice it into wedges using a sharp knife. Serve it warm, and be prepared for happy sighs and requests for seconds! This quiche is absolutely perfect as is, but feel free to add a sprinkle of fresh chives or parsley on top for an extra pop of color and freshness.
What to Serve It With
This zucchini quiche recipe is wonderfully versatile, making it perfect for any meal and any occasion! For a classic breakfast, I love pairing it with a simple cup of good quality coffee and maybe some fresh berries on the side. The richness of the quiche is perfectly balanced by a simple brew. If you’re planning a weekend brunch, this quiche is a star. I like to serve it alongside a light green salad with a lemon vinaigrette and some crusty bread. For a slightly more elegant presentation, you can cut it into smaller, appetizer-sized portions and serve it with a dollop of crème fraîche or sour cream. And you know what? This quiche is also surprisingly delicious as a light dessert! It’s perfect when you’re craving something sweet at 10pm but don’t want to bake a whole cake. Just a small slice, perhaps with a drizzle of extra honey, is just heavenly. On cozy nights in, it’s wonderful served with a side of tomato soup or a simple Baked Potato. My family also loves it on cooler evenings, with some roasted asparagus or a simple side of steamed green beans. It’s just one of those adaptable dishes that fits right into whatever meal you’re planning.
Top Tips for Perfecting Your Zucchini Quiche
Over the years of making this recipe countless times, I’ve picked up a few little tricks that I think really help elevate it from good to absolutely spectacular. First, about that zucchini prep: squeezing out the moisture is non-negotiable! Seriously, I’ve made it without doing it thoroughly, and the result is a watery, less-than-ideal quiche. You want to aim for dry, grated zucchini. I usually grate mine on the large holes of a box grater, and then I wrap it all up in a clean kitchen towel and give it a really good, firm squeeze over the sink. It might seem like a lot of effort, but trust me, it’s worth every second. When it comes to mixing, the key is gentle. You don’t want to overwork the egg mixture, as this can lead to a tough texture. Just fold until everything is nicely incorporated. For that beautiful swirl on top, don’t go crazy with the skewer; a few gentle passes are all you need to create a lovely marbled effect. If you’re looking to swap ingredients, I’ve experimented a lot! For the cheese, Gruyère is fantastic for its nutty flavor, but a sharp cheddar or even a Monterey Jack works beautifully. If you want to make it dairy-free, you can use a good quality unsweetened plant-based milk and a dairy-free shredded cheese alternative, though the texture might be slightly different. I’ve also tried adding other vegetables like finely chopped bell peppers or spinach (make sure to squeeze water out of spinach too!), and they’ve all turned out wonderfully. For baking, really pay attention to your oven. Ovens can vary so much, so use the visual cues – golden brown top, set center – rather than just relying on the timer. And that glaze? While it’s optional, it adds a lovely subtle flavor and shine. Don’t skip it if you can help it! I’ve found that using Dijon mustard gives it a nice tang that cuts through the richness perfectly.
Storing and Reheating Tips
One of the things I adore about this quiche recipe is how well it keeps, making it perfect for meal prep. If you have leftovers and need to store them, let the quiche cool completely on a wire rack. Once it’s at room temperature, you can cover it tightly with plastic wrap or transfer it to an airtight container. It’ll stay fresh in the refrigerator for about 3-4 days. I find that keeping it whole and slicing as needed helps maintain its quality for longer. Reheating is super simple too! For a single slice, the microwave is usually my go-to for speed – just a minute or two, until warmed through. If you have more time and want to regain some of that lovely crispness from the crust, I highly recommend popping it in a 350°F (175°C) oven for about 10-15 minutes, or until heated through and the crust is golden again. It’s like having a freshly baked slice! I don’t typically recommend leaving quiche at room temperature for more than two hours for food safety reasons, but it’s usually gone by then anyway! Freezing isn’t something I do often with this quiche, as the texture of the custard can change a bit upon thawing, but if you must, let it cool completely, wrap it very tightly in plastic wrap and then in foil, and freeze for up to 1-2 months. Thaw it in the refrigerator overnight before reheating. As for the glaze, I usually apply it right before serving the first time, but if you’re storing leftovers, you can always re-apply a fresh glaze after reheating for that extra touch.
Frequently Asked Questions
Final Thoughts
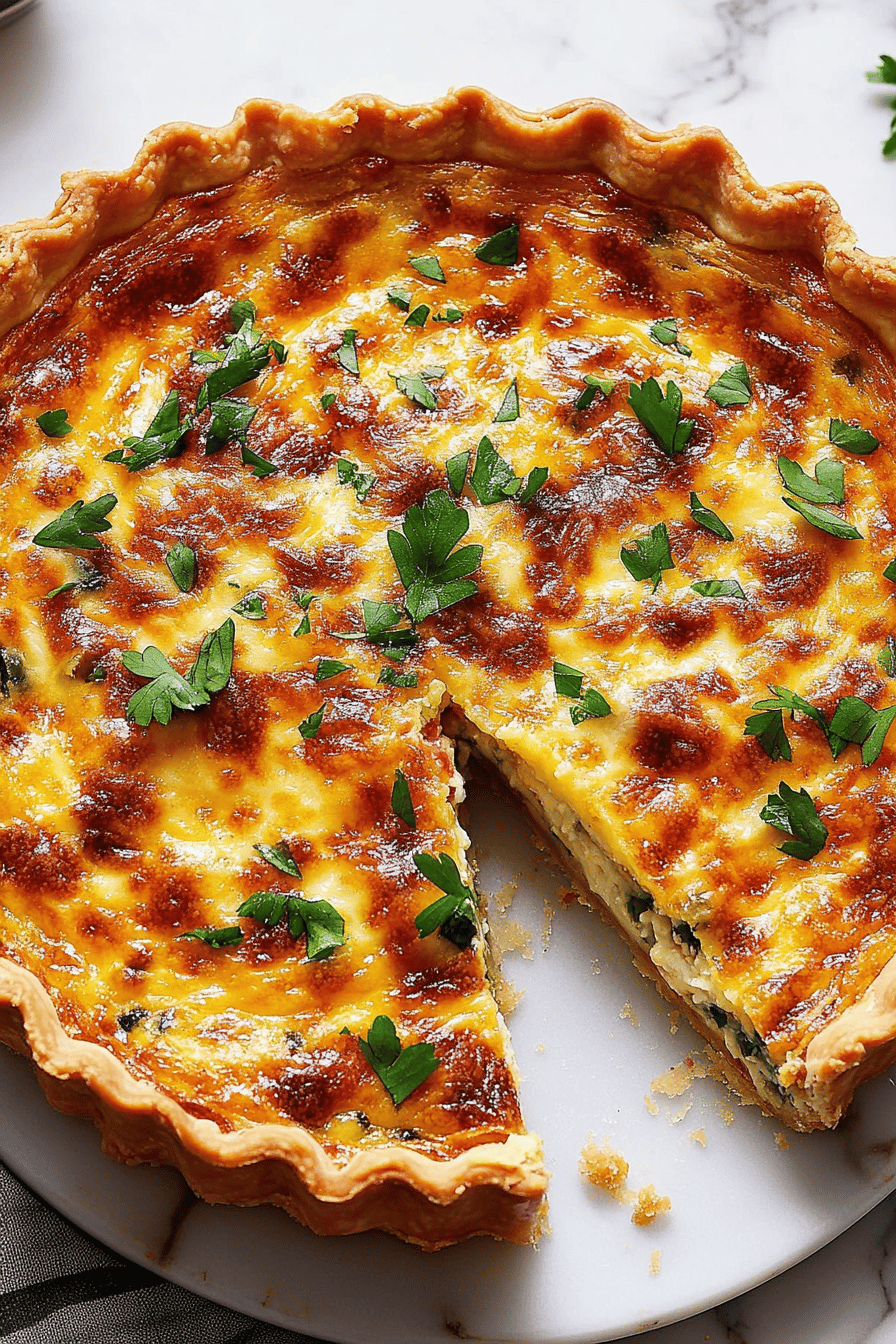
So there you have it – my absolute favorite zucchini quiche recipe! It’s the kind of dish that’s become a staple in my kitchen, a true comfort food that’s both easy to make and incredibly satisfying. It’s proof that you don’t need fancy ingredients or complicated techniques to create something truly delicious and impressive. I really hope you give this a try, and if you do, please let me know how it turns out! I’d love to hear your variations or any family traditions you add to it. You can leave a comment below or tag me in your photos on social media – I always love seeing what you wonderful people are cooking up. If you enjoyed this recipe, you might also love my rustic savory tart or my easy vegetable frittata recipe for more quick and delicious meal ideas. Happy baking, and may your kitchen always be filled with the wonderful aroma of delicious food!

Classic Quiche Lorraine
Ingredients
Crust
- 1.5 cup all-purpose flour
- 0.5 teaspoon salt
- 0.5 cup unsalted butter cold, cut into cubes
- 0.25 cup ice water
Filling
- 6 ounce bacon cooked and crumbled
- 1 cup Gruyère cheese shredded
- 3 large eggs
- 1.5 cup heavy cream
- 0.5 teaspoon salt
- 0.25 teaspoon black pepper
- 0.125 teaspoon nutmeg freshly grated
Instructions
Preparation Steps
- For the crust: In a large bowl, whisk together flour and salt. Cut in the cold butter using a pastry blender or your fingertips until the mixture resembles coarse crumbs with some pea-sized pieces of butter remaining.
- Gradually add ice water, 1 tablespoon at a time, mixing until the dough just comes together. Be careful not to overmix.
- Gather the dough into a ball, flatten it into a disc, wrap it in plastic wrap, and refrigerate for at least 30 minutes.
- Preheat oven to 375°F (190°C). On a lightly floured surface, roll out the dough into a 12-inch circle. Carefully transfer the dough to a 9-inch pie plate. Trim and crimp the edges.
- Line the pie crust with parchment paper and fill with pie weights or dried beans. Bake for 15 minutes, then remove the parchment paper and weights and bake for another 5-7 minutes, or until lightly golden.
- For the filling: Scatter the crumbled bacon and shredded Gruyère cheese evenly over the bottom of the pre-baked pie crust.
- In a medium bowl, whisk together the eggs, heavy cream, salt, pepper, and nutmeg until well combined.
- Pour the egg mixture over the bacon and cheese in the pie crust.
- Bake for 30-35 minutes, or until the center is set and the top is golden brown. If the crust edges start to brown too quickly, cover them with foil.
- Let the quiche cool for at least 10 minutes before slicing and serving.

