You know those recipes that just feel like a warm hug? The ones you can whip up without even looking at the instructions because you’ve made them so many times? For me, that’s quiche Lorraine. It’s not just a dish; it’s a memory. I remember my Grandma making it every Sunday, the aroma filling her tiny kitchen and drawing us all in. It’s that perfect balance of creamy, savory, and just a touch of richness that makes it absolutely irresistible. Honestly, when I’m craving something comforting but don’t want to spend hours in the kitchen, this quiche lorraine is my absolute go-to. It’s so much more satisfying and impressive than just a simple omelet, and dare I say, even better than some of those fancy brunch pastries you might find at a cafe. This recipe has truly stood the test of time in my family, and I’m so excited to share it with you.

What is Quiche Lorraine?
So, what exactly is this magical dish we call quiche Lorraine? At its heart, it’s a savory tart, an open-faced pie if you will, originating from the Lorraine region of France. The name itself, “Lorraine,” tells you where it all began! The classic version is wonderfully simple, featuring a rich custard filling made with eggs and cream, studded with smoky bacon or lardons, and baked in a buttery pastry crust. Think of it as a sophisticated, yet utterly comforting, egg bake. It’s not overly complicated, but the flavors are just divine. The beauty of quiche Lorraine lies in its delicious simplicity; it doesn’t need a ton of fussy ingredients to taste incredible. It’s the kind of dish that feels special enough for a weekend brunch but is also easy enough for a weeknight dinner when you need something satisfying and quick.
Why you’ll love this recipe?
There are so many reasons why I keep coming back to this quiche Lorraine recipe, and I just know you’ll fall in love with it too. First off, the flavor is absolutely unparalleled. That creamy, rich custard, infused with the savory goodness of smoky bacon, all nestled in a flaky, buttery crust? It’s pure culinary bliss. Every bite is a perfect harmony of textures and tastes. And don’t even get me started on the aroma that fills your kitchen while it’s baking – it’s truly intoxicating! Secondly, and this is a big one for me, it’s surprisingly simple to make. Even if you’re a beginner baker, you can totally nail this. The steps are straightforward, and I’ve included all my little tips and tricks to make sure it turns out perfectly every single time. It’s a lifesaver on busy mornings when you want something impressive to serve or when unexpected guests pop by. It’s also incredibly cost-effective. Most of the ingredients are pantry staples, making it a budget-friendly option that still feels luxurious. And the versatility! You can serve this quiche Lorraine for breakfast, lunch, dinner, or even as a delightful appetizer. It’s wonderful served warm, at room temperature, or even cold the next day. It’s a recipe that truly works for any occasion. What I love most about this particular recipe is that it balances tradition with ease, ensuring you get that authentic, comforting taste without any unnecessary stress.
How do you make a quiche Lorraine?
Quick Overview
Making this quiche Lorraine is a breeze! We’ll start by preparing a simple yet flaky pastry crust (or using a store-bought one to save even more time). Then, we’ll mix up a luscious, creamy custard with eggs, cream, and a hint of nutmeg. This gets poured over crispy bacon pieces baked right into the crust. Finally, we bake it until it’s golden, puffed, and utterly irresistible. It’s a process that’s as enjoyable as it is rewarding, and the result is always spectacular. You’ll be amazed at how something so simple can taste so incredibly rich and satisfying.
Ingredients
For the Pastry Crust: What is the recipe?
1 ¼ cups all-purpose flour (plus more for dusting)
½ teaspoon salt
½ cup (1 stick) unsalted butter, cold and cubed
3-4 tablespoons ice water
For the Filling:
6 ounces thick-cut bacon, diced
3 large eggs
1 ½ cups heavy cream (or a mix of heavy cream and whole milk for a slightly lighter version)
¼ teaspoon freshly grated nutmeg
Salt and freshly ground black pepper to taste
For the Optional Glaze (for that extra shine!):
1 egg yolk
1 tablespoon milk or cream

Step-by-Step Instructions
Step 1: Preheat & Prep Pan
First things first, let’s get our oven preheated to 375°F (190°C). This ensures it’s nice and hot when our quiche is ready to go in, helping to create that beautiful golden crust. For the pastry, you’ll want a 9-inch pie plate. I always lightly grease mine, even if it’s non-stick, just for good measure. If you’re making your own crust, you’ll roll it out to about a 12-inch circle and gently press it into the pie plate, trimming any excess overhang. Pricking the bottom of the crust all over with a fork is a crucial step to prevent it from puffing up too much while baking. We call this “docking,” and it’s a little trick that makes a big difference!
Step 2: Mix Dry Ingredients
If you’re making your pastry from scratch, this is where we start. In a medium bowl, whisk together the flour and salt. This ensures everything is evenly distributed. It sounds simple, but proper mixing of the dry ingredients is key to a tender crust. You want to make sure that salt is really worked into the flour.
Step 3: Mix Wet Ingredients
Now for the richness! In a separate bowl, whisk together the eggs, heavy cream, nutmeg, salt, and pepper. I like to use freshly grated nutmeg because it has a brighter, more intense flavor than pre-ground. Season generously with salt and pepper – the bacon adds saltiness, but the custard needs its own seasoning to truly shine. Make sure everything is thoroughly combined, but don’t over-whisk, as we don’t want to incorporate too much air. The mixture should be smooth and a lovely pale yellow.
Step 4: Combine
This step is for making the pastry dough if you’re going the homemade route. Add the cold, cubed butter to the flour mixture. You can use a pastry blender, your fingertips, or even a food processor here. The goal is to cut the butter into the flour until it resembles coarse crumbs with some pea-sized pieces of butter still visible. These little butter pockets are what create that wonderful flakiness in the crust! Then, gradually add the ice water, one tablespoon at a time, mixing just until the dough comes together. Be careful not to overwork the dough, or it will become tough.
Step 5: Prepare Filling
Crisp up that bacon! Cook the diced bacon in a skillet over medium heat until it’s nicely browned and crispy. Drain it well on paper towels to remove excess grease. This step is important for two reasons: it makes the bacon delicious and prevents a greasy quiche. Once drained, scatter the crispy bacon evenly over the bottom of your prepared Pie crust.
Step 6: Layer & Swirl
Now for the magic! Carefully pour the creamy egg and cream mixture over the bacon in the pie crust. Make sure to distribute it evenly. If you’re feeling fancy and want that beautiful swirl effect you sometimes see in professional quiches, you can gently swirl a toothpick or skewer through the custard a few times. Don’t go crazy with it, though; a subtle swirl is often best. If you’re using the optional glaze, whisk the egg yolk and milk together in a small bowl. You can brush this lightly around the edge of the crust right now for a beautiful golden finish after baking.
Step 7: Bake
Time to bake! Place the quiche in the preheated oven. Bake for about 35-45 minutes, or until the center is set and the top is golden brown and slightly puffed. To test for doneness, you can gently jiggle the pan – the edges should be set, and the center should only have a slight wobble. A knife inserted near the center should come out clean. If the crust starts to brown too quickly, you can loosely tent it with foil.
Step 8: Cool & Glaze
This is perhaps the hardest part – waiting! Let the quiche cool on a wire rack for at least 10-15 minutes before slicing. This allows the custard to fully set. If you opted for the egg wash glaze, it will have done its work during baking, giving you that lovely sheen. If you didn’t do the egg wash, you can brush a tiny bit of melted butter over the top right after it comes out of the oven for a subtle shine.
Step 9: Slice & Serve
Once cooled slightly, slice into wedges and serve immediately. The warm, creamy interior with the crisp bacon and tender crust is just heavenly. It smells amazing, looks beautiful, and tastes even better. Enjoy your delicious quiche Lorraine!
What to Serve It With
This quiche Lorraine is so versatile, it can really shine at any meal. For a relaxed breakfast, I love pairing a slice with a perfectly brewed cup of coffee and maybe a small side of fresh berries. The richness of the quiche is beautifully balanced by the bright, fresh fruit. If you’re planning a more elaborate brunch, it’s the star of the show! Serve it with a crisp green salad dressed with a light vinaigrette – think simple mixed greens, maybe some cherry tomatoes, and a zesty lemon dressing. A side of roasted potatoes or some crusty bread for soaking up any extra custard also works wonders. For a delightful dessert option, especially if you’ve made a slightly sweeter version (though this classic Lorraine isn’t sweet, some people adapt it!), a light fruit salad or a dollop of whipped cream can be lovely. And for those cozy, casual snack times when you just need something comforting, a generous slice with a glass of crisp white wine or even a refreshing sparkling cider is pure bliss. My kids especially love it when I serve it with some simple steamed Green beans – they say it makes them feel very grown up!
Top Tips for Perfecting Your Quiche Lorraine
Over the years, I’ve picked up a few little tricks that I think really elevate this quiche Lorraine. For the bacon, I always stress draining it really well. Greasy bacon makes for a greasy quiche, and we definitely don’t want that! I like to cook it until it’s extra crispy because it holds up better in the custard. When it comes to the custard itself, the ratio of eggs to cream is crucial. Too many eggs, and it can become rubbery; too much cream, and it might not set. I’ve found that 3 eggs to 1.5 cups of cream is the sweet spot for that perfect, creamy, just-set texture. And don’t skip the nutmeg! It’s a subtle addition, but it really adds a warmth and complexity to the flavor that you just can’t get from anything else. If your crust tends to shrink or puff up too much, try “blind baking” it for about 10-15 minutes before adding the filling. This means baking the crust partially empty, perhaps with pie weights or dried beans inside, to help it set. For ingredient swaps, if you’re not a fan of bacon, pancetta is a fantastic substitute, or even some sautéed mushrooms and onions can make a delicious vegetarian version. For baking, I always recommend placing the quiche on a baking sheet. This catches any potential drips and makes it easier to get in and out of the oven. Plus, it helps with even baking. If you notice the top browning too quickly, just loosely tent it with aluminum foil. It’s all about watching your oven, as they can be so different!
Storing and Reheating Tips
This quiche Lorraine is actually fantastic made ahead of time, which is a huge bonus! Once it’s completely cooled, you can store it at room temperature for up to two hours. For longer storage, wrap it tightly in plastic wrap or place it in an airtight container and refrigerate for up to 3-4 days. It holds its quality really well this way. If you want to freeze it, let it cool completely, then wrap it very securely in plastic wrap followed by a layer of aluminum foil. It can stay frozen for about 1-2 months. To reheat, the best way is to place a slice (or the whole thing, if it’s still whole) in a 350°F (175°C) oven for about 10-15 minutes for individual slices, or 20-30 minutes for a larger piece, until warmed through. Microwaving can work in a pinch, but you might lose some of that lovely crispness of the crust. If you’ve frozen it, thaw it in the refrigerator overnight before reheating. I haven’t found a need for a glaze after baking for storage, but if you wanted to add a fresh shine before serving, a tiny bit of melted butter brushed on top after reheating works wonders.
Frequently Asked Questions
Final Thoughts
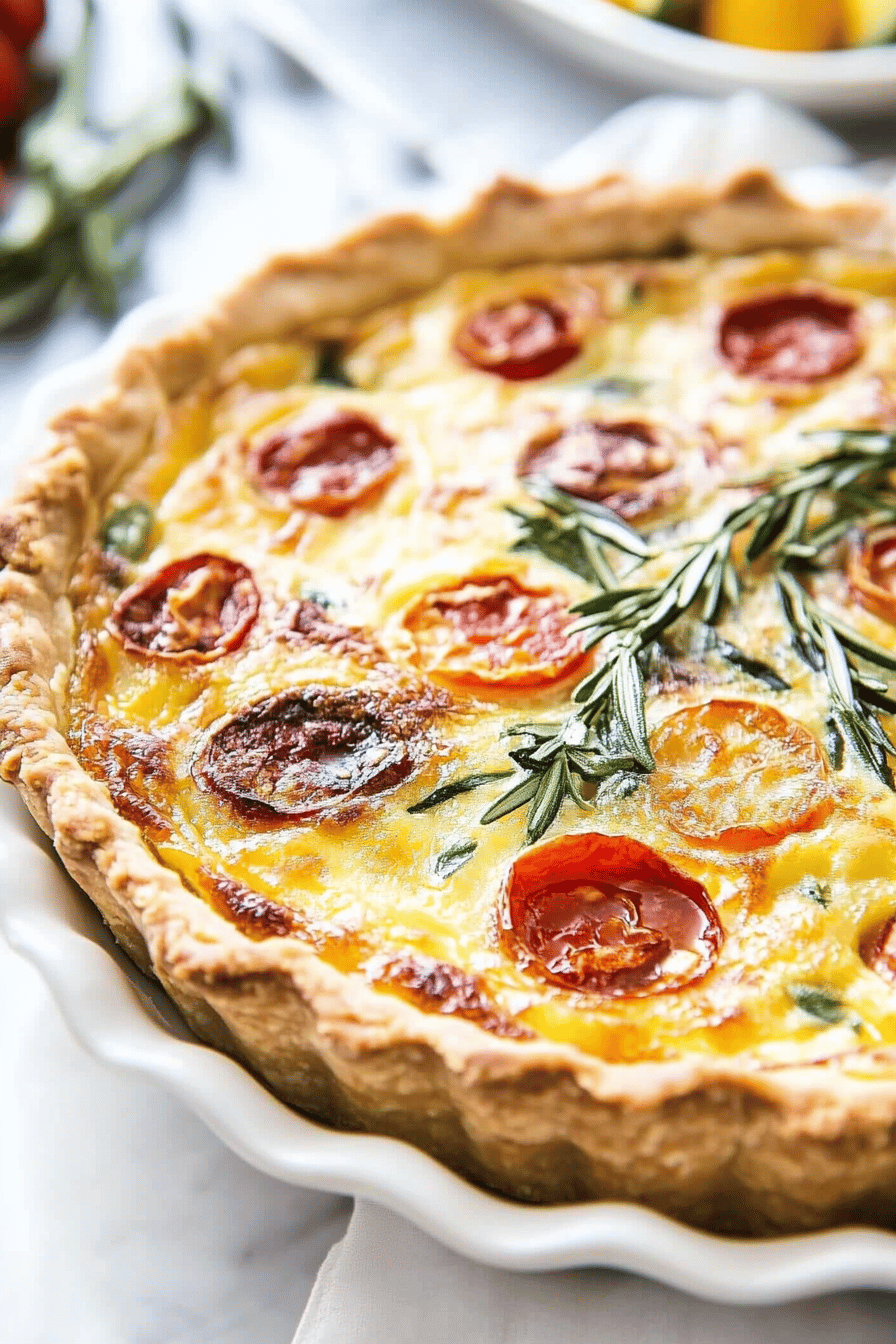
So there you have it – my beloved Quiche Lorraine! It’s more than just a recipe to me; it’s a taste of home, a reminder of happy family gatherings, and proof that simple ingredients can create something truly spectacular. The combination of crispy bacon, creamy custard, and a buttery crust is just unbeatable. It’s the kind of dish that brings people together, and I can’t wait for you to experience that same warmth and deliciousness in your own kitchen. If you love comforting, savory bakes, you might also enjoy my recipe for [Link to another related recipe, e.g., Savory Scones] or my [Link to another related recipe, e.g., French onion soup] – they have that same cozy, satisfying vibe. I truly hope you give this Quiche Lorraine a try. Please let me know in the comments below how yours turned out, what variations you tried, and any tips you discovered! I love hearing from you all. Happy baking, and enjoy every delicious bite!

Quiche Lorraine
Ingredients
For the Crust
- 1.5 cups all-purpose flour
- 0.5 teaspoon salt
- 0.5 cup unsalted butter cold, cut into cubes
For the Filling
- 6 ounces bacon chopped
- 1 medium onion finely chopped
- 3 large eggs
- 1.5 cups heavy cream
- 0.5 teaspoon salt
- 0.25 teaspoon black pepper
- 0.5 teaspoon nutmeg freshly grated
- 1 cup Gruyère cheese shredded
Instructions
Preparation Steps
- For the crust: In a bowl, whisk together flour and salt. Cut in cold butter with a pastry blender or your fingertips until the mixture resembles coarse crumbs.
- Add 2-3 tablespoons of ice water, one tablespoon at a time, mixing until the dough just comes together. Shape into a disc, wrap in plastic wrap, and refrigerate for at least 30 minutes.
- Preheat oven to 375°F (190°C). On a lightly floured surface, roll out the dough into a 12-inch circle. Carefully transfer to a 9-inch pie plate.
- Trim and crimp the edges. Prick the bottom of the crust with a fork.
- Line the crust with parchment paper and fill with pie weights or dried beans. Bake for 15 minutes. Remove parchment paper and weights, and bake for another 5-7 minutes, until lightly golden.
- For the filling: Cook bacon in a skillet over medium heat until crispy. Remove bacon with a slotted spoon and drain on paper towels. Leave about 1 tablespoon of bacon drippings in the skillet.
- Add chopped onion to the skillet and cook until softened, about 5 minutes. Remove from heat.
- In a medium bowl, whisk together eggs, heavy cream, salt, pepper, and nutmeg.
- Scatter the cooked bacon and sautéed onion over the bottom of the partially baked crust. Sprinkle with shredded Gruyère cheese.
- Pour the egg mixture evenly over the bacon, onion, and cheese.
- Bake for 30-35 minutes, or until the center is set and the top is golden brown. Let stand for 10 minutes before slicing and serving.