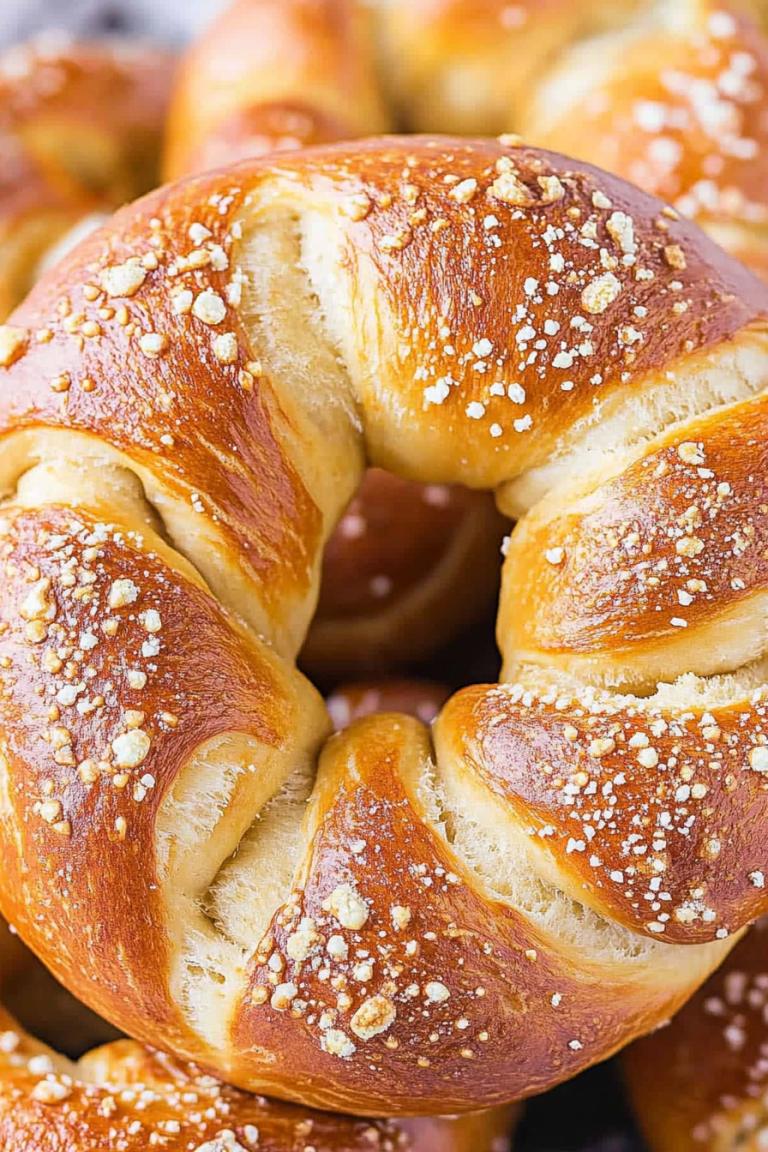
Oh, you guys! I am SO excited to share this recipe with you today. It’s one of those things that just feels like a warm hug in food form. You know those days when you just need something ridiculously delicious but also super comforting? That’s where these pretzel bites come in. They’re chewy, they’re salty (or sweet, depending on how you roll!), and honestly, they’re surprisingly simple to whip up. I always think of them as the bite-sized cousin to a giant, warm pretzel from a ballpark, but you can make them right in your own kitchen. My kids practically beg for these, and I’m not going to lie, neither can I resist when they come fresh out of the oven. Forget those fancy desserts for a minute; these little wonders are pure, unadulterated joy.
What are pretzel bites?
So, what exactly *are* pretzel bites? Think of them as the most adorable, snackable version of a classic soft pretzel. Instead of one big, twisty pretzel, you get a whole batch of small, chewy, doughy pieces that are just begging to be dipped into something delicious. The name kind of says it all, right? They’re literally the little “bites” of pretzel dough that are baked to chewy perfection. We’re talking that signature pretzel flavor, a slightly crisp exterior, and that wonderfully soft, slightly doughy interior. They’re essentially pure snacking gold, perfect for parties, movie nights, or honestly, just whenever that craving strikes. They don’t have the same kind of intricate twist as a full-sized pretzel, making them even easier to devour. It’s all about those irresistible little nuggets of doughy goodness.
Why you’ll love this recipe?
Why am I obsessed with pretzel bites?flavor is just out of this world. That classic pretzel taste, that little bit of malty sweetness from the dough, and that sprinkle of coarse salt on top – it’s a symphony for your taste buds. Then there’s the simplicity. I know baking bread or pretzels can sometimes feel daunting, but honestly, this recipe is a lifesaver. The dough comes together so easily, and shaping the bites is way less fussy than trying to get a perfect pretzel twist. It’s incredibly forgiving, which is a huge plus in my book. And let’s talk about Cost-efficiency: What is the best way to measure cost-efficiency?. Most of the ingredients are pantry staples, meaning you can whip these up without breaking the bank. It’s such a budget-friendly way to get a seriously impressive treat. The versatility is another huge win. You can go classic savory with just salt, or get creative with toppings like cinnamon sugar, everything bagel seasoning, or even a Garlic Herb butter. They’re perfect for pretty much any occasion. What I love most about this recipe, though, is that it taps into that nostalgic feeling of comfort food that just makes everything feel a little bit better. It’s the kind of thing that makes your house smell amazing and brings everyone to the kitchen, begging for more.
How to Make Pretzel Bites
Quick Overview
Making these delicious pretzel bites is a straightforward process that involves mixing a simple dough, letting it rise briefly, shaping it into small pieces, boiling them in a baking soda bath for that signature chew and color, and then baking them to golden perfection. It might sound like a few steps, but each one is super easy and yields incredibly rewarding results. You’ll be amazed at how quickly you can go from basic ingredients to a batch of warm, chewy pretzel bites that taste like they came straight from a bakery. The baking soda bath is the secret weapon here, giving them that characteristic texture and flavor that makes them utterly irresistible.
Ingredients
For the Main Batter:
1 ½ cups warm water (around 105-115°F – not too hot, not too cold!)
2 ¼ teaspoons active dry yeast (that’s one standard packet)
1 tablespoon granulated sugar (this feeds the yeast)
4 cups all-purpose flour, plus more for dusting
1 teaspoon salt
2 tablespoons unsalted butter, melted
For the Boiling Bath:
8 cups water
½ cup baking soda
For the Topping (Classic Salt):
1 large egg, beaten with 1 tablespoon water (for egg wash)
Coarse pretzel salt (or flaky sea salt)
Step-by-Step Instructions
Step 1: Preheat & Prep Pan
First things first, get your oven preheating to a nice, hot 450°F (230°C). While that’s happening, grab a couple of baking sheets and line them with parchment paper. This is super important for preventing sticking and making cleanup a breeze. Parchment paper is your best friend here, trust me.
Step 2: Mix Dry Ingredients
In a large mixing bowl, whisk together your 4 cups of all-purpose flour and 1 teaspoon of salt. Make sure they’re nicely combined. This ensures the salt is evenly distributed throughout the dough, so you don’t get any surprisingly salty bites.
Step 3: Mix Wet Ingredients
In a separate small bowl or liquid measuring cup, combine the warm water, active dry yeast, and granulated sugar. Give it a gentle stir and let it sit for about 5-10 minutes. You want to see it get nice and foamy on top – that’s your sign that the yeast is alive and ready to work its magic! If it doesn’t foam, your yeast might be old, and you’ll need to start over with fresh yeast.
Step 4: Combine
Pour the foamy yeast mixture into the bowl with the dry ingredients. Add the 2 tablespoons of melted butter. Now, using a sturdy spoon or a dough whisk, start mixing everything together until a shaggy dough forms. Turn the dough out onto a lightly floured surface and knead for about 5-7 minutes, until it’s smooth and elastic. It should feel slightly tacky but not stick to your hands. If it’s too sticky, add a little more flour, a tablespoon at a time. If it feels too dry, add a tiny bit more water. I usually get my kids to help with the kneading; they love it!
Step 5: Prepare Filling
This recipe is for classic pretzel bites, so the “filling” is really just the dough itself. However, if you wanted to get creative, you could, for example, have a small bowl of melted butter mixed with garlic powder and parsley ready for dipping after they bake, or a cinnamon sugar mixture to toss them in. For the classic version, we’re just focusing on the perfect dough.
Step 6: Layer & Swirl
Once your dough is kneaded, place it back into the lightly oiled mixing bowl. Cover it with a clean kitchen towel or plastic wrap and let it rise in a warm place for about 30-45 minutes, or until it’s roughly doubled in size. Once it’s risen, punch it down to release the air. Then, turn it out onto your lightly floured surface again. Roll the dough into a long rope, about ½ inch thick. Cut the rope into small, bite-sized pieces, about 1-inch long. Don’t worry about perfection here; they’re supposed to be rustic!
Step 7: Bake
In a large pot or Dutch oven, bring the 8 cups of water and ½ cup of baking soda to a rolling boil. Carefully drop a few pretzel bites into the boiling water, making sure not to overcrowd the pot. Let them boil for about 20-30 seconds on each side. Use a slotted spoon to remove them from the water and place them onto your prepared baking sheets. Immediately brush the tops with your egg wash and sprinkle generously with coarse pretzel salt. Repeat with the remaining dough pieces. Bake in your preheated oven for about 10-15 minutes, or until they’re a beautiful golden brown color. Keep an eye on them; ovens can be so finicky!
Step 8: Cool & Glaze
Once baked, carefully transfer the pretzel bites to a wire rack to cool slightly. If you want to add a glaze, this is the time! A simple glaze can be made with powdered sugar and a little milk or water. For a savory option, you could melt some butter with a pinch of garlic powder and brush it over the warm bites. I love serving them warm, so I usually don’t wait too long!
Step 9: Slice & Serve
These are best served warm, right out of the oven or shortly after. You can slice them in half if you like, or just enjoy them whole. They’re perfect for dipping in cheese sauce, mustard, or even a sweet caramel sauce. Just be warned: they disappear FAST!
What to Serve It With
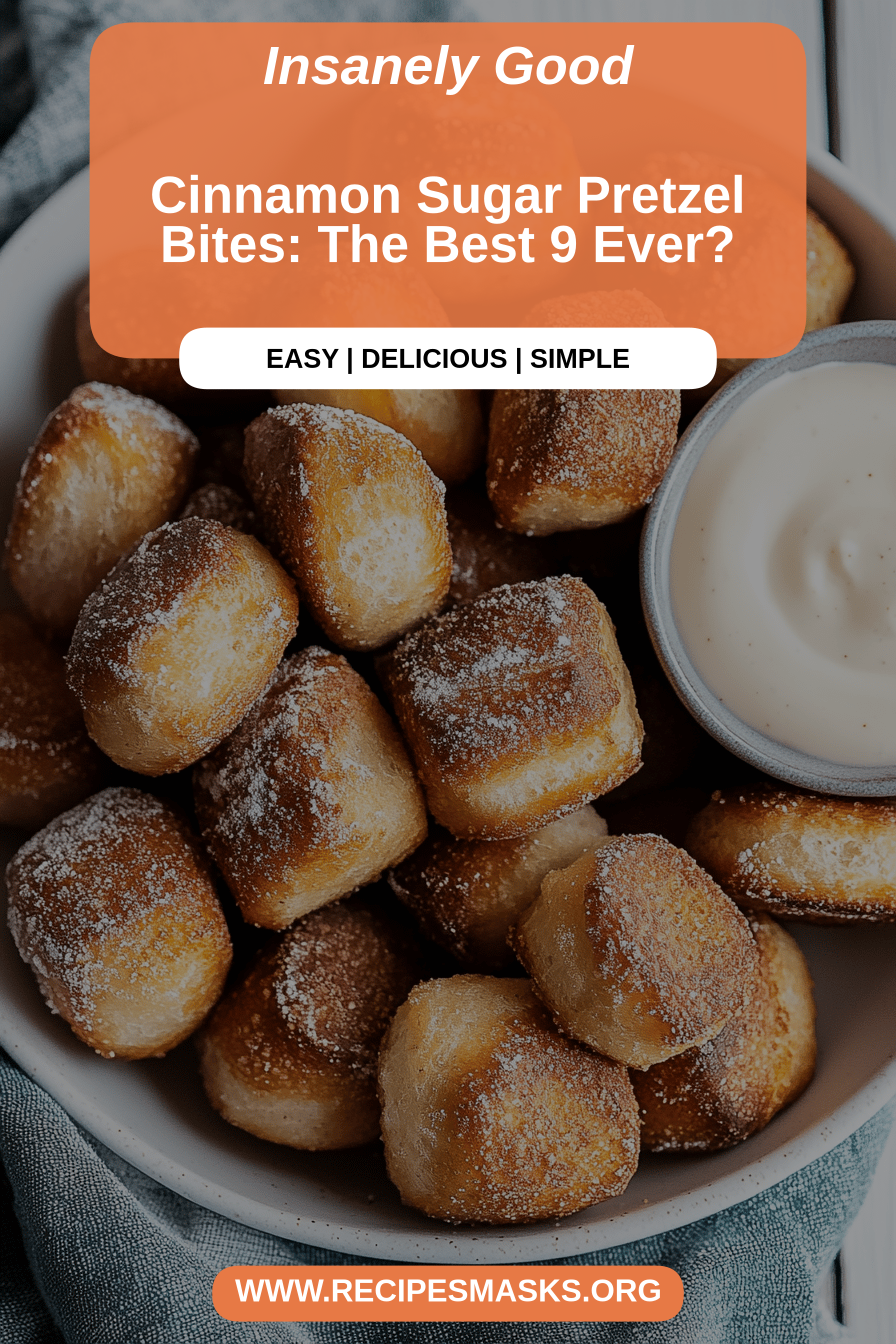
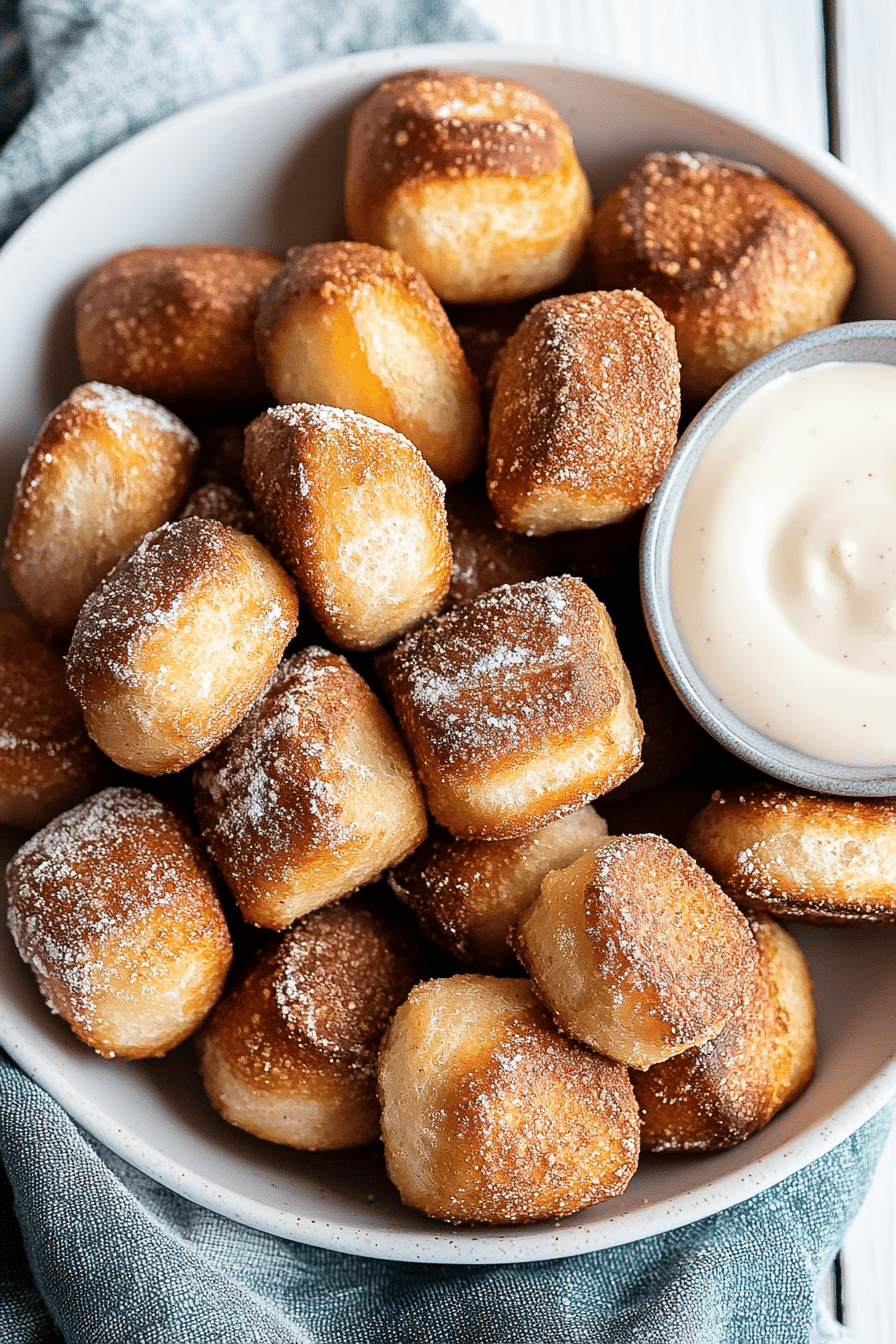
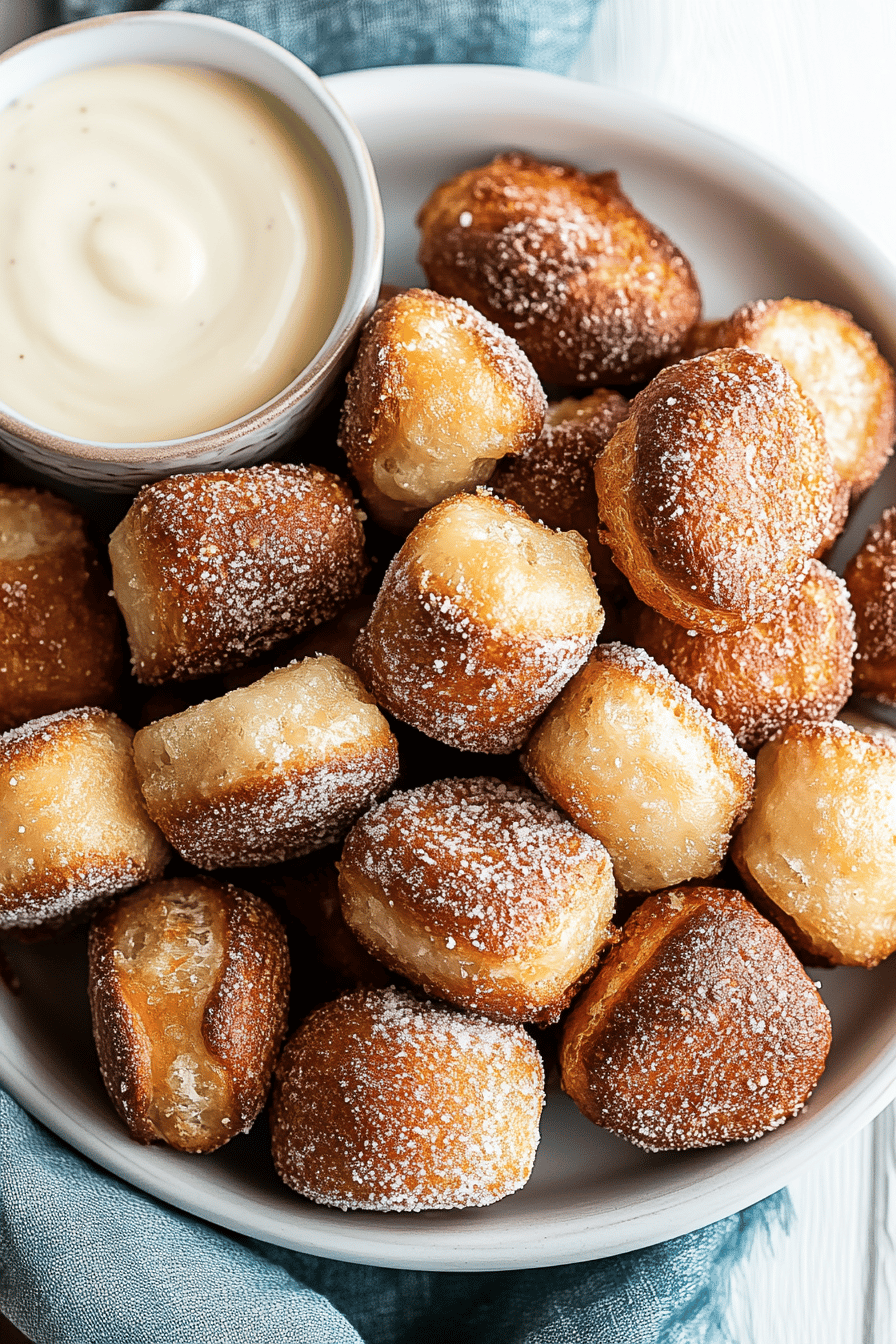
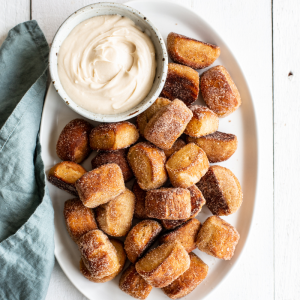
These little pretzel bites are so versatile, they can be the star of the show or a fantastic supporting player. For Breakfast, I love serving them warm with a dollop of cream cheese or a light fruit jam. They’re a delightful alternative to toast or muffins, and they pair perfectly with a hot cup of coffee. For Brunch, imagine a platter of these alongside some mini quiches or a charcuterie board. They add a wonderful texture and savory element. A little bowl of honey mustard or even a mild cheddar dipping sauce elevates them for this occasion. As Dessert, the possibilities are endless! Toss them in cinnamon sugar after they come out of the oven for a sweet treat, or serve them with a warm chocolate ganache for dipping. They’re like little edible cookies! For Cozy Snacks, this is where they truly shine. Serve them plain with a side of your favorite mustard, or a warm cheese dip. They’re the ultimate comfort food companion for a movie night or a relaxed afternoon. My family loves them dipped in a simple beer cheese sauce I make – it’s pure heaven!
Top Tips for Perfecting Your Pretzel Bites
I’ve made these pretzel bites countless times, and over the years, I’ve picked up a few tricks that really make them shine. When it comes to the dough, Mixing Advice is key. Don’t overwork the dough once you add the wet and dry ingredients together; you want it to be smooth and elastic, but over-kneading can make them tough. I always tell people to aim for a dough that feels soft and just slightly tacky. If it’s sticking too much, a tiny bit more flour is your friend. For the boiling bath, Baking Soda is Your Secret Weapon. It’s what gives pretzels their distinct chewy texture and beautiful brown crust. Make sure you use enough baking soda; that half cup is important! And don’t skip the egg wash and salt sprinkle – it’s what makes them look and taste like authentic pretzels. When it comes to Swirl Customization, while these are bites, you can still get creative. If you were making larger pretzels, you could make a slightly deeper cut before boiling to encourage more of a swirl, but for bites, the natural shape from cutting is usually perfect. For Ingredient Swaps, I’ve experimented a bit. If you’re in a pinch and don’t have active dry yeast, instant yeast can often be used, but you might need to adjust the timing slightly and can usually mix it directly with the dry ingredients. For the flour, all-purpose is generally best for that classic chew, but I’ve had friends experiment with a blend that included a little bread flour for extra chewiness, though it can make the dough a bit harder to work with. My best Baking Tips involve watching them closely. Ovens vary wildly, so use the time as a guide, but the color is what you’re really looking for. A beautiful, deep golden brown means they’re done. I usually rotate my baking sheets halfway through baking to ensure even browning. And for Glaze Variations, don’t be afraid to play! A simple glaze of powdered sugar and milk is classic, but you can add a splash of vanilla, a little lemon zest, or even some melted chocolate for a decadent treat. For savory, melted butter with herbs or a touch of garlic powder is fantastic.
Storing and Reheating Tips
One of the best things about pretzel bites is how well they keep, so you can enjoy them even after they’ve cooled. For Room Temperature storage, once they’ve cooled completely, I like to store them in an airtight container or a zip-top bag. They’re usually best eaten within a day or two at room temperature, as they tend to lose some of their chewiness after that. If you don’t think you’ll get through them that quickly, Refrigerator Storage is your best bet. They’ll keep well in an airtight container in the fridge for about 3-4 days. Just be aware that refrigeration can sometimes make them a bit harder, so reheating is often a good idea. If you’ve got a ton and want to save them for longer, Freezer Instructions are perfect. Let the pretzel bites cool completely, then wrap them tightly in plastic wrap, followed by a layer of aluminum foil or place them in a freezer-safe bag. They can stay frozen for up to 2-3 months. When you’re ready to enjoy them from frozen, you can either thaw them at room temperature for a few hours or reheat them directly. For Glaze Timing Advice, if you’ve already glazed them, store them in an airtight container at room temperature for a day or two. If you’re planning on storing them for longer, it’s often better to glaze them *after* reheating, especially if you’re using a simple powdered sugar glaze. For frozen pretzel bites, I usually reheat them in a warm oven (around 300°F or 150°C) for about 5-10 minutes until they’re heated through, then add the glaze. Reheating them on a baking sheet helps bring back that slight crispiness.
Frequently Asked Questions
Final Thoughts
So there you have it – my absolute favorite recipe for soft pretzel bites! I really hope you give these a try. They’re just one of those recipes that brings so much simple joy, whether you’re sharing them with family, bringing them to a potluck, or just treating yourself. The feeling of pulling a batch of these warm, chewy, perfectly salted bites out of the oven is just unmatched. They remind me of cozy evenings and happy gatherings, and I know they’ll do the same for you. If you love these, you might also enjoy my recipe for soft dinner rolls or my classic chocolate chip cookies – they have that same comforting, homemade vibe. I can’t wait to hear what you think of these pretzel bites! Let me know in the comments below if you try them and what toppings you use. Happy baking!
Soft Pretzel Bites
Ingredients
Dough
- 1.5 cups warm water 105-115°F
- 2.25 teaspoons active dry yeast
- 1 tablespoon granulated sugar
- 4.5 cups all-purpose flour plus more for dusting
- 1 teaspoon salt
- 2 tablespoons unsalted butter, melted
Boiling Water Bath
- 10 cups water
- 0.66 cup baking soda
Toppings (Optional)
- 1 egg egg wash beaten with 1 tablespoon water
- 2 tablespoons coarse salt
- 0.5 cup melted butter
- 0.5 cup granulated sugar
- 1 tablespoon ground cinnamon
Instructions
Preparation Steps
- In a large bowl, combine the warm water and yeast. Let sit for 5 minutes, or until foamy.
- Stir in the sugar and melted butter into the yeast mixture.
- In a separate bowl, whisk together the flour and salt.
- Gradually add the dry ingredients to the wet ingredients, mixing until a shaggy dough forms.
- Turn the dough out onto a lightly floured surface and knead for 5-7 minutes, or until smooth and elastic.
- Place the dough in a lightly oiled bowl, cover with plastic wrap, and let rise in a warm place for 1 hour, or until doubled in size.
- Preheat your oven to 400°F (200°C). Line two baking sheets with parchment paper.
- While the dough is rising, prepare the boiling water bath. In a large pot, bring the 10 cups of water and baking soda to a rolling boil.
- Once the dough has risen, punch it down and turn it out onto a lightly floured surface. Roll it into a long rope and cut into bite-sized pieces.
- Working in batches, carefully drop the pretzel bites into the boiling baking soda water for about 30 seconds per side.
- Remove the pretzel bites with a slotted spoon and place them on the prepared baking sheets.
- Brush the pretzel bites with egg wash and sprinkle with coarse salt, if desired.
- Bake for 10-12 minutes, or until golden brown.
- If making sweet pretzel bites, toss the warm baked pretzels in melted butter, then in a mixture of sugar and cinnamon.