Oh, friends, gather ‘round, because I’m about to share something truly special with you. You know those nights when you’re craving something comforting, something bursting with flavor, but you *really* don’t want to spend hours in the kitchen? Yeah, me too. And that’s exactly when this Mexican Pizza Recipe comes to the rescue. It’s a bit like a culinary hug, honestly. It brings back memories of my mom making a simplified version for us when we were kids, and now my own kids practically beg for it. It’s got all the cheesy, savory, slightly spicy goodness you’d expect, but with this incredible, crispy crust that just sings. It’s not quite a traditional pizza, and it’s definitely not a taco, but somewhere in that magical middle ground is this absolute gem. If you’ve ever loved the idea of a layered, baked Mexican dish but wanted something more structured, more… well, *pizza-like*, you are going to adore this. It’s genuinely a game-changer for weeknight dinners and even casual get-togethers.
What is Mexican pizza?
So, what exactly *is* a Mexican Pizza? Think of it as a delightful mashup. Instead of a traditional bread dough crust, we’re using crispy tortillas as our foundation. Layered between those golden, crunchy discs are all your favorite taco fillings – seasoned ground meat (or beans for a vegetarian option!), gooey cheese, and sometimes even a little salsa or beans. It’s then baked until everything is melty and glorious. The name itself, “Mexican Pizza,” perfectly captures the essence: it takes the familiar, comforting structure of a pizza and infuses it with the vibrant, zesty flavors of Mexican cuisine. It’s not a complicated dish; it’s more about layering deliciousness. It’s approachable, it’s fun to eat, and it’s incredibly satisfying. Honestly, calling it “pizza” might be a little playful, but once you taste it, you’ll understand why the name just *fits*.
Why you’ll love this recipe?
There are so many reasons why this Mexican Pizza has become a staple in my kitchen, and I just know you’re going to fall in love with it too. First off, the flavor profile is absolutely *out of this world*. You get the savory depth of the seasoned meat, the creamy richness of the cheese, the slight tang from any salsa you might add, all enveloped in that perfectly crisp tortilla. It’s a symphony of textures and tastes! And the simplicity? Oh my goodness, it’s a lifesaver. You can whip this up on a busy Tuesday night and have a truly satisfying meal on the table in under an hour, including baking time. No complicated dough kneading or long proofing times here! It’s also incredibly budget-friendly. Using tortillas instead of traditional pizza dough makes it so much more economical, especially when you’re feeding a crowd or just trying to keep grocery bills down. Plus, it’s ridiculously versatile. I’ll get into more variations later, but you can swap out the meat, add different veggies, use various cheeses – the possibilities are endless! What I love most about this Mexican Pizza, though, is how it brings everyone to the table. The smell alone as it bakes is enough to draw my kids into the kitchen, and it’s just one of those dishes that feels universally loved. It’s a guaranteed hit, and honestly, that’s priceless.
How do I make Mexican pizza?
Quick Overview
This recipe is all about layering deliciousness! We’ll start by getting our taco-seasoned filling ready, then assemble the “pizzas” using crispy tortillas as the base and top. A generous layer of cheese melts beautifully, and a quick bake transforms it all into a gooey, golden masterpiece. It’s so straightforward, you’ll be wondering why you haven’t made it sooner. The key is the crispy tortillas, which give it that satisfying crunch you can’t get with a softer base.
Ingredients
For the Tortillas (The Crust)
– 8-10 corn tortillas: I always go for the medium-sized ones, about 6 inches. They crisp up beautifully without getting too brittle. You can find these in the international aisle of most grocery stores. Make sure they’re fresh! If they’re a bit stiff, you can warm them gently in a dry skillet for a few seconds to make them pliable before assembling.
For the Savory Filling:
– 1 pound Ground Beef (or turkey, or a plant-based crumble): I usually opt for 80/20 beef because it has a little more flavor, but whatever you prefer works. For a vegetarian version, I often use black beans or refried beans, maybe mashed with a little extra seasoning.
– 1 packet (about 1 oz) taco seasoning: You can buy a pre-made packet, or make your own! If you make your own, I usually use chili powder, cumin, paprika, garlic powder, onion powder, and a pinch of cayenne.
– 1/2 cup water: This helps the seasoning distribute evenly and creates a nice sauce.
– 1 (15-ounce) can refried beans, warmed: This is optional but adds such a creamy, delicious layer. I usually microwave it for about a minute until it’s warm and spreadable.
– 1 cup shredded cheese blend: I love a mix of cheddar and Monterey Jack for that perfect meltiness. Mozzarella works too if you’re leaning more Italian-pizza vibe, but the cheddar blend is my go-to.
– 1/2 cup salsa (your favorite kind!): This adds a lovely zing and moisture. Medium heat is usually perfect for us, but you do you!
– Optional toppings: Diced green chilies, sliced black olives, chopped onions, fresh cilantro – whatever your taco-loving heart desires!
Step-by-Step Instructions
Step 1: Preheat & Prep Pan
First things first, let’s get that oven ready. Preheat it to 375°F (190°C). While it’s heating up, grab a couple of large baking sheets. You don’t need to grease them heavily, but a very light spray of cooking oil or a tiny brush of Olive oil helps ensure the tortillas don’t stick and get nice and crispy.
Step 2: Mix Dry Ingredients
(This step is for the filling, not the tortillas!)
In a large skillet over medium-high heat, add your ground meat. Break it up with a spoon and cook until it’s nicely browned. Drain off any excess grease – this is important for flavor and texture!
Step 3: Mix Wet Ingredients
(Again, for the filling!) Add the taco seasoning packet and the 1/2 cup of water to the browned meat. Stir everything together until it’s well combined and the meat is coated in that delicious seasoning. Let it simmer for a few minutes until the sauce thickens slightly. This is where all those amazing aromas start to fill your kitchen!
Step 4: Combine
(This step is integrated into the assembly, as we’re not mixing wet and dry in the traditional sense for the tortillas.)
Once the meat mixture is done, set it aside. Now, let’s get ready to assemble our Mexican Pizzas!
Step 5: Prepare Filling
We’ve already done this in steps 2 and 3! The seasoned meat mixture is your primary filling. If you’re using refried beans, gently warm them in a small bowl in the microwave or on the stovetop until they are spreadable. Have your salsa and shredded cheese ready to go.
Step 6: Layer & Swirl
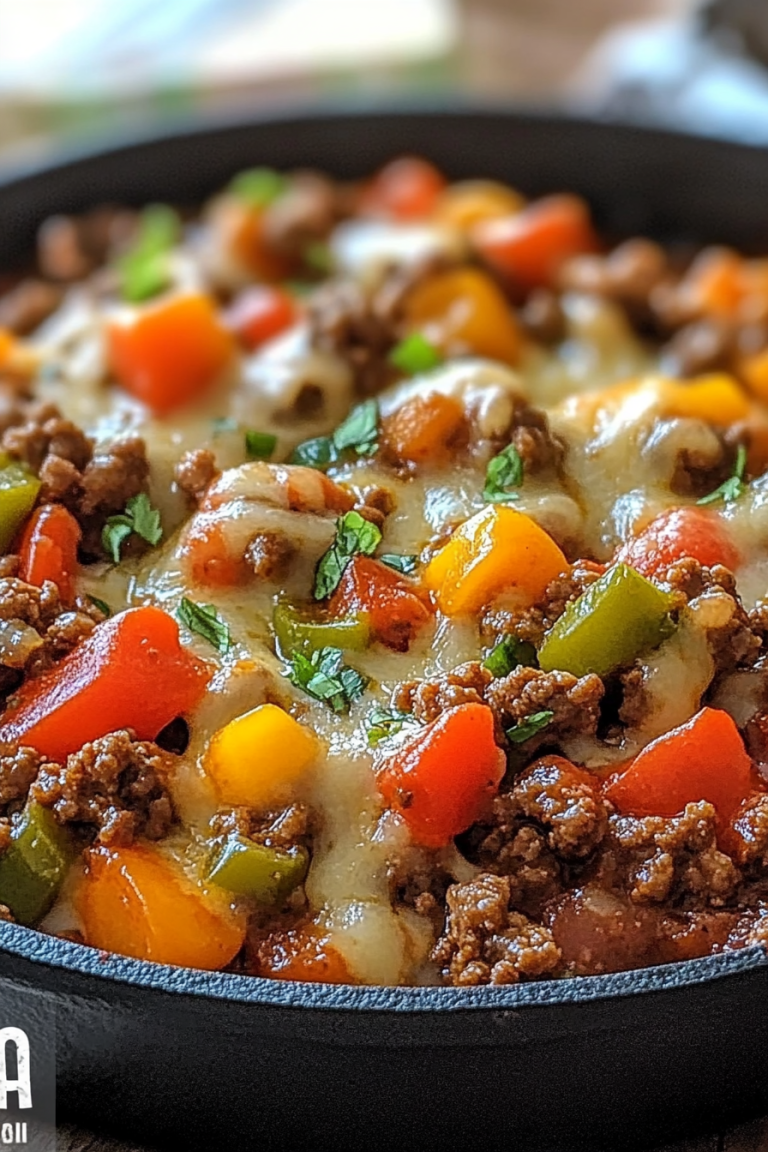
This is the fun part! Take one of your prepared baking sheets. Lay down two corn tortillas, slightly overlapping if needed to cover the baking sheet surface. Now, spread a thin, even layer of the warmed refried beans (if using) over the tortillas. Next, spoon about half of the seasoned meat mixture over the beans. Drizzle about half of your salsa over the meat. Finally, sprinkle about half of your shredded cheese blend evenly over the top.
Now, for the second layer: Place another two tortillas on top of the cheese. Repeat the layering process: refried beans (if using), the remaining seasoned meat, the remaining salsa, and finally, a generous, even coating of the rest of your shredded cheese. You should have two glorious, layered “pizzas” ready for the oven!
Step 7: Bake
Carefully place the baking sheets into your preheated oven. Bake for 12-15 minutes, or until the cheese is melted, bubbly, and starting to turn golden brown around the edges. The tortillas should be nice and crispy. Keep an eye on them to make sure they don’t burn – ovens can be finicky!
Step 8: Cool & Glaze
(We’re not really “glazing” in the traditional sense, but we are adding a finishing touch!) Once they’re out of the oven, let the Mexican Pizzas cool on the baking sheets for about 5-7 minutes. This is crucial! It allows the cheese to set a bit and makes them much easier to slice and serve without everything falling apart. While they’re cooling, you can prep any fresh toppings like cilantro or a dollop of Sour cream.
Step 9: Slice & Serve
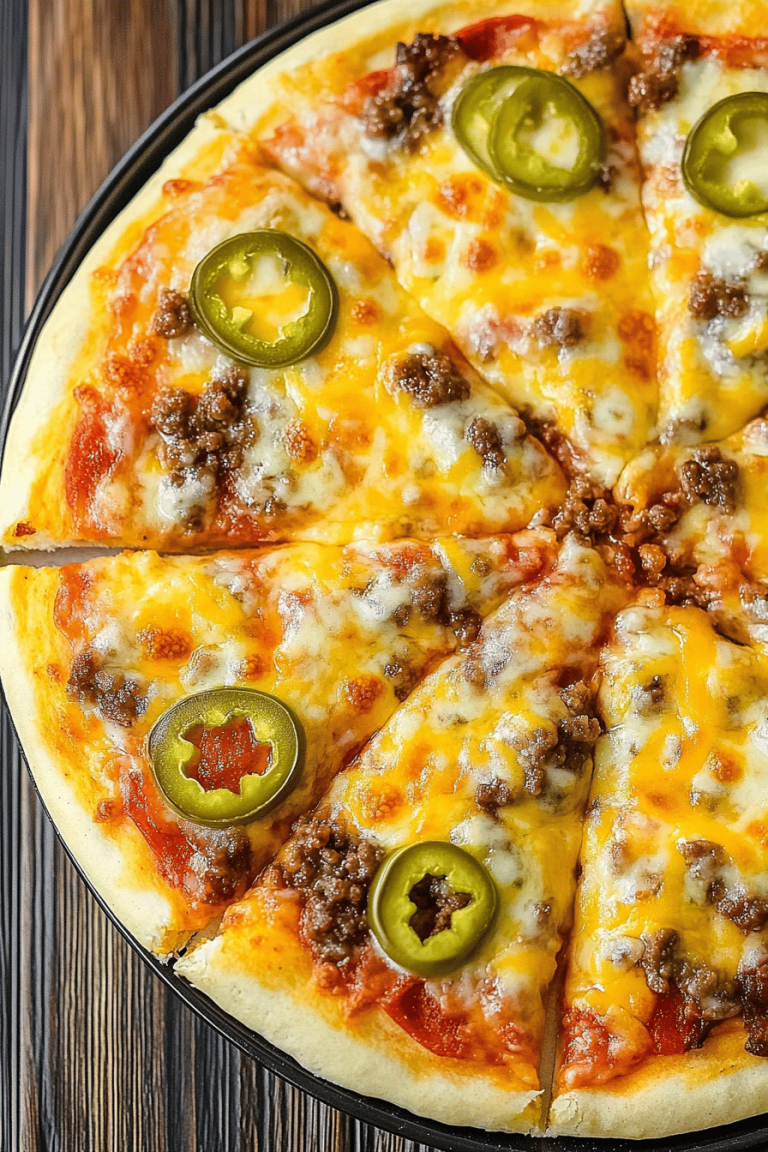
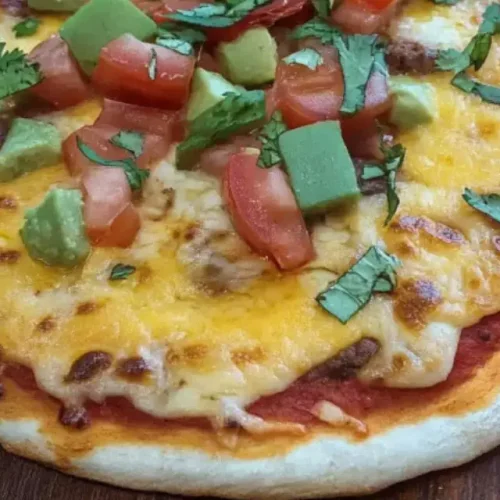
Using a sharp knife or a pizza cutter, carefully slice your Mexican Pizzas into wedges. Serve immediately while they’re hot, cheesy, and wonderfully crispy. This is where you can add those optional toppings like a sprinkle of fresh cilantro, a dollop of sour cream, or some sliced jalapeños if you like a little extra heat. Enjoy the cheers from your family!
What to Serve It With
This Mexican Pizza is practically a meal in itself, but it also plays wonderfully with a few friends on the plate! For a hearty breakfast, I love serving it with a side of scrambled eggs and maybe some crispy bacon. The richness of the pizza and the lightness of the eggs are just a perfect combo to start the day. If you’re thinking brunch, this is fantastic. Serve it alongside some fresh fruit salad – maybe some melon, berries, and pineapple. A light, zesty citrus vinaigrette on the salad cuts through the richness of the pizza beautifully. And for beverages, a mimosa or a sparkling grapefruit juice feels festive. As a dessert… well, it’s more of a savory delight, but if you’re serving this at a larger gathering where it’s part of a spread, it pairs nicely with a lighter, fresher dessert like a fruit tart or some sorbet. For those cozy snack nights, it’s perfect on its own, but sometimes I’ll add a small bowl of tortilla chips and some guacamole or a simple Pico de Gallo on the side. My kids also love having it with a side of corn salsa. It’s just one of those versatile dishes that can be dressed up or down so easily!
Top Tips for Perfecting Your Mexican Pizza
Over the years, I’ve learned a few tricks that I think make this Mexican Pizza even better. Here are my top tips to help you achieve pizza perfection:
Tortilla Prep: Don’t skip warming your tortillas if they’re a bit stiff. This prevents them from cracking when you’re layering. Also, ensure you’re using corn tortillas; flour tortillas tend to get chewier rather than crispy in this application, and that crunch is key! I’ve tried baking them slightly before layering, but I find layering them raw and letting them crisp up in the oven with all the toppings works best for that perfect texture contrast.
Mixing Advice: When cooking your ground meat, make sure to drain off as much grease as possible. This prevents the filling from becoming greasy and also helps the tortillas get crispier. If you’re making your own taco seasoning, taste it as you go to adjust the spice level to your preference!
Layering Wisdom: Don’t overload the layers too much, especially the meat and cheese. Too much can make it heavy and difficult for the tortillas to get fully crisp. A nice, even distribution is what you’re aiming for. If you’re using refried beans, spread them thinly – they add creaminess without weighing down the pizza.
Ingredient Swaps: This recipe is SO forgiving! For a vegetarian option, swap the ground meat for a can of black beans (rinsed and drained) or pinto beans, maybe mashed slightly with a fork. You can also add finely diced bell peppers or corn to the meat mixture for extra veggies. If you’re not a fan of ground beef, ground turkey or chicken works beautifully. For the cheese, feel free to mix and match – a little pepper jack adds a nice kick!
Baking Tips: Always preheat your oven fully. Placing the pizzas on a lower-middle rack can help ensure the bottom tortillas get nice and crispy. If you find your cheese is browning too quickly but the tortillas aren’t quite done, you can always loosely tent the pizzas with foil for the last few minutes of baking.
Topping Variations: Beyond the standard cheese and salsa, consider adding a layer of enchilada sauce instead of salsa for a different flavor profile, or top with some sliced pickled jalapeños for a spicy kick. A sprinkle of chopped fresh cilantro right after it comes out of the oven adds a burst of freshness that I absolutely love.
Storing and Reheating Tips
Leftover Mexican Pizza is a glorious thing, and it reheats surprisingly well! Store any leftovers in an airtight container. For best results, I like to let the pizza cool completely before storing. At room temperature, I wouldn’t leave it out for more than a couple of hours, just to be safe. In the refrigerator, it will keep well for about 3-4 days. The tortillas might lose a tiny bit of their initial crispiness, but that’s easily fixed. For reheating, my favorite method is in a skillet. Place a slice in a non-stick skillet over medium-low heat. Cover it for a few minutes to let the cheese melt and the tortilla warm through, then uncover and let it crisp up for another minute or two. It really brings back that delicious crunch! You can also reheat it in the oven at around 350°F (175°C) for about 5-10 minutes, or until heated through and the cheese is bubbly. The microwave works in a pinch, but it tends to make the tortillas a bit soft, so I usually reserve that for when I’m in a real hurry. If you plan to freeze portions, wrap them tightly in plastic wrap and then in aluminum foil, or place them in a freezer-safe container. They’ll keep for about 1-2 months. Thaw them in the refrigerator overnight before reheating using one of the methods above. For the glaze/topping timing, I never add fresh toppings like cilantro until *after* reheating and serving, otherwise, they can get soggy.
Frequently Asked Questions
Final Thoughts
There you have it, my friends! My absolute favorite Mexican Pizza recipe. It’s more than just a meal; it’s a little slice of comfort, a shortcut to happiness on busy weeknights, and a dish that consistently brings smiles to the table. I really hope you give it a try. It’s one of those recipes that’s so rewarding because it’s simple, relatively inexpensive, and delivers so much flavor. It’s proof that you don’t need to be a gourmet chef to create something truly delicious and crowd-pleasing. If you love this, you might also enjoy my Spicy Chicken Enchiladas or my recipe for Quick and Easy Taco Soup, which both share that same vibrant Mexican-inspired flavor profile. I can’t wait to hear how yours turns out! Please leave a comment below and tell me what you thought, or share any fun variations you tried. Your feedback always makes my day!
Mexican Pizza
Ingredients
Main Ingredients
- 0.5 lb ground beef
- 1 packet taco seasoning
- 0.5 cup water
- 1 can refried beans 16 oz
- 8 count flour tortillas 6 inch
- 2 cup shredded cheddar cheese
- 0.5 cup shredded Monterey Jack cheese
Optional Toppings
- shredded lettuce
- diced tomatoes
- salsa
- sour cream
Instructions
Preparation Steps
- Preheat oven to 400°F (200°C).
- In a skillet over medium heat, brown the ground beef. Drain off any excess grease.
- Stir in the taco seasoning and water. Bring to a simmer and cook for 2-3 minutes, or until thickened.
- Spread a thin layer of refried beans on one side of each tortilla.
- Top the refried beans with a layer of the seasoned ground beef.
- Sprinkle generously with cheddar and Monterey Jack cheeses.
- Place the tortillas on a baking sheet, cheese-side up.
- Bake for 8-10 minutes, or until the tortillas are slightly crispy and the cheese is melted and bubbly.
- Carefully remove from oven. Top with your favorite optional toppings such as shredded lettuce, diced tomatoes, salsa, and sour cream.
- Slice and serve immediately.