Oh, you guys. I’ve been wanting to share this with you for AGES. You know those recipes that just feel like a warm hug? This Lemon Custard recipe is exactly that for me. It’s pure sunshine in a bowl, the kind of dessert that makes even the cloudiest day feel a little brighter. I’ve been making this for years, and honestly, it’s become my secret weapon when I need something utterly delicious without a whole lot of fuss. It’s sort of like a crème brûlée’s laid-back cousin – all the creamy, dreamy flavor, but with an almost effortless elegance. When my mom first showed me this lemon custard recipe, I was just a kid, and the way that bright, zesty flavor just bloomed on my tongue felt like magic. It’s definitely a far cry from those boxed puddings, and believe me, once you try it, you won’t go back!
What is lemon custard?
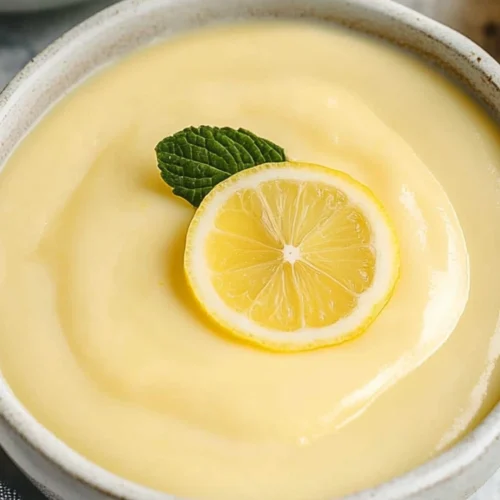
So, what exactly *is* this delightful little treat? Think of it as the ultimate creamy, dreamy, dessert. At its heart, it’s a simple custard base, usually made with eggs, milk or cream, sugar, and, of course, the star of the show: fresh lemon zest and juice. This combination creates this wonderfully smooth, rich texture that’s just begging to be spooned up. The “custard” part comes from the way the eggs gently cook and thicken the dairy, creating that signature velvety mouthfeel. The “lemon” adds this incredible zing, this bright, cheerful note that cuts through the richness and keeps it from being too heavy. It’s not quite a pie filling, and it’s definitely not a cake, but it holds its own as a standalone star. It’s simple, elegant, and utterly irresistible. For me, the name “Lemon Custard” itself sounds so comforting and bright!
Why you’ll love this recipe?
Honestly, where do I even begin with why this lemon custard recipe is a keeper? First off, the flavor. It’s just divine. That perfect balance of creamy sweetness with a lively punch of lemon is something else. It’s like a little vacation for your taste buds! It’s so refreshing, you can eat it even on a warm day, but it’s also comforting enough for a chilly evening. And the texture! Oh, the texture is just out of this world. Silky smooth, melts in your mouth… it’s pure bliss.
Beyond the incredible taste, the simplicity of this recipe is a total game-changer. I’ve tested this lemon custard recipe countless times, and it’s genuinely one of those things that feels fancy but is surprisingly easy to whip up. You probably already have most of the ingredients in your pantry. And speaking of ingredients, it’s so cost-effective! No exotic items needed here, just good old staples. This makes it a lifesaver when you want a special treat without breaking the bank.
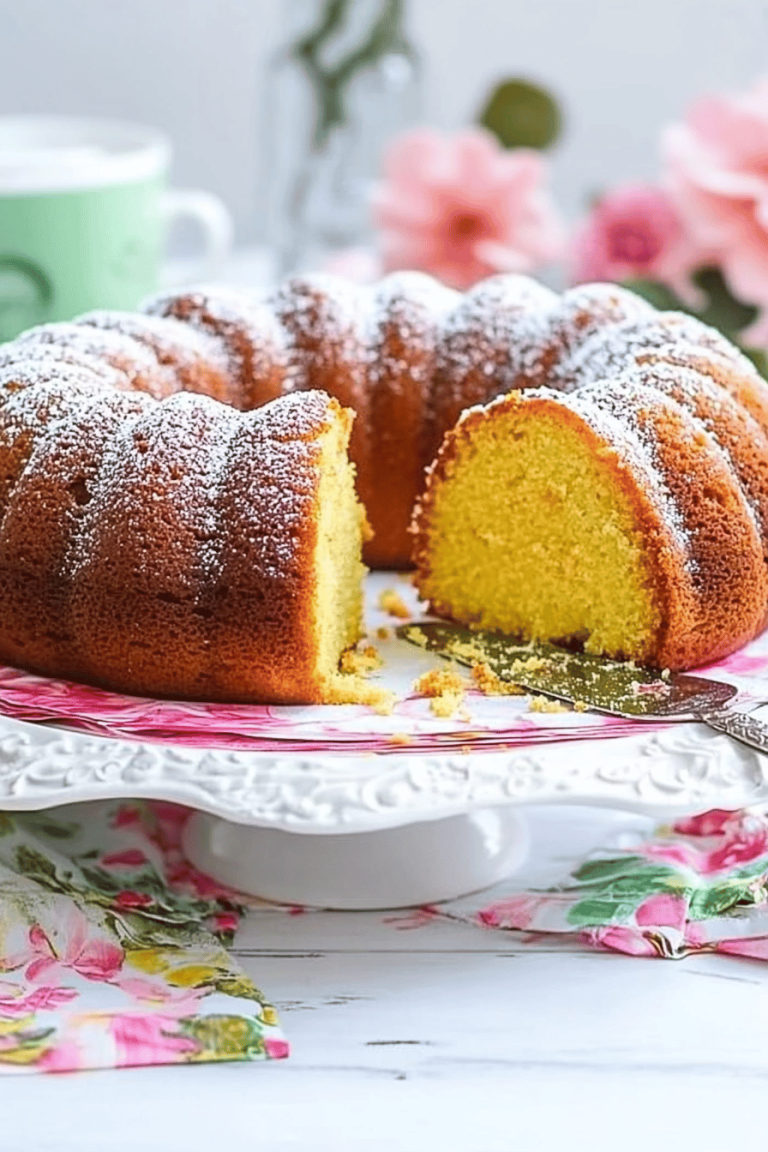
What I love most about this recipe, though, is its versatility. You can serve it in pretty little ramekins, or if you’re in a pinch (which I often am!), you can just pop it into small bowls. It’s perfect for a more formal dinner party, but it’s also fantastic for a casual weeknight dessert. My kids actually ask for this all the time, and they’re usually pretty picky! It’s a crowd-pleaser, for sure. It’s also a beautiful base for other flavors. I’ve added a swirl of raspberry coulis or some fresh berries on top, and it’s always a hit. If you’re a fan of lemon meringue pie or even a good Lemon pound cake, you’re going to adore this. It captures that same bright, zesty essence but in a wonderfully creamy, spoonable form.
How do I make lemon custard?
Quick Overview
Making this lemon custard is a surprisingly straightforward affair, I promise! You’ll basically be whisking some ingredients together, gently heating them to thicken, and then chilling them to that perfect custardy consistency. The magic happens when the simple ingredients transform into something so luxurious. It’s all about being a little patient during the heating and cooling stages, but the actual hands-on time is minimal. This means you can get a fancy-looking dessert ready without spending hours in the kitchen, which is a win in my book!
Ingredients
For the main custard base:
4 large egg yolks
1/2 cup granulated sugar
1 1/2 cups whole milk (you can use half-and-half for extra richness, but I find whole milk is perfect)
1/4 cup heavy cream (this makes it extra smooth!)
Zest of 2 large lemons (use a microplane, it gets all the fragrant oils without the pith)
3 tablespoons fresh lemon juice (strained to catch any seeds)
1 teaspoon vanilla extract
A tiny pinch of salt (it really enhances the flavors!)
For the Optional Lemon Curd Swirl (for extra zing!):
1/4 cup fresh lemon juice
2 tablespoons granulated sugar
1 egg yolk
1 tablespoon unsalted butter, cut into small pieces
For the Garnish (if you’re feeling fancy):
Fresh berries (raspberries or blueberries are my faves)
A little extra lemon zest
Step-by-Step Instructions
Step 1: Preheat & Prep Pan
First things first, get your oven preheating to 325°F (160°C). Now, this lemon custard recipe is best made in a couple of sturdy, oven-safe ramekins, about 6-ounce size. You can also use a small baking dish. What you’ll want to do is place these ramekins inside a larger baking pan – this is called a water bath, or a bain-marie. This helps the custard cook gently and evenly, preventing those dreaded scrambled egg bits. So, get your oven hot and set up your water bath!
Step 2: Mix Dry Ingredients
In a medium bowl, whisk together the egg yolks and the granulated sugar. Keep whisking until the mixture is pale yellow and a bit thick. This is called ribbon stage – when you lift the whisk, the mixture should fall back in a ribbon that sits on the surface for a moment before dissolving. This step is super important for a smooth custard. Don’t skip it! Add that tiny pinch of salt here too; it’s a secret weapon for flavor.
Step 3: Mix Wet Ingredients
In a separate saucepan, gently heat the whole milk and heavy cream over medium-low heat. You don’t want it to boil, just to get nice and warm, with tiny bubbles forming around the edges. While the milk is heating, you can stir in the lemon zest and vanilla extract. This allows those lovely lemon oils to infuse into the milk, making the flavor even more intense. Once warm, remove it from the heat.
Step 4: Combine
This is where we temper the eggs, which sounds fancy but is just a way to gently introduce the hot liquid to the cold eggs without scrambling them. Slowly, and I mean *slowly*, pour about half of the warm milk mixture into the egg yolk mixture, whisking constantly. You’ll see it start to thicken slightly. Once that’s incorporated, pour the tempered egg mixture back into the saucepan with the remaining milk mixture. Stir in the fresh lemon juice. Now, you’ll want to cook this mixture over low heat, stirring constantly with a wooden spoon or heatproof spatula, until it thickens enough to coat the back of the spoon. This usually takes about 5-8 minutes. Do NOT let it boil, or you’ll get scrambled eggs!
Step 5: Prepare Filling
While the custard is gently cooking, if you’re doing the optional lemon curd swirl, now’s the time to get that going in a small saucepan. Whisk together the lemon juice, sugar, and egg yolk. Cook over low heat, stirring constantly, until it thickens slightly. Then, whisk in the butter until it’s all melted and glossy. It should be thick enough to hold its shape a bit. Set this aside to cool slightly. This swirl adds an extra layer of intense lemon flavor that is just divine!
Step 6: Layer & Swirl
Once the main custard is thickened, pour it through a fine-mesh sieve into a clean bowl or measuring cup with a spout. This gets rid of any potential cooked bits and makes it extra smooth. If you’re doing the swirl, spoon dollops of the lemon curd mixture into the custard. Then, using a toothpick or the tip of a knife, gently swirl the curd through the custard to create a beautiful marbled effect. Don’t over-swirl, you want distinct ribbons!
Step 7: Bake
Carefully pour the custard mixture into your prepared ramekins, filling them about three-quarters of the way full. Place the ramekins in the larger baking pan. Now, carefully pour hot water into the larger baking pan, making sure it comes about halfway up the sides of the ramekins. This is your water bath! Bake for 30-40 minutes, or until the edges are set but the center is still slightly jiggly when you gently shake the pan. It will continue to set as it cools.
Step 8: Cool & Glaze
Once baked, carefully remove the ramekins from the water bath (I use tongs for this!). Let them cool on a wire rack for about 30 minutes, then cover them loosely with plastic wrap and refrigerate for at least 4 hours, or preferably overnight. This is crucial for the custard to fully set and develop its flavor. If you’re adding a glaze, now is the time to drizzle it on. I sometimes just dust with a little powdered sugar or serve it as is, but a thin lemon glaze made with powdered sugar and lemon juice can be lovely too. For a simple glaze: whisk about 1/2 cup powdered sugar with 1-2 tablespoons of lemon juice until smooth and pourable.
Step 9: Slice & Serve
When you’re ready to serve, I like to run a thin knife around the edge of the ramekin to loosen it, then invert it onto a small plate. Sometimes it comes out perfectly, sometimes it’s a bit more rustic, and both are beautiful! If it doesn’t release easily, just serve it right in the ramekin. Garnish with fresh berries and a little extra lemon zest. The vibrant colors are just stunning!
What to Serve It With
This lemon custard is so wonderfully versatile, it’s a joy to pair with different meals and occasions. It truly shines in so many ways!
For Breakfast: Imagine this: a bright, sunny morning, you’ve got a little time to savor. Serve a small portion of this lemon custard alongside some fluffy Scrambled eggs and crispy bacon. It’s like a little dollop of sunshine to start your day. A light dusting of powdered sugar and maybe a few fresh raspberries on top make it feel special, even on a Tuesday. Coffee is a must, of course!
For Brunch: Now, this is where it gets fun! This lemon custard is elegant enough for any brunch spread. Serve it in pretty little glasses or ramekins. It pairs beautifully with mini quiches, fresh fruit salads, and maybe even some scones. A light, bubbly mimosa or a refreshing elderflower cordial would be the perfect beverage to complement its bright flavors. The creamy texture is such a lovely contrast to lighter brunch fare.
As Dessert: This is its natural habitat! After a lovely dinner, this lemon custard is the perfect elegant ending. Serve it chilled, perhaps with a few more berries or a dollop of softly whipped cream. It’s light enough that it won’t weigh you down after a hearty meal, but satisfyingly rich and flavorful. It’s also a fantastic accompaniment to other desserts. I’ve served it alongside a slice of Chocolate Cake, and the lemon cuts through the richness of the chocolate beautifully. A small glass of dessert wine, like a Moscato, is also a wonderful pairing.
For Cozy Snacks: Sometimes, you just need a little pick-me-up, right? This lemon custard is perfect for those moments. It’s surprisingly satisfying without being too heavy. I love having a small bowl when I’m curled up with a good book or watching a movie. It’s way more satisfying and feels so much more special than just grabbing something processed. It’s like a little treat that tells you you’re worth it. Pair it with a cup of herbal tea, and you’ve got pure comfort in a bowl.
Top Tips for Perfecting Your Lemon Custard
Over the years of making this lemon custard, I’ve picked up a few tricks that I think really make a difference. They’re not complicated, but they do help ensure you get that perfect, silky smooth texture every time.
Zucchini Prep: Wait, zucchini? You might be thinking I’ve gone off my rocker! But stick with me here. For this specific lemon custard, we don’t use zucchini. However, if you were making a Zucchini Bread or muffin, the prep is key. You’d always want to grate your zucchini (medium or large grate works best) and then really squeeze out as much moisture as possible. Use a cheesecloth or a clean kitchen towel. This prevents your baked goods from becoming soggy. Fresh zucchini, grated just before use, will give you the best flavor and texture.
Mixing Advice: The biggest mistake I see people make with custards is over-whisking the egg yolks and sugar too vigorously after they’re already pale. Once you reach that ribbon stage, ease up. You want to incorporate, not aerate too much. And when you’re combining the tempered eggs back into the saucepan, stir gently but constantly. Think of it as coaxing it to thicken, not beating it into submission. Low and slow heat is your best friend here. If you see any little bits forming, pull it off the heat immediately and whisk vigorously.
Swirl Customization: If you’re doing the optional lemon curd swirl, don’t go crazy with the marbling! You want those distinct ribbons of bright yellow against the creamy custard. I like to use just a few dollops and then use a toothpick to drag it through in gentle figure-eights. The goal is a beautiful visual effect, not a uniform blend. It makes the custard look extra special and professional.
Ingredient Swaps: So, let’s talk substitutions. If you don’t have whole milk, 2% will work, but it might be slightly less rich. If you’re dairy-free, you can try a good quality full-fat coconut milk (the canned kind, not the beverage from the carton) for the milk and cream. You’ll get a slightly different flavor profile, but it can work. For the lemon juice, fresh is always best, but if you’re in a pinch, good quality bottled lemon juice can suffice, though you might miss a bit of that fresh brightness. I tested this once with Meyer lemons, and they added an extra floral note that was lovely!
Baking Tips: The water bath is non-negotiable for a smooth custard. It ensures even, gentle heat. Make sure the water is hot but not boiling when you pour it in. Also, resist the urge to open the oven door too many times while it’s baking – this can cause temperature fluctuations and affect the set. When testing for doneness, the edges should look set, like firm jelly, but the very center should still have a slight wobble. It will firm up considerably as it chills.
Glaze Variations: If you’re not a fan of the simple lemon glaze, consider a light dusting of powdered sugar – it’s classic and always looks elegant. For a little extra flair, you could try a very light meringue topping and briefly torch it, like a lemon meringue pie! Or, simply serve it unadorned with a scattering of fresh berries; the natural beauty of the custard is often enough.
Storing and Reheating Tips
One of the best things about this lemon custard recipe is that it keeps so well, making it perfect for making ahead of time. This is a lifesaver when you’re hosting or just want a treat readily available.
Room Temperature: Honestly, I don’t recommend storing this custard at room temperature for long. While it’s delicious served chilled, dairy and eggs are best kept cold to maintain freshness and safety. You can probably leave it out for an hour or so after it’s fully chilled if you’re serving it, but no longer than that.
Refrigerator Storage: This is where this lemon custard shines! Once completely cooled and set (after its minimum 4-hour chilling time), cover the ramekins tightly with plastic wrap or transfer the custard to airtight containers. It will stay delicious in the refrigerator for up to 3-4 days. The flavor actually deepens a bit over the first day, which is pretty fantastic. I find it’s best eaten within 3 days for optimal texture and flavor.
Freezer Instructions: While I don’t typically freeze custards because the texture can sometimes change upon thawing (it can become a bit watery or grainy), you *can* freeze it if you absolutely need to. Wrap the ramekins very, very well in plastic wrap, then a layer of aluminum foil. Freeze for up to 1 month. To thaw, transfer the frozen custard to the refrigerator overnight. You might want to gently whisk it before serving if it looks a little separated, or top it with some fresh berries to mask any minor textural changes.
Glaze Timing Advice: If you’ve added a glaze, it’s best to do it just before serving, especially if you’re storing it for a day or two. A glaze can sometimes soften or become a bit sticky when stored, particularly if it’s very thin. For a dusting of powdered sugar, you can do that right before serving too – it looks prettiest when it’s freshly applied. If you’re serving it directly from the fridge after storing for a day or two, you can always add a fresh garnish of berries and zest to liven it up!
Frequently Asked Questions
Final Thoughts
So there you have it – my absolute favorite Lemon Custard recipe! It’s one of those desserts that truly feels like a labor of love, but in the best way possible, because the effort is minimal and the reward is so incredibly high. It’s got that perfect balance of creamy, dreamy richness and bright, zesty lemon that just sings. I hope you give this recipe a try and fall in love with it as much as my family and I have. It’s the perfect way to add a little sunshine to your table, whether it’s for a special occasion or just because you deserve a treat!
If you’re someone who loves bright, citrusy flavors and comforting textures, you might also enjoy my recipe for Lemon Blueberry Scones or my Key Lime Pie Bars. They both capture that wonderful zesty goodness in different, delicious ways!
I can’t wait to hear how your Lemon Custard turns out! If you make it, please leave a comment below and let me know what you think, or share your own variations and tips. Happy baking (or, in this case, chilling)!
Lemon Custard Recipe
Ingredients
Main Ingredients
- 1 cup Granulated Sugar
- 0.25 cup Cornstarch
- 0.25 teaspoon Salt
- 2 cups Whole Milk
- 4 Large Egg Yolks
- 0.5 cup Fresh Lemon Juice
- 1 tablespoon Lemon Zest
- 4 tablespoons Unsalted Butter cut into small pieces
- 0.5 teaspoon Vanilla Extract optional
Instructions
Preparation Steps
- In a medium saucepan, whisk together the granulated sugar, cornstarch, and salt. Gradually whisk in the whole milk until smooth.
- Heat the mixture over medium heat, stirring constantly, until it begins to thicken and simmer. Reduce heat to low.
- In a separate small bowl, lightly beat the egg yolks. Slowly temper the egg yolks by whisking about 1/2 cup of the hot milk mixture into the yolks. This prevents the eggs from scrambling.
- Pour the tempered egg yolk mixture back into the saucepan with the remaining milk mixture. Whisk constantly over low heat for 1-2 minutes, until the custard is thick enough to coat the back of a spoon.
- Remove the saucepan from the heat. Stir in the fresh lemon juice, lemon zest, unsalted butter pieces, and vanilla extract (if using) until the butter is completely melted and incorporated.
- Pour the custard into a clean bowl. Press plastic wrap directly onto the surface of the custard to prevent a skin from forming. Refrigerate for at least 3-4 hours, or preferably overnight, until thoroughly chilled and set.
- Serve chilled, either on its own or as a topping for fresh berries, pie, or tart shells.