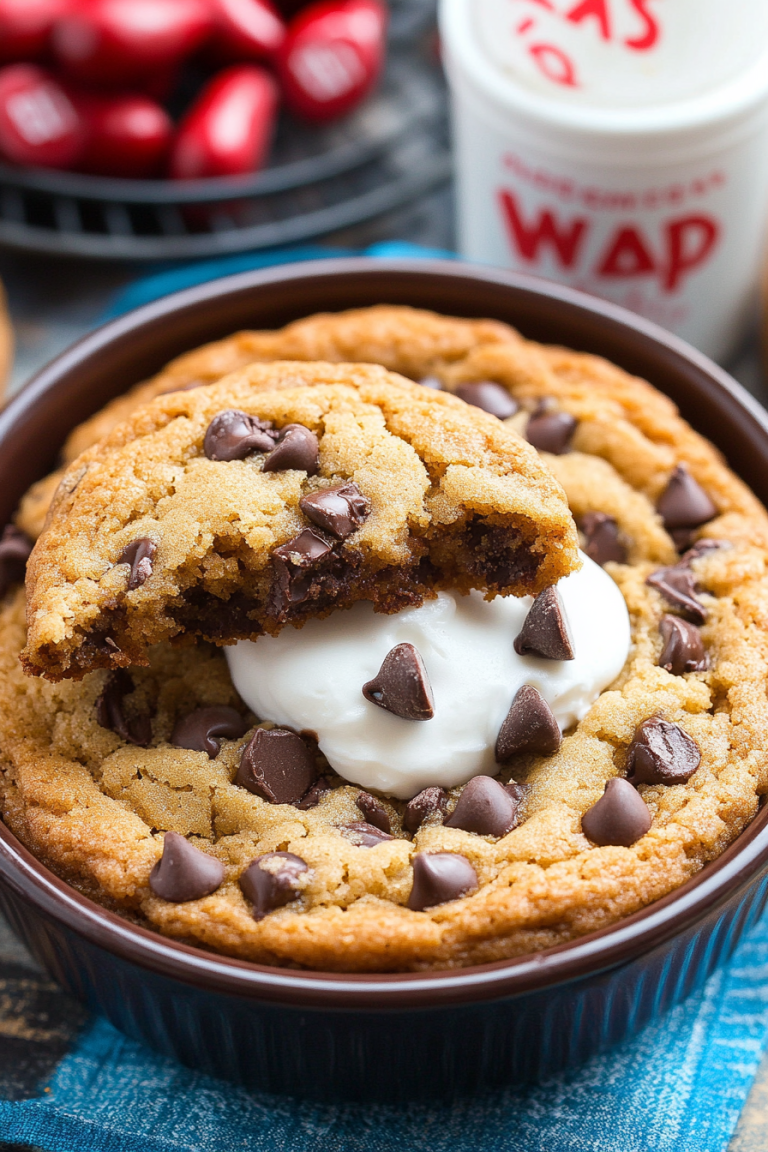
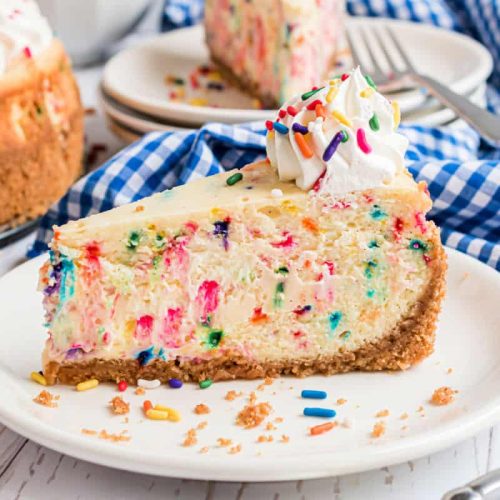
Oh, I am SO excited to share this recipe with you! You know those days when you just need a little burst of happiness, a sprinkle of pure, unadulterated joy in edible form? That’s exactly what this funfetti cheesecake brings to my kitchen, and I’m pretty sure it’ll do the same for yours. It’s like a party in your mouth, seriously! I remember the first time I made this; it was for my nephew’s birthday, and the look on his face when he saw all those colorful sprinkles peeking through the creamy filling… pure magic! It’s so much more than just a dessert; it’s a feeling. And while a classic New York cheesecake is divine, sometimes you just want something that screams celebration, right? This funfetti cheesecake is that voice, loud and proud.
What is Funfetti Cheesecake?
So, what exactly is this delightful creation? Think of it as your favorite classic cheesecake, but with a major personality upgrade. It’s essentially a creamy, rich, baked cheesecake that’s been infused with a generous amount of colorful sprinkles. The name “funfetti” comes from the confetti-like appearance of these tiny, vibrant sprinkles scattered throughout the batter. It’s not just about looks, though; those sprinkles add a subtle, almost imperceptible crunch and a tiny burst of sweetness that plays wonderfully with the smooth, tangy cheesecake. It’s the kind of dessert that makes you smile before you even take a bite, and it’s surprisingly simple to pull off, even if you’re not a seasoned baker.
Why you’ll love this recipe?
Honestly, where do I even begin? There are so many reasons why this funfetti cheesecake has become a staple in my recipe rotation. First off, the FLAVOR. It’s got that irresistible tang from the cream cheese, balanced perfectly with the sweetness. And then, BAM! You hit a little sprinkle, and it’s just… fun! It’s not overly sweet, which I appreciate, but it has that undeniable dessert factor. Then there’s the SIMPLICITY. I know cheesecake can sound intimidating, but this recipe is surprisingly forgiving. I’ve made it on weeknights when a sudden craving hit, and it was ready before you know it. Plus, it’s incredibly COST-EFFECTIVE. Most of the ingredients are pantry staples, and the sprinkles are the only “special” addition, which are inexpensive and bring so much bang for your buck. And let’s talk VERSATILITY! While I adore it plain with its vibrant sprinkles, you can easily customize it. Add a little almond extract to the batter, or top it with a dollop of whipped cream and even more sprinkles. It’s perfect for birthdays, holidays, or just Tuesdays. It truly stands out because it combines that comforting, familiar cheesecake texture with an element of pure, childlike delight. What I love most about this is that it’s a guaranteed crowd-pleaser. No one can resist a slice of this cheerful goodness!
How do you make Funfetti Cheesecake?
Quick Overview
Making this funfetti cheesecake is a straightforward process that even beginner bakers can conquer. We’ll start by preparing a simple graham cracker crust, then mix up a luscious, creamy cheesecake batter studded with rainbow sprinkles. A gentle bake in a water bath ensures a perfectly smooth, crack-free top, followed by a patient cooling period. Finally, a simple glaze or Whipped cream finishes it off beautifully. It’s all about gentle mixing and a slow, steady bake to achieve that dreamiest texture.
Ingredients
For the Graham Cracker Crust:
1 ½ cups graham cracker crumbs (about 10-12 full crackers)
¼ cup granulated sugar
6 tablespoons unsalted butter, melted
A pinch of salt
For the Cheesecake Filling:
24 ounces cream cheese, softened to room temperature (this is crucial for smoothness!)
1 ¼ cups granulated sugar
3 large eggs, room temperature
1 teaspoon vanilla extract
½ teaspoon lemon zest (optional, but adds a lovely brightness!)
⅓ cup sour cream or full-fat Greek Yogurt, room temperature
¾ cup rainbow sprinkles (the little rod-shaped ones work best and hold their color!)
For the Optional Glaze:
½ cup powdered sugar, sifted
1-2 tablespoons milk or heavy cream
¼ teaspoon vanilla extract
Step-by-Step Instructions
Step 1: Preheat & Prep Pan
First things first, let’s get your oven ready. Preheat it to 325°F (160°C). Now, grab a 9-inch springform pan. This is key for easy removal later. To make the crust, combine your graham cracker crumbs, sugar, and that pinch of salt in a medium bowl. Pour in the melted butter and stir until everything is evenly moistened, resembling wet sand. Press this mixture firmly and evenly into the bottom and about an inch up the sides of your prepared springform pan. I like to use the bottom of a glass to get it nice and compact. Pop this into the freezer for about 10 minutes while you work on the filling. This helps it set up nicely. For the water bath, wrap the outside of your springform pan tightly with a couple of layers of heavy-duty aluminum foil. This prevents water from seeping in during baking. You’ll also want to have a roasting pan or larger baking dish ready for this later.
Step 2: Mix Dry Ingredients
In a large bowl, whisk together the granulated sugar and the softened cream cheese. I always make sure my cream cheese is *truly* softened. If it’s still a little firm, it’ll lead to lumps, and nobody wants lumpy cheesecake! Beat them together until the mixture is light, fluffy, and completely smooth, with no lumps in sight. This usually takes about 3-5 minutes with an electric mixer. Scrape down the sides and bottom of the bowl a few times to make sure everything is incorporated. This step is all about building that super smooth, creamy foundation.
Step 3: Mix Wet Ingredients
Now, let’s add the other wet components. Add the eggs one at a time, beating well after each addition until just combined. It’s important not to overmix here, as too much air can cause cracking. Stir in the vanilla extract and the optional lemon zest. Then, gently fold in the sour cream or greek yogurt. Again, just mix until everything is nicely blended. The batter should look smooth and luscious. The room temperature ingredients really make a difference here, ensuring everything emulsifies beautifully.
Step 4: Combine
This is where the magic starts to happen! Gently fold in the rainbow sprinkles into your cheesecake batter. Be careful not to overmix at this stage. You want to distribute the sprinkles evenly without breaking them or making the batter too tough. Just a few gentle stirs should do the trick. The batter will look so cheerful already!
Step 5: Prepare Filling
You’ve already prepared the filling in the previous steps! This is where you fold in those glorious sprinkles to create the funfetti effect. The key is to incorporate them gently so they don’t bleed their colors too much into the batter before baking, but enough so they’re well-distributed. You’re looking for a batter that’s thick, creamy, and speckled with a rainbow of color.
Step 6: Layer & Swirl
Pour the funfetti cheesecake batter evenly over the prepared crust in your springform pan. If you’re feeling fancy and want a more marbled effect, you can reserve a small portion of the batter, add a few more sprinkles to it, and then dollop it on top before gently swirling it in with a knife or toothpick. However, for a true funfetti look, just spreading the sprinkle-filled batter is perfect.
Step 7: Bake
Carefully place your foil-wrapped springform pan into the larger roasting pan. Pour hot water into the roasting pan, about halfway up the sides of the springform pan. This water bath is the secret to a creamy, crack-free cheesecake. Bake for 50-65 minutes. The edges should be set, but the center should still be slightly jiggly when you gently shake the pan. It will continue to cook as it cools. Once done, turn off the oven, crack the oven door open slightly, and let the cheesecake cool in the oven for about an hour. This gradual cooling prevents sudden temperature changes that can cause cracks. After that hour, carefully remove the cheesecake from the water bath and let it cool completely on a wire rack.
Step 8: Cool & Glaze
Once the cheesecake is completely cool to the touch, cover it loosely with plastic wrap and refrigerate it for at least 4-6 hours, or preferably overnight. This chilling time is crucial for the cheesecake to firm up properly and for the flavors to meld. For the optional glaze, whisk together the sifted powdered sugar, 1 tablespoon of milk, and vanilla extract in a small bowl. Add more milk, a tiny bit at a time, until you reach your desired drizzling consistency. Drizzle this over the chilled cheesecake just before serving. It adds a touch of sweetness and a pretty finish!
Step 9: Slice & Serve
When you’re ready to serve, carefully run a thin knife around the edge of the cheesecake to loosen it from the sides of the springform pan, then release the sides of the pan. For the cleanest slices, use a sharp knife dipped in hot water and wiped dry between each cut. Serve chilled. The combination of the smooth, creamy cheesecake, the slight crunch from the crust, and the pops of color and sweetness from the sprinkles is just heavenly. Enjoy every joyful bite!
What to Serve It With
This funfetti cheesecake is a star on its own, but pairing it with the right accompaniments can elevate your dessert experience even further. For a delightful BREAKFAST or BRUNCH treat, I love serving it with a strong cup of coffee or a light, bubbly mimosa. A few fresh berries on the side can add a nice tart contrast. As a decadent DESSERT, it’s wonderful served with a dollop of homemade whipped cream, a drizzle of raspberry sauce, or even a scoop of vanilla bean ice cream. The coolness of the ice cream against the creamy cheesecake is just divine. For those times when you just need a COZY SNACK, a simple slice with a tall glass of cold milk is pure comfort. My family tradition is to serve it with extra sprinkles scattered around the plate – it just adds to the festivity! For bigger gatherings, I’ve also made mini versions in muffin tins, which are perfect for individual servings and make it super easy for guests to grab a slice of happiness.
Top Tips for Perfecting Your Funfetti Cheesecake
I’ve made this funfetti cheesecake more times than I can count, and along the way, I’ve picked up a few tricks that I think are absolute lifesavers. First, for the sprinkles: use the rod-shaped, candy-coated sprinkles. They hold their color and shape much better during baking than some of the other types. I’ve found that adding them at the very last minute before pouring into the pan ensures they’re evenly distributed without bleeding too much. For the MIXING ADVICE, please, please, please, don’t overbeat the batter once you’ve added the eggs. This is the number one culprit for cracks. Mix just until combined, and then fold in those sprinkles gently. If you’re aiming for a MARBLED EFFECT, reserve about a quarter cup of the plain batter before adding sprinkles, then dollop it on top of the main batter and swirl *very lightly* with a skewer. Don’t over-swirl, or you’ll lose the distinct colors. For INGREDIENT SWAPS, if you don’t have graham crackers, digestive biscuits or even vanilla wafers work in a pinch for the crust. For a touch more richness, try using a mix of butter and cream cheese in the crust. Regarding the WATER BATH, it’s non-negotiable for me. If you skip it, you’ll likely end up with a drier, more prone-to-cracking cheesecake. Just make sure your foil is truly watertight! And for BAKING TIPS, ovens vary wildly. My oven runs a bit hot, so I sometimes reduce the temp by 10 degrees. Trust your instincts and the visual cues: set edges, jiggly center. Don’t be afraid to do the “oven turn-off and crack door” cooling method; it’s a game-changer. Finally, for GLAZE VARIATIONS, if you’re not a fan of powdered sugar glaze, a simple drizzle of melted white chocolate or a swirl of strawberry jam can be equally delicious and visually appealing.
Storing and Reheating Tips
I’ve found that this funfetti cheesecake holds up beautifully, making it great for making ahead of time, which is always a win in my book! STORE IT AT ROOM TEMPERATURE only if it’s for a very short period, like an hour or two before serving, and only if your kitchen isn’t too warm. For longer storage, REFRIGERATOR STORAGE is best. Keep it tightly covered with plastic wrap or in an airtight container. It will stay deliciously fresh for about 4-5 days in the fridge. The flavor actually gets even better on the second day! If you need to FREEZE INSTRUCTIONS, this cheesecake freezes wonderfully. Make sure it’s completely cooled and chilled first. Wrap it very tightly in a layer of plastic wrap, then a layer of aluminum foil. It can be frozen for up to 2-3 months. To thaw, unwrap it and let it thaw slowly in the refrigerator overnight. Once thawed, if you notice any condensation, you can gently pat it dry with a paper towel. For the GLAZE TIMING ADVICE, I always recommend applying the glaze *just before serving*, especially if you’ve refrigerated or plan to freeze the cheesecake. This prevents the glaze from becoming sticky or dissolving.
Frequently Asked Questions
Final Thoughts
So there you have it – my tried-and-true recipe for the most delightful funfetti cheesecake! It’s more than just a dessert; it’s a little slice of pure, unadulterated happiness. It’s the perfect example of how simple ingredients can come together to create something truly special and joyful. Whether you’re celebrating a milestone or just looking for a way to brighten an ordinary day, this cheesecake is guaranteed to bring smiles. If you loved this recipe, you might also enjoy my Lemon Raspberry Mousse Cake or my No-Bake Chocolate Peanut Butter Pie for more delightful dessert inspiration. I truly hope you give this funfetti cheesecake a try. I can’t wait to hear how it turns out for you and see all your colorful creations! Happy baking, and may your day be as bright and cheerful as this cheesecake!
Funfetti cheesecake
Ingredients
Crust
- 2 cups graham cracker crumbs about 18 full size crackers
- 8 Tablespoons unsalted butter melted
- 0.25 cup granulated sugar
Cheesecake Filling
- 4 packages cream cheese softened (8 ounce each)
- 1 cup granulated sugar
- 1 cup sour cream
- 2 teaspoons vanilla extract
- 1 teaspoon vanilla bean paste optional
- 4 large eggs room temperature
- 0.75 cup sprinkles jimmies recommended
Topping
- 8 ounce Cool Whip thawed (or homemade whipped cream)
Instructions
Preparation Steps
- Prepare a 9-inch springform pan by lining the bottom with parchment paper. Set aside. Fill a broiler pan with about 1-2 inches of water and place it on the lowest rack in your oven. Preheat oven (with the broiler pan of water) to 325°F.
- To make the crust, blend graham crackers in a food processor until fine crumbs form. Pour in the melted butter and sugar, then pulse several times until combined. Press the crust firmly into the bottom and slightly up the sides of the prepared 9-inch springform pan. Set aside.
- For the filling, in a large bowl, beat cream cheese and 1 cup sugar with an electric mixer for about 2 minutes. Add in sour cream and vanilla extract (and vanilla bean paste, if using) and beat for an additional 2-3 minutes, scraping down the sides of the bowl as needed until smooth.
- Slowly add the eggs, one at a time, beating just until combined after each addition. Do not overbeat. Gently fold in the sprinkles. Pour the filling into the prepared crust and place the cheesecake pan into the middle of the preheated oven.
- Bake for 70 minutes. Turn off the oven, crack the door open slightly, and let the cheesecake sit undisturbed for about 15 minutes. Remove from the oven and carefully run a sharp knife along the edges of the pan to separate the cheesecake from the sides. Allow to cool on the counter (in the pan) for about 30 minutes, then place (still in the pan) in the refrigerator for about 6-8 hours (or overnight) to chill completely.
- Once chilled, remove the springform pan gently. Dollop the edges or top with thawed Cool Whip or homemade whipped cream. Add additional sprinkles on the whipped cream if desired before serving.