Oh, honey, pull up a chair. I’m about to let you in on a secret, one of those recipes that makes people ask, “Wait, you made that from scratch?!” because it tastes better than anything you could buy pre-made. We all love the simple, nostalgic flavor of Oreos, right? But when you take that beloved chocolate crunch and swirl it into a ridiculously moist, deeply chocolatey cake, you hit a whole new level of dessert heaven. This isn’t just any chocolate cake; this is my legendary Cookies and cream cake: What are some examples?. I swear, the first time I brought this to a neighborhood potluck, I didn’t even get home before I got three texts asking for the recipe. It’s rich, it’s fudgy, and the contrast between the dark cake and the white cream filling pieces suspended throughout? Absolute perfection. Forget those dry, crumbly boxed mixes; this is the real deal, and honestly, it’s become my go-to birthday cake since I was probably ten years old, just slightly more sophisticated now, I promise!
What is cookies and cream cake?
So, what exactly is a cookies and cream cake? Think of it as the best parts of a massive Oreo milkshake baked into a beautifully tender cake layer. It’s essentially a very rich, dark chocolate cake batter—not too light, not too fluffy, but definitely moist—that gets studded throughout with crushed or roughly chopped chocolate sandwich cookies. But we don’t stop there! The magic really happens when you fold in a creamy, vanilla-forward component. I prefer a simple, tangy sour cream element in the batter to keep things incredibly tender, and then, we ice the whole glorious thing with a velvety cream cheese frosting loaded with those same cookie crumbles. It’s essentially a celebration of texture: the soft, decadent cake, the satisfying, slightly crisp cookie bits, and the smooth, slightly tart frosting. It’s comforting because it uses familiar flavors, but it feels totally indulgent, which is exactly what a great homemade cake should be. It’s chocolate, vanilla, and crunch all rolled into one happy baked good.
Why you’ll love this recipe?
If you only have one cake recipe this year, make this one. What I love the most about this particular version of the cake is that it iscookies and cream cake is how resilient it is. I’m not kidding you; I have made this recipe when I was exhausted, running on fumes, and it still turned out magnificent. Why? Because we rely on really simple, reliable techniques. First, the flavor: it’s deep. I use good quality cocoa powder—the dark stuff, not the natural kind—because I want that intense chocolate backdrop that really lets the vanilla cream pop against it. You get those little pockets of creamy filling from the cookies melting slightly, which is pure gold.
Second, the simplicity is astounding, especially for how fancy it looks. You don’t need fancy equipment; a couple of bowls and a whisk are honestly fine if you’re in a pinch. The wet and dry ingredients mix separately, and you don’t have to worry about creaming butter for ages. It comes together faster than you think. This is a lifesaver when you need a last-minute dessert for a PTA meeting or when your significant other unexpectedly suggests having friends over. And cost-wise? It’s so budget-friendly. Flour, sugar, eggs, cocoa, and a pack of cookies—that’s most of the shopping list! The only component that feels “extra” is the cream cheese for the frosting, but trust me, it’s worth every penny. My kids actually ask for this cake specifically for their school events, not the store-bought stuff. It’s the perfect balance: familiar enough for the picky eaters, yet sophisticated enough for the adults who appreciate a truly well-made chocolate cake.
How to Make Cookies and Cream Cake
Quick Overview
The secret to this cake’s incredible texture lies in treating the dry and wet ingredients separately before bringing them together gently. We’re whipping up a deeply flavorful chocolate base, then folding in the crushed cookies right at the end. The addition of hot liquid—coffee or water—blooms the cocoa powder, giving us that intense, almost black color and richness without adding extra fat. After a relatively quick bake time, we cool it completely before slathering it with a rich, tangy cream cheese frosting that has those signature cookie chunks mixed right in. It’s straightforward, but the flavor payoff is enormous—prepare for applause!
Ingredients
For the Main Batter:
2 cups All-Purpose Flour (Make sure it’s properly spooned and leveled, not scooped straight from the bag!)
1 ¾ cups Granulated Sugar (Can slightly reduce to 1 ½ cups if you prefer less sweetness)
¾ cup Unsweetened High-Quality Cocoa Powder (I splurge here; it makes a difference!)
1 ½ teaspoons Baking Soda (This gives the rise)
1 teaspoon Salt (Crucial for balancing the chocolate)
2 large Eggs (Room temperature is best, helps emulsify everything)
1 cup Buttermilk (This is non-negotiable for tenderness; if you don’t have it, make some with milk and a tablespoon of vinegar)
½ cup Vegetable Oil (Keeps it moist for days)
1 teaspoon Vanilla Extract (Pure extract, please!)
1 cup Hot Brewed Coffee (This deepens the chocolate flavor. Trust me on the hot part!)
For the Filling/Mix-Ins:
1 package (about 14 oz) Chocolate Sandwich Cookies (Oreos are the classic, but any brand works fine), finely crushed (leave some chunkier pieces for texture)
For the Cream Cheese Frosting:
8 ounces Cream Cheese, softened (Full fat is the only way to go here)
½ cup Unsalted Butter, softened
3 to 4 cups Powdered Sugar, sifted (Sifting prevents lumps!)
1 teaspoon Vanilla Extract
Pinch of Salt
½ cup finely crushed Chocolate Sandwich Cookies (The same ones used in the batter)
Step-by-Step Instructions
Step 1: Preheat & Prep Pan
First things first, get your oven humming at 350°F (175°C). This is important; the batter can’t wait! Grease and flour two 9-inch round cake pans. I always line the bottoms with parchment paper circles, too. It’s my insurance policy against sticking, and I learned that trick after ruining a perfectly good layer during a Thanksgiving rush years ago. Don’t skip the parchment!
Step 2: Mix Dry Ingredients
In a large bowl, whisk together the flour, sugar, cocoa powder, baking soda, and salt. You want this thoroughly combined so there are no hidden pockets of baking soda. Whisk it well for about 30 seconds—it should look uniform in color and texture.
Step 3: Mix Wet Ingredients
In a separate medium bowl, whisk together the eggs, buttermilk, vegetable oil, and vanilla extract until they are just combined. You don’t need to beat air into this; just make sure those yolks are broken up and incorporated into the buttermilk mixture.
Step 4: Combine
Pour the wet ingredients into the dry ingredients. Mix on low speed (or by hand) until *just* combined. Seriously, stop mixing as soon as you see no more streaks of dry flour. Now, carefully pour in the hot coffee. The batter will thin out significantly—it will look runny, almost like chocolate soup. That is perfect! Overmixing at this stage develops gluten, and we want tender, not tough, cake.
Step 5: Prepare Filling
While the batter rests for a minute, quickly prepare your cookies. I usually throw half the package into a zip-top bag and hit them with a rolling pin a few times for large chunks, and then pulse the other half in a food processor until they are fine crumbs. You want a variety of textures. Gently fold the chopped cookies into the thin chocolate batter. Don’t stir vigorously; just gently fold them in so they distribute evenly.
Step 6: Layer & Swirl
Divide the batter evenly between your two prepared pans. Bake for 30 to 35 minutes. You’ll know they are done when a wooden skewer inserted into the center comes out with moist crumbs attached, but no wet batter.
Step 7: Bake
Keep an eye on them around the 30-minute mark. My oven runs a little hot, so sometimes they are done closer to 32. When testing, if the toothpick is totally clean, they might already be over-baked, so aim for those moist crumbs I mentioned. Let them cool in the pans on a wire rack for about 15 minutes before attempting to turn them out.
Step 8: Cool & Glaze
Once inverted onto the rack, carefully peel off the parchment paper and let the layers cool completely—and I mean completely. If you frost a warm cake, the frosting melts into a soupy mess, and nobody wants that tragedy. While cooling, make your frosting (see notes below for mixing technique!). Once cool, sandwich the layers together with a generous spread of frosting, saving most of it for the exterior.
Step 9: Slice & Serve
For the cleanest slices, use a long, sharp knife, wiping the blade between each cut. Serve these at room temperature for the absolute best texture. The smell alone when you slice into this rich, dark crumb speckled with white cookie pieces is divine.
What to Serve It With
This cookies and cream cake is pretty robust on its own, but the right accompaniments can truly elevate the experience depending on when you serve it. For a simple morning treat, forget the fancy stuff—it pairs flawlessly with a strong cup of black coffee or maybe a latte where the bitterness cuts through the sweetness. I always make a few extra cookies just to stand up in the frosting for decoration!
When serving it for brunch, perhaps alongside fruit salad or quiche, I like to serve a slightly thinner drizzle of the leftover frosting on the side, almost like a dipping sauce. A glass of cold milk, of course, is mandatory for that full nostalgic effect. If you’re taking this to a dinner party as the grand finale, I highly recommend serving it with a scoop of high-quality vanilla bean ice cream—the temperature contrast is heaven—or perhaps a tart raspberry sauce to introduce a little acidity to cut the richness. For cozy, late-night snacking, a small, thin wedge enjoyed right out of the fridge is my personal tradition. The cold makes the chocolate fudgier, and the cream cheese frosting gets wonderfully dense. Seriously, don’t knock eating leftover cake for breakfast until you’ve tried it!
Top Tips for Perfecting Your Cookies and Cream Cake
I’ve made this cake enough times to have collected a few hard-earned lessons. Pay attention here; this is where the difference between good and OMG-good happens.
Mixing Advice: That initial mixing stage is crucial. When you combine the wet and dry, mix only until the flour disappears. I cannot stress this enough: stop immediately. The hot coffee activates the cocoa and baking soda, so mixing beyond that point just toughens the crumb. If you see a tiny streak of flour? That’s fine; the coffee will handle it as you pour it in. Don’t panic!
Swirl Customization: When crushing your cookies, don’t go too fine. I learned this the hard way; if everything is powder, it just tastes like chocolate cake with faint grit. You want distinct, small chunks of the cookie and some slightly bigger pieces of the white filling. About two-thirds crushed, one-third roughly chopped is my sweet spot.
Ingredient Swaps: Buttermilk is key, but if you run out, sour cream thinned with a splash of milk works wonderfully and often makes the cake even richer. Also, for the coffee—if you absolutely cannot have caffeine, use hot water, but dissolve a teaspoon of instant espresso powder in it first. It doesn’t make the cake taste like coffee, it just amps up the chocolate factor immensely.
Baking Tips: Always place your oven rack in the center. Since this is a two-layer cake, you want even heat distribution so neither layer burns or sinks. When testing for doneness, remember that this cake is inherently fudgy, so you shouldn’t look for a perfectly clean toothpick; look for moist, clinging crumbs. If you pull it out too soon, it collapses; too late, and it tastes dry.
Glaze Variations: When making the frosting, start with three cups of powdered sugar. Mix until smooth, and *then* add the fourth cup one tablespoon at a time until you reach that perfect spreadable consistency. If it gets too stiff, add a teaspoon of milk or cream. If it’s too soft, add more sugar. Also, for a visual pop, reserve a few spoonfuls of the frosting *before* adding the cookie pieces, and use that plain white frosting to decorate the top border before sprinkling the remaining cookie crumbs over the whole thing.
Storing and Reheating Tips
One of the best parts about this rich cake is how well it holds up! It truly tastes better the next day, once the flavors have had a chance to settle together. For room temperature storage, if you’ve frosted it with the cream cheese frosting, it’s safest to keep it covered tightly at room temperature for about two days maximum, especially if your kitchen is warm. I wrap the cut edges tightly with plastic wrap or cover the plate with an upside-down large bowl to keep the air out.
If you need to keep it longer, the refrigerator is your friend. Store it in an airtight container—a cake carrier works great—for up to five days. When you pull it out of the fridge, let it sit on the counter for at least an hour before serving. The texture is noticeably better once it loses that chill. Do not, under any circumstances, store this cake unwrapped in the fridge; it will dry out faster than you can say “double fudge.”
For freezing, this cake freezes like a champ! I highly recommend freezing the layers unfrosted if you plan on frosting them later, or freezing the fully assembled cake. Wrap each layer tightly first in plastic wrap, then in a layer of aluminum foil. This double wrap prevents freezer burn. It keeps beautifully for up to three months. To thaw, transfer the wrapped cake to the refrigerator overnight. If it’s a full cake, unwrap it only once it’s completely thawed to avoid condensation ruining your frosting.
Glaze Timing Advice: Always frost the cake completely before storing it in the fridge or freezer. If you are storing only the unfrosted layers, keep the frosting separate and airtight. Trying to frost a cold, hard cake layer just leads to ripped cake surfaces, trust me on that one!
Frequently Asked Questions
Final Thoughts
There you have it—the blueprint for what I genuinely believe is the superior cookies and cream cake. It’s the kind of dessert that elicits happy sighs when you present it, and it proves that sometimes the simplest combinations are the most satisfying. This recipe demands a little patience while cooling, but honestly, the active mixing time is so minimal, it practically makes itself. I hope you get to experience that moment I always do, standing in the kitchen, stealing a smear of that incredible frosting while the cake layers are waiting to be assembled. It’s pure joy.
If you love this rich, chocolatey vibe, you might also want to try my dark chocolate fudge brownies—they share the same deep cocoa base! Don’t be shy about adjusting the cookie quantity; if you want it overloaded, throw in an extra sleeve! I’m so excited for you to bake this. Please, please come back and leave a comment letting me know how your family reacted, and don’t forget to share a picture on social media if you can! Happy baking, my friend; you deserve this perfectly moist, crunchy slice of heaven!
Cookies and cream cake
Ingredients
Main Ingredients
- 2.25 cups all-purpose flour
- 2.5 tsp baking powder
- 0.5 tsp salt
- 0.5 cup unsalted butter, room temperature
- 0.5 cup vegetable oil
- 1.5 cups sugar
- 4 large eggs
- 1 cup buttermilk
- 1 tbsp vanilla extract
- 3 cups chopped Oreos about 24 Oreos
- 3 cups unsalted butter, room temperature
- 12 cups powdered sugar
- 1 tbsp vanilla extract
- 6 tbsp water or cream adjust to desired consistency
- pinch salt
- 3.5 cups chopped Oreos for frosting and decoration
Instructions
Preparation Steps
- Preheat oven to 350°F (176°C) and prepare three 8-inch cake pans by greasing the sides and lining the bottoms with parchment paper.
- In a medium bowl, whisk together flour, baking powder, and salt. Set aside.
- In a large bowl, cream together butter, vegetable oil, and sugar until light and fluffy, about 3-4 minutes.
- Add eggs one at a time, beating well after each addition. Scrape down the sides as needed.
- Add half the flour mixture to the wet ingredients and mix until combined.
- Pour in buttermilk and vanilla extract and mix until incorporated.
- Add remaining flour mixture and mix until smooth. Do not overmix.
- Fold chopped Oreos into the batter gently.
- Divide batter evenly among pans and bake for 18-23 minutes or until a toothpick inserted comes out with a few crumbs.
- Allow cakes to cool for 2-3 minutes in pans, then transfer to wire racks to cool completely.
- To make buttercream, beat butter until smooth.
- Gradually add half the powdered sugar, beating until smooth.
- Add vanilla extract, 4-5 tablespoons water or cream, and salt; mix until smooth.
- Add remaining powdered sugar gradually and mix until smooth. Adjust water or cream as needed for desired consistency.
- Level cakes by trimming domes off the tops with a serrated knife if necessary.
- Place first cake layer on a serving plate or cake board.
- Spread about 1 cup frosting over the first layer, then sprinkle with 0.5 cup chopped Oreos, pressing them gently into the frosting.
- Repeat with second cake layer, frosting, and Oreos.
- Top cake with last layer and frost the entire outside smoothly.
- Press chopped Oreos onto the frosted sides of the cake while the buttercream is still fresh.
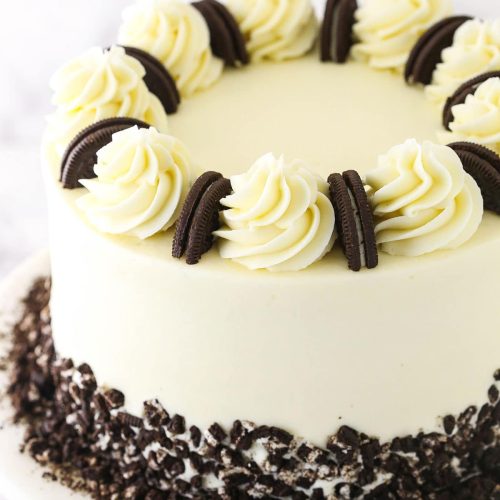
- Pipe buttercream swirls around the top edge and garnish with Oreo halves between swirls.