Oh, friends, gather ’round because I’m about to spill the beans on a recipe that has absolutely captured my heart (and my family’s stomachs!). If you’ve ever found yourself staring into the pantry, craving something that’s a perfect hug of sweet, a little bit decadent, but surprisingly easy to whip up, then you’re in for a treat. This Croissokie recipe is one of those gems that feels like a special occasion but is honestly perfect for a Tuesday afternoon. It’s got that irresistible pull, kind of like a croissant’s flaky magic meets a hearty, comforting bake. My kids, bless their little hearts, practically beg for this when they see me prepping the ingredients. It’s become my go-to when I need a little bit of joy in a hurry, and trust me, it’s a lifesaver on those busy evenings when you just don’t have time for complicated desserts but still want something truly delicious.

What is a Croissokie?
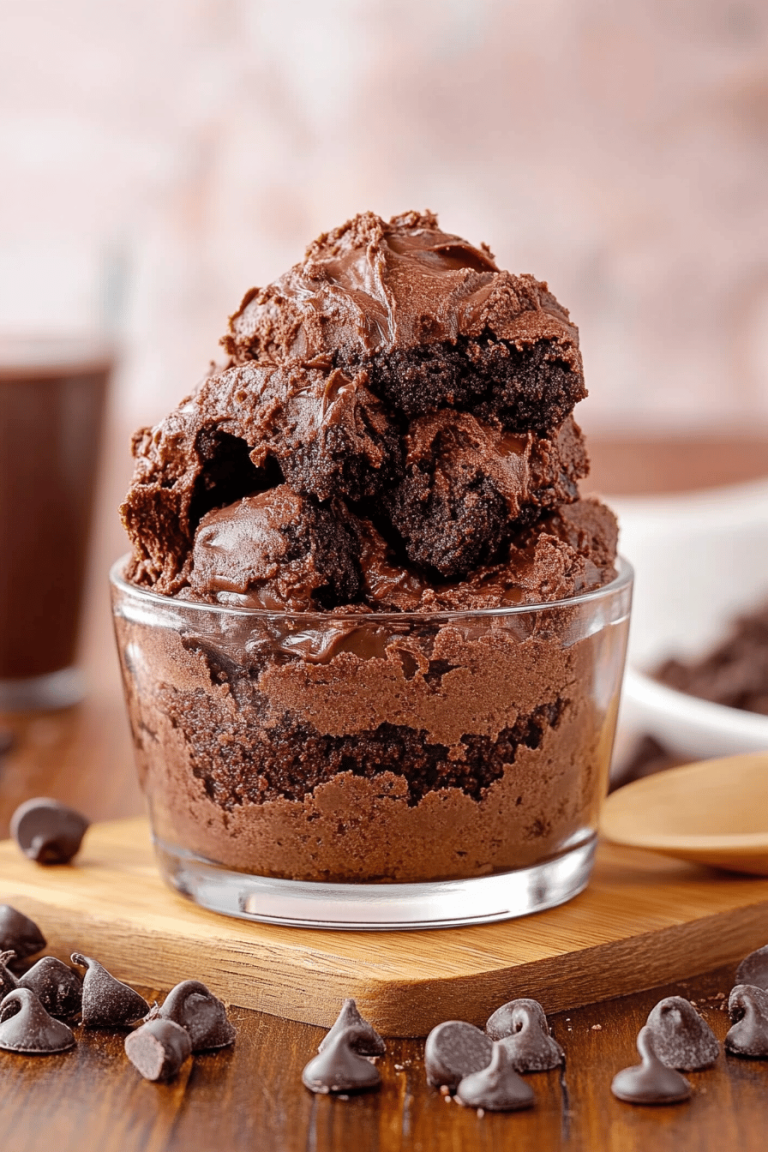
So, you might be asking, “What exactly is this Croissokie?” It’s a question I get a lot, and honestly, it’s the best kind of culinary mashup. Think of it as a delightful hybrid, a love child born from the flaky, buttery layers of a croissant and the comforting, homey embrace of a classic cookie or bar bake. The name itself kind of says it all, right? “Croiss” for croissant and “okie” for that familiar cookie vibe. It’s essentially a baked good that captures the essence of both worlds: the satisfying texture and richness of a cookie base, but with a delicate, almost ethereal quality reminiscent of a perfectly baked croissant. It’s not quite a cookie, not quite a cake, but something wonderfully in between that’s utterly addictive.
Why you’ll love this recipe?
Honestly, where do I even begin with why this Croissokie recipe is an absolute winner? Let’s break it down, because there are so many reasons why it’s earned a permanent spot in my recipe binder. First off, the flavor profile is just out of this world. You get that subtle sweetness, a hint of richness, and a texture that’s both tender and slightly crisp, depending on how long you bake it. It’s the kind of flavor that makes you close your eyes and savor every single bite. Then there’s the simplicity – and this is a big one for me. Despite how impressive it looks and tastes, it’s surprisingly straightforward to make. No fancy techniques or hard-to-find ingredients needed. Plus, it’s incredibly cost-efficient! You likely have most of the ingredients in your pantry right now, making it a budget-friendly indulgence. What I love most about this is its versatility. It’s perfect for a casual family breakfast, a fancy brunch spread, or even as a simple dessert after dinner. It’s also a fantastic base for all sorts of additions; I’ve experimented with adding different spices and even some fruit, and it always turns out wonderfully. If you enjoy my Lemon Blueberry Scones: What are some good recipes for this? or my What are some of the best chocolate chip cookie bars?, you’re going to adore this Croissokie. It hits all the right notes for comfort and indulgence.
How to Make Croissokie
Quick Overview
Making this Croissokie recipe is less about intense labor and more about gentle assembly. You’ll be whipping up a simple batter, layering it with a sweet, creamy filling, and then letting the oven do its magic. The real beauty lies in how seamlessly the flavors meld together as it bakes, creating those signature swirls and pockets of pure deliciousness. It’s a process that feels rewarding every step of the way, and the aroma that fills your kitchen is simply heavenly. Trust me, this method is designed to be fuss-free, ensuring you get amazing results even if you’re new to baking.
Ingredients
For the Main Batter:
2 and 1/4 cups all-purpose flour (plus a little extra for dusting)
1 teaspoon baking powder
1/2 teaspoon baking soda
1/4 teaspoon salt
1 cup (2 sticks) unsalted butter, softened but not melted
1 and 1/4 cups granulated sugar
2 large eggs, at room temperature
1 teaspoon pure vanilla extract
1/2 cup buttermilk (or milk with 1/2 tsp white vinegar added, let sit for 5 mins)
For the Filling:
1 cup finely grated zucchini (about 1 medium zucchini, well-drained)
1/2 cup packed light brown sugar
1 teaspoon ground cinnamon
1/4 teaspoon ground nutmeg
2 tablespoons all-purpose flour
For the Glaze:
1 cup powdered sugar
2-3 tablespoons milk (or lemon juice for a tangier flavor)
1/2 teaspoon vanilla extract

Step-by-Step Instructions
Step 1: Preheat & Prep Pan
First things first, get that oven preheating to 350°F (175°C). While it’s warming up, grab a 9×13 inch baking pan. I like to grease it well with butter or non-stick spray, and then give it a light dusting of flour. This ensures your beautiful Croissokie doesn’t get stuck, and you can easily lift it out in one glorious piece. Making sure your pan is prepped is a small step that saves a lot of potential frustration later on!
Step 2: Mix Dry Ingredients
In a medium bowl, whisk together the 2 and 1/4 cups of flour, baking powder, baking soda, and salt. Just a good whisking will do the trick to make sure everything is evenly distributed. You want those leavening agents to be well incorporated so your Croissokie bakes up perfectly light and airy. Don’t skip this step – it’s key to an even texture!
Step 3: Mix Wet Ingredients
In a separate, larger bowl, cream together the softened butter and granulated sugar until it’s light and fluffy. This is where the magic starts! Next, beat in the eggs one at a time, making sure each one is fully incorporated before adding the next. Then, stir in the vanilla extract. In a small cup, have your buttermilk ready. Alternate adding the dry ingredients and the buttermilk to the butter mixture, beginning and ending with the dry ingredients. Mix until just combined – don’t overdo it!
Step 4: Combine
Now, gently fold the dry ingredients into the wet ingredients, alternating with the buttermilk. Mix until everything is just combined. It’s really important not to overmix here; you want to avoid developing the gluten too much, which can make your Croissokie tough. A few streaks of flour are okay; they’ll disappear during baking. The batter should be thick and luscious, but still pourable.
Step 5: Prepare Filling
While your batter is resting briefly, let’s get the filling ready. In a small bowl, combine the finely grated zucchini (make sure you’ve squeezed out as much moisture as possible – this is crucial!), brown sugar, cinnamon, nutmeg, and 2 tablespoons of flour. Stir it all together until it forms a sort of crumbly, moist mixture. This is what will give you those wonderful pockets of spiced sweetness throughout your bake.
Step 6: Layer & Swirl
Pour about two-thirds of your batter into the prepared baking pan and spread it out evenly. Now, carefully spoon the zucchini filling evenly over the batter. Dollop the remaining batter over the filling, trying to cover as much of it as you can. You don’t need to spread it perfectly; the little gaps will create beautiful swirls as it bakes. If you want to get fancy, you can use a knife or skewer to gently swirl the top layer of batter into the filling, creating gorgeous patterns. I love doing this for an extra pretty presentation!
Step 7: Bake
Pop that pan into your preheated oven and bake for 30-35 minutes, or until a toothpick inserted into the center comes out clean or with just a few moist crumbs attached. The top should be golden brown and set. Keep an eye on it, as oven temperatures can vary. If it starts browning too quickly, you can loosely tent it with foil.
Step 8: Cool & Glaze
Once it’s baked to perfection, carefully remove the pan from the oven and let it cool in the pan on a wire rack for at least 15-20 minutes. This allows it to set up properly. While it’s cooling, whip up the glaze. In a small bowl, whisk together the powdered sugar, milk (start with 2 tablespoons and add more if needed for desired consistency), and vanilla extract until smooth and pourable. Once the Croissokie is mostly cool, drizzle the glaze generously over the top. I like to do this while it’s still a little warm, so the glaze melts slightly and creates a beautiful sheen.
Step 9: Slice & Serve
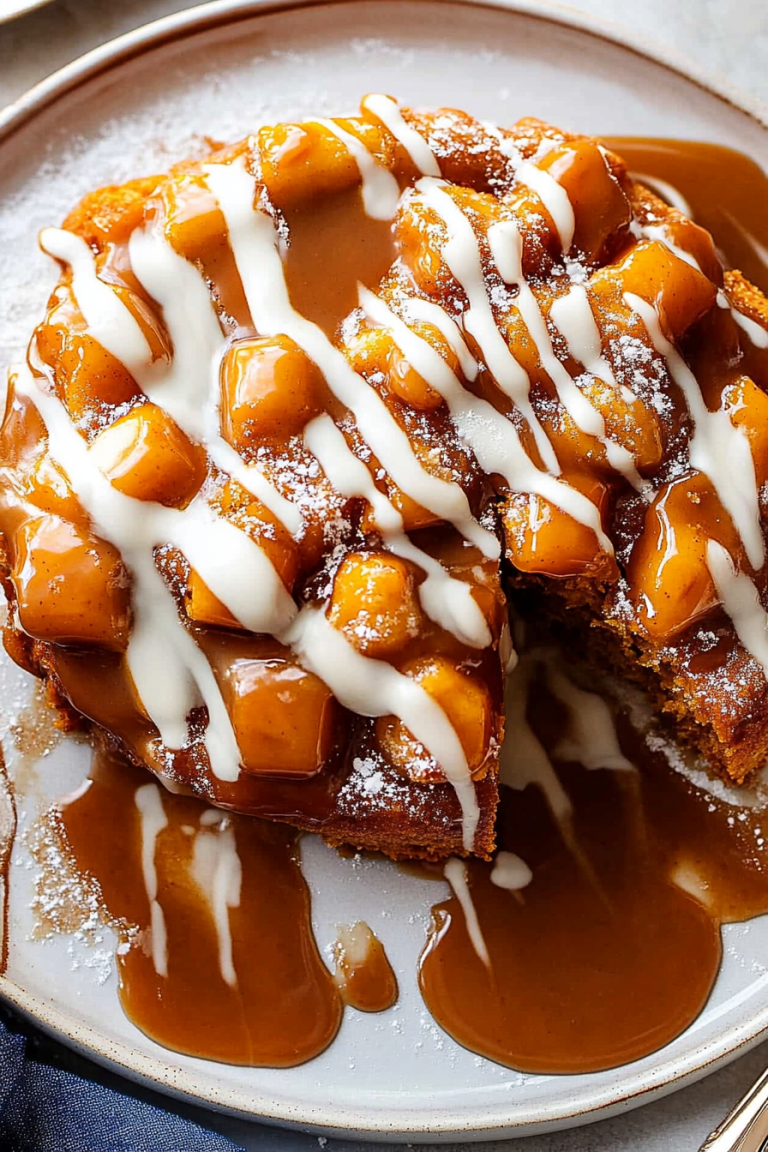
Let the glaze set a bit, then cut your Croissokie into squares or bars. It’s absolutely delicious served warm, but it’s also fantastic at room temperature. The combination of the tender cake-like base, the sweet spiced zucchini swirl, and the sweet glaze is pure bliss. Enjoy every bite!
What to Serve It With
This Croissokie is so wonderfully versatile, it truly fits into almost any meal or occasion. For a cozy breakfast, I love serving it warm with a steaming mug of coffee. The sweetness of the Croissokie and the slight hint of cinnamon is the perfect way to start the day. For a more elegant brunch, I’ll cut it into smaller, more refined squares and arrange them on a pretty platter alongside fresh fruit like berries or melon. A glass of mimosa or sparkling cider pairs wonderfully. As a dessert, it’s a dream. Serve it slightly warm with a scoop of vanilla bean ice cream or a dollop of whipped cream. The contrast in temperatures and textures is divine! And for those moments when you just need a comforting snack (which, let’s be honest, happens to me often!), a simple slice with a glass of cold milk is pure heaven. My family traditions often involve having this on a rainy Sunday afternoon, curled up on the couch with a good book – it just makes everything feel a little brighter and a lot more delicious.
Top Tips for Perfecting Your Croissokie
After making this Croissokie recipe more times than I can count, I’ve picked up a few little tricks that I think really make a difference. So, let’s talk about getting it just right! First, about the zucchini prep: it’s absolutely vital to squeeze out as much moisture as humanly possible. I usually grate my zucchini, then wrap it in a clean kitchen towel or cheesecloth and give it a good squeeze. You’d be amazed how much water comes out! Too much moisture can make your filling watery and affect the bake. When it comes to mixing the batter, remember my earlier tip: don’t overmix! Just combine until you no longer see dry flour. Overmixing can lead to a tough texture, and we want tender goodness here. For the swirl, you don’t need to be an artist. Just dollop and gently swirl. The beauty of this bake is its rustic charm. If you’re looking for ingredient swaps, I’ve successfully used almond milk instead of buttermilk in a pinch, and it made it even creamier! For the cinnamon and nutmeg, feel free to adjust to your preference, or even add a pinch of cardamom for a different twist. When baking, always trust your oven’s cues. If it’s baking faster than expected, a loose tent of foil will save the day. And for the glaze, consistency is key. If it’s too thick, add milk a teaspoon at a time. If it’s too thin, add a bit more powdered sugar. I’ve learned that a slightly thicker glaze holds its shape better for slicing.
Storing and Reheating Tips
One of the best things about this Croissokie is how well it keeps. If you have any leftovers (which is rare in my house!), you can store it at room temperature, well-covered with plastic wrap or in an airtight container, for up to 2 days. It stays wonderfully moist and delicious. For longer storage, pop it into the refrigerator. It’ll keep well for about 4-5 days. Make sure it’s properly covered to prevent it from drying out. And yes, you can absolutely freeze this! Once completely cooled, wrap the entire bake or individual slices tightly in plastic wrap, then in aluminum foil, or place in a freezer-safe container. It should keep well in the freezer for up to 2-3 months. To reheat, you can gently warm individual slices in a low oven (around 300°F/150°C) for a few minutes until warmed through. If it was glazed, I find it’s best to add the glaze *after* reheating, or if you glazed it beforehand, the glaze might melt a bit more upon reheating, which is still delicious! Just a heads-up on that.
Frequently Asked Questions
Final Thoughts

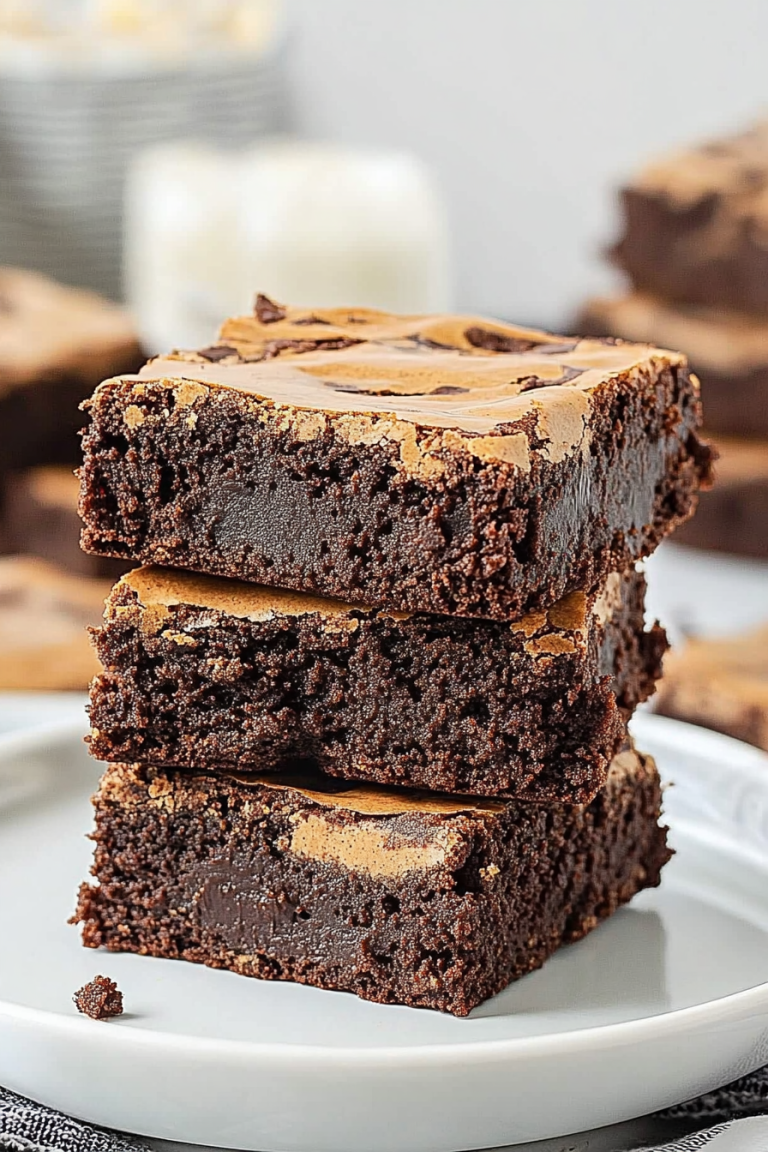
So there you have it, my friends! This Croissokie recipe is more than just a dessert; it’s a little slice of happiness that’s perfect for any occasion. It’s proof that you don’t need a ton of fancy ingredients or complicated steps to create something truly special and comforting. I truly hope you give this a try, because the moment you taste that perfect balance of tender bake and sweet, spiced filling, you’ll understand why I’m so obsessed. If you love this, you might also enjoy my Easy Banana Bread Muffins or my Decadent Brownie Recipe! Please, if you make this, let me know how it turns out in the comments below! I’d love to hear about your variations and see your beautiful creations. Happy baking, and enjoy every single delicious bite!

Croissokie Recipe
Ingredients
Croissant Dough
- 2.5 cups All-purpose flour
- 0.25 cup Granulated sugar
- 0.5 teaspoon Salt
- 0.125 cup Warm milk
- 0.125 cup Warm water
- 1.5 teaspoons Active dry yeast
- 0.25 cup Unsalted butter, softened
- 0.5 cup Unsalted butter, cold and cubed
Cookie Dough
- 1 cup Unsalted butter, softened
- 0.75 cup Granulated sugar
- 0.75 cup Packed light brown sugar
- 2 Large eggs
- 2 teaspoons Vanilla extract
- 3 cups All-purpose flour
- 1 teaspoon Baking soda
- 0.5 teaspoon Salt
- 1 cup Chocolate chips or chopped cookies
Egg Wash
- 1 Egg beaten
- 1 tablespoon Water
Instructions
Preparation Steps
- For the croissant dough: Whisk together warm milk, warm water, yeast, and sugar. Let sit for 5-10 minutes until foamy. In a large bowl, combine flour and salt. Add the yeast mixture and softened butter. Mix until a shaggy dough forms. Knead for 5-7 minutes until smooth. Shape into a rectangle, wrap, and refrigerate for 30 minutes.
- Roll out the cold butter into a thin rectangle. Place it on half of the chilled dough and fold the other half over. Pinch the edges to seal. Roll out the dough and perform a series of folds (like making puff pastry) with chilling periods in between. Aim for at least 3-4 folds.
- For the cookie dough: Cream together softened butter, granulated sugar, and brown sugar. Beat in eggs one at a time, then stir in vanilla extract. In a separate bowl, whisk together flour, baking soda, and salt. Gradually add the dry ingredients to the wet ingredients and mix until just combined. Stir in chocolate chips or chopped cookies.
- Once the croissant dough has been folded and chilled sufficiently, roll it out into a large rectangle. Cut out circles or squares. Place a dollop of cookie dough in the center of each croissant piece. Fold the croissant dough over the cookie dough to enclose it, creating a pocket. Pinch the seams to seal.
- Place the shaped croissokies on a baking sheet lined with parchment paper. Cover and let rise in a warm place for about 30-60 minutes, or until puffy. Preheat oven to 375°F (190°C).
- Brush the croissokies with the egg wash mixture. Bake for 12-15 minutes, or until golden brown and puffed.
- Let cool slightly before serving. Enjoy warm!