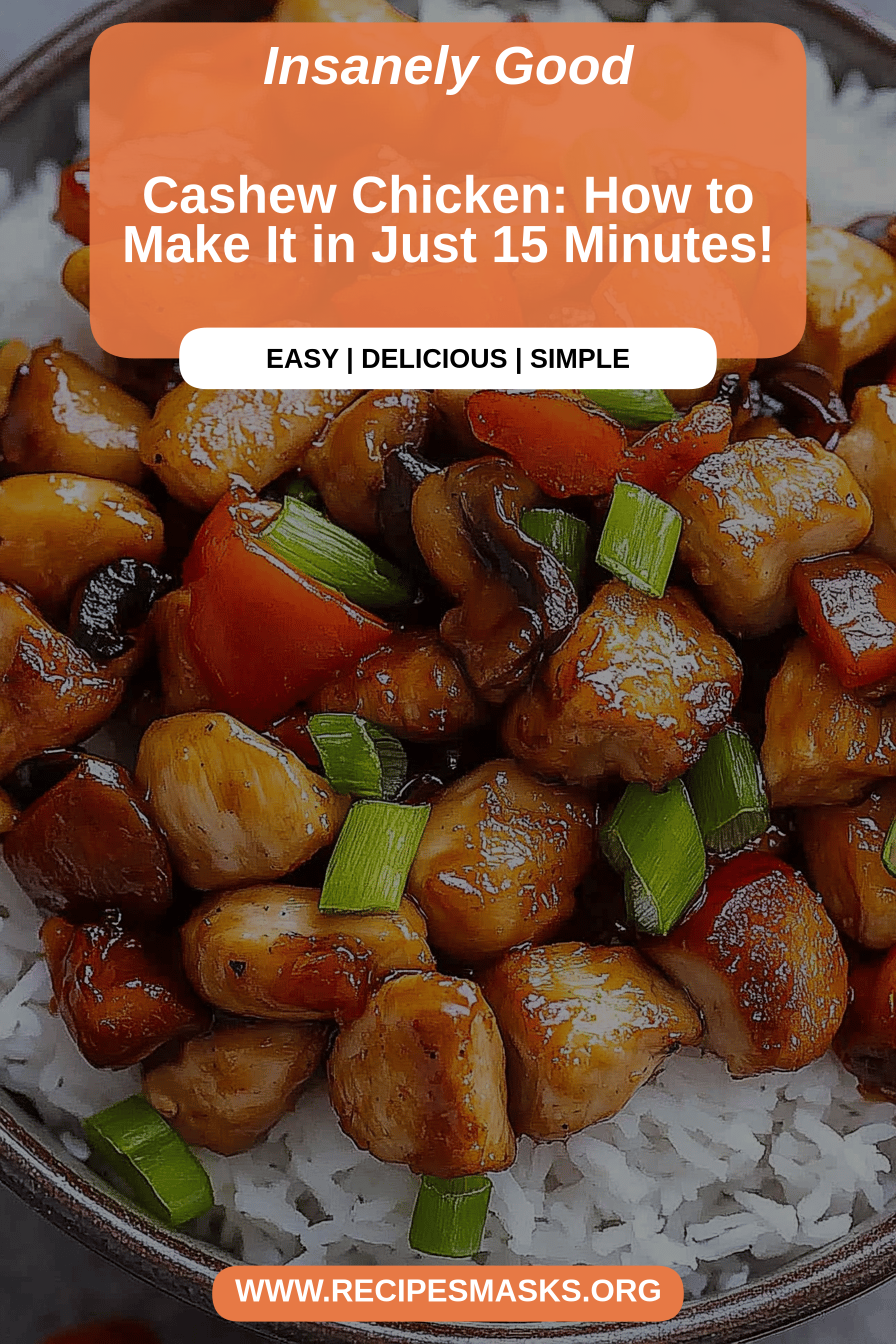
I remember the first time I ever tried making cashew chicken from scratch. It felt like this big, intimidating culinary feat. You know, the kind of dish you only get at your favorite Chinese takeout place? But let me tell you, after years of experimenting and a few kitchen mishaps (don’t ask about the time I accidentally used cornstarch instead of flour for the coating!), I’ve finally landed on a cashew chicken recipe that’s not just easy, it’s downright spectacular. It’s got that perfect balance of savory, slightly sweet, and that irresistible crunch from the cashews. Honestly, it’s become my go-to when I want something that feels like a treat but is surprisingly simple to whip up. It’s honestly in a league of its own compared to other stir-fries; the texture and flavor profile are just so satisfyingly unique. My family devours it every single time I make it, and the compliments never stop coming!
What is cashew chicken?
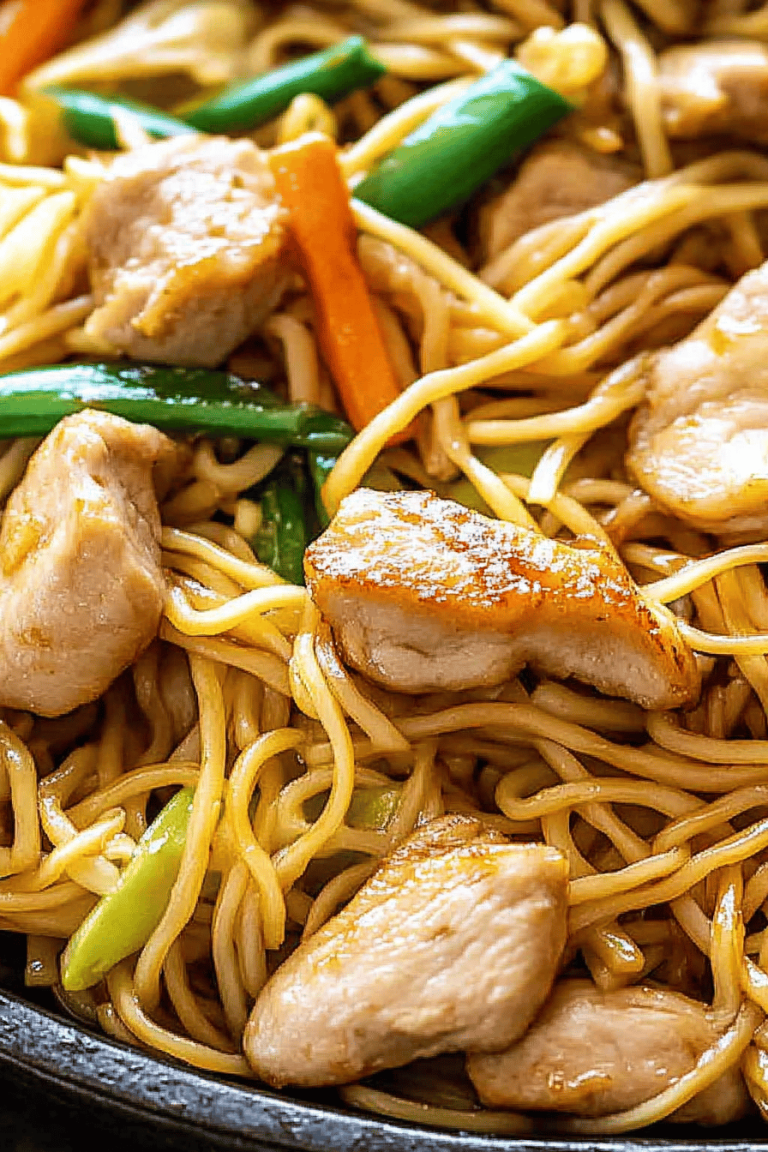
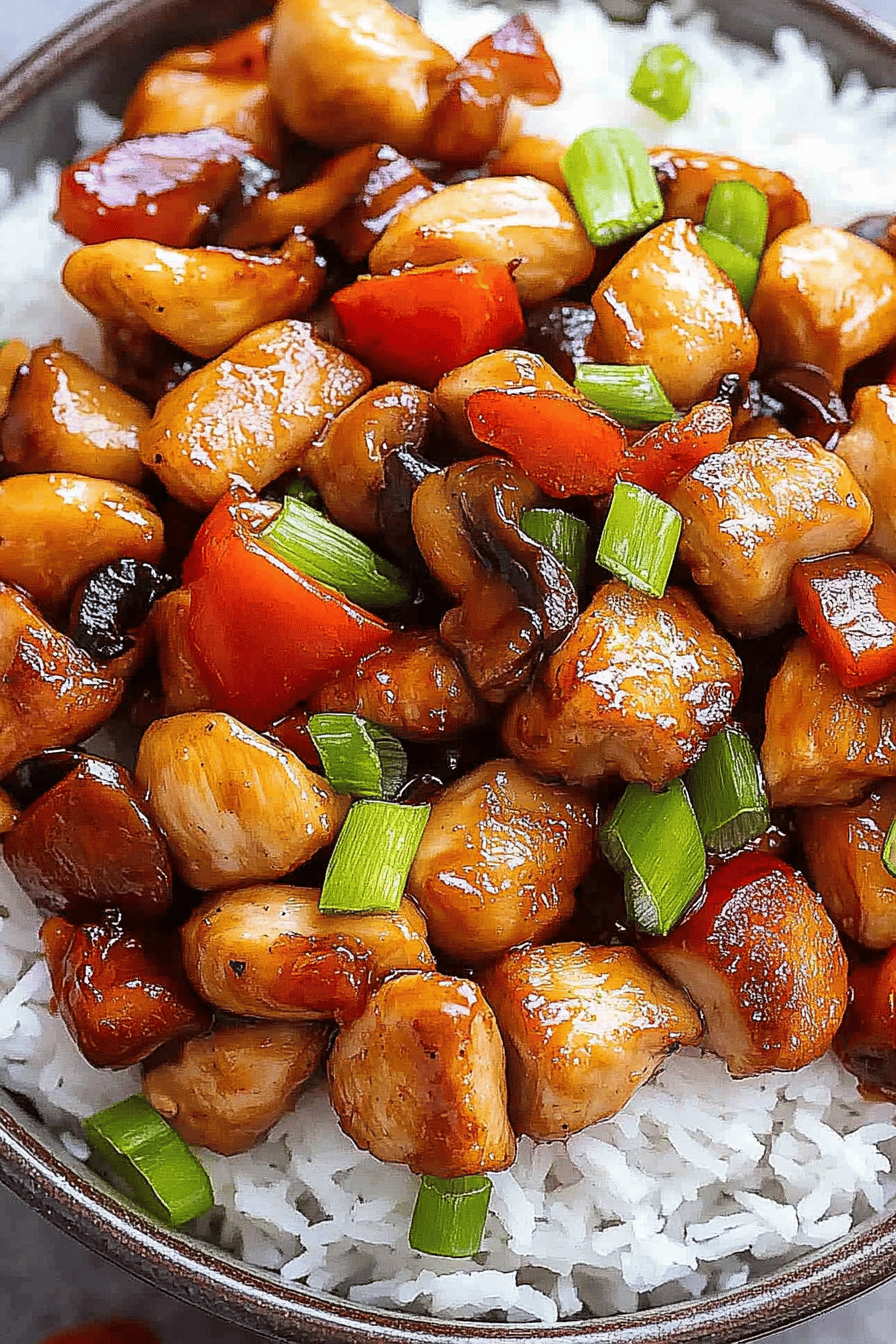
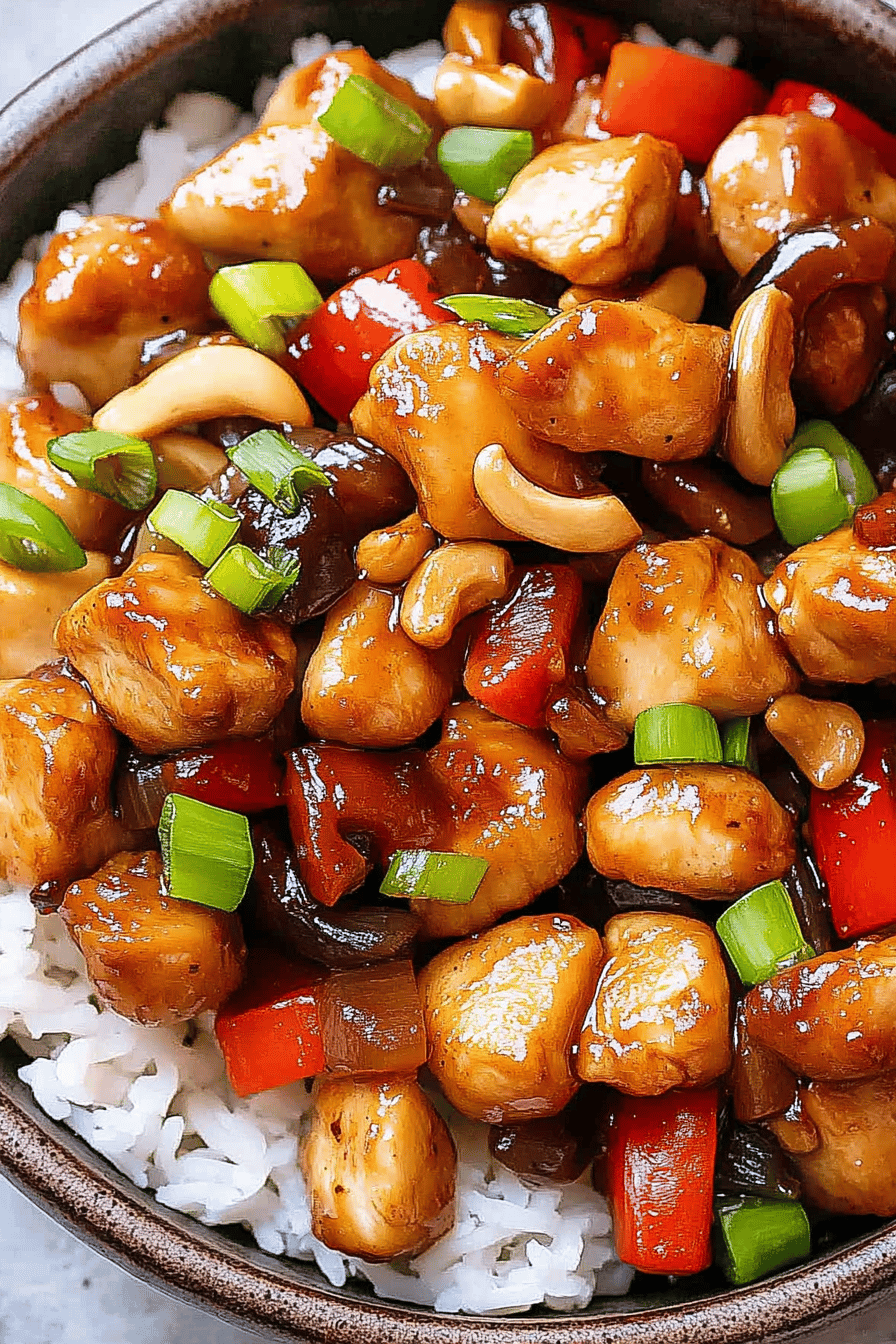
So, what exactly *is* cashew chicken? At its heart, it’s a classic Chinese-American stir-fry where tender pieces of chicken are coated and fried until golden, then tossed in a rich, savory sauce with plenty of crunchy cashews. Think of it as the comforting hug of a stir-fry, but with a bit more pizzazz. The “fried” chicken often gets a light batter or a simple coating that crisps up beautifully, making each bite a delightful contrast to the soft, nutty cashews and the glossy sauce. It’s not meant to be overly spicy or complex; it’s about celebrating simple, delicious flavors that just work so well together. The magic really happens when the sauce coats everything, making the chicken and cashews wonderfully sticky and flavorful. It’s one of those dishes that instantly makes any weeknight feel a little more special, and it’s so much more satisfying than the takeout version when you know exactly what’s gone into it.
Why you’ll love this recipe?
What are some of the reasons why this cashew chicken recipe has earned a permanent spot in my recipe collection, and I have a feeling itflavor is just out of this world. It’s got this incredible depth from the soy sauce and ginger, a hint of sweetness that’s not cloying, and then that wonderful nutty crunch from the cashews that really elevates the whole dish. It hits all the right notes! Then there’s the simplicity. I know, I know, “fried chicken” might sound daunting, but I’ve streamlined this process so much that it’s totally manageable, even on a busy weeknight. You get restaurant-quality results without the fuss. Plus, it’s surprisingly cost-efficient. Chicken Thighs are generally more budget-friendly than breasts, and the other pantry staples are things you probably already have on hand. It’s a win-win for your taste buds and your wallet! What I love most about this cashew chicken is its versatility. While it’s amazing as is, you can easily customize it. Add in some crisp-tender broccoli florets, bell peppers, or snap peas for extra color and nutrition. You can serve it over fluffy jasmine rice, or even with some tender noodles. It’s the kind of dish that makes everyone happy at the table, and that’s the best kind of recipe to have in your arsenal. It’s honestly more satisfying than a lot of my other stir-fry recipes because the texture play is just that good.
How do I make cashew chicken?
Quick Overview
This cashew chicken recipe is all about building layers of flavor and texture. We’ll start by getting our chicken perfectly coated and crispy, then we’ll whip up a quick, irresistible sauce, and finally, bring it all together with those essential crunchy cashews. The beauty of this method is how quickly it comes together once you have everything prepped. It’s a streamlined process designed to give you maximum deliciousness with minimal stress. Trust me, it’s easier than you think and the results are so worth it!
Ingredients
For the Chicken Coating:
1.5 pounds boneless, skinless chicken thighs, cut into 1-inch pieces
1/2 cup all-purpose flour
1/4 cup cornstarch
1 teaspoon salt
1/2 teaspoon black pepper
1 large egg, lightly beaten
1/4 cup water
Vegetable oil, for frying (about 1-2 inches deep in your pan)
For the Stir-Fry & Sauce:
1 tablespoon vegetable oil
3 cloves garlic, minced
1 teaspoon grated fresh ginger
1/2 cup chicken broth
1/4 cup soy sauce (or tamari for gluten-free)
2 tablespoons oyster sauce (optional, but adds great depth)
1 tablespoon rice vinegar
1 tablespoon brown sugar (or maple syrup for a refined sugar-free option)
1 teaspoon sesame oil
2 tablespoons cornstarch mixed with 3 tablespoons cold water (this is your slurry for thickening)
1.5 cups unsalted cashews, roasted (if you can find them pre-roasted, even better!)
Step-by-Step Instructions
Step 1: Preheat & Prep Pan
First things first, let’s get our frying setup ready. In a large, heavy-bottomed pot or Dutch oven, pour in enough vegetable oil to come about 1 to 2 inches up the sides. We want enough for the chicken to be submerged but not so much that it overflows. Heat the oil over medium-high heat until it reaches about 350-375°F (175-190°C). If you don’t have a thermometer, you can test it by dropping a tiny bit of the flour mixture in; it should sizzle and float immediately. While the oil heats, line a baking sheet with paper towels and set it near your stovetop. This is where our crispy chicken will go to drain.
Step 2: Mix Dry Ingredients
In a medium bowl, whisk together the all-purpose flour, cornstarch, salt, and black pepper. This blend of flour and cornstarch is key to getting that perfectly crisp coating that isn’t too heavy. Make sure it’s all nicely combined. This dry mix will adhere to the egg-washed chicken and become beautifully golden and crunchy when fried.
Step 3: Mix Wet Ingredients
In a separate small bowl, lightly beat the egg. Then, whisk in the 1/4 cup of water. This creates a simple egg wash that the dry ingredients will cling to. The water helps thin it out just enough so it coats the chicken without being too thick.
Step 4: Combine
Now, take your chicken pieces and add them to the wet ingredients. Toss them around until they’re all evenly coated in the egg wash. Then, working in batches, scoop the wet chicken pieces directly into the bowl of dry ingredients. Toss them gently to coat thoroughly. You want each piece to have a good, even layer of the flour mixture. Don’t overwork it; a light coating is better than a thick, gummy one. You can also do this by transferring the egg-washed chicken to a zip-top bag with the dry ingredients and shaking gently.
Step 5: Prepare Filling
While the chicken is frying or resting, let’s get our sauce ingredients ready. In a small bowl, whisk together the chicken broth, soy sauce, oyster sauce (if using), rice vinegar, brown sugar, and sesame oil. This is your flavor base. In a separate tiny bowl or mug, stir together the 2 tablespoons of cornstarch with 3 tablespoons of cold water. This slurry is what will thicken your sauce to that perfect glossy consistency. Set both bowls aside.
Step 6: Layer & Swirl
This step actually applies to the sauce! Once your sauce is mixed and ready, and your chicken is fried, you’ll gently toss the fried chicken and the cashews into the sauce. The ‘swirl’ aspect comes from how you combine the chicken and cashews with the sauce in the pan, ensuring everything gets beautifully coated without breaking the crispy coating too much.
Step 7: Bake
Actually, we’re frying the chicken, not baking it! So, carefully add the coated chicken pieces to the hot oil in batches, making sure not to overcrowd the pan. Overcrowding will lower the oil temperature and result in soggy chicken. Fry for about 3-5 minutes per batch, or until golden brown and cooked through. Use a slotted spoon or spider strainer to remove the chicken and place it on the prepared paper towel-lined baking sheet. Let it rest while you fry the remaining chicken. Keep the oil at the right temperature between batches.
Step 8: Cool & Glaze
Once all the chicken is fried and resting, carefully pour out most of the used frying oil, leaving about 1 tablespoon in the pan. Place the pan over medium heat. Add the minced garlic and grated ginger, and sauté for about 30 seconds until fragrant. Be careful not to burn them! Pour in the prepared sauce mixture and bring it to a simmer. Once simmering, slowly whisk in the cornstarch slurry. Continue whisking until the sauce thickens to a glossy, syrupy consistency. Add the fried chicken and roasted cashews to the pan. Toss gently to coat everything evenly. You want the sauce to cling to the chicken and cashews, making them wonderfully sticky.
Step 9: Slice & Serve
Serve your delicious cashew chicken immediately while it’s hot and crispy. It’s absolutely divine spooned over fluffy steamed jasmine rice. You can also garnish it with some chopped green onions or toasted sesame seeds for a little extra flair. The contrast between the crunchy chicken, the tender cashews, and the savory sauce is pure culinary bliss.
What to Serve It With
This cashew chicken is so versatile, it truly works for any meal and any occasion! For a simple and satisfying Breakfast, I sometimes enjoy a smaller portion with just a side of plain white rice. It’s surprisingly comforting and gives you a good start to the day, especially if you’re someone who enjoys savory breakfasts. For a lovely Brunch, imagine serving this alongside some delicate steamed dumplings or a light, refreshing cucumber salad. The rich flavors of the cashew chicken are balanced beautifully by lighter accompaniments. It really makes a casual get-together feel a bit more elevated without any extra effort. As a delightful Dessert? Okay, hear me out – while not a traditional dessert, a smaller, richer portion with a slightly sweeter glaze can be an interesting end to a meal, especially if you’re serving it after a very light appetizer. Think of it as a savory-sweet treat that’s unexpected! But my favorite way to serve it is for Cozy Snacks or weeknight dinners. It’s perfect for a family movie night, served in a big bowl for everyone to share. I always pair it with steamed white or brown rice to soak up all that glorious sauce. Sometimes, I’ll toss in some steamed broccoli or snap peas right at the end for a little added color and a nice crisp texture. My kids absolutely love it this way, and it always disappears in minutes!
Top Tips for Perfecting Your Cashew Chicken
Over the years, I’ve learned a few tricks that really make a difference in getting this cashew chicken just right. Let’s talk about Chicken Prep. Make sure you cut your chicken into uniform, bite-sized pieces. This ensures they cook evenly. If you’re using chicken thighs, trim any excess fat. For the coating, I always find that patting the chicken dry before coating helps the egg wash and flour stick better. And don’t skip the cornstarch in the dry mix; it’s the secret to that extra crispiness! When it comes to Mixing Advice, the key with the coating is to coat the chicken well but avoid overworking it. Overmixing can make the coating gummy. Once coated, fry them relatively quickly. For the sauce, Swirl Customization is all about the final toss. Gently fold the chicken and cashews into the thickened sauce, ensuring everything is coated but try not to agitate it too much, or you’ll lose that delightful crispness. If you want to add vegetables, I recommend stir-frying them separately until crisp-tender and then adding them in with the chicken and cashews at the very end. For Ingredient Swaps, if you’re out of chicken thighs, Chicken Breast can work, but be careful not to overcook it, as it can become dry quickly. You can also try adding a pinch of red pepper flakes to the sauce for a little heat, or a splash of mirin for an extra layer of sweetness. For Baking Tips, well, we’re frying! But for frying, maintaining the oil temperature is crucial. If it gets too hot, the outside will burn before the inside cooks. If it’s too cool, it’ll be greasy. I find medium-high heat is the sweet spot. And finally, Glaze Variations: If you find the sauce isn’t thickening enough, add a little more cornstarch slurry, whisking constantly. If it’s too thick, a splash more chicken broth or water will thin it out. You can also adjust the sweetness by adding more or less brown sugar. I once accidentally used honey instead of brown sugar, and it gave it a lovely floral note!
Storing and Reheating Tips
This cashew chicken is so good, sometimes I end up with leftovers, and I’ve figured out the best ways to keep it tasting amazing. For Room Temperature storage, I honestly don’t recommend leaving it out for too long, as it contains fried chicken and a sauce. It’s best to refrigerate it within two hours of cooking. If you’re transporting it or need it to sit out for a short period, cover it loosely. When it comes to Refrigerator Storage, this is my usual method for leftovers. Make sure the chicken and cashews have cooled down completely. Then, transfer everything to an airtight container. I like to store the rice separately if I have any, to prevent it from getting too mushy. It should stay good in the fridge for about 3-4 days. For Freezer Instructions, this isn’t my top choice for cashew chicken because the fried coating can lose its crispness. However, if you must freeze it, cool it completely, then wrap it tightly in plastic wrap and then in aluminum foil or place it in a freezer-safe bag. It should be good for about 1-2 months. Thaw it overnight in the refrigerator before reheating. The trickiest part is reheating – you want to try and recapture some of that crispness. For Glaze Timing Advice, if you know you’ll be storing it, I sometimes add the cashews and chicken to the sauce just before serving, and keep the sauce separate if I plan to freeze. But usually, I just toss it all together, and reheating is done in a pan.
Frequently Asked Questions
Final Thoughts
Honestly, making this cashew chicken from scratch has been such a game-changer for me, and I truly hope it becomes a staple in your kitchen too. It’s more than just a meal; it’s that feeling of accomplishment when you create something so delicious and satisfying with your own two hands. The balance of tender, crispy chicken, crunchy cashews, and that perfectly savory, slightly sweet sauce is just something special. It’s the kind of dish that brings people together and creates happy memories around the dinner table. If you love this recipe, you might also enjoy my Kung Pao Chicken for a spicier kick or my General Tso’s Chicken for another crowd-pleasing favorite. Give this cashew chicken a try, and I can’t wait to hear how yours turns out! Don’t forget to leave a comment below with your thoughts or any fun variations you try. Happy cooking!
Cashew Chicken
Ingredients
Main Ingredients
- 1.5 pounds boneless, skinless chicken breasts cut into 1-inch pieces
- 0.5 cup cashews unsalted, roasted
- 1 tablespoon vegetable oil
- 1 medium onion chopped
- 2 cloves garlic minced
- 0.5 teaspoon ground ginger
Sauce Ingredients
- 0.25 cup soy sauce
- 0.25 cup chicken broth
- 2 tablespoons oyster sauce
- 1 tablespoon rice vinegar
- 1 tablespoon sesame oil
- 1 tablespoon cornstarch
- 2 tablespoons water
Instructions
Preparation Steps
- In a small bowl, whisk together soy sauce, chicken broth, oyster sauce, rice vinegar, and sesame oil. In another small bowl, whisk together cornstarch and water to create a slurry.
- Heat vegetable oil in a large skillet or wok over medium-high heat. Add chicken and cook until browned and cooked through, about 5-7 minutes. Remove chicken from skillet and set aside.1.5 pounds boneless, skinless chicken breasts
- Add onion and red bell pepper to the skillet and cook until softened, about 3-4 minutes. Add garlic and ginger and cook for 1 minute more until fragrant.1.5 pounds boneless, skinless chicken breasts
- Return chicken to the skillet. Pour in the sauce mixture and bring to a simmer.1.5 pounds boneless, skinless chicken breasts
- Whisk the cornstarch slurry again and gradually stir it into the simmering sauce until thickened. Stir in the cashews.1.5 pounds boneless, skinless chicken breasts
- Serve hot over steamed rice.