Okay, so let’s talk about brownies. Not just any brownies, mind you. I’m talking about the kind that are so intensely chocolatey, so gloriously fudgy, and so ridiculously easy to make that they’ve become my go-to for literally any chocolate craving. Seriously, if I’m having one of those days where the world feels a little… much, and I need something comforting and utterly delicious, these are what I whip up. They’re like a warm hug in dessert form. Forget those cakey, dry brownies that leave you feeling disappointed; these are the real deal. I’ve tried a million brownie recipes over the years, from fancy bakery-style ones to super-quick box mixes, but these? These Flourless Chocolate brownies have a permanent spot in my heart (and my recipe binder). They’re so good, my family devours them in mere minutes, and honestly, I’m usually right there with them.
What is flourless chocolate brownie?
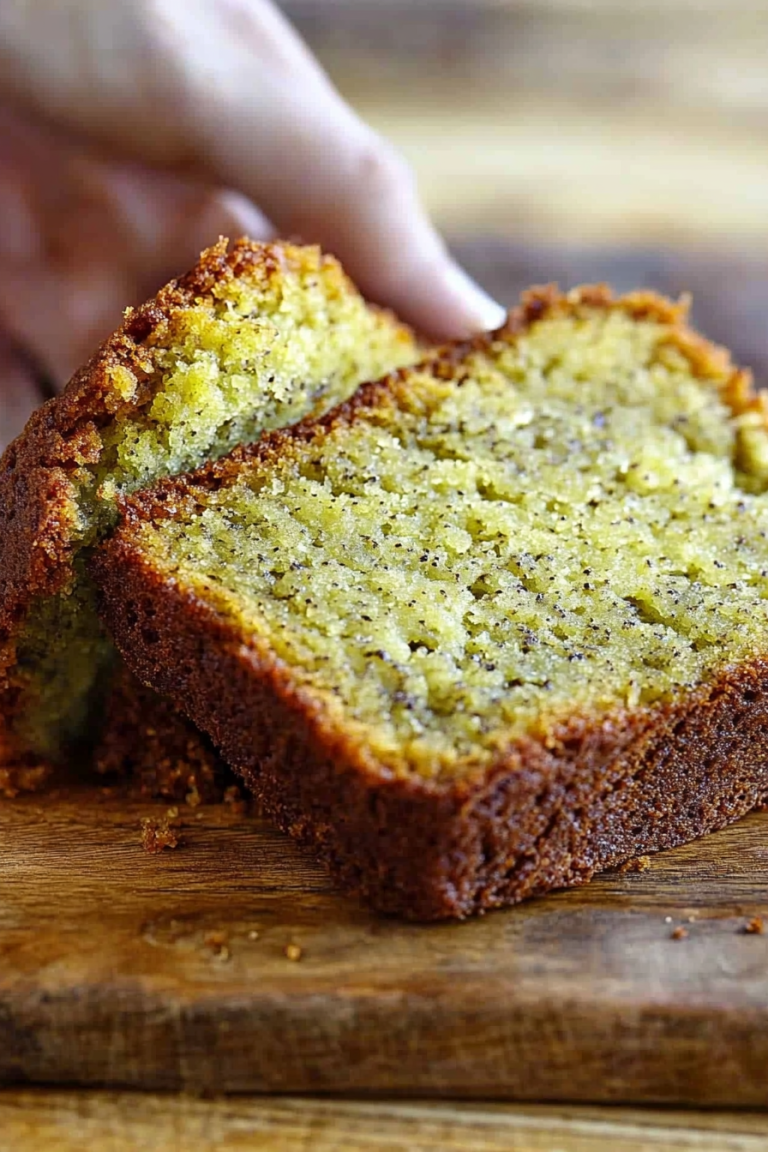
So, what exactly *are* these magical things? At their core, they’re brownies that ditch the flour. Yep, you read that right! Instead of flour providing structure, we rely on eggs, chocolate, and a touch of butter to create this incredibly rich, dense, and gooey texture. Think of it as a decadent chocolate truffle that happens to be baked. The absence of flour is what gives them that signature fudgy center and a slightly chewy edge that’s just *chef’s kiss*. The name itself, “flourless chocolate brownies,” sounds a bit fancy, doesn’t it? But trust me, the process is anything but complicated. It’s essentially melting, mixing, and baking. It’s a lifesaver when you’re short on time or, like me, sometimes forget to pick up flour at the grocery store and *really* need chocolate, like, yesterday. They’re pure, unadulterated chocolate bliss.
Why you’ll love this recipe?
There are so many reasons why I think you’re going to adore this recipe as much as I do. First and foremost, the flavor is just out of this world. We’re talking deep, dark, intense chocolate that coats your tongue. It’s not overly sweet, which I appreciate because it lets the quality of the chocolate really shine through. And the texture! Oh, the texture. It’s that perfect balance of fudgy in the middle with a slightly crisp, caramelized edge. It’s the kind of brownie that makes you close your eyes with the first bite. Then there’s the simplicity. Honestly, this is probably one of the easiest chocolate desserts I make. It takes barely any time to mix up, and the ingredients are pretty standard. You likely have most of them in your pantry right now. What I love most is that it feels like a gourmet treat, but it’s surprisingly budget-friendly. You don’t need any fancy or expensive ingredients to achieve this level of deliciousness. Plus, they’re naturally gluten-free, which is a huge bonus for my friends who have gluten sensitivities. I’ve even made them with a mix of dark and milk chocolate to get a different flavor profile, and it turned out beautifully! This recipe is a testament to the fact that sometimes, the simplest things are the most delicious.
How do you make Flourless Chocolate Brownies?
Quick Overview
This recipe is all about letting good quality chocolate do the heavy lifting. You’ll melt your chocolate and butter together, whisk in sugar and eggs until it’s glossy, then fold in your cocoa powder and vanilla. The magic happens in the baking: a relatively short bake time is key to achieving that perfect fudgy center. It’s a straightforward process, requiring minimal effort but delivering maximum flavor. You’ll be amazed at how quickly you can go from craving to consuming these delectable brownies.
Ingredients
For the Main Batter:
Let’s start with the heart of these brownies: the chocolate. I always recommend using good quality chocolate; it makes a world of difference. I usually go for a semi-sweet or bittersweet chocolate, around 60-70% cacao. You’ll need about 6 ounces (170g). If you can’t find bars, good quality chocolate chips work too, but they might take a minute longer to melt smoothly. Next up, unsalted butter. About 1/2 cup (113g) will do the trick. Using unsalted lets you control the saltiness perfectly. For sweetness, we’ll use granulated sugar, 1 cup (200g). And then, the stars that bind it all together: eggs. You’ll need 2 large eggs, plus 2 large egg yolks. The extra yolks are my secret to that extra fudgy, rich texture! A teaspoon of pure vanilla extract is essential for rounding out the flavors. And finally, for that deep chocolate punch, 1/4 cup (25g) of unsweetened cocoa powder. Don’t skimp on this; it’s what makes them truly brownie-like.
For the Filling:
Honestly, these brownies are so good on their own, they barely need anything else! But if you’re feeling adventurous, I love to add a few things. My absolute favorite is a swirl of raspberry jam or preserves. Just a few tablespoons, warmed slightly and swirled in at the last minute, add a lovely tartness that cuts through the richness beautifully. You could also do a swirl of Peanut Butter or even some chopped nuts like walnuts or pecans if you’re feeling it. For the jam, just have about 1/4 cup (60g) ready to go.
For the Glaze:
This is completely optional, but if you want that extra touch of decadence, a simple glaze is perfect. I usually just melt a little more chocolate (about 2 ounces, 57g) with a teaspoon of butter or coconut oil until smooth. Sometimes, I’ll stir in a tiny splash of milk or cream to make it a bit thinner. You can drizzle this over the cooled brownies for an extra glossy finish. It’s entirely up to you – these brownies are amazing with or without it!
Step-by-Step Instructions
Step 1: Preheat & Prep Pan
First things first, get that oven preheating to 350°F (175°C). This is a pretty standard baking temperature and it works perfectly for these brownies. Grab an 8×8 inch baking pan. You can use parchment paper to line it, leaving some overhang on the sides. This makes lifting the brownies out so much easier later on, and it also helps keep the pan clean. If you don’t have parchment, just grease and flour your pan really well. Make sure you get into all the corners!
Step 2: Mix Dry Ingredients
In a medium bowl, whisk together the unsweetened cocoa powder and a pinch of salt. If you’re using any additional dry ingredients like nuts, you’d add them here too. Whisking them together now ensures they’re evenly distributed throughout the batter later on. It’s a small step, but it really pays off in the final product. You want to make sure there are no pockets of cocoa powder.
Step 3: Mix Wet Ingredients
Now for the melty goodness! In a heatproof bowl set over a saucepan of simmering water (a double boiler setup), combine your chopped chocolate and butter. Stir gently until everything is completely melted and smooth. Be careful not to let the water boil too vigorously; you don’t want to scorch the chocolate. Once smooth, remove the bowl from the heat. In a separate, larger bowl, whisk together the granulated sugar, eggs, and egg yolks until they are well combined and the mixture looks a little lighter in color. Then, whisk in the vanilla extract.
Step 4: Combine
Pour the melted chocolate and butter mixture into the egg and sugar mixture. Whisk everything together until it’s smooth and glossy. Now, gently fold in the cocoa powder mixture you prepared earlier. Use a spatula and fold until just combined. You don’t want to overmix here; overmixing can make the brownies tough, and we want them to be tender and fudgy. Just a few streaks of cocoa remaining are fine; they’ll disappear as you continue.
Step 5: Prepare Filling
If you’re adding a swirl, now’s the time to get that ready. If you’re using jam, spoon it into a small bowl. If it’s a bit thick, you can warm it up for about 10-15 seconds in the microwave to make it more pourable. If you’re using something like Peanut Butter, just make sure it’s soft enough to swirl easily.
Step 6: Layer & Swirl
Pour the brownie batter into your prepared baking pan and spread it out evenly. If you’re adding a swirl, dollop spoonfuls of your jam (or Peanut Butter) over the top of the batter. Then, take a knife or a skewer and gently swirl it through the batter. Don’t over-swirl, or you’ll mix it in too much; you want distinct ribbons of flavor.
Step 7: Bake
Pop the pan into your preheated oven. Bake for about 20-25 minutes. This is where the magic happens. The edges should look set and slightly firm, but the center should still be a little soft and jiggly. A toothpick inserted into the center should come out with moist crumbs attached, not wet batter. This is crucial for that fudgy texture! Overbaking will result in dry brownies, so keep a close eye on them towards the end.
Step 8: Cool & Glaze
Once they’re baked, take them out of the oven and let them cool completely in the pan on a wire rack. This is super important! While they’re still warm, they’ll be too fragile to handle. Let them cool for at least an hour, or even better, pop them in the fridge for a bit to firm up. If you’re adding a glaze, now is the time. Melt your extra chocolate and butter (or oil), let it cool slightly, then drizzle it over the cooled brownies. Let the glaze set before slicing.
Step 9: Slice & Serve
Once cooled (and glazed, if you chose to do so), lift the brownies out of the pan using the parchment paper overhang. Place them on a cutting board. For the cleanest slices, use a sharp knife that you’ve run under hot water and dried. Wipe the knife clean between each cut. Slice into squares and enjoy! These are absolutely divine served slightly warm, or at room temperature. A little scoop of vanilla ice cream or a dollop of whipped cream is never a bad idea, either!
What to Serve It With
These brownies are such a crowd-pleaser, and they really do go with almost anything, depending on the occasion. For a leisurely weekend breakfast (yes, I sometimes have brownies for breakfast, don’t judge!), a strong cup of coffee is the perfect companion. The bitterness of the coffee balances the sweetness of the brownie beautifully. For a more elegant brunch spread, I like to serve them cut into smaller, bite-sized squares on a pretty platter. A glass of cold milk or even a mimosa would be lovely alongside. As a decadent dessert, they truly shine. I love pairing them with a scoop of good quality vanilla bean ice cream or a rich chocolate gelato. A raspberry coulis drizzled around the plate adds a pop of color and flavor that’s just divine. And for those cozy, late-night snack cravings, there’s nothing better than a warm brownie, maybe with a glass of milk, enjoyed in your comfiest PJs. My family has a tradition of having these on movie nights, and everyone gets their own little square, sometimes topped with a dusting of powdered sugar.
Top Tips for Perfecting Your Flourless Chocolate Brownies
Over the years, I’ve learned a few tricks that consistently make these brownies turn out perfectly fudgy and delicious. First, about the chocolate: Don’t be tempted to use milk chocolate if the recipe calls for semi-sweet or dark. The flavor profile will be completely different, and the results won’t be as rich. Melting chocolate slowly over a double boiler is key. If you microwave it, do it in short bursts (15-30 seconds) and stir in between, otherwise, you risk scorching it. When you’re combining the wet and dry ingredients, really, *really* try not to overmix. Overmixing develops the gluten in the flour (which we don’t have here, but it still toughens the texture) and can lead to a less tender brownie. Just fold until you don’t see large streaks of dry ingredients. My favorite trick for that fudgy texture? The extra egg yolk! It adds fat and richness without making the brownies cakey. And speaking of texture, don’t be afraid of a slightly underbaked center. That’s where the magic happens! The brownies will continue to cook and set as they cool in the pan. A toothpick test is your best friend here; you want moist crumbs, not clean. If you like a bit of crunch, adding chopped nuts like walnuts or pecans to the batter after folding in the cocoa is fantastic. Just about 1/2 cup is usually perfect. For the swirl, warm jam or peanut butter makes it much easier to get those pretty ribbons. And remember, proper cooling is non-negotiable! If you try to slice them too early, they’ll just crumble apart.
Storing and Reheating Tips
These brownies are notoriously good at disappearing quickly, but if you happen to have any leftovers (a rare occurrence in my house!), they store quite well. For best results, keep them at room temperature in an airtight container for up to 3 days. They tend to stay the fudgiest when stored this way. If your kitchen is particularly warm, or if you’ve added a glaze that you’re worried about melting, they can be stored in the refrigerator for up to a week. Just make sure to let them come back to room temperature for about 20-30 minutes before serving, as they can get quite firm when chilled. My absolute favorite way to store them for longer periods, though, is in the freezer. You can wrap individual brownies tightly in plastic wrap, then place them in a freezer-safe bag or container. They’ll stay delicious for up to 2-3 months. To reheat, you can either let them thaw at room temperature or pop a frozen brownie in the microwave for about 15-20 seconds on a low setting, just until warmed through. If you’ve glazed them, I generally recommend adding the glaze *after* they’ve been stored and reheated, as the glaze can sometimes get a bit sticky or melt unevenly during storage and reheating. Though, if you are eating them within a day or two, glazing them before storing at room temp is usually fine.
Frequently Asked Questions
Final Thoughts
I really hope you give these flourless chocolate brownies a try. They’re more than just a dessert to me; they’re a little piece of comfort, a quick fix for a sweet craving, and a guaranteed win every single time I bake them. They prove that you don’t need a ton of ingredients or complicated steps to create something truly spectacular. The deep chocolate flavor, the impossibly fudgy texture, and that hint of chewiness around the edges – it’s just pure bliss. If you love rich, decadent chocolate treats, these are going to be your new favorite. I also have a killer recipe for [link to another brownie recipe here, e.g., “one-bowl chocolate chip cookies”] that you might enjoy if you’re on a baking kick! Don’t be shy about letting me know how yours turn out in the comments below. I’d absolutely love to hear about any variations you try or how much your family devours them! Happy baking, everyone!
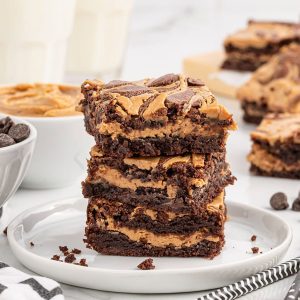
Peanut Butter Brownies {Fudgy and Chewy}
Ingredients
Dry Ingredients
- 0.75 cup all-purpose flour spooned and leveled
- 0.5 cup unsweetened cocoa powder
- 0.5 teaspoon baking powder
- 0.5 cup chocolate chips your choice of milk, semi sweet or dark chocolate chips
- 0.5 teaspoon kosher salt
Wet Ingredients & Peanut Butter Swirl
- 0.5 cup salted butter melted and cooled
- 0.75 cup granulated sugar
- 0.75 cup light brown sugar
- 2 count extra large eggs room temperature
- 2 teaspoons pure vanilla extract
- 1 cup creamy peanut butter Divide ⅓ cup for body of brownies and ⅔ cup for peanut butter swirls
Instructions
Preparation Steps
- Preheat the oven to 350°F. Line a 9x9 baking dish with parchment paper, leaving a slight overhang to help lift the brownies out of the pan. You can use small binder clips to fasten the top edge of the parchment paper to the baking dish to prevent it from folding over onto the brownies as they bake. Lightly spray the parchment paper with nonstick cooking spray.
- In a small bowl, whisk together the flour, unsweetened cocoa powder, baking powder, and chocolate chips.
- In a medium-sized mixing bowl, add the melted and cooled butter.
- Add the granulated and light brown sugar, room temperature eggs, vanilla extract and kosher salt to the butter and stir just until combined.
- Stir in the flour mixture and chocolate chips just until combined. (It’s very important to not overmix the brownie batter which would make tough textured brownies)
- Use a silicone spatula, or an offset spatula to spread half of the brownie batter evenly into the prepared baking dish.
- Dollop teaspoons of the ⅓ cup creamy peanut butter on top of the brownie batter. (You can add the creamy peanut butter to a piping bag for more control)
- Spread the remaining brownie batter over the top of the creamy peanut butter dollops.
- Heat the ⅔ cup of peanut butter in a microwave safe bowl for about 10 seconds and stir well.
- Drizzle the heated creamy peanut butter over the top of the brownie batter. Use the tip of a knife to create a swirl pattern.
- Bake for about 30 minutes, or until a toothpick inserted comes away with a few moist crumbs.
- Allow the brownies to cool completely at room temperature for 2 hours before cutting 4 slices x 4 slices and serving.