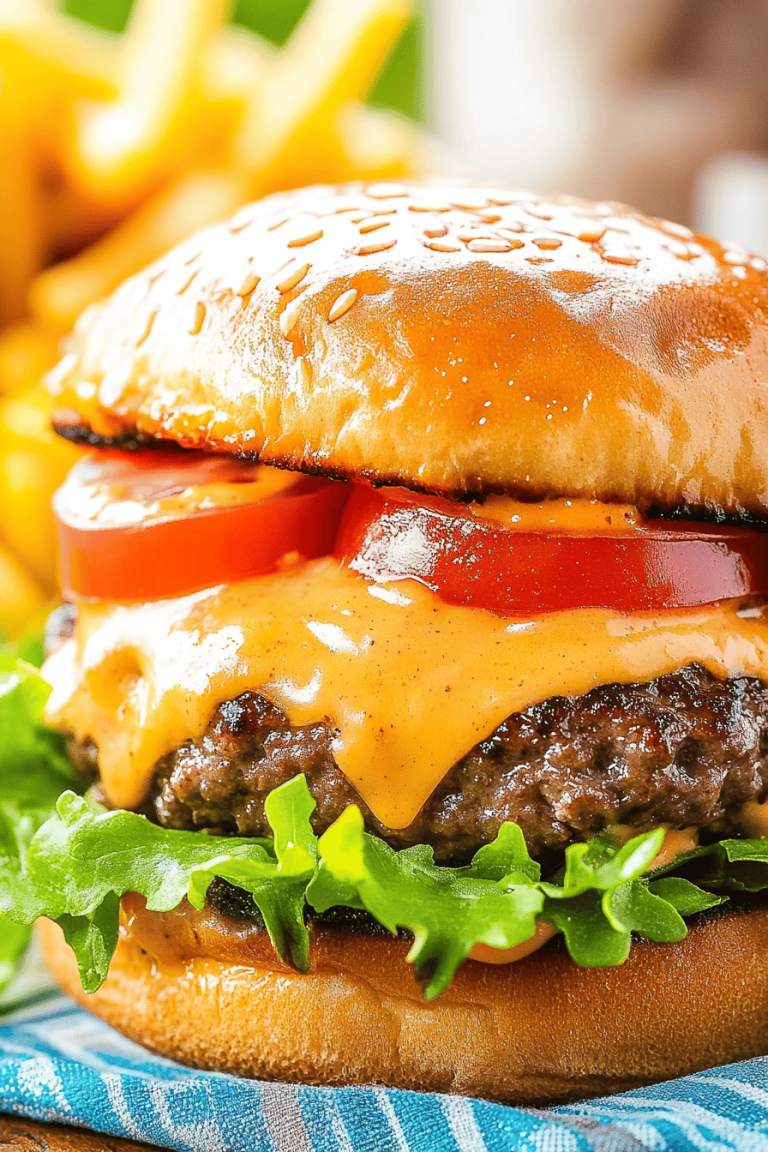
There are few things that bring me as much joy as a perfectly cooked batch of baked wings. Seriously, if you’ve ever been disappointed by soggy, sad, oven-baked chicken wings, you are in for a treat. My journey to this ultimate baked wings recipe wasn’t exactly a straight line, mind you! I remember my mom making them when I was a kid, and they were… fine. Edible. But they never had that satisfying crunch, that deep, savory flavor that makes you close your eyes with each bite. It wasn’t until I started experimenting in my own kitchen, wanting something that mimicked the deliciousness of fried wings without all the fuss and grease, that I stumbled upon this method. It’s become our go-to for game nights, casual dinners, and honestly, just when a craving hits out of nowhere. These baked wings are so good, they often disappear faster than I can get them onto the serving platter – my kids are always the first in line, and they’re picky eaters, so that’s saying something!
What are some of the best baked wings?
So, what exactly makes these baked wings so special? Think of them as the star player you always wanted on your team. They’re not just “baked chicken wings;” they’re a testament to how simple techniques and a little bit of love can transform humble chicken wings into something truly spectacular. The magic lies in a two-step cooking process that ensures an unbelievably crispy exterior while keeping the inside juicy and tender. It’s essentially a low-and-slow start to render out the fat, followed by a high-heat blast to achieve that irresistible crunch. We’re talking about wings that hold their own against any deep-fried version, but without the mess or the guilt. It’s the kind of dish that makes people ask, “How did you do this?” and the answer is surprisingly simple.
Why you’ll love this recipe?
There are so many reasons why this baked wings recipe has earned a permanent spot in my recipe rotation, and I just know you’re going to love it too. First and foremost, the flavor is just out of this world. We’re talking a symphony of savory, slightly spicy (but adjustable!), and utterly addictive notes that coat every single wing. The texture? Oh, the texture! Forget anything remotely close to rubbery chicken. These wings boast a golden-brown, shatteringly crisp skin that’s just begging to be bitten into. It’s that perfect crunch that’s so hard to achieve when baking.
And then there’s the simplicity. Honestly, if you can chop vegetables, you can make these. I’ve made them on the busiest weeknights when I’m starting dinner at 7 PM and everyone’s starving. The prep is minimal, and the oven does most of the heavy lifting. Plus, it’s incredibly cost-effective! chicken wings are usually quite affordable, and the rest of the ingredients are pantry staples. You get restaurant-quality results without the restaurant price tag. I’ve tried other methods, like just tossing them in sauce and baking, but they never quite get that perfect crisp. This method is a game-changer. It’s also super versatile – I’ll often whip up a double batch and serve them with different dipping sauces to keep things interesting. What I love most, though, is the reaction. Seeing my family and friends devour them, asking for more, that’s what makes this recipe a winner in my book.
How do you make Baked Wings?
Quick Overview
The core of this recipe is a two-stage baking process. We start by baking the wings at a moderate temperature to render out the fat and dry out the skin. This is where the magic happens, ensuring a crispy finish later on. Then, we crank up the heat for a final blast, giving them that irresistible golden-brown crispness. It sounds simple, and it truly is! You’ll end up with wings that are incredibly juicy on the inside and wonderfully crunchy on the outside, no frying required. It’s the ideal method for anyone looking for delicious, crowd-pleasing wings that are surprisingly easy to make.
Ingredients
For the Wings:
2.5 – 3 pounds chicken wings, separated into drumettes and flats (tips can be discarded or saved for stock)
2 tablespoons Olive oil or other neutral cooking oil
1 teaspoon baking powder (this is the secret weapon for crispiness, trust me!)
1 teaspoon salt
1/2 teaspoon black pepper
For the Sauce (Classic Buffalo Style):
1/2 cup Frank’s RedHot sauce (or your favorite cayenne pepper sauce)
2 tablespoons unsalted butter, melted
1 tablespoon white vinegar
1/2 teaspoon garlic powder
1/4 teaspoon cayenne pepper (optional, for extra heat)
Optional Garnishes/Dips:
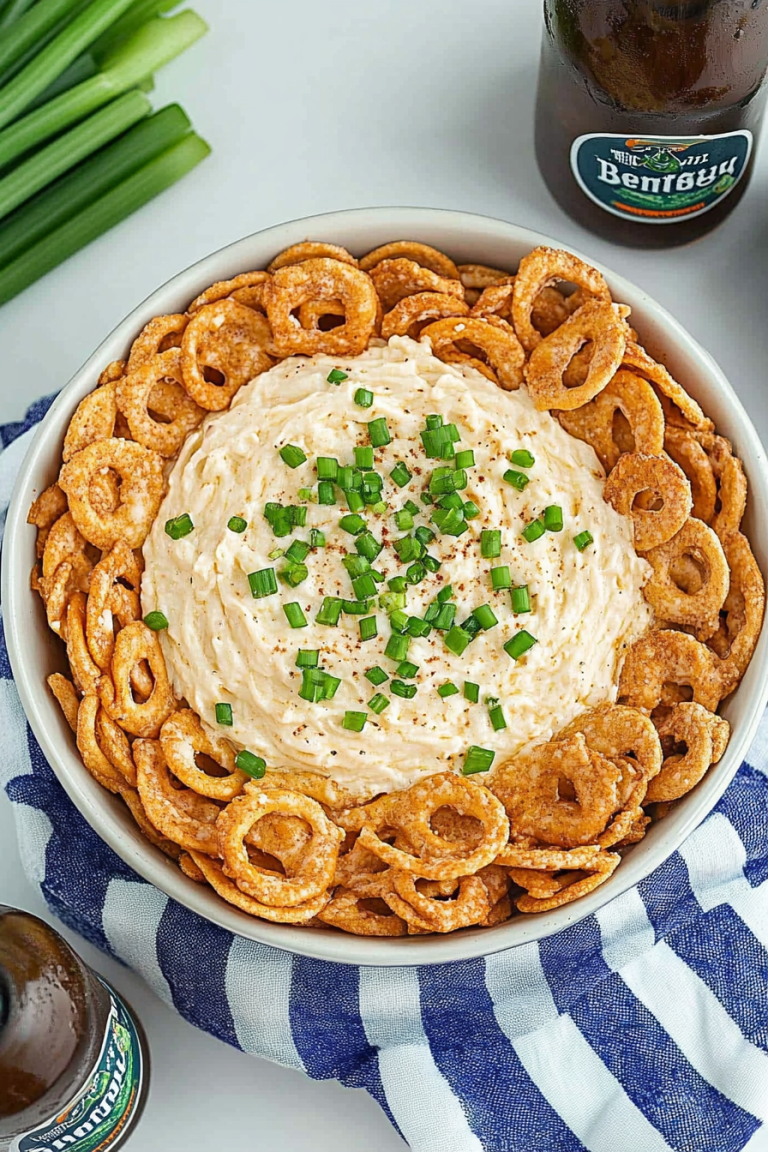
Celery sticks
Blue cheese dressing or ranch dressing
Step-by-Step Instructions
Step 1: Preheat & Prep Pan
First things first, preheat your oven to a nice, steady 400°F (200°C). While the oven is warming up, grab a large baking sheet. To make cleanup a breeze (because nobody likes scrubbing burnt-on bits!), I highly recommend lining your baking sheet with parchment paper or aluminum foil. Then, place a wire rack on top of the baking sheet. This elevated rack is crucial because it allows air to circulate all around the wings, which is key for getting them evenly crispy. Don’t skip this! Lay your chicken wings out on the rack in a single layer, making sure they aren’t overlapping. This ensures each wing gets direct heat and can crisp up beautifully.
Step 2: Mix Dry Ingredients
In a medium bowl, combine the baking powder, salt, black pepper, and any other dry spices you might want to add (like paprika, onion powder, or a touch of chili powder for an extra kick). Whisk them all together really well. The baking powder is a game-changer here. It’s not for leavening, but it helps to dry out the chicken skin as it bakes, making it incredibly crispy without any need for deep frying. Make sure your wings are completely dry before you add this mixture – I usually pat them down with paper towels. This is a step I learned after many batches of not-so-crispy wings; a dry wing is a crispy wing!
Step 3: Toss Wings with Oil and Dry Mix
Drizzle the olive oil over the dried chicken wings on the rack. Use your hands or a spatula to gently toss the wings, ensuring they are lightly coated with the oil. Now, sprinkle the dry spice and baking powder mixture over the oiled wings. Toss again, making sure every single wing is thoroughly coated. You want a light, even dusting. Don’t glob it on, just a nice, even coating is all you need.
Step 4: First Bake (Rendering Fat)
Place the baking sheet with the wings into your preheated 400°F (200°C) oven. Let them bake for about 25-30 minutes. During this time, the wings will start to render their fat, and the skin will begin to dry out and get a little crispy. You don’t need to flip them halfway through this initial bake – just let them do their thing. You’ll notice the fat dripping down onto the foil or parchment paper below, which is exactly what we want.
Step 5: Prepare the Sauce
While the wings are in their first bake, it’s time to whip up our delicious sauce. In a small saucepan over medium-low heat, combine the melted butter and the Frank’s RedHot sauce. Stir in the white vinegar, garlic powder, and cayenne pepper (if using). Let this mixture gently simmer for about 5 minutes, stirring occasionally. You want the flavors to meld together beautifully. The vinegar adds a nice tang that cuts through the richness, and the garlic powder brings a savory depth. Taste it and adjust seasonings if you like – maybe a pinch more salt or a dash more cayenne if you’re feeling brave!
Step 6: Second Bake (Crisping Up!)
After the initial 25-30 minutes, carefully remove the baking sheet from the oven. The wings should look a little drier and be starting to brown. Now, crank up the oven temperature to 425°F (220°C). This higher heat is what’s going to give us that amazing crispy texture. Return the wings to the oven and bake for another 15-20 minutes, or until they are golden brown and super crispy all over. You can flip them once during this stage if you want to ensure even crisping, but honestly, with the rack, it’s usually not strictly necessary. Keep an eye on them so they don’t burn!
Step 7: Toss with Sauce
Once the wings are perfectly crisp, carefully remove them from the oven. Transfer the hot, crispy wings to a large, clean bowl. Pour the prepared sauce over the wings. Toss gently but thoroughly until every single wing is coated in that luscious, spicy sauce. Don’t be shy with the sauce – you want them beautifully glistening!
Step 8: Rest (Optional, but Recommended!)
If you can resist, let the wings sit in the sauce for about 5 minutes before serving. This short resting period allows the sauce to slightly thicken and adhere even better to the crispy wings. It’s a small step that makes a big difference in flavor distribution.
Step 9: Slice & Serve
Arrange your sauced wings on a serving platter. I love serving them with some cool, crisp celery sticks and a generous bowl of blue cheese or ranch dressing for dipping. It’s the perfect balance to the spicy, crispy wings. And that’s it! Your incredibly delicious, perfectly baked wings are ready to be devoured.
What to Serve It With
These baked wings are so versatile, they can honestly fit into almost any meal or occasion. For a classic game-day spread, you can’t go wrong with piling them high on a platter alongside some crunchy celery sticks and plenty of blue cheese or ranch dressing. They’re also a fantastic appetizer for parties – I always make at least two batches because they disappear so fast! If I’m making them for a more casual family dinner, I’ll often serve them with some homemade coleslaw, oven-baked fries, or even a simple garden salad to round out the meal. They make a surprisingly satisfying light lunch too, especially if you’re craving something savory but don’t want anything too heavy. My kids also love them as a fun “snack meal” when they get home from school. We’ll sometimes serve them with little mini cornbread muffins or garlic knots, which are perfect for sopping up any extra sauce. The possibilities are really endless, and they always get rave reviews, no matter how I serve them!
Top Tips for Perfecting Your Baked Wings
I’ve made these baked wings more times than I can count, and over the years, I’ve picked up a few tricks that I swear by to make them absolutely perfect every single time. First, and I can’t stress this enough, is ensuring your wings are completely dry before you season them. I use paper towels and really pat them down. Any moisture on the skin will steam the wings instead of crisping them. Second, the baking powder is non-negotiable! It sounds weird, but it’s the magic ingredient that draws out moisture from the skin, leading to that incredible crunch. Make sure you’re using baking powder, not baking soda – they’re very different!
When it comes to the sauce, don’t be afraid to customize. My classic buffalo is a crowd-pleaser, but I love experimenting. Sometimes I’ll add a touch of honey or maple syrup for a sweet and spicy kick, or a dash of smoked paprika for an extra layer of flavor. If you prefer a thicker sauce, you can simmer it a little longer, or even whisk in a tiny bit of cornstarch slurry (cornstarch mixed with water) at the end. For the baking itself, using a wire rack is a must. It allows hot air to circulate underneath the wings, ensuring they crisp up evenly on all sides. If you don’t have a rack, you can try flipping them more frequently, but it’s just not quite the same. And speaking of baking, ovens can be so different! Keep an eye on your wings, especially during the second bake. They can go from perfectly crispy to slightly burnt faster than you think. If your oven tends to run hot, you might need to adjust the time or temperature slightly. Lastly, for the best texture, serve these wings immediately after saucing. While they’re still good later, that initial super-crispy crunch is truly unbeatable when they’re fresh out of the oven!
Storing and Reheating Tips
So, you’ve made an epic batch of baked wings, and by some miracle, there are leftovers! Lucky you! Here’s how to keep them tasting as good as possible. If you’ve got a few stragglers that need to be stored, your best bet is the refrigerator. Once they’ve cooled down a bit, pop them into an airtight container. They’ll typically last for about 3-4 days in the fridge. Now, when it comes to reheating, this is where a little care goes a long way to recapture that delicious crispiness. I strongly advise against the microwave if you want any semblance of crispness; it tends to make them rubbery. Instead, the best method is to pop them back into a preheated oven at around 375°F (190°C) for about 8-10 minutes, or until heated through and warmed up. If you’re in a real pinch for time, a toaster oven works wonderfully too. Just spread them out on a small baking sheet and reheat until they’re warm and slightly crisped up again. I’ve also had decent success with an Air Fryer for reheating, about 4-5 minutes at 375°F (190°C), shaking the basket halfway through. For best results, try to store them *without* the sauce if you know you’ll have leftovers. Then, you can re-toss them in freshly made sauce (or your favorite store-bought one) after reheating. This keeps the crispiness factor high!
Frequently Asked Questions
Final Thoughts
I really hope you give these baked wings a try! They’re genuinely a game-changer in my kitchen, and I’m so excited for you to experience that perfect crispy, flavorful bite for yourself. It’s more than just a recipe for me; it’s those moments around the table, the satisfied sighs after a perfect wing, and the laughter shared with loved ones that make me keep coming back to it. If you love these baked wings, you might also enjoy my recipe for Crispy Baked Chicken Tenders or my Sheet Pan Lemon Herb Chicken and Veggies for more simple, delicious chicken dinners. I can’t wait to hear how yours turn out! If you make them, please leave a comment below and let me know what you think, or share your favorite sauce variations – I’m always looking for new ideas! Happy baking!

baked wings
Ingredients
Main Ingredients
- 1.5 pounds chicken wings split and tips removed, about 18 wings
- 1 tablespoon all-purpose flour
- 1 teaspoon baking powder
- 0.5 teaspoon seasoned salt
- 0.5 teaspoon black pepper
- 1 tablespoon olive oil
Instructions
Preparation Steps
- Pat wings dry with a paper towel. This is crucial for crispiness.
- Prepare a pan by lining with foil and placing a baking rack on it. Spray the rack with cooking spray to prevent sticking.
- Combine flour, baking powder, salt and pepper in a bowl. Toss with wings until evenly coated and place on prepared pan. Refrigerate 30 minutes (or up to 4 hours) uncovered.
- Preheat oven to 425°F (220°C).
- Toss wings with olive oil in a bowl, ensuring there are no dry spots of flour. Return them back to the prepared pan.
- Bake wings for 20 minutes, then flip them over and bake an additional 15 minutes. If your wings are smoking, remove the foil and add new foil. Cook until crisp and broil for 1 minute each side if extra crispiness is desired.
- Toss with your favorite sauce immediately or serve with dips on the side.