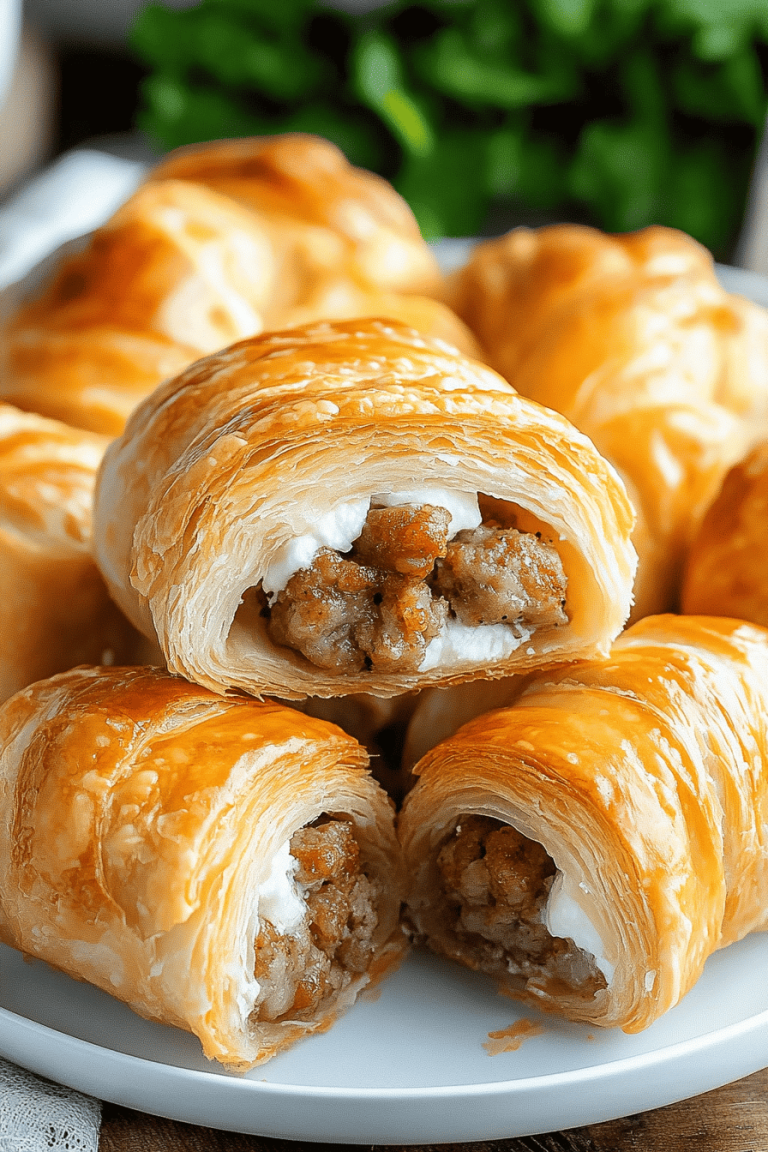
You know those evenings? The ones where the kids are buzzing with energy, you’re craving something undeniably comforting, and the thought of a complicated dinner feels utterly overwhelming? Yeah, I know them well. This is where my absolute favorite baked mozzarella sticks come swooping in like a cheesy, golden superhero. Forget those sad, pale versions you might have encountered elsewhere; these are something else entirely. They’re perfectly crispy on the outside, with that gooey, stretchy mozzarella pulling out with every bite, and a flavor that just screams “happy times.” Honestly, if you can master these, you’ve basically unlocked a secret weapon for any spontaneous get-together or a cozy movie night in. They’re like the ultimate appetizer, but substantial enough to feel like a real treat. If you’ve ever loved a classic, I mean *really* loved a classic, these baked mozzarella sticks are going to steal your heart. I can’t wait to share them with you!
What Are Baked Mozzarella Sticks?
So, what exactly are these magical little creations? At their heart, baked mozzarella sticks are simply strips of mozzarella cheese that have been coated in a flavorful breading and then baked until they’re wonderfully golden and, of course, melty on the inside. Think of them as a more sophisticated, less greasy cousin to the deep-fried version. We’re talking about taking those perfect strings of cheese and giving them a lovely, crunchy exterior that doesn’t get soggy. It’s the kind of snack that makes you close your eyes with the first bite. My mom used to make a similar version when I was a kid, and the smell of them baking would have my siblings and me practically glued to the kitchen door. It’s that simple, honest goodness that makes them so special. They’re the edible equivalent of a warm hug, really.
Why you’
Oh, where do I even begin with why this recipe is a keeper? For starters, the flavor is just out of this world. The breading isn’t just plain breadcrumbs; it’s seasoned with just the right touch of garlic powder, onion powder, and a hint of Italian herbs that really elevate the humble mozzarella. When it bakes, it creates this incredible crust that’s delightfully crispy without being hard. And the cheese? It’s that perfect, satisfyingly gooey stretch that makes everyone – kids and adults alike – smile. What I love most about this particular recipe, though, is how incredibly simple it is to get such amazing results. You don’t need any fancy equipment or hard-to-find ingredients. Seriously, most of what you’ll need is probably already in your pantry!
Plus, let’s talk about the cost-efficiency. Making a batch of these at home is so much more budget-friendly than buying pre-made ones, and the quality is so much better. You have complete control over the ingredients, and you end up with a much more satisfying snack. And the versatility! While they’re absolutely divine on their own with a marinara dip, I’ve found they’re fantastic served alongside other appetizers for a party, or even as a fun, kid-friendly side dish for a weeknight meal. They really do disappear fast, which is always the sign of a winning recipe in my book. If you enjoy comforting, cheesy goodness like my popular [Link to another recipe, e.g., Cheesy Garlic Bread Bombs], you are going to adore these baked mozzarella sticks. They just hit that sweet spot of being both incredibly satisfying and surprisingly easy to whip up, making them a true lifesaver.
How do you make baked mozzarella sticks?
Quick Overview
Making these baked mozzarella sticks is a straightforward process that involves a simple three-step breading station, preparing the cheese, and then baking them to golden perfection. You’ll be coating strips of mozzarella in flour, then an egg wash, and finally a seasoned breadcrumb mixture before they hit the oven. The result? Crispy, cheesy perfection without the fuss of frying. It’s genuinely that easy, and the smell that fills your kitchen as they bake is just heavenly.
Ingredients
For the Main Batter:
- 2 cups all-purpose flour
- 1 teaspoon salt
- 1/2 teaspoon black pepper
- 1/2 teaspoon garlic powder
- 1/2 teaspoon onion powder
- 2 large eggs
- 2 tablespoons milk (any kind works, whole milk makes it a bit richer!)
- 2 cups Panko breadcrumbs (these give the best crunch!)
- 1/2 cup grated Parmesan cheese (optional, but highly recommended for extra flavor)
For the Filling:
- 1 pound block mozzarella cheese (low-moisture, part-skim is best for less grease!)
- 1 tablespoon all-purpose flour (for dusting the cheese sticks)
For Serving:
- Marinara sauce, for dipping (your favorite store-bought or homemade!)
- Optional: Fresh basil, chopped, for garnish
Step-by-Step Instructions
Step 1: Preheat & Prep Pan
First things first, get your oven preheating to a nice, hot 400°F (200°C). This temperature is key to getting that crispy exterior without the cheese melting out too soon. While the oven is warming up, grab a large baking sheet. Line it with parchment paper or a silicone baking mat. This is a lifesaver for easy cleanup, trust me! You can also lightly grease it if you don’t have either of those. Having everything ready to go before you start breading makes the whole process so much smoother.
Step 2: Mix Dry Ingredients
Now, let’s get our breading station ready. You’ll need three shallow dishes or bowls. In the first one, combine the 2 cups of all-purpose flour with the salt, pepper, garlic powder, and onion powder. Give it a good whisk to make sure all those seasonings are evenly distributed. This seasoned flour is going to be the first layer of deliciousness that helps the egg stick and gives the breadcrumbs something to cling to.
Step 3: Mix Wet Ingredients
In the second shallow dish, crack your two large eggs. Add the 2 tablespoons of milk and whisk everything together until it’s well combined and a little frothy. This egg wash is crucial for binding the breadcrumbs to the cheese. It’s the glue that holds our crispy coating together!
Step 4: Combine
In the third shallow dish, combine your Panko breadcrumbs and the grated Parmesan cheese (if you’re using it). Panko breadcrumbs are my absolute favorite here because they’re larger and airier than regular breadcrumbs, giving you an extra-crispy crunch. Give this mixture a quick stir. This is where all the flavor really comes alive!
Step 5: Prepare Filling
Okay, time for the star of the show: the cheese! Take your block of mozzarella and, using a sharp knife, cut it into sticks that are roughly 3-4 inches long and about 1/2 inch thick. Don’t worry if they’re not perfectly uniform; it adds to the homemade charm. As you cut them, you might notice they feel a bit slippery. That’s why I like to lightly dust each stick with the extra 1 tablespoon of all-purpose flour. This just gives the egg wash a bit more surface to adhere to, preventing any accidental cheese escapes during baking.
Step 6: Layer & Swirl
This is the fun part – breading! Take a floured mozzarella stick and dredge it in the seasoned flour, making sure it’s coated all over. Gently shake off any excess flour. Next, dip it into the egg wash, letting any excess drip back into the bowl. Finally, roll the stick generously in the Panko breadcrumb mixture, pressing lightly to ensure the crumbs adhere well. You want a nice, even coating. Place the breaded mozzarella sticks onto your prepared baking sheet, making sure they aren’t touching each other. This helps them get nice and crispy all around.
Step 7: Bake
Pop that baking sheet into your preheated oven. You’ll want to bake them for about 10-14 minutes. Keep an eye on them! You’re looking for that beautiful golden-brown color on the breadcrumbs and you should see the cheese starting to get slightly melty and puffed. The exact time can vary depending on your oven, so start checking around the 10-minute mark. If they’re looking golden and the cheese is gooey, they’re ready!
Step 8: Cool & Glaze
Once they’re perfectly golden and gooey, carefully remove the baking sheet from the oven. Let the mozzarella sticks rest on the baking sheet for a couple of minutes. This is important because they’ll be incredibly hot and the cheese will still be quite molten. Letting them sit for just a few minutes helps them set up slightly, making them easier to handle and preventing that molten cheese lava-flow when you bite into them. If you plan on serving them with a glaze, this is also a good time to drizzle it over, though I personally love them best with a simple marinara dip.
Step 9: Slice & Serve
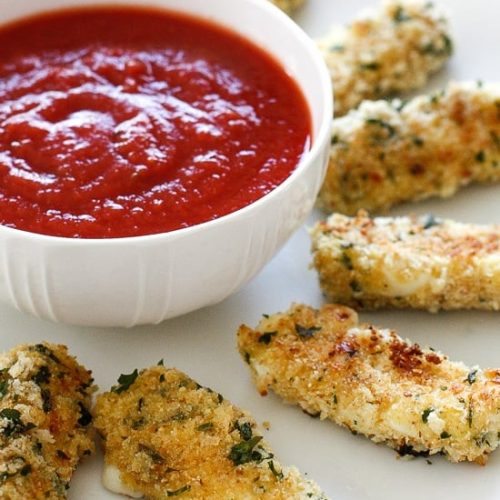
Now for the best part! Serve your beautiful baked mozzarella sticks immediately while they are warm and gooey. Arrange them on a platter and serve with your favorite marinara sauce for dipping. A sprinkle of fresh chopped basil over the top adds a lovely pop of color and freshness. They’re best enjoyed right away, but I’ll give you some tips on storing them later if you happen to have any leftovers (which, let’s be honest, is rare in my house!).
What to Serve It With
These baked mozzarella sticks are so versatile, they honestly work for almost any occasion! For a quick and easy breakfast, especially on weekends, I love serving them alongside some scrambled eggs or even just a simple fruit salad. The savory crunch is a fun change from typical breakfast fare. For a more substantial brunch spread, they can be a fantastic addition to a buffet alongside mini quiches, pastries, and a fresh green salad. Imagine them piled high next to some smoked salmon and bagels – a delicious contrast!
As an appetizer, they are, of course, a total superstar. Pile them high on a platter with various dipping sauces like marinara, ranch, or even a spicy honey for a sweet and savory kick. They pair wonderfully with other finger foods for a party, like mini meatballs or bruschetta. And for dessert? While it might sound a little unconventional, I’ve found that serving them with a raspberry dipping sauce or even a lightly sweetened balsamic glaze can be a surprisingly delightful way to end a meal, especially if you’re going for a tapas-style dining experience. My kids especially love them as a cozy snack during movie nights. They’re just pure, unadulterated comfort food, perfect for any time you need a little cheesy pick-me-up!
Top Tips for Perfecting Your Baked Mozzarella Sticks
Over the years, I’ve learned a few tricks that take these baked mozzarella sticks from good to absolutely phenomenal. First off, the type of mozzarella you use is important. While pre-shredded cheese is convenient, I *always* opt for a block of low-moisture, part-skim mozzarella. It melts beautifully without releasing too much grease, which can make your breading soggy. When cutting the cheese into sticks, make sure your knife is sharp and that the cheese is cold. This will give you cleaner cuts and less squishing.
When it comes to breading, don’t rush it. Ensure each stick is thoroughly coated in flour, then egg, then breadcrumbs. Press the breadcrumbs gently but firmly onto the cheese. This creates a good seal and ensures you get a nice, thick, crispy coating. If you’re worried about any cheese escaping, you can double-dip the sticks – flour, egg, breadcrumbs, then egg again, and breadcrumbs again. This extra layer provides added insurance against melty cheese explosions in the oven!
For baking, the parchment paper or silicone mat is your best friend. It prevents sticking and makes cleanup a breeze. Don’t overcrowd the baking sheet! Give each mozzarella stick a little breathing room so the air can circulate around it, helping to crisp up all sides evenly. I’ve learned this the hard way – crammed mozzarella sticks tend to steam rather than crisp. Also, keep an eye on them. Ovens vary, and you want that perfect golden-brown color. They should be puffed up slightly and you might even see a little bit of cheese peeking out, which is exactly what you want.
For flavor customization, feel free to jazz up the breadcrumb mixture! Add a pinch of cayenne pepper for a little heat, some dried Italian herbs like oregano and basil, or even a touch of smoked paprika for a deeper flavor profile. Experimentation is part of the fun! And if you’re making these for a crowd, you can even prepare the unbaked, breaded mozzarella sticks ahead of time and store them in the freezer. Just arrange them in a single layer on a baking sheet, freeze until solid, then transfer to a freezer bag. You can bake them directly from frozen, just add a few extra minutes to the baking time.
Storing and Reheating Tips
Okay, so if by some miracle you have leftover baked mozzarella sticks (I’m always impressed when this happens!), storing them properly is key to maintaining their deliciousness. If they’ve cooled completely, you can store them in an airtight container in the refrigerator for up to 2-3 days. The breading might lose a bit of its crispness, but they’ll still be wonderfully cheesy and tasty.
When it comes to reheating, the oven or toaster oven is your best bet to bring back some of that crunch. I usually pop them back onto a baking sheet in a preheated oven at around 350°F (175°C) for about 5-7 minutes, or until they’re heated through and the cheese is melty again. A quick blast in an Air Fryer also works wonders for reviving that crispiness! I try to avoid the microwave if possible, as it can make the breading a bit chewy. If you absolutely must use the microwave, heat them in short intervals and know that the texture won’t be quite the same.
If you’re planning ahead, you can freeze the breaded, unbaked mozzarella sticks. Arrange them in a single layer on a baking sheet and freeze until solid, then transfer them to a freezer-safe bag or container. They’ll keep well in the freezer for up to 2-3 months. When you’re ready to bake them, you can go straight from the freezer to a 400°F (200°C) oven, adding about 5-7 minutes to the baking time. As for the glaze, I always prefer to add it right before serving to keep it fresh and vibrant. Reheating can sometimes dull the flavors of a sauce or glaze.
Frequently Asked Questions
Final Thoughts
Honestly, I can’t say enough good things about these baked mozzarella sticks. They’re the kind of recipe that makes you feel like a culinary rockstar without actually breaking a sweat. The combination of that perfectly crispy coating and the warm, gooey mozzarella inside is just pure magic. They’re ridiculously easy to make, budget-friendly, and always a huge hit with everyone, from my picky eaters to my grown-up friends. They prove that sometimes, the simplest things are the most satisfying.
If you’re looking for other crowd-pleasing, easy-to-make appetizers or comfort food recipes, you might also want to check out my [Link to another recipe, e.g., Easy baked chicken wings] or my [Link to another recipe, e.g., Creamy Spinach Artichoke Dip]. They’re all designed to bring joy to your kitchen and your table. I truly hope you give these baked mozzarella sticks a try. I’m so excited for you to experience that first, perfect, cheesy pull! Please, let me know in the comments below how yours turn out, or if you have any fun variations you’ve tried. Happy baking!
Baked Mozzarella Sticks
Ingredients
Main Ingredients
- 12 sticks part-skim (reduced sodium mozzarella string cheese) Cut into halves for 24 pieces
- 1 large egg beaten
- 2 tbsp flour
- 5 tbsp Italian seasoned breadcrumbs or GF breadcrumbs
- 5 tbsp panko crumbs
- 2 tsp parmesan cheese
- 1 tbsp dried parsley
- 1 olive oil cooking spray
Instructions
Preparation Steps
- Cut cheese in half to give you 24 pieces. Place cheese in the freezer until cheese is frozen (at least 1 hour).
- In a small bowl, whisk the egg. Place the flour on another small dish.
- In a separate bowl, combine bread crumbs, panko, parmesan cheese, and dried parsley.
- Dip the frozen sticks in flour, shaking off excess, then into the egg, then coat with the crumbs. Repeat this process with the remaining cheese, placing them on a tray with wax paper.
- Place cheese back into the freezer at least 1 hour until ready to bake (this is a MUST or they will melt before the crumbs get golden).
- When ready to bake, preheat oven to 400° F. Line a baking sheet with aluminum foil and lightly spray with oil.
- Place frozen cheese sticks on the baking sheet. Spray the tops of the mozzarella sticks with a little more oil and bake in the bottom third of your oven until crisp, about 4 to 5 minutes.
- Turn and bake an additional 4 - 5 minutes watching them closely so they don't melt.