There are some recipes that just feel like a warm hug. They’re the ones you pull out when you need something special but don’t have hours to spend in the kitchen. This angel food cake is exactly that for me. I remember the first time I made it on a whim, totally intimidated by the idea of a meringue-based cake. I’d always pictured it as this fussy, delicate thing that only pastry chefs could master. But honestly, this version is so surprisingly straightforward, it quickly became my secret weapon for last-minute dessert emergencies or when I just wanted a taste of pure sunshine. It’s so different from a dense Pound Cake, offering this ethereal lightness that just melts in your mouth. If you’ve ever thought angel food cake was too difficult, let me tell you, this recipe is going to change your mind forever. It’s become a staple in my baking repertoire, and I’m so excited to share it with you!
What is angel food cake?
So, what exactly *is* angel food cake? Think of it as the ballerina of the cake world – incredibly light, airy, and graceful. Unlike most cakes that rely on butter and eggs for richness and structure, angel food cake is primarily made with egg whites, sugar, and flour. It gets its signature fluffy texture from the whipped egg whites, which trap air, creating that signature delicate crumb. The “angel food” name perfectly captures its essence; it feels like you’re eating something heavenly. It’s naturally fat-free because there’s no butter or oil, which makes it a lighter option compared to, say, a classic Chocolate Cake. It’s often baked in a special tube pan with a hollow center and little feet, which helps it cool evenly and prevents it from collapsing. It’s a simple concept, really, but the magic happens in how those few ingredients come together to create something so wonderfully unique.
Why you’ll love this recipe?
Honestly, there are so many reasons this angel food Cake Recipe has earned a permanent spot in my heart (and on my recipe cards!). Firstly, the flavor is just sublime. It’s subtly sweet with a delicate vanilla aroma that’s just perfection. It’s not overly rich, so you can enjoy a generous slice without feeling weighed down. What I absolutely adore is the incredible simplicity of it all. Yes, it involves whipping egg whites, but the steps are clear, and the payoff is enormous for minimal effort. I’ve tried other cake recipes that require a dozen steps and obscure ingredients, but this one is truly a lifesaver on busy nights when I need a dessert that looks and tastes impressive without the fuss. And the cost-efficiency? You probably have most of the ingredients in your pantry right now! It’s just sugar, flour, eggs, vanilla, and cream of tartar. Plus, it’s so versatile! Whether you’re serving it with fresh berries and a dollop of whipped cream for a light dessert, or dusting it with powdered sugar for a simple treat, it always shines. It’s not quite a sponge cake, and definitely not a genoise; it stands beautifully on its own. This is the recipe I turn to when I want something reliably delicious and elegant.
How do I make angel food cake?
Quick Overview
The process is wonderfully simple: whip egg whites until stiff peaks form, gradually beat in sugar, then gently fold in sifted flour and vanilla. Bake until golden and springy, then invert to cool completely. The key is gentle handling of the egg whites and not overmixing the batter. This method ensures that beautiful, airy texture we all love, and it’s surprisingly quick to whip up once you get the hang of it. Trust me, even if you’re a beginner baker, you can nail this!
Ingredients
For the Main Batter:
1 ½ cups (300g) granulated sugar, divided
1 cup (120g) cake flour
1 ½ teaspoons cream of tartar (this is your secret weapon for stable egg whites!)
¼ teaspoon salt
7 large egg whites, at room temperature (about 1 cup or 240ml)
½ teaspoon pure vanilla extract
¼ teaspoon almond extract (optional, but it adds a lovely subtle depth!)
A note on egg whites: Make sure there is absolutely NO trace of yolk in your egg whites. Even a tiny bit will prevent them from whipping up properly. Separating them carefully is key. Room temperature eggs also whip up best.
Step-by-Step Instructions
Step 1: Preheat & Prep Pan
First things first, preheat your oven to 350°F (175°C). Grab your angel food cake pan (the one with the removable bottom and the hole in the middle – it’s crucial for even cooling). Do NOT grease the pan! Angel food cake needs to cling to the sides of the pan as it rises and cools, otherwise, it can deflate. Just make sure it’s clean and dry.
Step 2: Mix Dry Ingredients
In a medium bowl, whisk together the cake flour, 1 cup (200g) of the granulated sugar, cream of tartar, and salt. Sifting the cake flour is non-negotiable here. It helps break up any clumps and aerates the flour, which is essential for that light texture. Whisking the dry ingredients together thoroughly ensures everything is evenly distributed. This step is quick but mighty important!
Step 3: Mix Wet Ingredients
In a large, spotlessly clean bowl (metal or glass is best, avoid plastic as it can hold grease), beat the egg whites with an electric mixer on medium speed until they become frothy. You’re looking for soft peaks to form. Gradually add the remaining ½ cup (100g) of granulated sugar, about a tablespoon at a time, while continuing to beat on medium-high speed. Keep beating until you have stiff, glossy peaks that hold their shape when you lift the beaters. Then, gently beat in the vanilla extract and almond extract, if using. This is where the magic starts! Don’t overbeat here, you want them stiff but not dry.
Step 4: Combine
Now comes the delicate part: folding. Take about a third of the sifted dry ingredients and gently fold them into the whipped egg whites using a rubber spatula. Don’t stir or beat! Use an under-and-over motion, cutting down through the middle of the mixture and bringing it up and over. Fold until just combined, then add another third of the dry ingredients and repeat. Finally, add the last of the dry ingredients and fold until no streaks of flour remain. The key here is to be gentle; you want to keep as much air in those egg whites as possible. Overmixing will knock the air out, resulting in a dense cake.
Step 5: Prepare Filling
This recipe is for the classic angel food cake itself, but it’s absolutely divine with a simple topping. For serving, I usually prepare a fresh berry compote or a light Whipped cream. If I’m feeling fancy, a quick lemon curd or a simple strawberry sauce is also fantastic. The beauty of angel food cake is its neutral canvas, so the possibilities are endless!
Step 6: Layer & Swirl
Gently spoon the batter into your prepared (ungreased!) angel food cake pan. Use a spatula to spread it evenly, making sure to fill any gaps. Run a knife or skewer through the batter a couple of times to release any large air pockets, but again, be gentle. We want to keep that air!
Step 7: Bake
Bake for 35 to 45 minutes, or until the cake is golden brown, springs back when lightly touched, and a wooden skewer inserted near the center comes out clean. The cake should also start to pull away slightly from the sides of the pan.
Step 8: Cool & Glaze
This is SUPER important: Immediately invert the pan onto a wire rack, or rest it upside down on the little feet of the pan if it has them. Let it cool completely upside down (this can take a couple of hours). This step prevents the cake from collapsing on itself as it cools. Once completely cool, you can run a thin knife or offset spatula around the edges of the pan and the center tube to release the cake. If you plan to glaze it, wait until it’s fully cooled.
Step 9: Slice & Serve
To slice, use a serrated knife for clean cuts. Serve with fresh whipped cream, berries, or your favorite fruit sauce. It’s also lovely on its own with a light dusting of powdered sugar.
What to Serve It With
Oh, the serving possibilities are endless and truly make this angel food cake shine! For a delightful breakfast treat, I love to serve a slice with a good cup of coffee and a scattering of fresh strawberries. It feels so elegant yet is so simple to prepare on a weekend morning. For a more sophisticated brunch affair, imagine this cake as the centerpiece, perhaps with a drizzle of raspberry coulis and a side of macerated berries. It’s light enough not to overpower other brunch dishes. As a dessert, this cake is a dream. A dollop of freshly whipped cream, a handful of mixed berries, or even a light chocolate sauce works wonders. It’s the perfect palate cleanser after a richer meal. And for those cozy, quiet afternoons when you just need a little something sweet, a simple dusting of powdered sugar is all you need. My kids, believe it or not, sometimes just ask for it with a little bit of whipped cream! It’s that good.
Top Tips for Perfecting Your Angel Food Cake
Over the years, I’ve learned a few tricks that make this angel food cake absolutely foolproof. First, regarding the egg whites: make sure your bowl and beaters are impeccably clean and free of any grease or fat. Even a tiny speck of yolk or oil can prevent your whites from reaching those glorious stiff peaks. Room temperature egg whites also whip up much better than cold ones, so let them sit out for about 30 minutes before you start. Cream of tartar is your best friend here; it stabilizes the egg whites, giving you more volume and a less likely chance of collapse. Don’t skip it! When it comes to folding in the dry ingredients, be patient. It’s better to have a few tiny streaks of flour remaining than to overmix and deflate your beautiful meringue. Gentle is the name of the game. For baking, ovens can vary, so rely on the visual cues: a golden brown top that springs back when gently touched. The most crucial part is the cooling. Inverting the pan is non-negotiable. It allows gravity to help keep the cake’s structure as it cools, preventing that dreaded sinking. I learned this the hard way after my first couple of attempts collapsed spectacularly! If you’re using a different pan size, you might need to adjust baking time, but always check for doneness. And for ingredient swaps, while this recipe is perfected with cake flour, if you absolutely must use all-purpose flour, make sure to sift it well and perhaps remove a tablespoon or two from the measurement to compensate for its higher protein content. Experimenting with extracts is fun too – a touch of lemon zest or a different floral extract can create delightful variations!
Storing and Reheating Tips
Storing angel food cake is pretty straightforward, and it holds up beautifully. At room temperature, it’s best to keep it loosely covered with plastic wrap or in a cake dome. It will stay fresh for about 2 to 3 days. Because it doesn’t contain any fat, it tends to dry out a bit faster than other cakes, so airtight isn’t always best. If you know you won’t finish it within a couple of days, or if your kitchen is particularly warm, refrigerator storage is a good option. Wrap the cooled cake tightly in plastic wrap, then tuck it into an airtight container. It should last well for about 4 to 5 days in the fridge. When it comes to reheating, I honestly rarely need to, as it’s delicious at room temperature. However, if it feels a little dry after refrigeration, a very gentle warming in a low oven (around 300°F or 150°C) for just a few minutes can revive it slightly, but be careful not to overdo it! For freezing, it’s best to do so *before* glazing. Wrap the completely cooled cake tightly in a layer of plastic wrap, followed by a layer of aluminum foil or a freezer-safe bag. It can be frozen for up to 2-3 months. To thaw, unwrap it and let it come to room temperature slowly on the counter for several hours. The glaze is best added just before serving, especially if you plan on storing any leftovers, as it can make the cake soggy over time.
Frequently Asked Questions
Final Thoughts
There you have it – my absolute favorite angel food cake recipe! I truly hope you give this a try. It’s one of those recipes that feels like a little bit of magic, transforming simple ingredients into something so wonderfully light and delicious. It’s proof that you don’t need tons of butter or complicated steps to create a show-stopping dessert. It’s perfect for celebrations, a sweet ending to a dinner party, or even just a special treat on a quiet afternoon. If you love this, you might also enjoy my Lemon Raspberry Pound Cake for a denser, brighter citrus kick, or my Classic Vanilla Bean Sponge Cake for another incredibly light option. I can’t wait to hear what you think once you try it! Please leave a comment below with your thoughts, or share your own favorite ways to serve it. Happy baking!
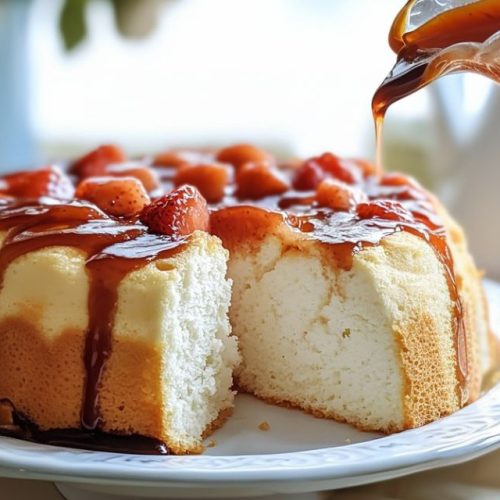
Angel Food Cake
Ingredients
Cake Ingredients
- 1 cup cake flour sifted twice
- 1.75 cups granulated sugar divided
- 12 large egg whites at room temperature, about 1.5 cups
- 1.5 teaspoons cream of tartar
- 0.25 teaspoon salt
- 1.5 teaspoons vanilla extract
- 0.5 teaspoon almond extract optional
Instructions
Preparation Steps
- Preheat your oven to 350°F (175°C). Do NOT grease a 10-inch tube pan (angel food cake pan).
- In a medium bowl, sift the cake flour and 0.75 cup of granulated sugar together. Repeat this sifting process once more to ensure it's very light and airy. Set aside.
- In a large, very clean mixing bowl (ensure no grease), beat the egg whites, cream of tartar, and salt with an electric mixer on medium speed until soft peaks form.
- Gradually add the remaining 1 cup of granulated sugar, about 2 tablespoons at a time, continuing to beat on high speed until stiff, glossy peaks form. The mixture should hold its shape and look smooth.
- Gently fold in the vanilla extract and almond extract (if using) into the egg white mixture.
- Carefully fold the sifted flour and sugar mixture into the egg whites, about 0.25 cup at a time, until just combined. Be very gentle to avoid deflating the egg whites.
- Pour the batter evenly into the ungreased tube pan. Gently run a knife or thin spatula through the batter to release any large air pockets.
- Bake for 35-40 minutes, or until the top springs back when lightly touched and the cake is golden brown. Do not open the oven door during the first 25 minutes of baking.
- Immediately invert the cake pan onto its feet (if it has them) or onto the neck of a bottle until completely cool, about 1.5 to 2 hours. This prevents the cake from collapsing.
- Once completely cool, run a thin knife around the edges of the pan and the center tube to release the cake. Invert onto a serving plate.