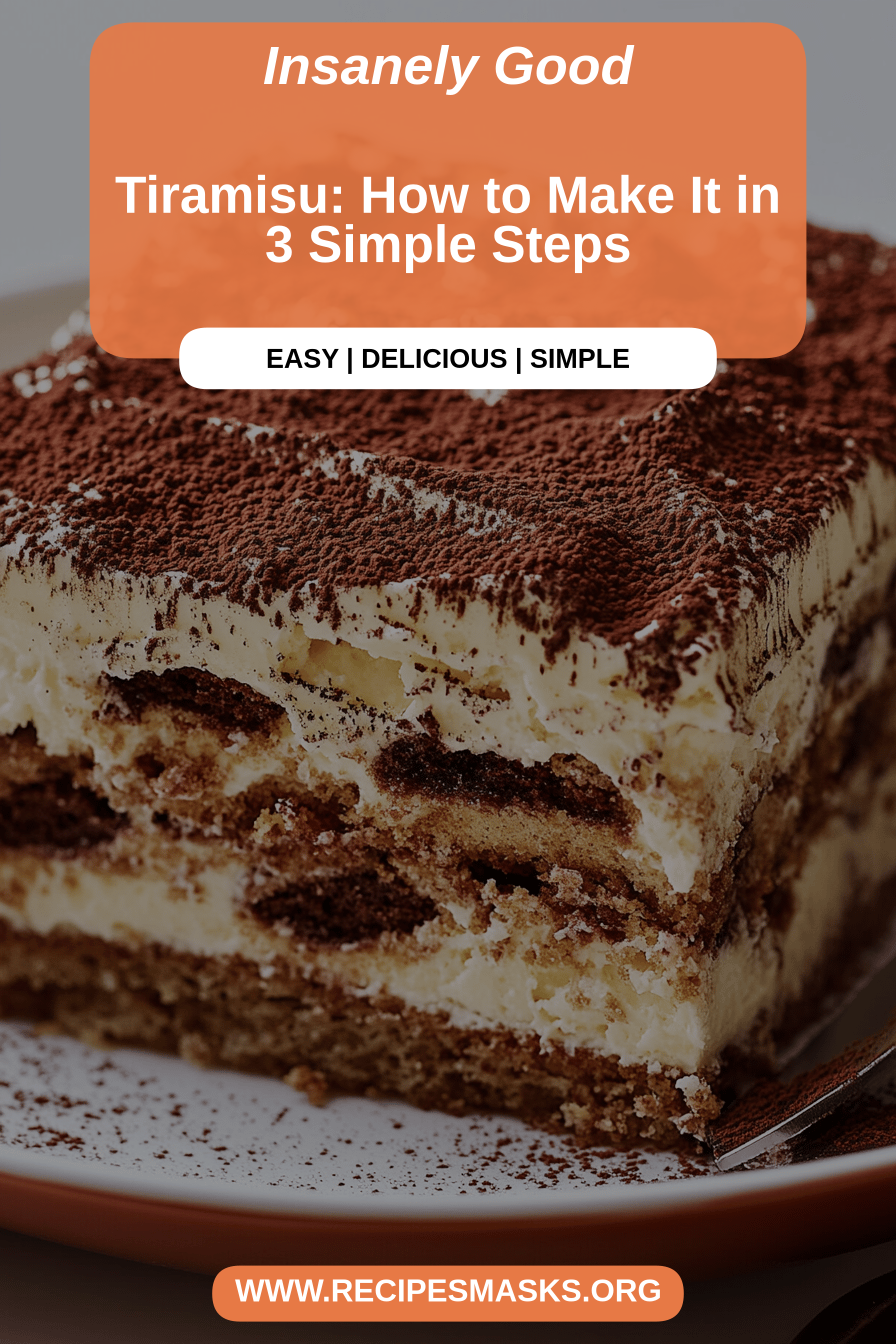
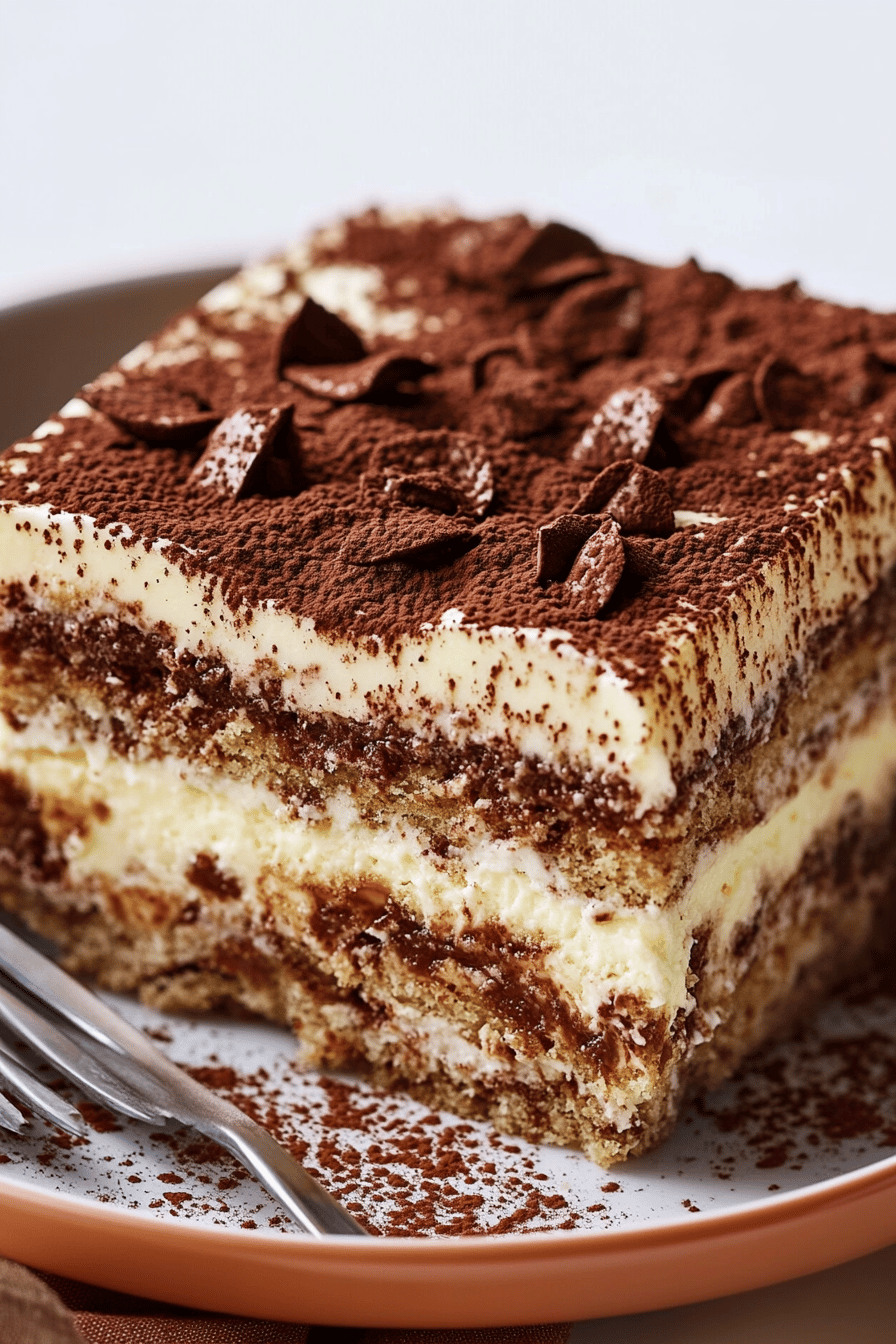
You know those recipes that just feel like a warm hug? The ones that bring back memories of happy times, or that always manage to impress, even when you’re feeling totally uninspired in the kitchen? For me, that recipe is tiramisu. I know, I know, tiramisu sounds fancy, right? Like something you’d only order in a restaurant. But I promise you, this version is surprisingly approachable, and the result is just… pure magic. It’s layers of coffee-soaked ladyfingers, creamy mascarpone goodness, and a dusting of cocoa that tastes like the best kind of indulgence. It’s the kind of dessert that makes everyone at the table pause and sigh with delight. Forget fussy cakes that take hours; this is my secret weapon for those moments you need something truly special without the stress. It’s so good, my kids practically beg me to make it for every family gathering, and honestly, I’m always happy to oblige.
What is Tiramisu?
So, what exactly is this delightful dessert we call tiramisu? The name itself, in Italian, translates to “pick me up” or “cheer me up,” and let me tell you, it absolutely lives up to its name! It’s essentially an Italian layered dessert, and at its heart, it’s all about the beautiful marriage of strong coffee, delicate ladyfingers (savoiardi), and a rich, creamy mascarpone cheese filling. It’s not baked in the traditional sense; instead, it’s chilled, which allows all those wonderful flavors to meld together perfectly. Think of it as a sophisticated, yet incredibly comforting, no-bake wonder. It’s the kind of dessert that feels special because of its textures and its deep, satisfying flavors. It’s a little bit sweet, a little bit coffee-bitter, and wonderfully creamy all at once.
Why you’ll love
Honestly, where do I even begin with why this tiramisu recipe is a lifesaver and a total crowd-pleaser? First off, the flavor profile is just divine. You get that deep, robust coffee soaking into the ladyfingers, which then meets the luxuriously smooth, slightly tangy mascarpone cream. The hint of cocoa powder on top is the perfect finishing touch – it’s not too sweet, it’s not too bitter, it’s just… *right*. And the best part? It’s deceptively simple to make. You don’t need any fancy pastry skills or a double boiler. It comes together with just a few key steps, and the chilling time does all the hard work for you. This makes it incredibly cost-effective too; the ingredients aren’t obscure or expensive, and you can easily find everything at your local grocery store. What I love most is its versatility. While it’s spectacular served as a traditional dessert, I’ve also found it’s incredible for brunches, or even just as a late-night treat when I’m craving something sweet but don’t want to go through the hassle of baking a whole cake. It’s a little bit like my favorite chocolate lava cake in terms of pure indulgence, but with a completely different flavor profile and a much easier prep time. If you enjoy other creamy, coffee-infused desserts, you might also love my recipe for coffee panna cotta – but this tiramisu holds a special place in my heart.
How do I make Tiramisu?
Quick Overview
This tiramisu recipe is all about building layers of flavor and texture. We’ll start by quickly preparing our coffee dip, then whip up a dreamy mascarpone cream. The magic happens when we artfully layer the coffee-soaked ladyfingers with this luscious cream, finishing with a dusting of cocoa. It sounds simple, and it truly is! The key is to let it chill thoroughly so all those flavors can get acquainted. This method ensures you get that signature soft, creamy texture with just the right hint of coffee in every bite, without any fuss.
Ingredients
For the Main Batter (Ladyfingers):
You’ll need about 24-30 Savoiardi biscuits (also known as ladyfingers). I always go for the slightly firmer ones; they hold up better to the coffee soak without becoming completely mushy. If you can’t find them, some other firm sponge fingers can work, but Savoiardi are truly the best. You’ll also need 2 cups of strong, brewed coffee (espresso is ideal, but really, whatever coffee you brew strong will do!), cooled. And a tablespoon or two of coffee liqueur or dark rum – this is totally optional but adds a wonderful depth of flavor. If you’re making this for the kids or prefer not to use alcohol, just skip it or add a tiny splash of vanilla extract instead.
For the Filling:
This is where the creaminess comes from! You’ll need 3 large egg yolks and 3/4 cup of granulated sugar. I use large eggs because they give a richer yolk. For the mascarpone, you’ll need 16 ounces (about 2 standard tubs) of good quality mascarpone cheese, softened slightly at room temperature. Make sure it’s full-fat for the best creamy texture. You’ll also need 1 teaspoon of pure vanilla extract for that lovely aromatic note, and a pinch of salt to balance the sweetness. Some recipes call for whipped egg whites, but I find this method without them creates a denser, more stable cream that’s easier for beginners.
For the Glaze:
This is super simple: just about 2 tablespoons of unsweetened cocoa powder for dusting over the top. Make sure it’s unsweetened; sweetened cocoa powder will make it too sugary. I like to use a fine-mesh sieve to dust it evenly for a beautiful finish.

Step-by-Step Instructions
Step 1: Preheat & Prep Pan
This recipe doesn’t require baking, so no preheating needed! What you *do* need to do is prep your serving dish. I usually use an 8×8 inch square dish or a similar-sized rectangular one. Make sure it’s a dish you love, as the tiramisu will be assembled and served right in it. Get your cooled coffee ready in a shallow bowl or pie plate – this is what we’ll be dipping our ladyfingers into.
Step 2: Mix Dry Ingredients
In a medium bowl, whisk together the granulated sugar and the egg yolks. You want to whisk these together really well until the mixture is pale yellow and slightly thickened. This process is sometimes called creating a sabayon or pâte à bombe, and it helps to cook the yolks slightly and create a stable base for our cream.
Step 3: Mix Wet Ingredients
To the sugar and yolk mixture, add the softened mascarpone cheese, vanilla extract, and a pinch of salt. Now, this is where you need to be gentle! You can use an electric mixer on low speed, or even a whisk, to combine everything. You just want to mix until everything is *just* combined and smooth. Be careful not to overmix, as mascarpone can sometimes curdle or become watery if overworked. We’re looking for a luscious, thick, and creamy consistency.
Step 4: Combine
In this recipe, the “combining” is more about assembling than mixing ingredients together into one bowl. The egg yolks and sugar are already combined, and the mascarpone is blended with them. The main “combination” step will happen in the next few stages when we dip the ladyfingers and layer them with the cream.
Step 5: Prepare Filling
This step is already covered in Step 3! The “filling” is our wonderfully rich mascarpone cream that we’ve just made by gently combining the mascarpone, egg yolks, sugar, vanilla, and salt. Ensure it’s perfectly smooth and creamy before you start assembling.
Step 6: Layer & Swirl
Now for the fun part! Quickly dip each ladyfinger into the cooled coffee mixture – just a quick dip on each side, don’t let them soak too long or they’ll fall apart. Arrange a single layer of these coffee-dipped ladyfingers in the bottom of your prepared dish, breaking them to fit as needed. Spoon about half of the mascarpone cream over the ladyfingers and spread it out evenly. Repeat with another layer of dipped ladyfingers, then top with the remaining mascarpone cream. You can gently swirl the top layer of cream with a spoon for a pretty effect, but it’s not essential. The goal is a beautiful, creamy surface ready for its cocoa blanket.
Step 7: Bake
Good news! No baking required for this tiramisu. That’s one of the best parts! The dessert sets and melds its flavors in the refrigerator.
Step 8: Cool & Glaze
This is crucial for the best tiramisu. Cover the dish tightly with plastic wrap and refrigerate for at least 4 hours, but ideally overnight. This allows the flavors to meld and the ladyfingers to soften perfectly. Just before serving, dust the top generously with unsweetened cocoa powder using a fine-mesh sieve. This is your final flourish!
Step 9: Slice & Serve
Use a sharp knife to cut the tiramisu into portions. Because it’s so creamy, it’s best served chilled. A gentle slice will reveal those beautiful layers. Serve immediately and watch it disappear!
What to Serve It With
While tiramisu is undeniably a star all on its own, it does play wonderfully with a few accompaniments, depending on the occasion. For a sophisticated breakfast or brunch, I love serving a smaller slice alongside a perfectly brewed cup of espresso or a frothy cappuccino. The coffee notes in the tiramisu echo the coffee in your drink, creating a harmonious start to the day. For more formal brunch settings, I might plate it with a few fresh berries – raspberries or strawberries add a lovely tartness that cuts through the richness. As a dessert, it’s classic on its own, but if you’re feeling extra, a small dollop of lightly sweetened whipped cream on the side or a drizzle of chocolate sauce can be a delightful addition. My kids, however, just want it plain and simple, maybe with a glass of milk! For those cozy evenings when you just want a little sweet something, a warm cup of herbal tea pairs surprisingly well, offering a soothing contrast to the dessert’s richness.
Top Tips for Perfecting Your Tiramisu
I’ve made this tiramisu so many times, I’ve learned a few tricks that really make a difference. First, about those ladyfingers: don’t drown them! A quick dip on each side is all they need. If you soak them too long, your tiramisu will end up a bit too wet and the ladyfingers will disintegrate. It’s a balance – you want them moist enough to be tender but not soggy. When it comes to the mascarpone filling, resist the urge to overmix. Once the mascarpone, egg yolks, sugar, and vanilla are *just* combined and smooth, stop mixing. Overworking it can make the cream grainy or separate. I learned this the hard way early on! For a really beautiful swirl on top, I sometimes use the back of a spoon to create gentle patterns before dusting with cocoa, but honestly, even a rough spread looks rustic and inviting. If you want to experiment with flavors, I’ve found that a tiny bit of orange zest added to the mascarpone cream can be lovely, especially if you’re serving it in the spring or summer. And for the coffee, make it strong! Weak coffee just won’t give you that signature tiramisu flavor. If you can, use good quality espresso. If you’re substituting something, make sure it’s a robust brew. The chilling time is non-negotiable! Seriously, give it at least 4 hours, but overnight is truly where the magic happens. This is when the flavors meld together beautifully and the texture becomes perfect.
Storing and Reheating Tips
Storing tiramisu is pretty straightforward, thankfully! If you have any leftovers (which is rare in my house!), you can keep it covered tightly with plastic wrap in the refrigerator for up to 3 days. It actually gets better as it sits, as the flavors continue to meld. I wouldn’t recommend leaving it at room temperature for more than 2 hours, especially if it’s warm, due to the dairy and egg components. For longer storage, you can technically freeze tiramisu, but it’s not ideal. The texture of the mascarpone cream can change once thawed, becoming a bit watery. If you absolutely must freeze it, wrap it very well in plastic wrap and then in foil, and freeze for up to 1 month. Thaw it slowly in the refrigerator overnight. As for the glaze, I always add the cocoa powder right before serving. If you dust it on too early and store it, the cocoa powder can absorb moisture and clump. So, store the tiramisu plain, and add that lovely cocoa dusting just before you dig in!
Frequently Asked Questions
Final Thoughts
So there you have it – my absolute favorite tiramisu recipe. It’s a dessert that truly brings joy, and I sincerely hope it does the same for you and your loved ones. It’s proof that you don’t need to be a pastry chef to create something absolutely stunning and delicious. The combination of coffee, mascarpone, and that hint of cocoa is just timeless, and the fact that it requires no baking makes it a winner for any occasion, or just a Tuesday night treat. If you love this kind of creamy, coffee-infused goodness, you might also enjoy my recipe for Affogato – it’s the simplest Italian dessert you can make! I can’t wait to hear how your tiramisu turns out. Don’t be shy, leave a comment below, rate the recipe, and tell me all about your experience. Did you try any fun variations? Did it disappear as quickly at your house as it does at mine? Happy baking, and enjoy every single bite!

Tiramisu
Ingredients
Main Ingredients
- 6 large egg yolks
- 0.75 cup granulated sugar
- 1 pound mascarpone cheese softened
- 1.5 cup heavy cream cold
- 1.5 cup strong brewed coffee cooled
- 0.25 cup coffee liqueur optional
- 24 ladyfingers
- unsweetened cocoa powder for dusting
Instructions
Preparation Steps
- In a heatproof bowl set over a pot of simmering water (make sure the bowl doesn't touch the water), whisk together the egg yolks and granulated sugar until pale and thick. This is a double boiler method and cooks the yolks.
- Remove the bowl from the heat and continue whisking until the mixture cools completely. It should be thick and ribbon-like.
- In a separate bowl, whip the cold heavy cream until stiff peaks form. Be careful not to over-whip.
- Gently fold the softened mascarpone cheese into the cooled egg yolk mixture until just combined and smooth.
- Fold the whipped cream into the mascarpone mixture until no streaks remain.
- In a shallow dish, combine the cooled coffee and coffee liqueur (if using).
- Quickly dip each ladyfinger into the coffee mixture, ensuring they are moistened but not soggy. Place a layer of dipped ladyfingers in the bottom of a serving dish (approximately 8x8 inch).
- Spread half of the mascarpone cream mixture evenly over the ladyfingers.
- Repeat the layering process with another layer of dipped ladyfingers and the remaining mascarpone cream mixture.
- Cover the dish tightly with plastic wrap and refrigerate for at least 4 hours, or preferably overnight, to allow the flavors to meld and the tiramisu to set.
- Just before serving, dust the top generously with unsweetened cocoa powder using a fine-mesh sieve.