
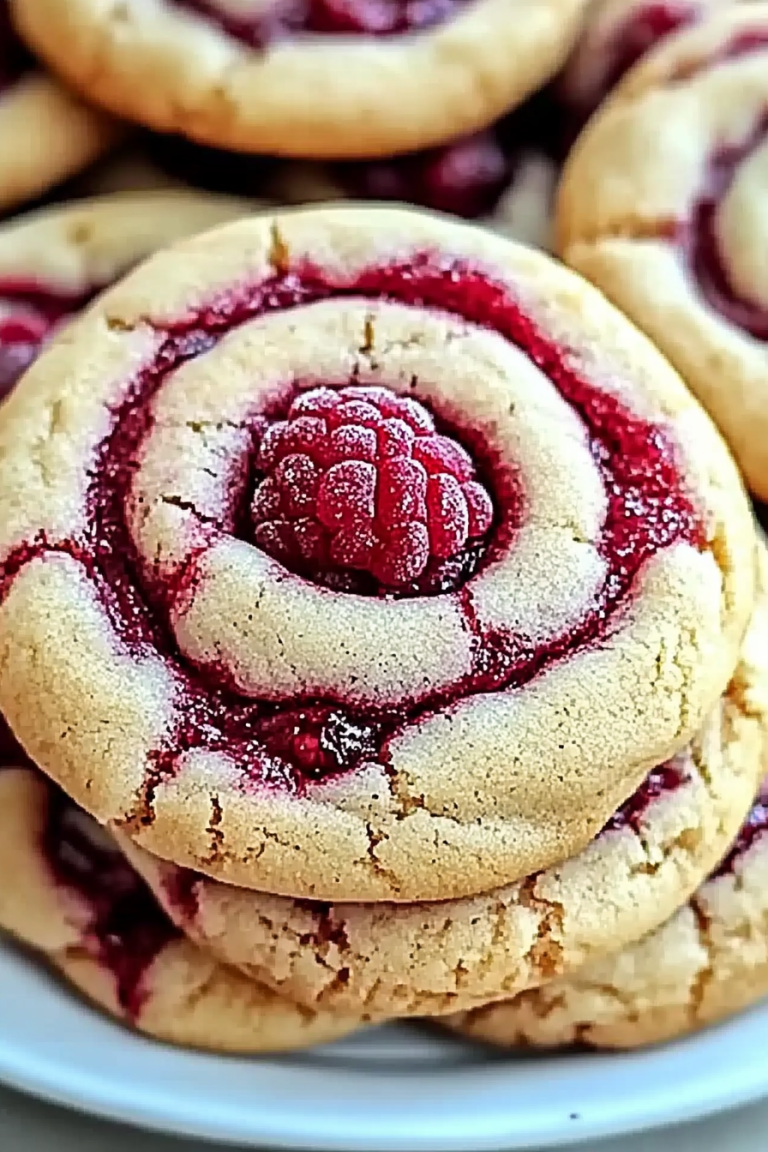
There’s something undeniably comforting about baking a Ding Dong Cake—especially on those lazy Sunday afternoons when your kitchen fills with the warm aroma of cocoa and vanilla. I remember the very first time I made this cake, it was a spur-of-the-moment decision after spotting a boxed Ding Dong at a vintage bakery. The taste instantly took me back to childhood summers, those sticky-finger afternoons with my cousins, fighting over who gets the last chocolatey bite. This cake isn’t just a treat; it’s a small celebration of that nostalgic joy. If you’ve ever loved the classic Ding Dong snack from the supermarket, just wait until you try this homemade version. It’s like the snack got a cozy upgrade, turning into a bigger, softer, more indulgent experience. Trust me: Ding Dong Cake has a way of disappearing faster than you’d expect. My kids actually beg for seconds every time I make it, and I swear the smell alone gathers the whole family around the kitchen island.
What is a ding dong cake?
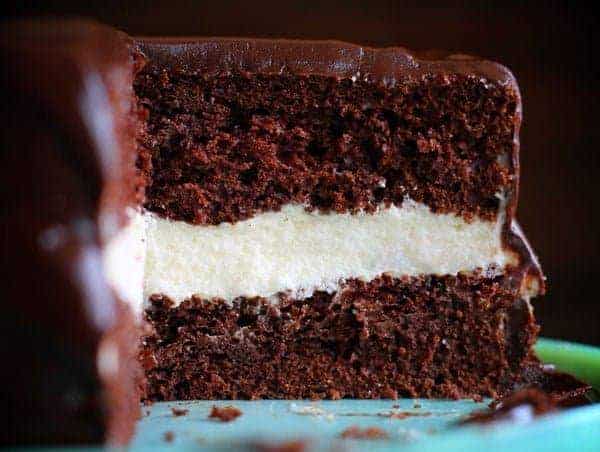
Think of Ding Dong Cake as the grown-up cousin of the classic chocolate snack cake you might’ve devoured back in grade school. It’s essentially a moist chocolate cake layered with a fluffy, creamy vanilla filling and topped with a shiny, fudge-like chocolate glaze. The name “Ding Dong” originally comes from the popular packaged snack, but I like to think of my version as a homemade tribute—something you’d serve proudly at a family gathering or coffee date. It’s approachable in the best way—no fancy techniques, no mysterious ingredients—just a simple, irresistible cake that hits all the right comfort-food notes. Baking it feels like a little act of love, like I’m bringing the magic of childhood right back to my kitchen counter.
Why you’ll love this recipe?
What I love most about this Ding Dong Cake is how it combines that childhood nostalgia with the satisfaction of baking something from scratch that everyone actually loves. First off, the flavor combo is on point: rich, tender chocolate cake balanced by that light, creamy vanilla filling—and don’t even get me started on the silky chocolate glaze that just seals the deal. It’s like dessert heaven on a plate. Plus, the recipe is surprisingly easy. If you’ve ever doubted whether a homemade snack cake can really be effortless, this one will change your mind. It’s straightforward, needs just a handful of pantry basics, and comes together faster than you think. I appreciate how budget-friendly the ingredients are too—not every crowd-pleaser needs expensive add-ons!
Then there’s the versatility. You can slice this up for a birthday party, crumble it over ice cream for an indulgent twist, or just enjoy a wedge with your morning coffee when you want a little treat that’s not overwhelming. If you’re familiar with zucchini bread, this recipe shares some of that moist, tender crumb magic—without tasting overly “veggie”—and that’s a little kitchen secret worth sharing. I’ve even tried these as cupcakes for a potluck, and they’re always a hit. Honestly, this cake has been a lifesaver on busy nights when I want homemade but need something quick and crowd-pleasing.
How do I make a Ding Dong cake?
Quick Overview
This cake comes together like a dream: you start by prepping a luscious chocolate batter, whip up a simple yet incredible vanilla cream filling, and finish with a glossy chocolate glaze. The swirling method is what makes this cake sing—a little chocolate, a little filling artfully mixed in for that classic layered look. I promise you, it’s easier than it sounds. You don’t need fancy equipment or hours of standing by the oven. In less than an hour, you’ll have a cake that looks like you spent all afternoon fussing, even if you didn’t.
Ingredients
For the Main Batter:
- 1 ¾ cups all-purpose flour — I always sift mine for better texture.
- ½ cup cocoa powder (unsweetened, Dutch-processed if possible for darker color).
- 1 teaspoon baking soda.
- ½ teaspoon baking powder.
- ½ teaspoon salt.
- 1 cup granulated sugar — you can adjust this later based on your sweetness preference.
- ½ cup packed light brown sugar — adds great moisture and depth.
- 2 large eggs (room temperature is best!).
- ½ cup vegetable oil — keeps the crumb tender and moist.
- 1 cup buttermilk — this is my secret weapon for tang and softness.
- 1 teaspoon vanilla extract — fresh is best whenever you can.
For the Filling:
- 1 cup heavy cream — chilled to whip perfectly.
- ⅓ cup powdered sugar — sifted to avoid lumps.
- 1 teaspoon vanilla extract — this little addition makes the filling sing.
- Optional: 2 tablespoons mascarpone cheese or cream cheese for extra richness.
For the Glaze:
- ½ cup semi-sweet chocolate chips or finely chopped baking chocolate.
- ⅓ cup heavy cream.
- 1 tablespoon unsalted butter — adds sheen and smoothness.
- Optional: pinch of salt to balance sweetness.
Step-by-Step Instructions
Step 1: Preheat & Prep Pan
Start by preheating your oven to 350°F (175°C). I like to line a 9×9-inch square pan with parchment paper, leaving some overhang for easy cake removal. Grease the sides lightly so the parchment doesn’t stick. This prep makes cleanup a breeze and prevents the cake edges from drying out.
Step 2: Mix Dry Ingredients
In a medium bowl, whisk together the flour, cocoa powder, baking soda, baking powder, and salt until nice and combined. This step is crucial because it ensures your cake rises evenly and the cocoa is dispersed well. I learned the hard way to always sift the cocoa separately if it’s clumpy to avoid those dry chocolate chunks.
Step 3: Mix Wet Ingredients
In a large bowl, beat the sugar, brown sugar, eggs, and oil until combined. Then, add the buttermilk and vanilla and mix until smooth. The batter should be loose but silky. Make sure your wet ingredients aren’t cold — room temp eggs and buttermilk help the batter blend beautifully.
Step 4: Combine
Gradually add the dry mixture to the wet, folding gently with a spatula. Don’t overmix—just until you no longer see flour streaks. Overmixing makes the cake dense, which we don’t want here. I pause and fold softly, then scrape the bowl sides to catch any stubborn patches.
Step 5: Prepare Filling
Using a chilled bowl and beaters, whip the heavy cream until it starts thickening. Add powdered sugar and vanilla, then continue whipping to soft peaks. If you want richer filling, fold in mascarpone or cream cheese gently until smooth. This filling is light but luxuriously creamy—my personal fave part!
Step 6: Layer & Swirl
Pour half the chocolate batter into the pan. Spoon dollops of the filling over the batter. Add the remaining batter on top. Using a butter knife or skewer, swirl the batter and filling together in a figure-eight or circular motion. The goal is a pretty marble effect, not perfect blending. This swirl gives the classic Ding Dong Cake its irresistible look.
Step 7: Bake
Bake for 35-40 minutes or until a toothpick comes out with just a few moist crumbs. Ovens vary, so start checking at 30 minutes if you’re using a convection oven. The kitchen will fill with this amazing chocolate scent that’ll have you sneaking bites even before it cools.
Step 8: Cool & Glaze
Once out of the oven, let the cake cool completely in the pan. Meanwhile, heat the cream for the glaze until just simmering, then pour over the chopped chocolate and butter. Let sit for a couple minutes, then stir until shiny and smooth. Pour glaze evenly over the cooled cake and let it set at room temp. If you’re impatient like me, a quick chill in the fridge firms it up.
Step 9: Slice & Serve
Use a sharp knife dipped in hot water (wiped dry) for neat slices. This cake is lovely slightly chilled or room temperature. I like to serve it with a cup of strong coffee or a tall glass of milk. Sometimes, a dollop of whipped cream on the side just sends it over the top. It’s a simple pleasure you never get tired of.
What to Serve It With
For Breakfast: Nothing beats a slice of Ding Dong Cake with a steaming mug of black coffee or your favorite latte first thing in the morning. The creamy filling and chocolate cake are just enough to feel indulgent but not overwhelming. I sometimes toast it lightly just to warm it up—it smells divine!
For Brunch: Pair it with fresh berries and a side of Greek yogurt for a balanced spread that feels fancy but is totally easy. A sparkling white wine or mimosa adds a fun, celebratory twist if you’re hosting friends.
As Dessert: Serve cake slices with a scoop of vanilla ice cream or drizzle some caramel sauce over the top. A sprinkle of sea salt enhances the chocolate glaze beautifully—trust me on this. My family loves cutting the cake into smaller bites after dinner for a light but satisfying sweet finish.
For Cozy Snacks: On chilly afternoons, a warm slice of Ding Dong Cake with a cup of chai or hot chocolate turns any snack time into a moment to savor. My kids and I always fight over who gets the “end piece because it’s extra fudgy.”
Top Tips for Perfecting Your Ding Dong Cake
Zucchini Prep: Okay, quick confession: I add a bit of finely grated zucchini to the batter sometimes to keep things super moist without altering flavor. If you do, make sure to squeeze out excess water in a clean kitchen towel to avoid sogginess. Fresh zucchini is always best; avoid anything too mature and seedy.
Mixing Advice: Folding gently is your best friend here. I learned over years that a few flour streaks are better than a dense cake from overmixing. Take your time folding—patience pays off in tender crumbs.
Swirl Customization: The swirl is what makes the Ding Dong Cake unique. I play around with the pattern—sometimes a figure-eight swirl, sometimes just light circular motions. Avoid over-swizzling so the filling doesn’t completely disappear, or else you lose that classic contrast.
Ingredient Swaps: I’ve tried swapping buttermilk for almond milk with a splash of lemon juice; it actually made the cake creamier and gave a subtle tang. Coconut oil works okay instead of vegetable oil for a hint of coconut aroma, but I’d avoid butter here for moisture reasons.
Baking Tips: Keep your cake in the middle rack for even heat, and if your oven tends to run hot, tent loosely with foil halfway through baking to avoid a dry crust. Toothpick tests are your best gauge—avoid opening the oven door too often, or it might sink.
Glaze Variations: For a different spin, swap semi-sweet chocolate for dark or milk chocolate depending on your sweet tooth. Mixing a teaspoon of espresso powder in the glaze amps up the chocolate flavor beautifully. For a lighter twist, dust with cocoa powder and powdered sugar instead of glaze.
Storing and Reheating Tips
Room Temperature: You can keep the Ding Dong Cake covered with a cake dome or airtight container at room temp for up to two days. It stays wonderfully moist but watch out for any warm or humid environments that might soften the glaze too much.
Refrigerator Storage: Store the cake in an airtight container or wrapped tightly in plastic wrap. The filling needs that chill to stay fresh, and it actually firms up the glaze too. It’ll keep well for up to five days in the fridge—you might want to let slices sit out for 15 minutes before serving to soften slightly.
Freezer Instructions: Wrap the whole cake tightly in plastic wrap, then foil, or freeze slices individually in zipper bags. It’ll last up to three months this way. Thaw overnight in the fridge, then bring to room temp before eating. If you glaze before freezing, the texture softens a bit but still tastes great.
Glaze Timing Advice: If you plan to freeze or store longer, I recommend glazing right before serving for the best texture and shine. If you glaze too early and refrigerate, the glaze can harden or sometimes get a dull finish.
Frequently Asked Questions
Final Thoughts
This Ding Dong Cake really is one of those recipes that makes you want to bake it again and again. It’s got the nostalgic punch of a classic chocolate snack cake, but the homemade love infuses it with something deeper and more special. Whether you’re baking for your family’s lunchbox, a weekend treat, or to impress friends with a retro-inspired dessert, this cake checks all the boxes. I’ve made it countless times, and it never fails to bring smiles and a few “Mmm”s around the table. If you’re someone who adores the cozy, comforting feeling of food made from scratch, you’ll find this cake hits the mark every time. Let me know how yours turns out, and if you try adding any fun twists! Happy baking!
Ding Dong Cake
Ingredients
Main Ingredients
- 1.75 cups all-purpose flour
- 2 cups granulated sugar
- 0.75 cups unsweetened cocoa powder
- 2 teaspoons baking soda
- 1 teaspoon baking powder
- 1 teaspoon kosher salt
- 1 cup buttermilk (room temperature)
- 0.5 cup vegetable oil
- 2 large eggs (room temperature)
- 2 teaspoons pure vanilla extract McCormick preferred
- 1 cup freshly brewed hot coffee
- 1 cup whole milk
- 5 tablespoons all-purpose flour
- 1 cup unsalted butter 2 sticks, softened to room temperature
- 1 cup granulated sugar
- 1 teaspoon vanilla extract
- 12 ounces semi-sweet chocolate finely chopped
- 12 ounces heavy cream room temperature
Instructions
Preparation Steps
- Preheat oven to 350°F. Grease and spray two 8-inch round cake pans with nonstick spray. Set aside.
- In a large bowl, whisk together flour, sugar, cocoa powder, baking soda, baking powder, and salt until well combined.
- In a separate bowl, mix together buttermilk, vegetable oil, eggs, and vanilla extract.
- Slowly add the wet ingredients to the dry ingredients while mixing on low speed. Then stir in the hot coffee until just combined.
- Divide the batter evenly between the prepared pans. Bake for 30 to 40 minutes or until a toothpick inserted in the center comes out mostly clean.
- Allow cakes to cool in pans for 30 minutes. Remove cakes from pans and cool completely on wire racks.
- For the filling, whisk milk and flour in a medium saucepan over medium heat until thickened and smooth, about 3-5 minutes. Remove from heat and cool to room temperature.
- In a mixer bowl, cream together butter and sugar until light and fluffy. Slowly add the cooled milk mixture and beat on medium-high speed until fluffy.
- Add vanilla and whisk on high speed for 7 to 8 minutes until smooth and creamy.
- For ganache, place chopped chocolate in a heatproof bowl. Heat heavy cream until just simmering then pour over the chocolate. Let sit for 2 minutes then whisk until smooth.
- To assemble, level the cooled cakes if needed. Place one cake layer on a serving plate, spread with filling, then top with second cake layer.
- Pour ganache over the entire cake, smoothing the sides. Allow ganache to set before slicing and serving.

I love how this recipe captures that cozy baking vibe—perfect for lazy Sundays with a warm cup of coffee!