You know, there are some recipes that just feel like sunshine on a plate, and for me, Greek chicken kabobs are absolutely one of them. The moment the weather starts to warm up, and I can even *think* about firing up the grill, my mind immediately goes to these. They’re just… happy food. They remind me of lazy summer evenings with family, the sizzle of the grill, and the air filled with that irresistible aroma of lemon, oregano, and perfectly cooked chicken. It’s not just dinner; it’s a whole vibe. Honestly, I’ve tried other marinated chicken recipes, but nothing quite captures that bright, zesty, perfectly balanced flavor like these Greek chicken kabobs. They’re my go-to for everything from backyard BBQs to simple weeknight dinners that need a little something special. They’re so easy to throw together, and the taste? Out of this world. Seriously, if you’re looking for a crowd-pleaser that’s as delicious as it is beautiful, you’ve found it!
What are Greek chicken kabobs?
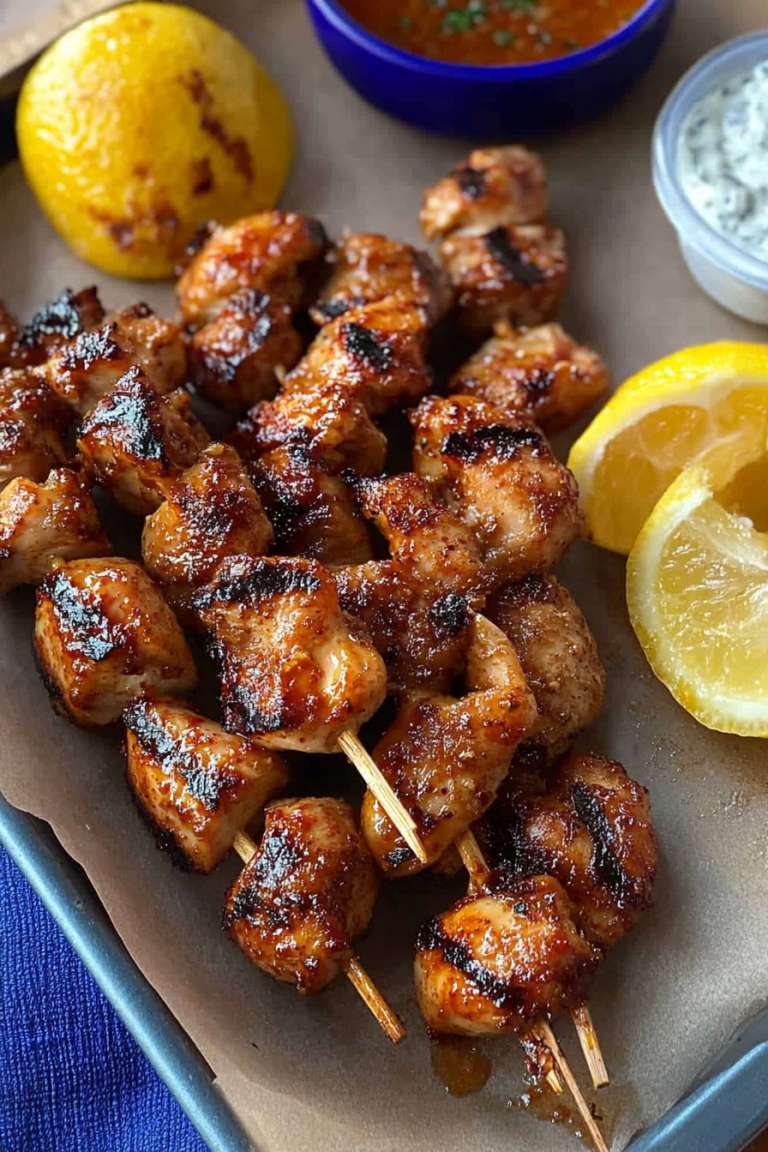
So, what exactly are these magical little skewers of deliciousness? Think of them as bite-sized pieces of tender chicken, marinated in a vibrant, herbaceous mixture that screams Mediterranean summer. We’re talking fresh lemon juice, fragrant oregano, garlic, a good glug of olive oil – all the classic Greek flavors you love. These marinated chicken pieces are then threaded onto skewers, often with colorful veggies like bell peppers, red onions, and maybe even some cherry tomatoes or zucchini, and grilled until they’re beautifully charred and cooked through. It’s a simple concept, really, but the magic is in the marinade and the grilling process that locks in all those incredible flavors. It’s essentially summer on a stick, designed to be fun, flavorful, and utterly irresistible. They’re a far cry from a plain old grilled chicken breast, offering so much more zest and zest!
Why you’ll love this recipe?
There are so many reasons why I’ve made this recipe a staple in my kitchen, and I just know you’re going to fall in love with it too. First off, the flavor explosion is unreal. That marinade is a game-changer. It’s tangy from the lemon, super savory with the garlic and oregano, and that good quality olive oil just brings it all together. The chicken comes out incredibly juicy and infused with all those wonderful herbs. What I love most is how darn simple it is, even though it tastes like something you’d get at a fancy restaurant. You basically just chop, marinate, skewer, and grill. It’s a lifesaver on busy weeknights when you want something healthy and delicious without spending hours in the kitchen. And speaking of budget, it’s fantastic for that too! Chicken thighs are usually pretty affordable, and the marinade uses pantry staples. Plus, these are so versatile. You can serve them right off the grill, toss them into a salad, stuff them into pita bread with some tzatziki… the possibilities are endless! Compared to some other marinated chicken recipes, this one just hits different. It’s brighter, fresher, and has that irresistible char from the grill that really makes it sing. It’s the kind of meal that makes everyone happy, from picky eaters to seasoned foodies. Trust me, once you try it, you’ll see exactly what I mean.
How do I make Greek Chicken Kabobs?
Quick Overview
This recipe is all about maximizing flavor with minimal fuss. We’ll marinate chicken thighs (they stay so juicy!) in a zesty, herbaceous blend, thread them onto skewers with colorful veggies, and then grill them to perfection. The key is letting that marinade work its magic for at least 30 minutes, but an hour is even better. It’s incredibly straightforward, and the result is tender, flavorful chicken with beautifully tender-crisp vegetables, all kissed by the grill. It’s the ultimate easy entertaining dish or a delightful weeknight meal that feels special.
Ingredients
For the Marinade:
You’ll want about 1.5 pounds of boneless, skinless chicken thighs for this. I always go for thighs because they stay so wonderfully moist and forgiving on the grill, unlike chicken breasts which can dry out so easily. Make sure they’re trimmed of any excess fat. For the liquids, grab about 1/4 cup of good quality extra virgin olive oil – it really makes a difference here. Fresh lemon juice is essential, so measure out about 1/4 cup. If you’re squeezing your own lemons, make sure to strain out any pulp or seeds. Then, we need 3-4 cloves of garlic, minced really fine. You can also use a microplane for this; it distributes the flavor so well. And for the herbs, the star players are dried Greek oregano (about 2 tablespoons) and a teaspoon of dried thyme. Don’t skimp on the oregano; it’s the soul of this marinade! A teaspoon of salt and about half a teaspoon of black pepper are your seasoning basics. Sometimes, if I’m feeling fancy or have it on hand, I’ll add a pinch of red pepper flakes for a tiny bit of heat, but it’s totally optional.
For the Kabobs:
Besides the marinated chicken, you’ll want about 1 pound of chicken cut into roughly 1-inch cubes. For the veggies, I love using a mix of colorful bell peppers – think red, yellow, and green – cut into bite-sized chunks that are similar in size to the chicken so they cook evenly. One large red onion, also cut into chunks, adds a wonderful sweetness as it grills. If you like, add some cherry tomatoes, or even chunks of zucchini or yellow squash. And of course, you’ll need about 8-10 wooden or metal skewers. If you’re using wooden skewers, this is super important: soak them in water for at least 30 minutes before you plan to use them. This prevents them from burning to a crisp on the grill. Seriously, I learned that the hard way years ago!
For Serving (Optional but Recommended!):
This is where you can really elevate your Greek chicken kabobs. A simple squeeze of fresh lemon juice right before serving is a must for extra brightness. And if you’re feeling it, some fresh chopped parsley or dill sprinkled over the top adds a lovely fresh pop of color and flavor. A side of warm pita bread, some creamy tzatziki sauce, or a big Greek salad takes these kabobs from delicious to absolutely divine.
Step-by-Step Instructions
Step 1: Marinate the Chicken
This is where all the magic starts! Grab a medium-sized bowl or a large zip-top bag. Add your cubed chicken thighs. Now, pour in that beautiful marinade mixture: the olive oil, fresh lemon juice, minced garlic, dried oregano, dried thyme, salt, and pepper (and red pepper flakes if you’re using them). Give everything a good toss with your hands or a spoon until every piece of chicken is thoroughly coated. If you’re using a bowl, cover it tightly with plastic wrap. If you’re using a zip-top bag, just press out as much air as you can before sealing it. Now, pop this into the refrigerator to marinate. I usually aim for at least 30 minutes, but an hour is even better. If you have the time and want to prep ahead, you can even marinate it for up to 4 hours. Any longer than that, and the lemon juice can start to “cook” the chicken, changing its texture, which isn’t ideal. I find that the hour mark is usually the sweet spot for maximum flavor without compromising texture.
Step 2: Prep Your Veggies and Skewers
While the chicken is busy soaking up all those amazing flavors, it’s time to get your veggies ready and prepare your skewers. If you’re using wooden skewers, now is the time to get them soaking in a shallow dish or pan filled with water. Make sure they’re fully submerged! Then, chop up your bell peppers, red onion, and any other veggies you’re using into roughly 1-inch pieces. You want them to be about the same size as your chicken cubes so everything cooks evenly on the grill. If you have some cherry tomatoes, you can leave them whole. Once your chicken has marinated to your liking, discard the leftover marinade. You don’t want to use that raw marinade on your cooked food. It’s done its job!
Step 3: Assemble the Kabobs
This is the fun part where everything starts to come together visually! Take your pre-soaked wooden skewers or metal skewers. Start by threading on a piece of chicken, then a chunk of bell pepper, then a piece of red onion, then another piece of chicken, and so on. Alternate the chicken with the vegetables in a way that looks appealing to you. Try not to pack them on too tightly; you want the heat from the grill to be able to reach all sides of the chicken and veggies for even cooking and nice charring. Leave a little bit of space between each piece. Aim for a good mix of chicken and colorful vegetables on each skewer. I usually end up with about 4-5 pieces of chicken per skewer, depending on the size of the pieces.
Step 4: Preheat the Grill
This step is crucial for that perfect char and juicy interior. You’ll want to preheat your grill to medium-high heat. This usually means getting the temperature up to around 400-450 degrees Fahrenheit. Give your grill grates a good cleaning – a clean grill prevents sticking and imparts better flavor. Once the grill is hot, you can give the grates a quick brush with a little bit of oil (like canola or vegetable oil) using a paper towel held with tongs. This extra layer of lubrication is another safeguard against sticking, especially for those marinated chicken pieces.
Step 5: Grill the Kabobs
Carefully place your assembled kabobs onto the hot, oiled grill grates. You’ll likely want to do this in batches so you don’t overcrowd the grill, which can lead to uneven cooking and steaming instead of grilling. Grill the kabobs for about 10-15 minutes total, turning them every few minutes, until the chicken is cooked through and nicely charred on the edges, and the vegetables are tender-crisp. The exact cooking time will depend on the heat of your grill and the size of your chicken pieces, so keep an eye on them. The best way to check if the chicken is done is to cut into one of the largest pieces; it should be opaque white all the way through with no pinkness. The vegetables should have those lovely grill marks and be softened but still have a slight bite to them. This part is so satisfying to watch!
Step 6: Rest and Serve
Once your Greek chicken kabobs are perfectly grilled, carefully remove them from the grill using tongs and transfer them to a clean platter or cutting board. It’s really important to let them rest for about 5 minutes before serving. This allows the juices in the chicken to redistribute, making them even more tender and moist. While they’re resting, you can give them a final squeeze of fresh lemon juice and a sprinkle of fresh parsley or dill if you’re using them. Then, serve them up hot and enjoy that amazing aroma and taste!
What to Serve It With
Honestly, Greek chicken kabobs are so versatile, they fit into pretty much any mealtime scenario you can imagine! For a classic breakfast or brunch, I love serving them alongside some fluffy scrambled eggs or a simple Greek yogurt parfait with fresh berries and a drizzle of honey. They add a wonderfully savory and protein-packed element to the start of the day. If you’re going for a more elegant brunch spread, maybe arrange them artfully on a platter with some sliced feta cheese and a side of warm pita bread and hummus. They’re a fantastic alternative to heavier brunch fare. As a main course for dinner, they are absolute stars. Serve them with a big, crisp Greek salad (lots of cucumbers, tomatoes, olives, and feta!) and some lemon-dill roasted potatoes. Or, stuff them into warm pita pockets with shredded lettuce, sliced tomatoes, and a generous dollop of tzatziki sauce – it’s practically a meal in itself. For lighter, cozier snacks or appetizers, you can even serve them as is, maybe with a small bowl of tzatziki for dipping. My family also loves them tossed into a bed of orzo pasta with some sautéed spinach and Kalamata olives. It’s a complete, flavorful meal that feels both comforting and healthy. They’re also amazing chilled the next day, so leftovers are always a win!
Top Tips for Perfecting Your Greek Chicken Kabobs
I’ve made these Greek chicken kabobs more times than I can count, and over the years, I’ve picked up a few tricks that I think make a real difference. For the chicken, seriously, use thighs! They are so forgiving and stay incredibly juicy. If you do opt for breasts, be extra careful not to overcook them, and maybe marinate for a shorter time. When you’re chopping your veggies, try to keep them all roughly the same size as your chicken pieces. This is a small thing, but it ensures everything cooks at the same rate, so you don’t end up with mushy peppers and undercooked onions, or vice versa. It’s all about balance! For the marinade, don’t rush it. Letting the chicken soak in those flavors for at least 30 minutes, and ideally an hour, makes a world of difference. I’ve even prepped the marinade the night before and tossed the chicken in it first thing in the morning, and that works beautifully. When it comes to grilling, a hot grill is your friend. Make sure it’s properly preheated and that the grates are clean and lightly oiled. This is key for getting those gorgeous grill marks and preventing sticking. If you see flare-ups, move the kabobs to a cooler part of the grill temporarily. Don’t be afraid to turn them frequently; this helps them cook evenly and prevents one side from burning before the other is cooked. I’ve found that checking the internal temperature of the thickest piece of chicken with a meat thermometer is the most reliable way to know they’re done – you’re looking for around 165°F (74°C). And lastly, remember that resting period! It might seem like an extra step, but letting those kabobs sit for just five minutes off the heat allows the juices to settle back into the meat, making every bite incredibly tender and moist. Trust me on this one!
Storing and Reheating Tips
One of the best things about these Greek chicken kabobs is that they’re just as delicious the next day, and sometimes I even find myself looking forward to the leftovers! If you have any that didn’t get devoured right off the grill, let them cool completely before storing. For storage at room temperature, I wouldn’t leave them out for more than two hours, as per general food safety guidelines. Once cooled, you can store them in an airtight container in the refrigerator for up to 3 days. They stay pretty good in there, and I love having them ready to go for quick lunches. If you want to freeze them, that’s an option too! Once they’re completely cool, you can wrap each skewer individually in plastic wrap, then place them in a freezer-safe bag or container. They’ll keep well in the freezer for about 2-3 months. To reheat, if they’re from the fridge, you can pop them back on a grill (if it’s nice out!) or in a hot skillet for a few minutes per side until heated through. You can also warm them gently in the oven at around 300°F (150°C) for about 10-15 minutes, or until warmed through. Be careful not to overheat, as they can dry out. If you’re reheating frozen kabobs, it’s best to thaw them in the refrigerator overnight first. Then, you can reheat them as you would refrigerated ones. For best results, try to add a little bit of fresh lemon juice or a drizzle of olive oil when reheating to bring back that fresh flavor.
Frequently Asked Questions
Final Thoughts
There you have it – my absolute favorite Greek chicken kabobs! I really hope you give these a try. They’re more than just a recipe to me; they’re a gateway to those relaxed, happy summer vibes, and I love sharing them with people. They’re proof that you don’t need complicated steps or fancy ingredients to make something truly spectacular. That perfect balance of lemon, oregano, and garlic, combined with the smoky char from the grill, just makes for an unforgettable meal. If you love these, you might also enjoy my Lemon Herb Roasted Chicken or my Mediterranean Quinoa Salad – they hit a similar flavor profile! I can’t wait to hear how yours turn out, so please leave a comment below with your thoughts, or share your own favorite veggie additions! And if you made them for a gathering, I’d love to see pictures – tag me on social media! Happy grilling, everyone!