You know those recipes that just *feel* like home? The ones you crave when the air gets crisp, the leaves start to turn, and you just want something warm and comforting without all the fuss? Well, I’ve got one for you. This isn’t just any cranberry cake; it’s *the* cranberry cake. It’s the one that smells like my childhood kitchen on a Saturday morning, with just a hint of spice and the bright tang of fresh cranberries. It’s honestly one of the simplest cakes I know, but it delivers a flavor punch that’s absolutely incredible. If you love a good apple crumble or a spiced Pumpkin bread, you’re going to fall head over heels for this cranberry cake. It’s got that perfect balance of sweet and tart, moist and tender, all wrapped up in a beautiful, rustic package. I swear, the aroma alone will have the whole family asking what’s baking!
What is Cranberry Cake?
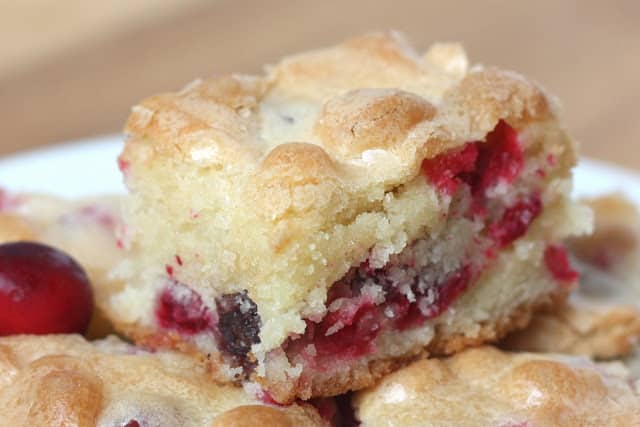
So, what exactly *is* this magical cranberry cake I’m gushing about? Think of it as your new go-to for that perfect fall baking fix. It’s essentially a moist, tender cake, studded generously with tart cranberries, and often finished with a simple, sweet glaze. The cranberries burst as it bakes, creating these little pockets of bright, juicy flavor that cut through the richness of the cake beautifully. It’s not overly sweet, which is a big win in my book, allowing the natural flavors of the cranberries and the subtle spices to really shine. The name itself, “cranberry cake,” is pretty straightforward, but for me, it evokes the entire season – cozy sweaters, steamy mugs of cider, and the anticipation of holidays. It’s like a warm hug from autumn itself, baked into a slice of pure deliciousness. It’s less fussy than a formal layer cake but way more exciting than a basic loaf.
Why you’ll love
Honestly, there are so many reasons why this cranberry cake has become a staple in my kitchen. First and foremost, the flavor. It’s just divine. You get that delightful burst of tartness from the cranberries, perfectly complemented by the warm spices like cinnamon and nutmeg. The cake itself is wonderfully moist and tender, thanks to a secret ingredient I’ll share later (spoiler: it involves a certain squash!). It’s not overly sweet, which I adore, making it perfect for any time of day. Secondly, the simplicity is a lifesaver. I’ve made this on ridiculously busy weeknights, and it still turns out beautifully. You can whip up the batter in one bowl, and the whole process takes less time than you’d think. For those of you keeping an eye on the grocery bill, this recipe is wonderfully budget-friendly. Cranberries are often on sale in the fall, and the other ingredients are pantry staples. Plus, it’s incredibly versatile. I’ve served this at casual brunches, as a dessert after a hearty meal, and even just as a special afternoon treat with a cup of tea. It’s a crowd-pleaser that always gets rave reviews, much like my famous spiced apple muffins, but with its own unique, vibrant personality.
How do I make Cranberry Cake?
Quick Overview
This cranberry cake is a breeze to make! You’ll basically mix your dry ingredients, whisk your wet ingredients, combine them gently, fold in the cranberries, and bake until golden and fragrant. Then, a simple glaze finishes it off. It’s a one-bowl wonder for the batter, which means less cleanup, and the whole process is designed to be straightforward, even for beginner bakers. You don’t need any fancy equipment, just your trusty mixing bowls and a whisk.
Ingredients
For the Main Batter:
2 cups all-purpose flour (I like King Arthur for its consistent results)
1 ½ teaspoons baking powder (make sure it’s fresh for a good rise!)
½ teaspoon baking soda
½ teaspoon ground cinnamon
¼ teaspoon ground nutmeg (freshly grated is always best if you have it)
½ teaspoon salt
¾ cup granulated sugar (you can dial this back a tiny bit if you prefer it less sweet)
½ cup unsalted butter, softened (or good quality margarine for a dairy-free option)
2 large eggs, at room temperature (this really helps with emulsion)
1 teaspoon vanilla extract
1 cup finely grated zucchini, squeezed dry (this is my secret for moisture!)
½ cup milk (any kind works, but I love whole milk for richness or unsweetened almond milk for creaminess)
For the Filling:
1 ½ cups fresh or frozen cranberries (if frozen, no need to thaw!)
1 tablespoon all-purpose flour
2 tablespoons granulated sugar
½ teaspoon lemon zest (optional, but adds a lovely brightness)
For the Glaze:
1 cup powdered sugar
2-3 tablespoons milk or lemon juice (lemon juice gives a nice tang)
Step-by-Step Instructions
Step 1: Preheat & Prep Pan
First things first, get your oven preheating to 350°F (175°C). This is crucial for an even bake. Then, grab a 9×5 inch loaf pan. You’ll want to grease it really well – I use butter or cooking spray – and then dust it with a little flour. Tap out any excess. This step is a game-changer to prevent your beautiful cranberry cake from sticking. If you’re feeling fancy or want a really neat presentation, you can also line it with parchment paper, leaving some overhang to lift the cake out easily.
Step 2: Mix Dry Ingredients
In a large mixing bowl, whisk together the flour, baking powder, baking soda, cinnamon, nutmeg, salt, and granulated sugar. Give it a good whisk for about 30 seconds. This ensures all those leavening agents and spices are evenly distributed, which means you won’t have little pockets of baking soda or clumps of cinnamon in your final cake. It also helps aerate the flour a bit!
Step 3: Mix Wet Ingredients
In a separate medium bowl, cream together the softened butter and the room temperature eggs. You can use an electric mixer for this, or just a good old whisk and some elbow grease! Beat until it’s light and fluffy. Then, stir in the vanilla extract and the finely grated zucchini. Make sure you’ve squeezed most of the water out of the zucchini first; this is super important to avoid a soggy cake! Finally, pour in the milk and whisk until everything is just combined. Don’t overmix here!
Step 4: Combine
Now, it’s time to bring the wet and dry ingredients together. Pour the wet ingredients into the bowl with the dry ingredients. Using a spatula or wooden spoon, gently fold them together until *just* combined. Seriously, stop mixing as soon as you don’t see any dry streaks of flour. Overmixing develops the gluten in the flour, which can lead to a tough cake, and we definitely don’t want that. A few small lumps are perfectly okay!
Step 5: Prepare Filling
In a small bowl, toss the cranberries with the 1 tablespoon of flour, 2 tablespoons of sugar, and the optional lemon zest. Tossing the cranberries in flour helps them suspend more evenly throughout the batter instead of sinking to the bottom during baking. It’s a little trick that makes a big difference!
Step 6: Layer & Swirl
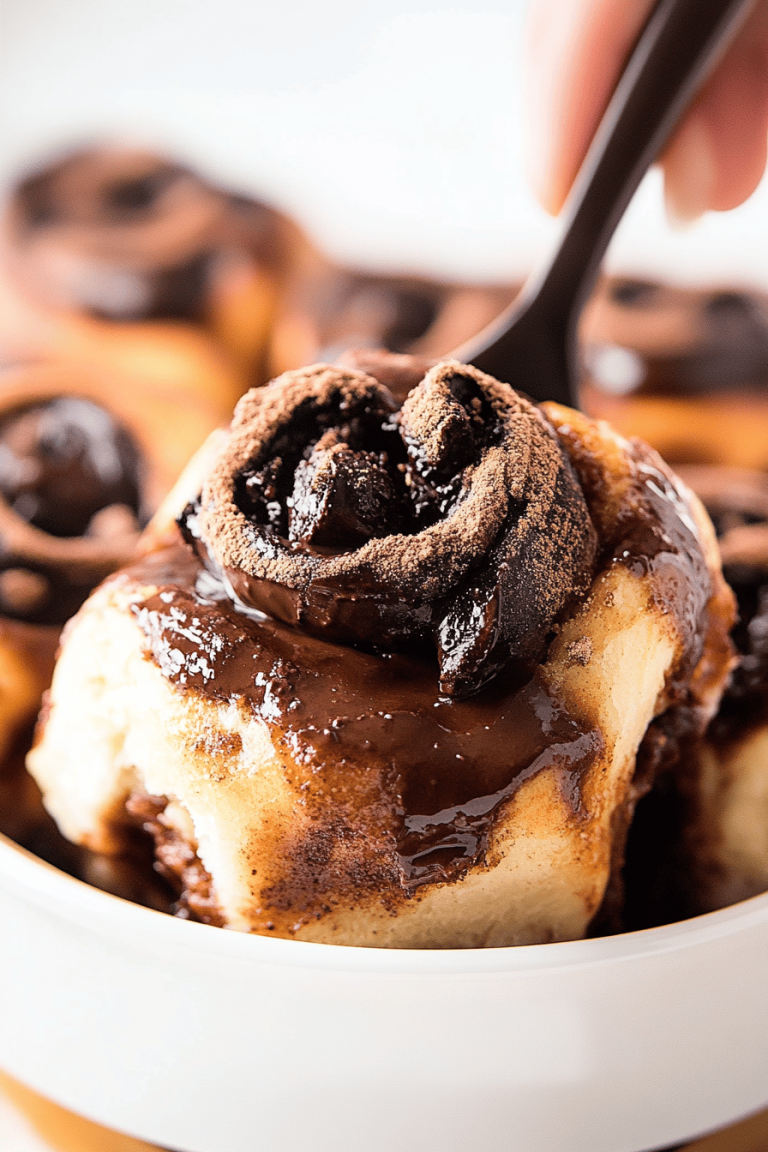
Pour about half of the batter into your prepared loaf pan and spread it evenly. Scatter half of the cranberry mixture over the batter. Then, spoon the remaining batter on top, covering the cranberries. Finally, scatter the rest of the cranberries over the top layer of batter. If you want a swirl effect, you can very gently swirl a knife through the batter a couple of times, but don’t go too crazy – we want those beautiful cranberry pockets!
Step 7: Bake
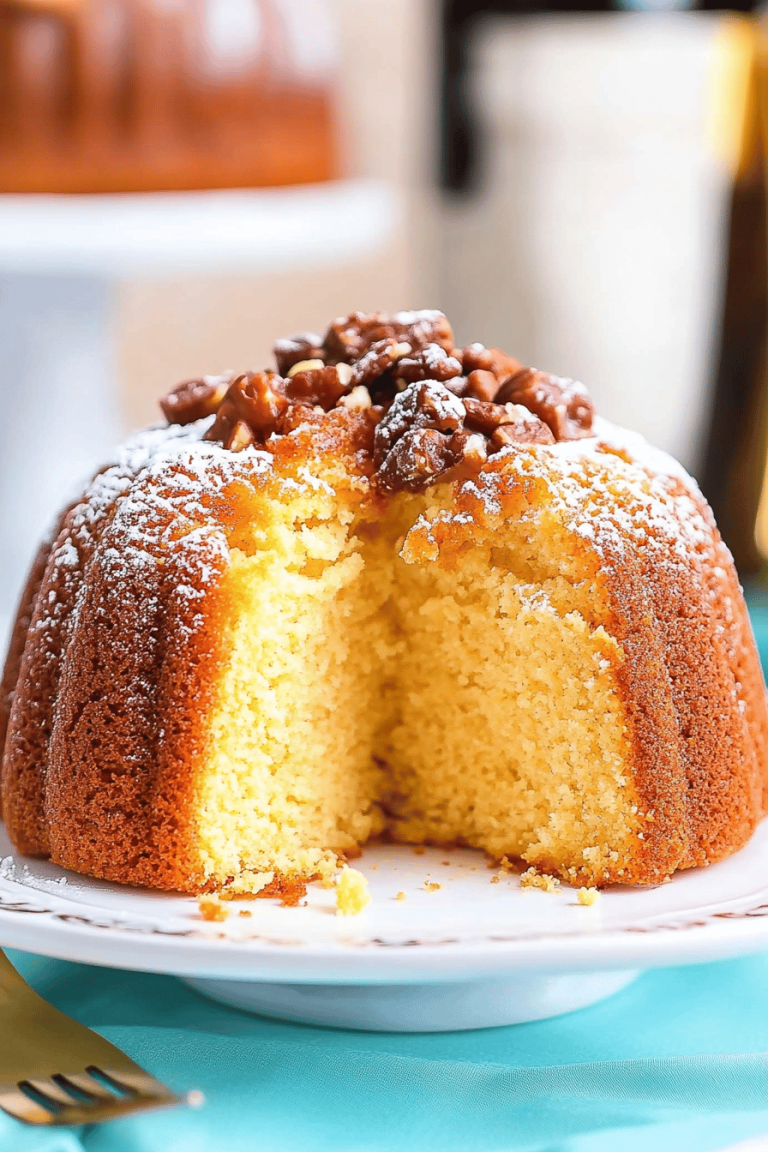
Pop the pan into your preheated oven and bake for about 50-60 minutes. The exact time will vary depending on your oven. You’ll know it’s done when a wooden skewer or toothpick inserted into the center comes out clean (or with a few moist crumbs, but no wet batter). The top should be golden brown and the cake should feel set when gently pressed. If the top starts browning too quickly, you can loosely tent it with aluminum foil.
Step 8: Cool & Glaze
Once baked, let the cranberry cake cool in the pan for about 10-15 minutes. This allows it to firm up a bit before you attempt to remove it. Then, carefully invert it onto a wire rack to cool completely. Trying to glaze a warm cake is a recipe for a melted, drippy mess, so patience is key here! Once it’s completely cool, whisk together the powdered sugar and 2 tablespoons of milk or lemon juice until you have a smooth, pourable glaze. If it’s too thick, add a tiny bit more liquid; if it’s too thin, add more powdered sugar. Drizzle the glaze over the top of the cooled cake, letting it drip down the sides. It looks so pretty!
Step 9: Slice & Serve
Once the glaze has set (which only takes a few minutes), your gorgeous cranberry cake is ready to be sliced and enjoyed! I like to use a sharp serrated knife for clean slices. Serve it at room temperature for the best texture and flavor. This cake is absolutely delicious on its own, but it’s also wonderful with a dollop of whipped cream or a scoop of vanilla ice cream if you’re feeling decadent.
What to Serve It With
This cranberry cake is so versatile, it fits right in no matter the occasion! For a cozy breakfast, I love a thick slice alongside a steaming mug of coffee or a hot cup of chai tea. It’s not too sweet, so it’s a perfect morning treat. On a leisurely brunch table, it’s a beautiful addition. I often pair it with fresh fruit salad, maybe some crispy bacon, and a mimosa. It adds a lovely pop of color and flavor. As a dessert, it’s a fantastic, lighter option after a rich meal. Serve a slice with a dollop of lightly sweetened whipped cream, a scoop of vanilla bean ice cream, or even a drizzle of crème anglaise. For those pure comfort snack cravings, especially on a chilly afternoon, just a slice of this cranberry cake is pure bliss. It’s wonderful with a glass of milk or a soothing herbal tea. My kids have a tradition of asking for it with hot chocolate on the first truly cold day of the year, and it just feels so special.
Top Tips for Perfecting Your Cranberry Cake
After making this cranberry cake countless times, I’ve picked up a few tricks that really help ensure it turns out perfectly every single time. First, regarding the zucchini prep: squeezing out as much moisture as possible is non-negotiable! You can use your hands, a clean kitchen towel, or even a potato ricer. You want it finely grated, not mushy. This keeps the cake moist without making it heavy or watery. For mixing, remember my mantra: “Don’t overmix!” Once the flour is added, just stir until you *barely* see any dry streaks. A few small lumps are fine, really. Overmixing is the enemy of tender cakes. When it comes to the swirl customization, I usually just do a gentle swirl with a butter knife. You don’t need fancy marbling; just a little bit to distribute the cranberries slightly more. The key is having those bright red jewels scattered throughout. If you’re thinking about ingredient swaps, I’ve experimented! For a gluten-free version, a good 1:1 gluten-free flour blend usually works well, though the texture might be slightly different. You can also try adding a tablespoon more liquid if it seems too dry. For the glaze, if you want a thicker, more frosting-like consistency, just add more powdered sugar. If you prefer a thinner drizzle, use more liquid. Baking tips: always use the middle rack of your oven for even heat. And don’t be afraid to check for doneness a little early – ovens can be fickle! For glaze variations, a little orange zest or a tiny splash of orange juice instead of lemon juice adds a wonderfully festive flavor. You could even add a pinch of cardamom to the glaze for an extra warm spice note. I learned the hard way that cooling completely before glazing is essential, otherwise, you’ll have a sticky, melted mess. Trust me on this one!
Storing and Reheating Tips
This cranberry cake is pretty resilient and stays delicious for a few days, which is great because it usually doesn’t last long! For room temperature storage, once it’s completely cool and the glaze has set, I like to wrap it tightly in plastic wrap or place it in an airtight container. It will stay fresh at room temperature for about 2-3 days. If you live in a very warm or humid climate, or if it’s particularly hot where you are, I’d opt for refrigerator storage to be safe. In the refrigerator, it will stay good for up to 5 days. Keep it in an airtight container to prevent it from drying out. When you’re ready to enjoy a slice from the fridge, you can serve it cold, or let it sit at room temperature for about 30 minutes to come back to a more pleasant texture. I haven’t personally frozen this cake *with* the glaze on, as it can sometimes make the glaze a little less appealing after thawing, but you absolutely can freeze the un-glazed cake! Wrap it very tightly in plastic wrap, then add a layer of aluminum foil, and it should be good in the freezer for up to 2-3 months. Thaw it overnight in the refrigerator, then bring it to room temperature before glazing. If you do glaze before freezing, just be aware the texture might change slightly.
Frequently Asked Questions
Final Thoughts
There you have it – my absolute favorite cranberry cake! It’s more than just a recipe; it’s a little piece of my kitchen comfort, and I’m so thrilled to share it with you. The magic of this cake lies in its perfect balance of tart cranberries and tender, spiced crumb, all made incredibly moist by a secret ingredient that’s so simple but makes all the difference. It’s proof that you don’t need complicated steps or fancy ingredients to create something truly special. This cranberry cake is proof that baking can be joyful, easy, and incredibly rewarding. If you love this recipe, you might also enjoy my Spiced Pear Bread or my Lemon Blueberry Scones. I truly hope this cranberry cake brings as much warmth and happiness to your home as it does to mine. I can’t wait to hear how yours turns out! Please leave a comment below with your thoughts or any variations you tried. Happy baking, friends!
cranberry cake
Ingredients
Main Ingredients
- 3 large eggs
- 2 cups granulated sugar
- 0.75 cup unsalted butter softened
- 1 teaspoon vanilla extract
- 2 cups all-purpose flour see notes for gluten-free alternative
- 12 ounces fresh cranberries
Instructions
Preparation Steps
- Preheat oven to 350 degrees F (175 degrees C). With a mixer, beat the eggs with the sugar until slightly thickened and light in color, about 5-7 minutes. The mixture should almost double in size. The eggs work as your leavening agent in this recipe, so do not skip this step. This mixture should form a ribbon when you lift the beaters out of the bowl.
- Add the softened butter and vanilla extract; mix two more minutes until well combined. Stir in the flour until just combined, being careful not to overmix. Add the fresh cranberries and gently stir to mix throughout the batter.
- Spread the batter evenly in a buttered 9x13 inch baking pan. Bake for 40-50 minutes, or until the cake is very lightly browned and a toothpick inserted near the center of the cake comes out clean. (Baking time may vary, typically around 43 minutes.)
- Let the cake cool completely in the pan before cutting into small slices. For party servings, cut into fairly small pieces (about 1x2 inches) for easy enjoyment.