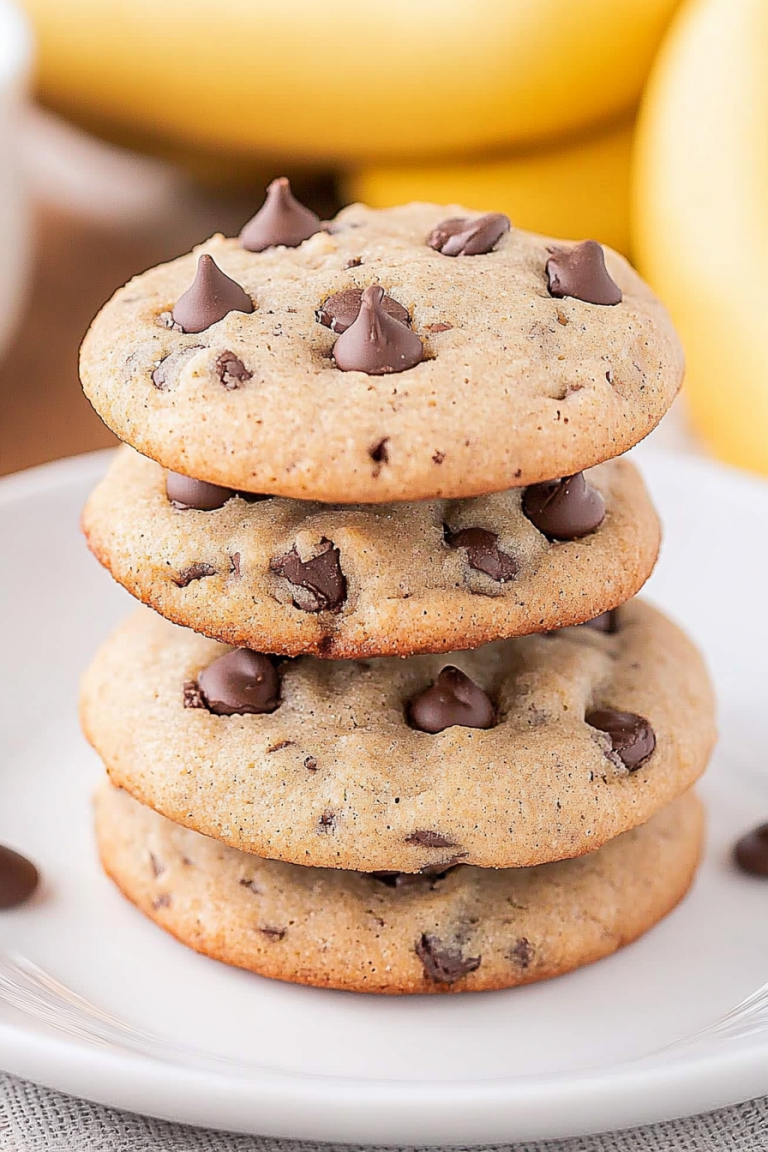
I remember the first time I ever tasted a real cowboy cookie. It was at a little bake sale at my son’s school, and I was honestly just buying something to contribute to the jar. But oh my goodness, that cookie! It was like a perfect harmony of textures and flavors – chewy, slightly crisp edges, pockets of melty chocolate, and that delightful crunch from the oats. I was hooked. Since then, I’ve spent years perfecting my own version, and let me tell you, this cowboy cookie recipe is the one that always, always hits the spot. It’s the kind of cookie that brings smiles to faces, whether it’s for a quick afternoon treat or a special occasion. Forget those sad, flat cookies that crumble into dust; this recipe delivers on every single promise. It’s a flavor explosion, a textural dream, and frankly, it’s become my go-to when I need a baking win.
What is a cowboy cookie?
So, what exactly is a cowboy cookie? Think of it as the ultimate cookie mashup. It’s essentially a classic Chocolate Chip cookie that decided to invite some friends to the party. You’ve got your beloved chocolate chips, of course, but then there are rolled oats for that fantastic chewiness and texture, and often, some crunchy nuts like pecans or walnuts for an extra layer of goodness. Some recipes even sneak in a little bit of coconut for a tropical twist. The magic really lies in the balance – it’s not quite a crispy cookie, and it’s definitely not a super soft, cakey one either. It lives in that perfect sweet spot that makes you want to keep reaching for another. It’s got heart, it’s got soul, and it’s undeniably delicious.
Why you’ll love this recipe?
Honestly, I could write a novel about why this cowboy cookie recipe is so darn good, but let’s just hit the highlights. First off, the flavor. It’s this incredible blend of rich brown sugar, sweet vanilla, and the salty undertones of the butter and flour. Then you get the bursts of gooey chocolate, the satisfying chew from the oats, and the nutty crunch if you decide to add them in. It’s complex enough to be interesting, but familiar enough to feel like home. And the texture? Oh, the texture! The edges get just slightly crisp, while the center stays wonderfully soft and chewy. It’s the best of all worlds.
Beyond the taste, this recipe is a lifesaver for busy nights. It comes together so quickly, and you can literally mix it up in one bowl if you’re feeling extra ambitious (which I often do!). The ingredients are all pantry staples, so there’s usually no last-minute dash to the grocery store. Plus, it’s incredibly forgiving. I’ve messed up measurements here and there – sometimes I’m a little heavy-handed with the oats, other times I might forget the vanilla for a second – and it *still* turns out beautifully. That’s the mark of a truly great recipe, right? It’s also super versatile. You can swap out the chocolate chips for White Chocolate, butterscotch, or even a mix! And for those who love a little extra texture, adding pecans or walnuts is an absolute game-changer. This recipe just… works. It’s reliable, it’s delicious, and it’s a surefire way to make everyone happy.
How do you make cowboy cookies?
Quick Overview
Making these incredible Cowboy cookies is surprisingly straightforward. You’ll basically cream together your butter and sugars, then mix in your eggs and vanilla. After that, it’s just a matter of stirring in your dry ingredients – flour, oats, baking soda, salt – and finally folding in those delicious add-ins like chocolate chips and nuts. Scoop them onto a baking sheet and bake until they’re golden brown and irresistible. The whole process, from start to finish, can be done in under an hour, making it perfect for those days when you need a sweet treat fast.
Ingredients
For the Main Batter:
Butter: 1 cup (2 sticks) unsalted butter, softened. It’s really important that your butter is softened, not melted. You want it to be pliable enough to cream with the sugar easily. I usually pull mine out of the fridge about an hour before I plan to start baking.
Sugars: 1 cup packed light brown sugar and 1/2 cup granulated sugar. The brown sugar is key for that chewy texture and deep flavor, while the granulated sugar helps with a bit of crispness on the edges.
Eggs: 2 large eggs. Make sure they’re at room temperature – they incorporate much better this way and create a more stable batter.
Vanilla Extract: 2 teaspoons. Don’t skimp on this! Good quality vanilla makes a world of difference. I’ve even experimented with a touch of almond extract alongside it, which is divine.
Flour: 2 1/2 cups all-purpose flour. I always measure my flour by spooning it into the cup and leveling it off with a straight edge; don’t scoop directly from the bag, or you might end up with too much flour, making your cookies dry.
Rolled Oats: 3 cups old-fashioned rolled oats (not instant or quick oats!). These give the cookies their signature chewiness and structure. Trust me, the old-fashioned ones are worth seeking out.
Baking Soda: 1 teaspoon. This is what helps the cookies spread and rise just a bit.
Salt: 1/2 teaspoon. Balances out the sweetness and enhances all the other flavors.
For the Filling (and oh, this is where the magic happens!):
Chocolate Chips: 2 cups semi-sweet chocolate chips. I’m a semi-sweet purist, but feel free to use milk chocolate, dark chocolate, or even a mix! Mini chips are great too, as they distribute more evenly.
Nuts (Optional but highly recommended): 1 cup chopped pecans or walnuts. Toasting them lightly beforehand really brings out their flavor, but it’s not strictly necessary if you’re short on time.
Step-by-Step Instructions
Step 1: Preheat & Prep Pan
First things first, let’s get your oven nice and warm. Preheat it to 375 degrees Fahrenheit (190 degrees Celsius). While the oven heats up, line your baking sheets with parchment paper or silicone baking mats. This is a total lifesaver for cleanup and ensures your cookies don’t stick. I usually have two sheets ready to go so I can bake in batches.
Step 2: Mix Dry Ingredients
In a medium bowl, whisk together the all-purpose flour, rolled oats, baking soda, and salt. Give it a good whisk so everything is evenly distributed. This ensures you don’t end up with pockets of baking soda or flour in your finished cookies. It doesn’t need to be fancy, just well combined.
Step 3: Mix Wet Ingredients
In a large bowl (or the bowl of your stand mixer if you’re using one), cream together the softened butter, light brown sugar, and granulated sugar until light and fluffy. This usually takes about 3-5 minutes. Then, beat in the eggs one at a time, making sure each is fully incorporated before adding the next. Finally, stir in the vanilla extract. The mixture should look smooth and creamy.
Step 4: Combine
Gradually add the dry ingredients to the wet ingredients, mixing on low speed (or by hand with a sturdy spoon) until just combined. Be careful not to overmix here! Overmixing can develop the gluten too much, leading to tough cookies. You just want to see streaks of flour disappear. It’s okay if there are still a few small bits of flour – they’ll get incorporated when you add the mix-ins.
Step 5: Prepare Filling
Now for the fun part! Gently fold in the chocolate chips and chopped nuts (if you’re using them) into the cookie dough. Use a spatula or a sturdy spoon for this. You want to distribute them evenly throughout the dough without overworking it. The dough will be quite thick at this point, which is exactly what you want!
Step 6: Scoop & Bake
Drop rounded tablespoons of dough onto your prepared baking sheets, leaving about 2 inches between each cookie to allow for spreading. I like to use a cookie scoop for uniform size, but two spoons work just as well. I usually get about 2-3 dozen cookies depending on the size.
Step 7: Bake
Bake for 9-12 minutes, or until the edges are golden brown and the centers are still slightly soft. They will continue to set up as they cool on the baking sheet. Don’t overbake them – you want that lovely chewy center! If you’re unsure if they’re done, you can gently press the top of a cookie; if it springs back slightly, they’re ready.
Step 8: Cool & Enjoy
Let the cookies cool on the baking sheets for 5-10 minutes before transferring them to a wire rack to cool completely. This is crucial for them to firm up properly. Once cooled, they’re ready to be devoured! The smell alone is usually enough to get everyone in the kitchen.
Step 9: Slice & Serve
These cookies are best enjoyed at room temperature. You can serve them as is, or with a tall glass of milk, a cup of coffee, or even a scoop of vanilla ice cream for an extra special treat. They’re perfect for dunking!
What to Serve It With
These cowboy cookies are so versatile, they can seriously be enjoyed anytime, anywhere! For breakfast, I love pairing them with a strong cup of coffee. The sweetness of the cookie and the richness of the coffee is just perfection to start the day. My kids also love them with a glass of cold milk before school – it’s a little treat that makes mornings brighter. At brunch, they make a wonderful addition to any spread. They look so inviting nestled amongst fruit salads and pastries. I like to arrange them on a pretty platter, maybe with a few extra chocolate chips scattered around them.
As a dessert, they’re a crowd-pleaser every single time. Serve them warm from the oven with a scoop of vanilla bean ice cream – it’s like a deconstructed cookie sundae! They also pair beautifully with a rich, dark chocolate ganache if you’re feeling fancy. And for those cozy snack moments, whether it’s a quiet afternoon with a book or a movie night with the family, these cookies are the ultimate comfort food. They’re substantial enough to satisfy a craving but not so heavy that they weigh you down. Honestly, they’re just good with everything!
Top Tips for Perfecting Your Cowboy Cookies
Over the years, I’ve picked up a few tricks that make these cowboy cookies absolutely foolproof. For the oats, always, always use old-fashioned rolled oats. The instant or quick-cooking ones tend to turn mushy and don’t give you that satisfying chewy texture. They’re just not the same! When you’re mixing the wet and dry ingredients, remember that less is more. Overmixing is the enemy of tender cookies. Mix until *just* combined. A few streaks of flour are perfectly fine, they’ll disappear as you add the mix-ins.
I’ve also found that chilling the dough for at least 30 minutes can make a big difference, especially if your kitchen tends to be warm. It helps the cookies hold their shape better and prevents them from spreading too much. It’s not strictly necessary, but it does lead to a slightly thicker, chewier cookie. For the nuts, toasting them lightly in a dry skillet before chopping them really amplifies their flavor. It takes just a few minutes and is totally worth the effort if you have the time.
When it comes to baking, ovens can be notoriously finicky. My oven tends to run a little hot, so I often reduce the temperature by 5-10 degrees Fahrenheit. It’s always a good idea to know your oven and adjust accordingly. Also, pay attention to the visual cues – golden brown edges and a slightly soft center. They’ll continue to firm up as they cool on the baking sheet. If you want to get fancy with your swirls, you can try adding some melted chocolate or a drizzle of caramel sauce over the top after they’ve cooled slightly. It’s all about making them your own!
Storing and Reheating Tips
These cowboy cookies are pretty hardy and store quite well, which is another reason I love them. At room temperature, in an airtight container, they’ll stay fresh and chewy for about 3-5 days. Make sure they’re completely cooled before sealing them up, otherwise, you’ll create condensation, which can make them soggy. If I’m making a big batch for the week, I’ll often stash a few in a pretty tin on the counter, and everyone knows those are fair game!
For longer storage, the refrigerator is your friend. They can last up to a week in an airtight container in the fridge. They might feel a little firmer when cold, but they’ll soften up again at room temperature. If you plan to freeze them, which I highly recommend for stocking up, wrap them individually in plastic wrap, then place them in a freezer-safe bag or container. They’ll keep beautifully for up to 3 months. To reheat, just pop a frozen cookie in the toaster oven for a few minutes until warmed through, or let it thaw at room temperature for about 30 minutes. They come out almost as good as fresh!
Frequently Asked Questions
Final Thoughts
So there you have it – my tried-and-true cowboy cookie recipe. I truly believe this is the recipe that will become a staple in your kitchen too. It’s more than just a cookie; it’s a little bite of happiness, a reliable treat that never disappoints. The balance of chewy oats, gooey chocolate, and that perfect cookie base is something special. I’ve made these for countless birthdays, holidays, school events, and frankly, just because. They always disappear in minutes, and I always get asked for the recipe!
If you love this recipe, I think you might also enjoy my Chewy Chocolate Chip Cookie Bars or my incredibly moist Banana Bread. Both have that same comforting, homemade feel. I really hope you give this cowboy cookie recipe a try. Let me know in the comments below how yours turn out, or if you discover any fun new variations! I love hearing from you. Happy baking!
cowboy cookie recipe
Ingredients
Main Ingredients
- 1 large egg
- 0.5 cup unsalted butter softened
- 0.5 cup light brown sugar packed
- 0.25 cup granulated sugar
- 2 teaspoons vanilla extract
- 1 cup all-purpose flour
- 1 cup old-fashioned whole-rolled oats not quick-cook or instant
- 1 teaspoon baking soda
- 0.5 teaspoon salt or to taste
- 1 cup semi-sweet chocolate chips
- 0.75 cup Cornflakes or Special K cereal Frosted Flakes or a similar cereal may be substituted
- 0.75 cup sweetened shredded coconut
- 0.5 cup pecans coarsely chopped (walnuts or raisins may be substituted)
Instructions
Preparation Steps
- To the bowl of a stand mixer fitted with the paddle attachment (or large mixing bowl and electric mixer) add the egg, butter, sugars, vanilla, and beat on medium-high speed until creamed and well combined, about 4 minutes.
- Stop, scrape down the sides of the bowl, and add the flour, oats, baking soda, salt, and beat on low speed until just combined, about 1 minute.
- Stop, scrape down the sides of the bowl, and add the chocolate chips, Cornflakes, coconut, pecans, and beat on low speed until just combined, about 1 minute.
- Using a large cookie scoop, 1/4-cup measure, or your hands, form approximately 13 equal-sized mounds of dough.
- Place mounds on a large plate or tray, cover with plastic wrap, and refrigerate for at least 2 hours, up to 5 days. Do not bake with unchilled dough because cookies will bake thinner, flatter, and be more prone to spreading.
- Preheat oven to 350°F (175°C), line a baking sheet with a Silpat or spray with cooking spray. Place dough mounds on baking sheet, spaced at least 2 inches apart (I bake 8 cookies per sheet) and bake for about 10 to 12 minutes (11 minutes in my oven is just right), or until edges have set and tops are just set, even if slightly undercooked, pale, and glossy in the center; don’t overbake. Cookies firm up as they cool.
- Allow cookies to cool on baking sheet for about 10 minutes before serving. I let them cool on the baking sheet and don’t use a rack.