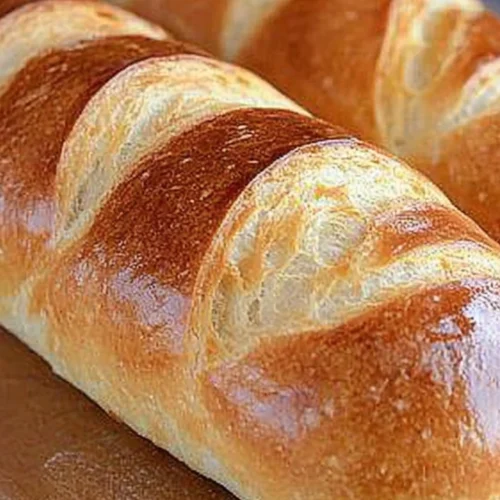
Oh, you guys! I am so incredibly excited to share this recipe with you. This isn’t just any bread; this is the kind of fluffy French bread that brings back memories of Sunday dinners, the smell wafting through the house, and my grandma gently reminding us to “leave some for everyone else!” It’s that perfect balance of a slightly crisp crust and an impossibly soft, airy interior. Honestly, if you’ve ever struggled with bread that turns out too dense or like a brick (we’ve all been there, right?), this is your lifesaver. It’s even better than those fancy bakery loaves, and the best part? It’s surprisingly simple to make. Think of it as my love letter to bread-making, a recipe I’ve tweaked and perfected over years, and one that truly makes any meal feel special. If you love my simple focaccia, you’re going to adore this fluffy French bread.
What is a fluffy French bread?
So, what exactly *is* fluffy French bread? Well, in my kitchen, it’s pure magic. The name itself conjures up images of those classic baguettes, but my version takes it a step further. It’s essentially a wonderfully light and airy white bread, shaped into a classic loaf, but with a secret ingredient that keeps it unbelievably tender and moist. It’s not your typical dense, chewy French bread; this one is all about that delightful fluffiness that makes you want to tear off a piece the moment it cools. It’s the kind of bread that makes you feel like a baking pro, even if you’re just starting out. It’s versatile, it’s comforting, and it’s guaranteed to be a hit at any table. It’s like the comforting hug of the bread world!
Why you’ll love this recipe?
I love this fluffy French Bread Recipe. I know you will too. Secondly, the recipe is very easy to make.flavor is just out of this world. It has a subtle sweetness that’s perfect on its own, but it’s also the ideal canvas for whatever toppings you fancy. The aroma while it bakes? Pure bliss. My whole house smells like a bakery, and it never fails to get everyone excited for dinner. Then there’s the simplicity. I know, I know, bread can sound intimidating, but I promise, this one is genuinely easy. The steps are straightforward, and the ingredients are all common pantry staples. You don’t need any fancy equipment, just a little patience. And speaking of ingredients, it’s incredibly cost-efficientWhat I love about this food is that it is easy to cook and it is a great option for a family of four.versatility. This fluffy French bread is perfect for slathering with butter, dipping into soups, making killer sandwiches, or just enjoying plain. It’s the kind of bread that elevates a simple weeknight meal into something truly memorable. It’s a crowd-pleaser, a stress-reliever, and honestly, just plain delicious. If you enjoyed my easy no-knead artisan bread, this offers a different kind of delightful texture that you’ll appreciate.
How to Make Fluffy French Bread
Quick Overview
This fluffy French bread comes together with minimal fuss. We’ll start by activating yeast, then mixing in our simple ingredients to create a soft dough. After a short rise, it gets shaped, has a second proof, and then bakes to golden perfection. The secret to its incredible fluffiness? A touch of something special that keeps the crumb wonderfully soft, even after it cools. It’s a straightforward process that guarantees a beautiful, delicious loaf every single time, perfect for when you need a reliable bread recipe.
Ingredients
For the Main Batter:
This is where the magic begins. You’ll need warm water (around 105-115°F – not too hot, not too cold!), active dry yeast, a pinch of sugar to feed the yeast, all-purpose flour, and salt. I always use whole milk for this; it adds a richness and tenderness that water just can’t replicate. Make sure your yeast is fresh – it makes a huge difference! If you’re unsure, sprinkle a little in warm water with a pinch of sugar and see if it gets foamy after 5-10 minutes. If not, grab a new packet.
For the Secret Softening Agent:
This is the game-changer! It’s a simple mixture of a little bit of vegetable oil (or melted unsalted butter) and a touch of cornstarch. This combination helps retain moisture and keeps the bread incredibly soft for days. Don’t skip this step; it’s what makes it truly ‘fluffy’ French bread and not just a standard white loaf.
For the Glaze (Optional but Recommended):
A simple egg wash (one egg beaten with a tablespoon of water) brushed on top before baking gives it that gorgeous golden-brown crust. You can also brush it with melted butter or milk after it comes out of the oven for an extra soft top.
Step-by-Step Instructions
Step 1: Preheat & Prep Pan
Preheat your oven to 375°F (190°C). Lightly grease and flour a standard loaf pan, or line it with parchment paper for easy removal. If you prefer a slightly more rustic crust, you can bake it directly on a baking sheet lined with parchment paper, but a loaf pan helps maintain that classic shape.
Step 2: Mix Dry Ingredients
In a large mixing bowl, whisk together the flour and salt. Make sure they are well combined; this ensures even distribution of salt throughout the dough, preventing any bland spots.
Step 3: Mix Wet Ingredients
In a separate bowl or a large measuring cup, combine the warm water, yeast, and sugar. Let it sit for about 5-10 minutes until it gets nice and foamy. This tells you the yeast is alive and ready to work its magic! Then, stir in the milk and the vegetable oil (or melted butter).
Step 4: Combine
Pour the wet ingredients into the bowl with the dry ingredients. Mix with a wooden spoon or a spatula until just combined. The dough will be quite sticky and shaggy at this point. Don’t overmix! Overmixing can develop the gluten too much, leading to a tougher bread. We want it tender!
Step 5: Prepare Secret Softening Agent
In a small bowl, whisk together the cornstarch and the additional tablespoon of oil (or melted butter) until smooth. This simple mixture is our secret weapon for ultimate fluffiness!
Step 6: Incorporate Softening Agent & Knead (Lightly!)
Add the cornstarch mixture to the dough. Now, turn the dough out onto a lightly floured surface. Gently knead the dough for about 5-7 minutes, just until it becomes smooth and elastic. It will still be a bit soft and slightly tacky, and that’s perfectly okay. You’re not aiming for a super tight, bouncy dough like you might with a baguette; we want that tender crumb!
Step 7: First Rise
Place the dough in a lightly oiled bowl, turning to coat. Cover the bowl with plastic wrap or a clean kitchen towel and let it rise in a warm place for about 1 to 1.5 hours, or until it has doubled in size. I usually put mine in a slightly warmed oven (turned off, of course!) or near a sunny window.
Step 8: Shape & Second Rise
Gently punch down the risen dough. Turn it out onto a lightly floured surface and shape it into your desired loaf shape. Place it into your prepared loaf pan. Cover loosely with plastic wrap or a kitchen towel and let it rise again for another 30-45 minutes, or until it’s nearly doubled and looks puffy. This second rise is crucial for that fluffy texture!
Step 9: Bake
While the dough is on its second rise, preheat your oven to 375°F (190°C). Once the dough has finished its second rise, brush the top with the egg wash (if using) for a beautiful golden crust. Bake for 30-35 minutes, or until the crust is a deep golden brown and the internal temperature reaches about 200-210°F (93-99°C). If it sounds hollow when tapped on the bottom, it’s usually done.
Step 10: Cool & Glaze (Optional)
Remove the bread from the loaf pan immediately and place it on a wire rack to cool completely. This is important to prevent a soggy bottom! If you like, you can brush the top with a little melted butter or milk right after it comes out of the oven for an extra soft crust. Resist the urge to slice it too soon – let it cool for at least an hour for the best texture.
Step 11: Slice & Serve
Once cooled, slice your beautiful fluffy French bread with a serrated knife. Serve warm or at room temperature. It’s perfect for breakfast, lunch, dinner, or any time you need a comforting slice of heaven!
What to Serve It With
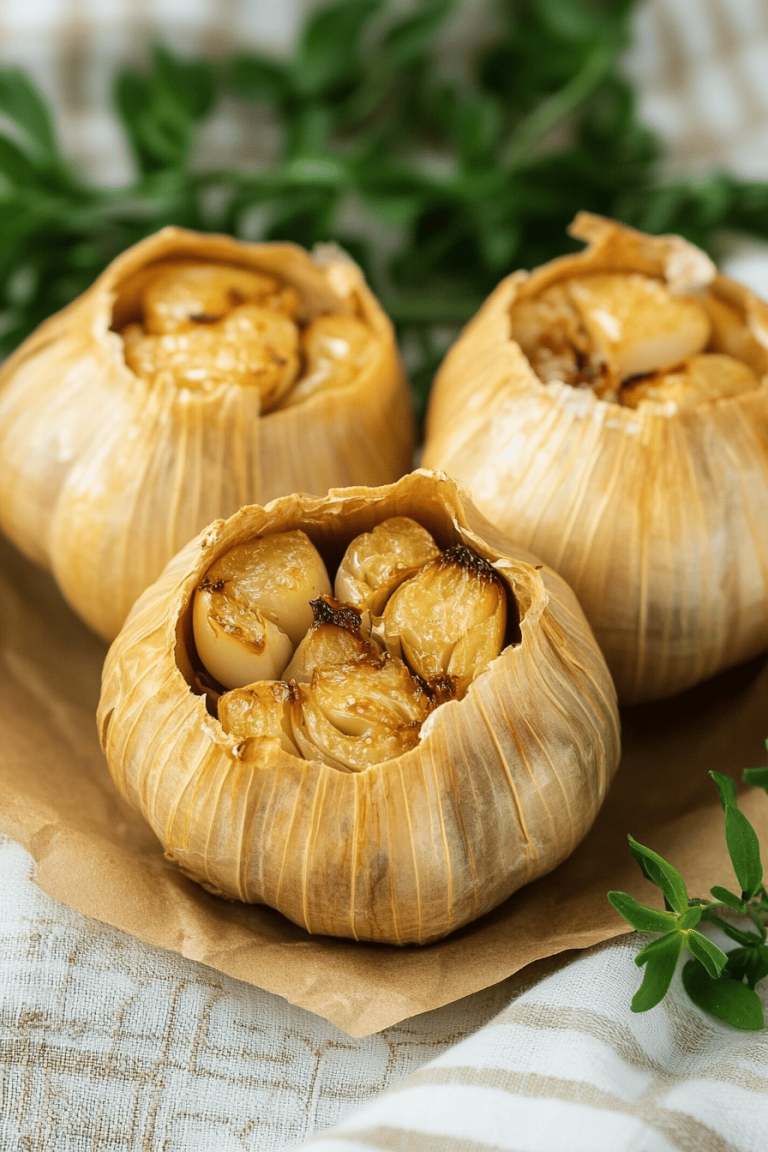
This fluffy French bread is honestly so good, you could eat it all by itself with just a smear of butter, but it truly shines when paired with other dishes. For breakfast, it’s divine toasted and topped with jam or avocado. Imagine a warm slice with a side of scrambled eggs and a perfectly brewed cup of coffee – it’s the kind of start to the day that makes everything feel a little brighter. For a more elaborate brunch, serve thick slices alongside your favorite quiche or a spread of charcuterie. It’s elegant enough for guests but still wonderfully comforting. As a dessert, believe it or not, it can be amazing! Think French toast casserole or bread pudding. The slightly sweet, tender crumb holds up beautifully to rich custards. And for those cozy snack moments, it’s unbeatable. Dip warm slices into a hearty bowl of tomato soup, serve it with a creamy garlic butter, or just enjoy it with a glass of milk while you relax. My family loves it with chili, and the bread just soaks up all those delicious flavors perfectly!
Top Tips for Perfecting Your Fluffy French Bread
Over the years, I’ve learned a few tricks that make this fluffy French bread recipe consistently amazing. Here are my top tips to ensure yours turns out perfectly every time.
Flour Measurement is Key: Don’t just scoop flour directly from the bag with your measuring cup. This can pack too much flour into the cup, leading to a drier, denser bread. Instead, spoon the flour into your measuring cup and then level it off with a straight edge (like a knife). Trust me, this small step makes a big difference in texture!
Don’t Rush the Rises: Patience is a virtue when it comes to bread. Make sure your dough has doubled in size during both rises. If your kitchen is cool, it might take a little longer. A warm, draft-free spot is your best friend here. You can even pop it into a slightly warmed (then turned-off) oven.
Embrace the Stickiness: This dough is meant to be a bit sticky. Resist the urge to add too much extra flour when kneading or shaping. A little bit of flour on your hands and work surface is all you need. Too much flour makes the bread heavy.
The Secret Ingredient is Crucial: That little bit of cornstarch and oil is not optional in my book! It’s the magic that ensures the bread stays soft and moist for days. I’ve tested this recipe with and without it, and the difference is noticeable. It’s the key to that delightful fluffiness that keeps you coming back for more.
Know Your Oven: Ovens can be quirky! Mine tends to run a bit hot, so I often adjust the temperature down by 10-15 degrees Fahrenheit. Keep an eye on your bread, especially the first time you make it, and adjust baking time as needed. Use a thermometer if you’re unsure about doneness.
Cooling is Non-Negotiable: I know it’s tempting to slice into that warm loaf the moment it comes out of the oven, but please, resist! Letting it cool completely on a wire rack allows the steam to escape and the crumb structure to set. Slicing too early can result in a gummy texture.
Ingredient Swaps: While this recipe is designed for all-purpose flour, you can experiment with a 50/50 blend of all-purpose and bread flour for a slightly chewier texture. For the milk, you can use lactose-free milk or even a good quality unsweetened plant-based milk like soy or oat milk, though it might slightly alter the richness. I’ve even tested a version with almond milk and it was surprisingly creamy!
Storing and Reheating Tips
Keeping your fluffy French bread fresh and delicious is easy with a few simple tricks. The goal is to maintain that wonderful softness and prevent it from drying out. Since this bread has that special ingredient to keep it moist, it actually stays good for longer than many other homemade breads!
Room Temperature Storage: For bread that will be eaten within 1-2 days, simply wrap it tightly in plastic wrap or place it in a resealable plastic bag. You can also store it in a bread box. It will maintain its best texture at room temperature. Avoid storing it in the refrigerator at this stage, as that can actually make it stale faster.
Refrigerator Storage: If you need to store the bread for a bit longer (3-4 days), then the refrigerator is your best bet. Wrap it very tightly in plastic wrap, then place it in an airtight container or a heavy-duty resealable bag. The fridge will help prevent mold, but it might slightly dry out the crust. Reheating will revive it beautifully.
Freezer Instructions: This fluffy French bread freezes wonderfully! For the best results, let the loaf cool completely. Then, wrap it tightly in a double layer of plastic wrap, ensuring no air can get in. You can then add a layer of aluminum foil or place it inside a freezer-safe bag for extra protection. It will keep well in the freezer for up to 2-3 months. Thaw it at room temperature, or slice it while frozen and toast the slices directly.
Glaze Timing Advice: If you’re planning to freeze your bread, it’s best to glaze it *after* thawing and reheating. The egg wash can sometimes get a bit splotchy or sticky if frozen. So, bake, cool, freeze. When ready to eat, thaw, then brush with egg wash and briefly pop it back into a warm oven (around 300°F/150°C) for a few minutes to crisp up the crust and set the glaze.
Frequently Asked Questions
Final Thoughts
I really hope you give this fluffy French bread a try. It’s more than just a recipe to me; it’s a source of comfort, a way to bring people together, and a reminder that delicious, homemade bread is achievable for everyone. The way the crust gently yields to the impossibly soft interior, the subtle aroma that fills your kitchen – it’s just pure baking joy. It’s simple enough for a weeknight but special enough for company. If you’re someone who loves the idea of homemade bread but feels a little intimidated, I truly believe this is the recipe that will change your mind. It’s stood the test of time in my own family, and I’m so excited for it to become a staple in yours too. I can’t wait to hear what you think! If you try it, please let me know in the comments below how it turned out, or share your favorite way to enjoy it. Happy baking, everyone!
fluffy french bread
Ingredients
Main Ingredients
- 1.5 cups warm water (105-115°F)
- 2.25 tsp active dry yeast or 1 packet
- 1 tbsp granulated sugar
- 4 cups all-purpose flour
- 1.5 tsp salt
- 2 tbsp olive oil
Instructions
Preparation Steps
- In a large bowl, combine warm water, yeast, and sugar. Let sit for 5-10 minutes until foamy, indicating the yeast is active.
- In a separate medium bowl, whisk together the all-purpose flour and salt.
- Add the olive oil to the yeast mixture. Gradually add the dry ingredients to the wet ingredients, mixing with a wooden spoon or stand mixer until a shaggy dough forms.
- Turn the dough out onto a lightly floured surface and knead for 8-10 minutes, until it becomes smooth and elastic.
- Lightly grease a large bowl with a little olive oil. Place the dough in the bowl, turning once to coat. Cover the bowl with plastic wrap or a damp kitchen towel and let it rise in a warm place for 1 to 1.5 hours, or until it has doubled in size.
- Gently punch down the risen dough to release the air. Divide the dough into two equal pieces. On a lightly floured surface, shape each piece into a long, tapered loaf (like a baguette or bâtard).
- Place the shaped loaves on a baking sheet lined with parchment paper, ensuring there is some space between them. Cover loosely with plastic wrap and let them rise for another 30-45 minutes, or until nearly doubled in size.
- Preheat your oven to 400°F (200°C). Place a shallow oven-safe pan on the bottom rack of the oven to create steam. Just before baking, use a sharp knife or a bread lame to make 3-4 diagonal slashes across the top of each loaf.
- Carefully place the baking sheet with the loaves into the preheated oven. Pour about 0.5 cup of hot water into the shallow pan on the bottom rack (this creates steam for a crispier crust). Bake for 20-25 minutes, or until the loaves are golden brown and sound hollow when tapped on the bottom.
- Transfer the baked French bread loaves to a wire rack to cool completely before slicing and serving. This allows the internal structure to set.