You know those flavors that just instantly transport you back to pure childhood joy? For me, it’s that unmistakable swirl of orange and vanilla, like the classic popsicle on a sweltering summer day. I’ve spent years trying to capture that magic in something a little more grown-up, something I can actually serve at brunch or even just have with my afternoon coffee without feeling like I’m stealing from the ice cream truck. And I think, after countless batches and a few minor kitchen disasters (don’t ask!), I’ve finally nailed it. This Creamsicle Frosty loaf cake is exactly that: sunshine in cake form, with that delightful, tangy orange zest playing perfectly with sweet, creamy vanilla. It’s surprisingly simple, uses ingredients I almost always have on hand, and honestly, it’s the perfect pick-me-up when you need a little dose of happy. Forget complicated layered cakes; this one is all about pure, unadulterated comfort and flavor, and it brings that nostalgic Creamsicle Frosty vibe right to your own kitchen table. It’s not just a cake; it’s a happy memory you can eat!
What is a Creamsicle Frosty Loaf Cake?
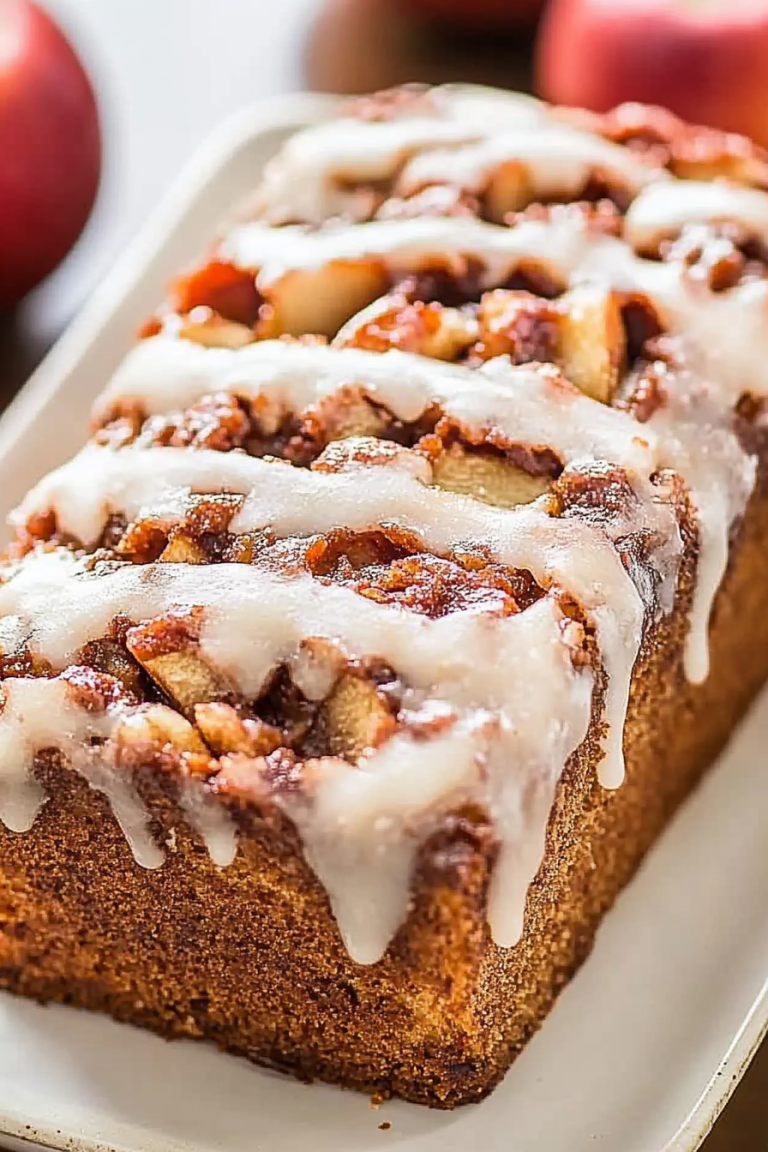
So, what exactly *is* this Creamsicle Frosty loaf cake I’m so excited about? Think of it as the grown-up, slightly more sophisticated cousin to the beloved orange and vanilla swirl popsicle. It’s a tender, moist loaf cake that captures those two iconic flavors in a beautiful, marbled swirl. The base is a simple vanilla cake, infused with real vanilla bean for that authentic, creamy sweetness. Then, we swirl in a vibrant, zesty orange component that cuts through the richness and adds that signature tang. It’s not overly sweet, which is something I really aimed for. The “Frosty” part comes from the incredibly smooth, melt-in-your-mouth texture, and the “Creamsicle” is that perfect dance between bright citrus and sweet cream. It’s essentially your favorite childhood treat reimagined as a comforting, sliceable loaf. No ice cream maker needed, just pure, delicious nostalgia!
Why you’ll love this recipe?
Okay, let me tell you why this Creamsicle Frosty loaf cake has become a staple in my kitchen. First off, the FLAVOR is just out of this world. That combination of creamy vanilla and bright orange is so classic for a reason, and in this cake, it’s perfectly balanced. You get that little zing from the orange zest that keeps it from being too sweet, and the vanilla bean adds such a lovely depth. It’s like sunshine and comfort all rolled into one bite. Then there’s the SIMPLICITY. Seriously, if you can stir ingredients together, you can make this cake. There are no fancy techniques, no intimidating steps. It’s the kind of recipe I whip up on a Tuesday when I need a little something special, or when unexpected guests drop by. And speaking of guests, it’s always a huge hit! My kids practically inhale it, and honestly, it’s a lifesaver on busy nights when I want to serve a dessert but don’t have time for anything elaborate. It’s also incredibly COST-EFFECTIVE. All the ingredients are pretty standard pantry staples, so you don’t need to make a special trip to the store. I love that I can create something so delicious and impressive without breaking the bank. What I love most about this recipe, though, is its VERSATILITY. You can enjoy it for breakfast (yes, I said breakfast!), as a delightful brunch centerpiece, or as a satisfying dessert. It’s perfect for a mid-afternoon snack, too. It’s not quite as rich as some other loaf cakes, making it feel right at home at any time of day. It’s a recipe that feels both special and incredibly approachable, and that’s hard to beat.
How do I make a Creamsicle Frosty Loaf Cake?
Quick Overview
The process is super straightforward: cream butter and sugar, add eggs and vanilla, then alternate adding your dry and wet ingredients to form a simple batter. We then divide the batter, flavor one part with orange zest and juice, and swirl it all together in your loaf pan before baking. The result is a beautifully marbled cake that looks as good as it tastes. It’s a one-bowl wonder for the most part, minimizing cleanup, and the marbling happens so easily you’ll feel like a baking pro!
Ingredients
For the Main Batter:
2 ½ cups all-purpose flour: Make sure it’s spooned and leveled, not scooped directly from the bag. This prevents a dense cake. I like to sift mine, though it’s not strictly necessary.
1 ½ teaspoons baking powder: This is what gives our cake its lovely lift. Fresh baking powder is key!
½ teaspoon salt: Balances the sweetness and brings out the flavors.
1 cup (2 sticks) unsalted butter, softened: Don’t skimp on softening! It should yield slightly to pressure but not be melted. This is crucial for creaming properly.
1 ¾ cups granulated sugar: For that classic sweetness. You can try reducing it slightly, but this is the sweet spot for that “frosty” feel.
3 large eggs, room temperature: Room temperature eggs incorporate much better into the batter, creating a smoother texture. If you forget, just pop them in warm water for 5 minutes.
1 tablespoon pure vanilla extract (or vanilla bean paste): For the best flavor, use pure vanilla extract or, even better, vanilla bean paste. You’ll see those little flecks of vanilla bean, and the taste is incredible.
1 cup milk (whole milk is best): Again, room temperature is ideal for smooth incorporation.
For the Orange Swirl:
Zest of 2 large oranges: Use a microplane or fine grater to get just the orange part, avoiding the bitter white pith. This is where so much of that amazing Creamsicle aroma comes from!
2 tablespoons fresh orange juice: Freshly squeezed is a must. It adds moisture and brightens the flavor.
1 tablespoon granulated sugar: To enhance the orange flavor and sweetness of the swirl.
For the Optional Glaze:
1 cup powdered sugar: Sifted to avoid lumps.
2-3 tablespoons fresh orange juice or milk: Start with 2 and add more if needed to reach your desired drizzling consistency.
Step-by-Step Instructions
Step 1: Preheat & Prep Pan
Get your oven preheated to 350°F (175°C). Grease and flour a standard 9×5 inch loaf pan. I like to line the bottom with parchment paper, leaving an overhang on both sides. This makes lifting the cake out a breeze, and trust me, you’ll thank yourself later when it’s time to unmold it!
Step 2: Mix Dry Ingredients
In a medium bowl, whisk together the flour, baking powder, and salt. Give it a good whisk to ensure everything is evenly distributed. This ensures your leavening is consistent throughout the cake.
Step 3: Cream Butter and Sugar
In a large bowl, beat the softened butter and granulated sugar together with an electric mixer (a stand mixer with a paddle attachment is ideal, but a hand mixer works great too) on medium-high speed until light and fluffy, about 3-5 minutes. This step is crucial for creating a tender crumb – you’re essentially aerating the butter and sugar.
Step 4: Add Eggs and Vanilla
Beat in the eggs one at a time, mixing well after each addition. Scrape down the sides of the bowl as needed. Then, stir in the vanilla extract or paste. The mixture might look a little curdled at this point, but don’t worry, it will smooth out.
Step 5: Alternate Dry and Wet Ingredients
Now, we’ll alternate adding the dry ingredients and the milk to the butter mixture. Start by adding about one-third of the dry ingredients and mix on low speed until just combined. Then, add half of the milk and mix until just combined. Repeat this process, ending with the last third of the dry ingredients. Be careful not to overmix here! Overmixing develops the gluten in the flour, which can lead to a tough cake. Mix only until you no longer see streaks of flour or milk.
Step 6: Prepare Orange Swirl Mixture
In a small bowl, combine the orange zest, fresh orange juice, and the 1 tablespoon of granulated sugar. Stir it all together. You can smell that bright citrus already!
Step 7: Divide and Flavor Batter
Take about half of your vanilla batter and place it into a separate bowl. Stir the orange zest mixture into this smaller portion of batter until evenly combined and beautifully orange-hued. You’ll have one bowl of plain vanilla batter and one bowl of orange-flavored batter.
Step 8: Layer and Swirl
Spoon alternating dollops of the vanilla batter and the orange batter into your prepared loaf pan. Don’t worry about making it perfect; the beauty is in the imperfect swirl! Once all the batter is in the pan, insert a knife or skewer and gently swirl it through the batters a few times. Don’t over-swirl, or the colors will blend too much. You want distinct ribbons of orange and vanilla.
Step 9: Bake
Bake for 50-65 minutes, or until a wooden skewer inserted into the center comes out clean. The baking time can vary depending on your oven, so start checking around the 50-minute mark. If the top starts browning too quickly, you can loosely tent it with aluminum foil.
Step 10: Cool
Let the cake cool in the pan on a wire rack for about 15-20 minutes. This allows it to set up a bit. Then, carefully use the parchment paper overhang to lift the cake out of the pan and place it directly onto the wire rack to cool completely. Don’t glaze it while it’s warm, or the glaze will just melt off!
Step 11: Glaze (Optional)
Once the cake is completely cool, whisk together the sifted powdered sugar and 2 tablespoons of orange juice or milk. Add more liquid, a teaspoon at a time, until you reach a thick but pourable consistency. Drizzle it over the top of the cooled loaf cake, letting it drip down the sides. Let the glaze set for about 15-30 minutes before slicing.
Step 12: Slice and Serve
Using a serrated knife will give you the cleanest slices. Slice and enjoy your homemade Creamsicle Frosty loaf cake!
What to Serve It With
This Creamsicle Frosty loaf cake is so wonderfully versatile, it fits into almost any meal or occasion. For a delightful BREAKFAST, I love a thick slice alongside a steaming mug of black coffee or a simple glass of milk. The bright orange flavor is invigorating, and the cake itself is comforting without being too heavy to start the day. It’s also fantastic for BRUNCH. I’ll often serve it as part of a larger spread, perhaps with some fresh berries, a dollop of whipped cream, or even a side of Greek Yogurt. For a more elegant presentation, I might dust it lightly with powdered sugar or add a few edible flowers. As a DESSERT, it’s a winner all on its own. It’s perfect after a lighter meal, and if you want to elevate it, a scoop of vanilla bean ice cream or a drizzle of raspberry coulis is divine. For those COZY SNACKS, this is my absolute go-to. Paired with a cup of herbal tea or hot chocolate on a chilly afternoon, it’s pure bliss. My family loves it after school with a glass of cold milk; it just disappears in minutes! I’ve even served it at birthday parties with a simple birthday candle, and everyone raves about that unique Creamsicle flavor.
Top Tips for Perfecting Your Creamsicle Frosty Loaf Cake
I’ve learned a few things over the years of making this particular cake, and I want to share them so yours turns out perfectly! First, about the ORANGE ZEST PREP: Don’t underestimate the power of fresh zest! Using a microplane is your best friend here; it gets all that fragrant zest without the bitter white pith. If you can get organic oranges, even better! Make sure to zest them *before* you juice them. And for the juicing, always use fresh! Bottled juice just doesn’t have the same vibrant flavor. For MIXING ADVICE, the biggest thing is not to overmix once you add the flour. Seriously, mix until *just* combined. A few little lumps of flour are okay; they’ll disappear in the oven. Overmixing is the number one culprit for a tough, dense loaf cake. You want a tender, moist crumb, and gentle mixing is the way to get it. When it comes to the SWIRL CUSTOMIZATION, experiment! You don’t have to do just two colors. You could even make a separate, smaller batch of batter with a touch of orange food coloring if you want that super vibrant Creamsicle look, but I personally love the natural marbling. You can also adjust the intensity of the orange swirl by adding more or less zest and juice. For INGREDIENT SWAPS, if you’re out of milk, you can use buttermilk or even plain yogurt mixed with a little water for a tangier, even more tender crumb. For the butter, I’ve tested this with vegan butter sticks and it worked quite well, though the texture might be slightly different. Baking powder can sometimes lose its oomph; I always test mine by putting a teaspoon in hot water – it should fizz vigorously. If it doesn’t, grab a new box! For BAKING TIPS, ovens really do vary. My oven tends to run a little hot, so I often set my timer for 5-10 minutes less than the recipe states and then check from there. A skewer test is foolproof: if it comes out clean, it’s done. If it has wet batter, bake a bit longer. A few crumbs are fine, but no wet batter! Finally, for GLAZE VARIATIONS, if you’re not a fan of a thick glaze, a light dusting of powdered sugar with a few orange slices as garnish looks lovely too. You could also add a tiny bit of almond extract to the glaze for a nod to the almond note often found in Creamsicles.
Storing and Reheating Tips
Storing this Creamsicle Frosty loaf cake is pretty straightforward, and it keeps well, which is fantastic because I rarely eat it all in one sitting! At ROOM TEMPERATURE, the cake is best stored in an airtight container or well-wrapped in plastic wrap for up to 3 days. Keep it in a cool, dry place, away from direct sunlight. If you live in a very warm or humid climate, you might want to refrigerate it sooner to prevent spoilage. For REFRIGERATOR STORAGE, wrap the cooled cake tightly in plastic wrap, then in foil, or place it in an airtight container. It will stay fresh for up to a week. When you want to serve it from the fridge, I usually let it sit out at room temperature for about 30 minutes to soften up a bit, especially if it has a glaze. If you’re thinking of FREEZER INSTRUCTIONS, this cake freezes beautifully! Wrap the completely cooled cake tightly in several layers of plastic wrap, then add a layer of aluminum foil for extra protection. It will keep in the freezer for up to 3 months. To thaw, unwrap it and let it come to room temperature on a wire rack, which usually takes a few hours. If it has a glaze, it’s best to add that *after* thawing to avoid a sticky mess. For GLACE TIMING ADVICE, if you plan to store the cake unfrosted, that’s ideal for freezing or longer refrigerator storage. If you do glaze it beforehand and want to freeze it, make sure the glaze is fully set, and then wrap it very carefully. However, for the best texture and appearance, I highly recommend glazing it just before serving or after the cake has been thawed.
Frequently Asked Questions
Final Thoughts
There you have it – my beloved Creamsicle Frosty loaf cake! This recipe is more than just a cake to me; it’s a little piece of sunshine and happy memories baked into every slice. It’s proof that you don’t need complicated steps or exotic ingredients to create something truly special and delicious. The balance of tangy orange and creamy vanilla is just perfection, and the ease with which it comes together makes it a true weeknight hero. If you love nostalgic flavors or are just looking for a wonderfully moist and flavorful cake that’s incredibly easy to make, you absolutely have to give this a try. It’s a recipe that’s sure to bring a smile to your face and maybe even a little bit of that childhood magic back into your day. I hope you love it as much as my family and I do! If you make this Creamsicle Frosty loaf cake, please let me know how it turns out in the comments below! I’d love to hear about your experience, any variations you tried, or even just what you thought of the flavor. And if you snap a photo, tag me on social media – I always love seeing your creations! Happy baking!